Browse Author

Paul Hayes

Cisco Re-Direction Service (EDOS) Outage

14:40 BST:

We are aware that Cisco currently have a fault with their re-direction service for MPP phones.

This is currently affecting provisioning for any phones in the “CP” range that we sell.

As of this time, we do not have an ETA on a fix from Cisco but are assured that they are working on it.

This will only affect new phones being provisioned or phones that are factory reset.

Please keep checking here for updates.

9th April 09:00 BST:

Cisco emailed overnight at approx 10pm UK time to say that the service is now fully restored.

Full factory reset on Vega 3050G

The new Vega 3050G gateway uses a different method for performing a full factory reset than other gateways.  This was called a “config clear” on other gateways.

Important

Before doing this make sure you have backed up the license key from the Vega as you will need to manually restore it afterwards.  Without this, the Vega will only process a couple of calls at a time.

Instructions on how to get the license key can be found here:

https://wiki.sangoma.com/display/VG/Factory+Reset

If you cannot do this for some reason (such as not knowing the admin password) then you will need to raise a support request with us and tell us the serial number of the unit.  But be aware, we have to then request the key from Sangoma and this can take a business day.  If your gateway is  being used, wait for the license key before doing the reset.

How-to

Connect a serial console cable to the Vega, instructions can be found in the link above.

With the console cable still connected, remove the power cable from the Vega.  Get ready to start pressing the enter key on your keyboard, put the power cable back in and immediately start pressing the enter key on your keyboard.

You should see the uboot prompt on the screen:

U-Boot#

At this point, enter these commands one by one (pressing enter each each one) to action the reset:

sf probe

sf erase 0x70000 0x90000

boot

The Vega will now reboot with all factory settings including network and password settings.

Note: be very careful to type those commands in correctly, the 2nd one is erasing a section of the flash memory, getting the numbers wrong could damage your Vega gateway.

Lastly, restore your license key using the instructions found in the link above.


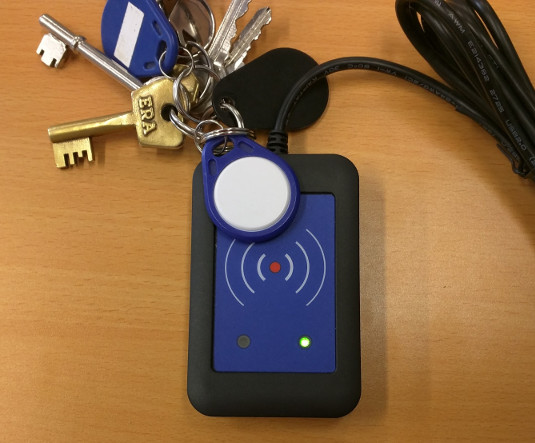
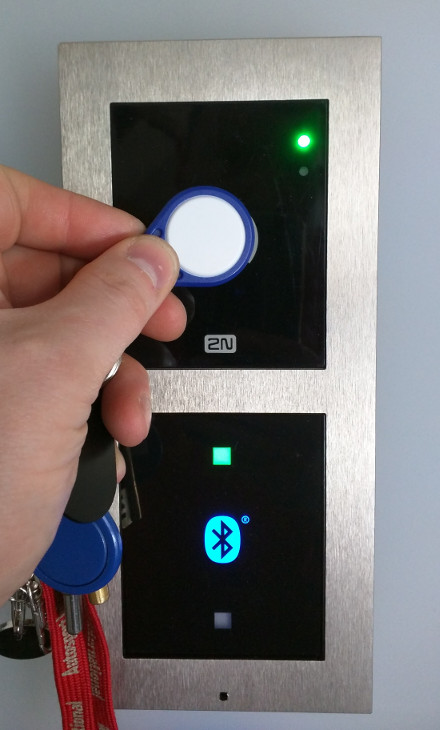
2N External RFID reader for 125kHz & 13.56MHz How-to Guide

In order to use the 2N RFID reader you need to install the correct driver software.  This is only available for Microsoft Windows and can be downloaded from this page:

https://www.2n.cz/en_GB/products/access-control/2n-access-unit#tab-2

Scroll down to the Documents section and you’ll see the driver listed in the “Software & Firmware” list.

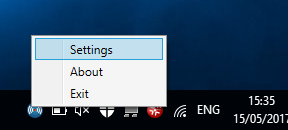
Once installed, you will see an icon in the task bar on your computer:

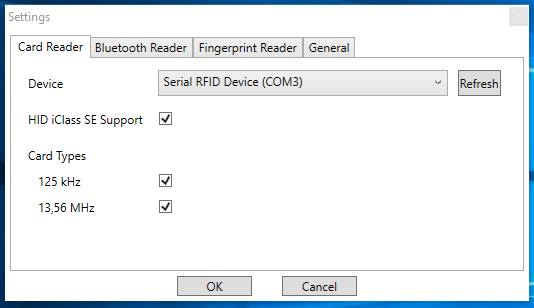
Right click this and select “Settings”.  This window will pop-up:

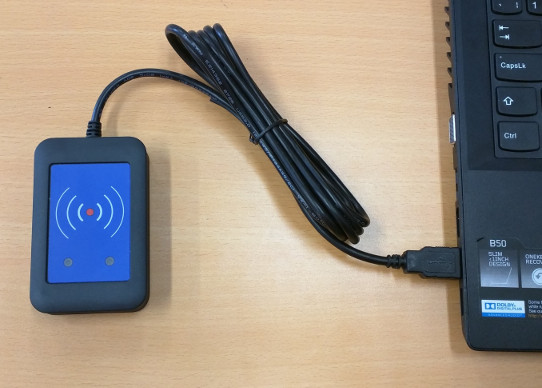
The device field may be empty, make sure you have the USB reader plugged in:

You may need to click refresh in the settings window.  Make sure you have the correct device selected before clicking “OK” to close that window.

Now you can use the reader to scan compatible RFID/NFC cards into the 2N Access Commander software or in the web interface for 2N intercoms and access control devices.

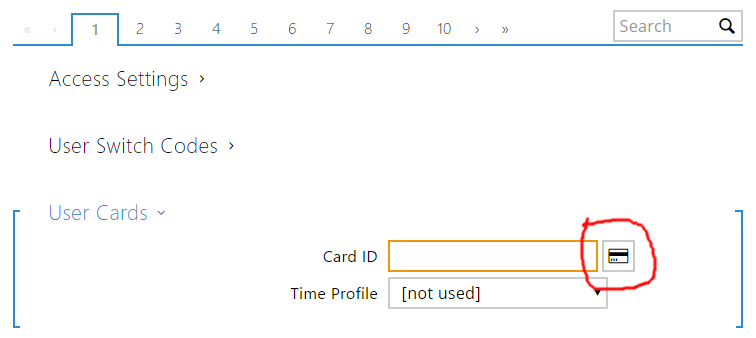
For example, in the web interface for an Access Control unit:

Click on the card icon and you will be prompted to scan a card:

That’s it, you’ll now be able to use that device to open the door.

Konftel 300Wx firmware upgrade

When using a Konftel 300Wx with a Gigaset N300IP or N510IP it may be necessary to upgrade the 300Wx to the latest firmware.  If you are having problems making or receiving calls this should sort it.

  1. Go to go the Konftel firmware download page: http://www.konftel.com/Support/Upgrade
  2. Select “Konftel 300Wx” and scroll down to the bottom of the page
  3. Download the latest firmware version for use with SD card.  The version is 1.9.8 at the time of writing
  4. Then download the “DECT module” firmware.  The version of this is 932 at the time of writing
  5. Put both files onto a FAT formatted SD card in the root folder
  6. Insert the SD card into the 300Wx, navigate to the settings menu and select the upgrade mode option
  7. Press and hold the “hold” key on the 300Wx (bottom left of the keypad)
  8. Follow the instructions on screen
  9. Once the firmware image upgrade has completed, go back into “menu” -> “Settings” -> “Upgrade Mode” and this time select DECT
  10. Wait approx 3 minutes for the upgrade to complete
  11. Finally, reboot the 300Wx


SIP-TLS with the Panasonic TGP600

The Panasonic TGP-600 DECT phone supports encryption of SIP signalling and audio (RTP) using the common SIP-TLS and SRTP methods supported by many VoIP platforms.

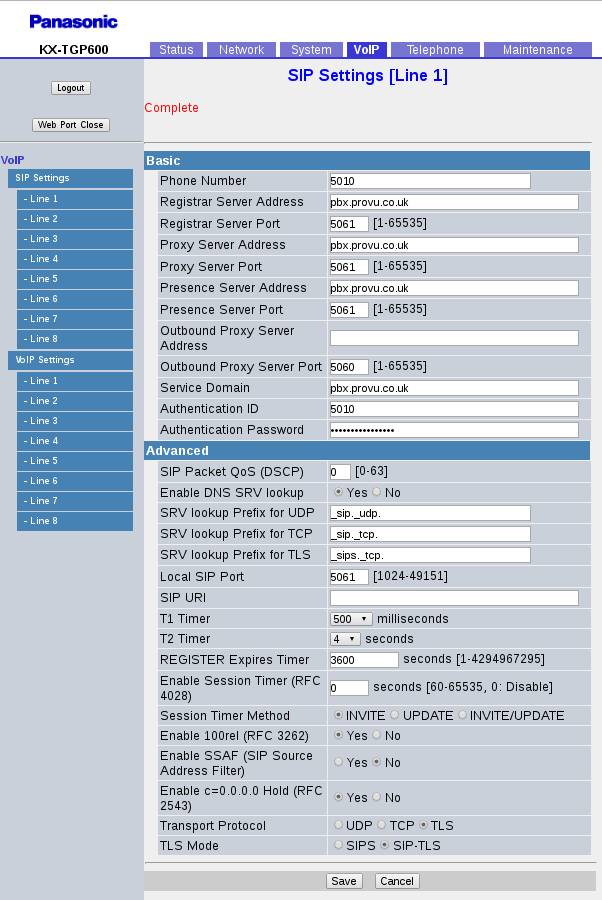
Configuration is very simple.  In the SIP Settings page:

Important settings are:

  • Proxy Server Port, Registrar Server Port, Presence Server Port.  The standard port for encrypted SIP is 5061 (rather than 5060 for normal plain-text SIP).  This depends on your SIP platform.
  • Transport Protocol. Set this to TLS
  • TLS Mode.  Depends on your platform but SIP-TLS is what I am using with an Asterisk PBX

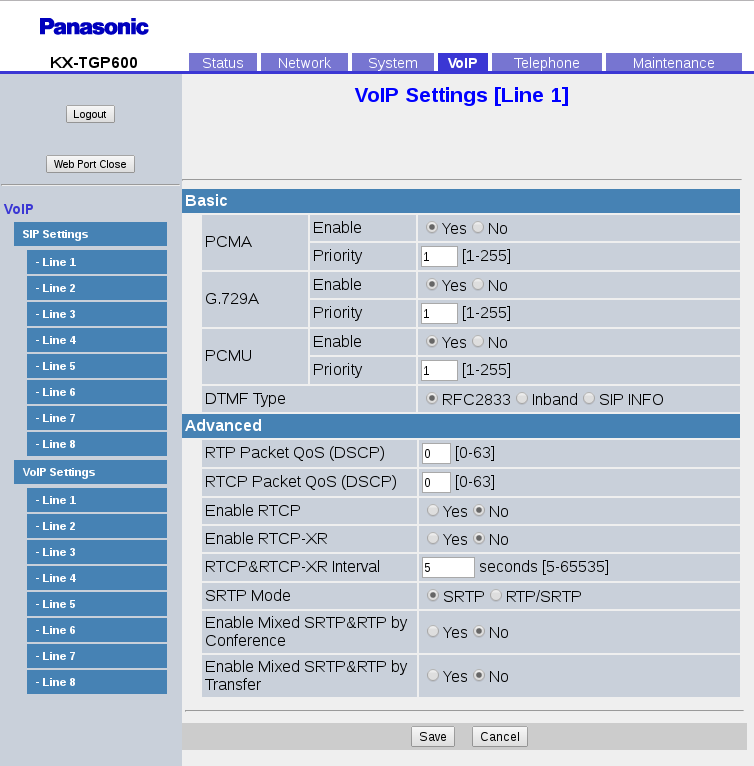
All other settings on that page are the as normal.  You might need to alter some of the SRTP settings for voice encryption, on the VoIP Settings page:

  • SRTP Mode. This also depends on your SIP platform but Asterisk doesn’t handle negotiation of encryption so if it is being used at all, you need to get the phone to always use it, not attempt to negotiate.  In that case, this setting is set to “SRTP”

Certificates

By default the Panasonic phone is set to accept all certificates (meaning that self-signed certificates will work OK).  You can provision the phones to verify the certificate if you want to using the setting SIP_TLS_VERIFY_1_=”1″.  You need to ensure that you have loaded the necessary root certificate beforehand.

Why use TLS & SRTP?

Security:  If you are able to sniff the traffic on someone’s network (e.g. using Wireshark or tcpdump) then you will capture any VoIP calls going on.  A tool such as Wireshark can be used to extract the audio from the RTP packets on the network.  The SIP packets can be read in plain-English and can be used to ascertain certain things such as what extension numbers there are, who is phoning different numbers etc…

If the SIP traffic is encrypted then no-one can see it other than the telephone and the SIP server at the other end (much like HTTPS used by secure websites).

If the RTP stream is encrypted then the audio cannot be extracted from the network without access to the SRTP keys generated on each call.  If you try this using Wireshark, the audio file you’ll get out of it will contain only white-noise.  Because the encryption keys for SRTP are generated on each call and send within the SIP packets, it would make no sense to use SRTP without encrypting the SIP packets as well.

Hiding SIP from Application Layer Gateways:  Routers with SIP-ALGs built into them are the biggest single cause of issues with SIP, things such as one-way audio, calls cutting out, calls failing to connect etc…. can all be caused by a SIP-ALG on a router.  The job of the ALG is to keep an eye out for SIP packets going past and then to modify them in an attempt to fix them up to work through NAT.  But they nearly always cause more problems than they solve.  A less obvious attraction to SIP-TLS is that if the SIP traffic is encrypted, then a SIP-ALG cannot possibly see any SIP traffic going through it and much less, make any modifications to it.  This can be very useful for remote phones talking to a hosted PBX or a central office PBX.

The latter advantage is the main reason I am seeing people interested in SIP-TLS or already using it, rather than it’s intended use which is for secure calling.

Distinctive ringing with Cisco phones

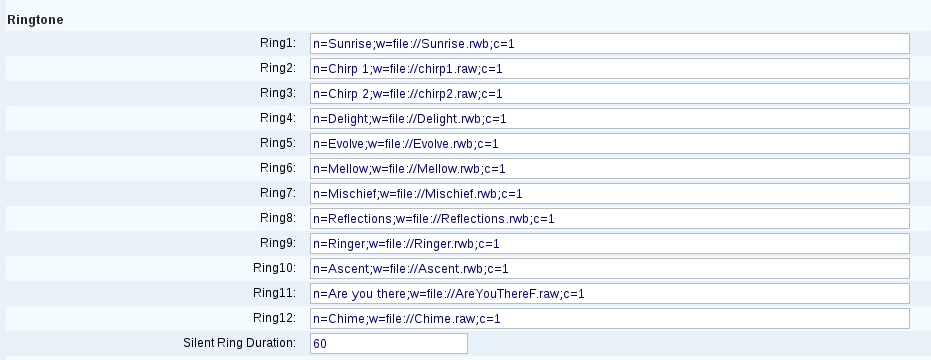
Both the older Cisco SPA range and the new CP range support distinctive ringing through the use of Alert-Info SIP headers.

The names to use can be found in the web interface for both phone types.  In the web interface, the settings are in the Voice section, phone tab, Ringtone heading.

On CP phones:

On SPA phones:

The important part for Alert-Info is the name part after “n=”.  The Alert-Info header must look like these examples:

Alert-Info:Mellow

Alert-Info:Simple-2

So simply put the name of the ringtone in the header and nothing else.  This is different to most phones (and actually not as specified in the SIP RFC) as they need to have a dummy URI inside them.

As an example, if you wanted to add this header in Asterisk, use the SIPAddHeader application:

SIPAddHeader(“Alert-Info:Mellow”)

Technicolor TG589VN V3 – End of Life Notice

We have received notice from Technicolor that the TG589VN V3 is now end of life. We have a limited number of units available, when we run out we will be unable to get more stock.

We recommend the TG588v v2 or the TG589vac as alternative products. Both routers are BT Wholesale approved, support ADSL2+, VDSL and are ideal for Fibre to the Cabinet scenarios. The TG589vac also features IEEE 802.11ac wireless standard for the 5 GHz band, enabling even higher throughput and better Wi-Fi coverage.

Find out more information: Technicolor TG588v v2
Find out more information: Technicolor TG589vac

Pricing and stock availability can found on ProSys our reseller portal. If you have any questions please email the sales team at contact@provu.co.uk or call 01484 840048.

Sangoma Vega 100G/200G/400G Missing 0 on Caller ID

If you have a Sangoma Vega 100G, 200G or 400G gateway connected to a BT ISDN line, you might find sometimes that the Caller ID coming in on phone calls is missing the leading zero.  So you might receive a call that shows as being from ‘7123456789’ instead of ‘07123456789’.

The reason for this is that often an ISDN line doesn’t send the national or international dialling codes but instead a flag in the ISDN message called Type-Of-Number.  This flag can usually contains ‘national’ or ‘international’ as a value which is intended to tell the device connected to the ISDN line (i.e. an ISDN PBX) to add the correct codes to the start of the Caller ID depending on the location/country it is in.  The point of this is that these numbers might not be the same in different areas or countries.

To make the Vega put these numbers in, change the following settings found in the SIP -> Advanced SIP Settings page:

  • National Prefix = 0
  • International Prefix = 00

Then the gateway will add these numbers as long as the ISDN line includes the TON flag (which it should do if it is not sending the 0/00 in the Caller ID).


Strangest bug I’ve ever discovered

I have just accidentally discovered a very strange bug (or feature?) on a snom phone.

It affects 8.7.5.35 firmware and possibly others.  When tested on firmware 8.7.5.13 this doesn’t occur.

If you set up a SIP account, any SIP account (doesn’t even have to be a real working one) and the SIP password contains the word “monkey”, you get the following error message and the account will not work:

Screenshot from 2016-07-06 11:30:03


I have informed Snom about this.  I’ve never had a customer reporting this problem, it is just funny.

no_monkeys

Easy TG582 router firmware upgrade

You can connect to the TG582 router’s command line interface using telnet which gives you a great level of control over this router.  You need to be connected to the LAN side of the router, you cannot do this over the Internet (unless you are VPN’d to a PC on the local network the router is on).  The default login username is “Administrator” (yes. uppercase ‘A’!) and the password is the web interface password (blank by default).

You will need to have the firmware file hosted on a web server somewhere, lets say the URL for this is http://myserver.com/tg582firmware.bin.  The server this is hosted on doesn’t need to be on the local network with the router as long as the router has a working Internet connection.

Iissue this command in your router’s telnet interface:

software download url=http://myserver.com/tg582firmware.bin filetype=firmware

It may ask you for some other options, just leave them blank (by pressing the return key).

Then your router will download, reboot & upgrade itself.

Note: on the new TG588 & TG589 routers there is no need for this as you can simply upgrade firmware in the web interface.  Some of these do have a command line interface but it is totally different to the TG582 and doesn’t seem to be very useful (yet).