Browse Month

June 2013

New Yealink T4X range, Available Now at ProVu

Yealink T4X

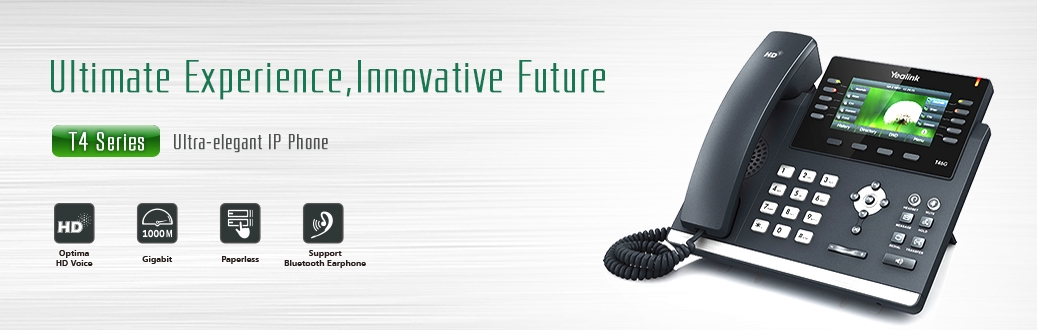
ProVu are excited to announce the launch of the new T4 series range of IP phones from widely recognised manufacturer, Yealink.

The T4 series offers the industry’s latest telephony features combined with intuitive user-interfaces, easy to use BLF keys, superior quality audio and large clear mirror style display screens.

The T4 series revolutionary design not only applies to the quality of its telephony but also to its attractive and stylish looks making it an ideal choice for the discerning user.

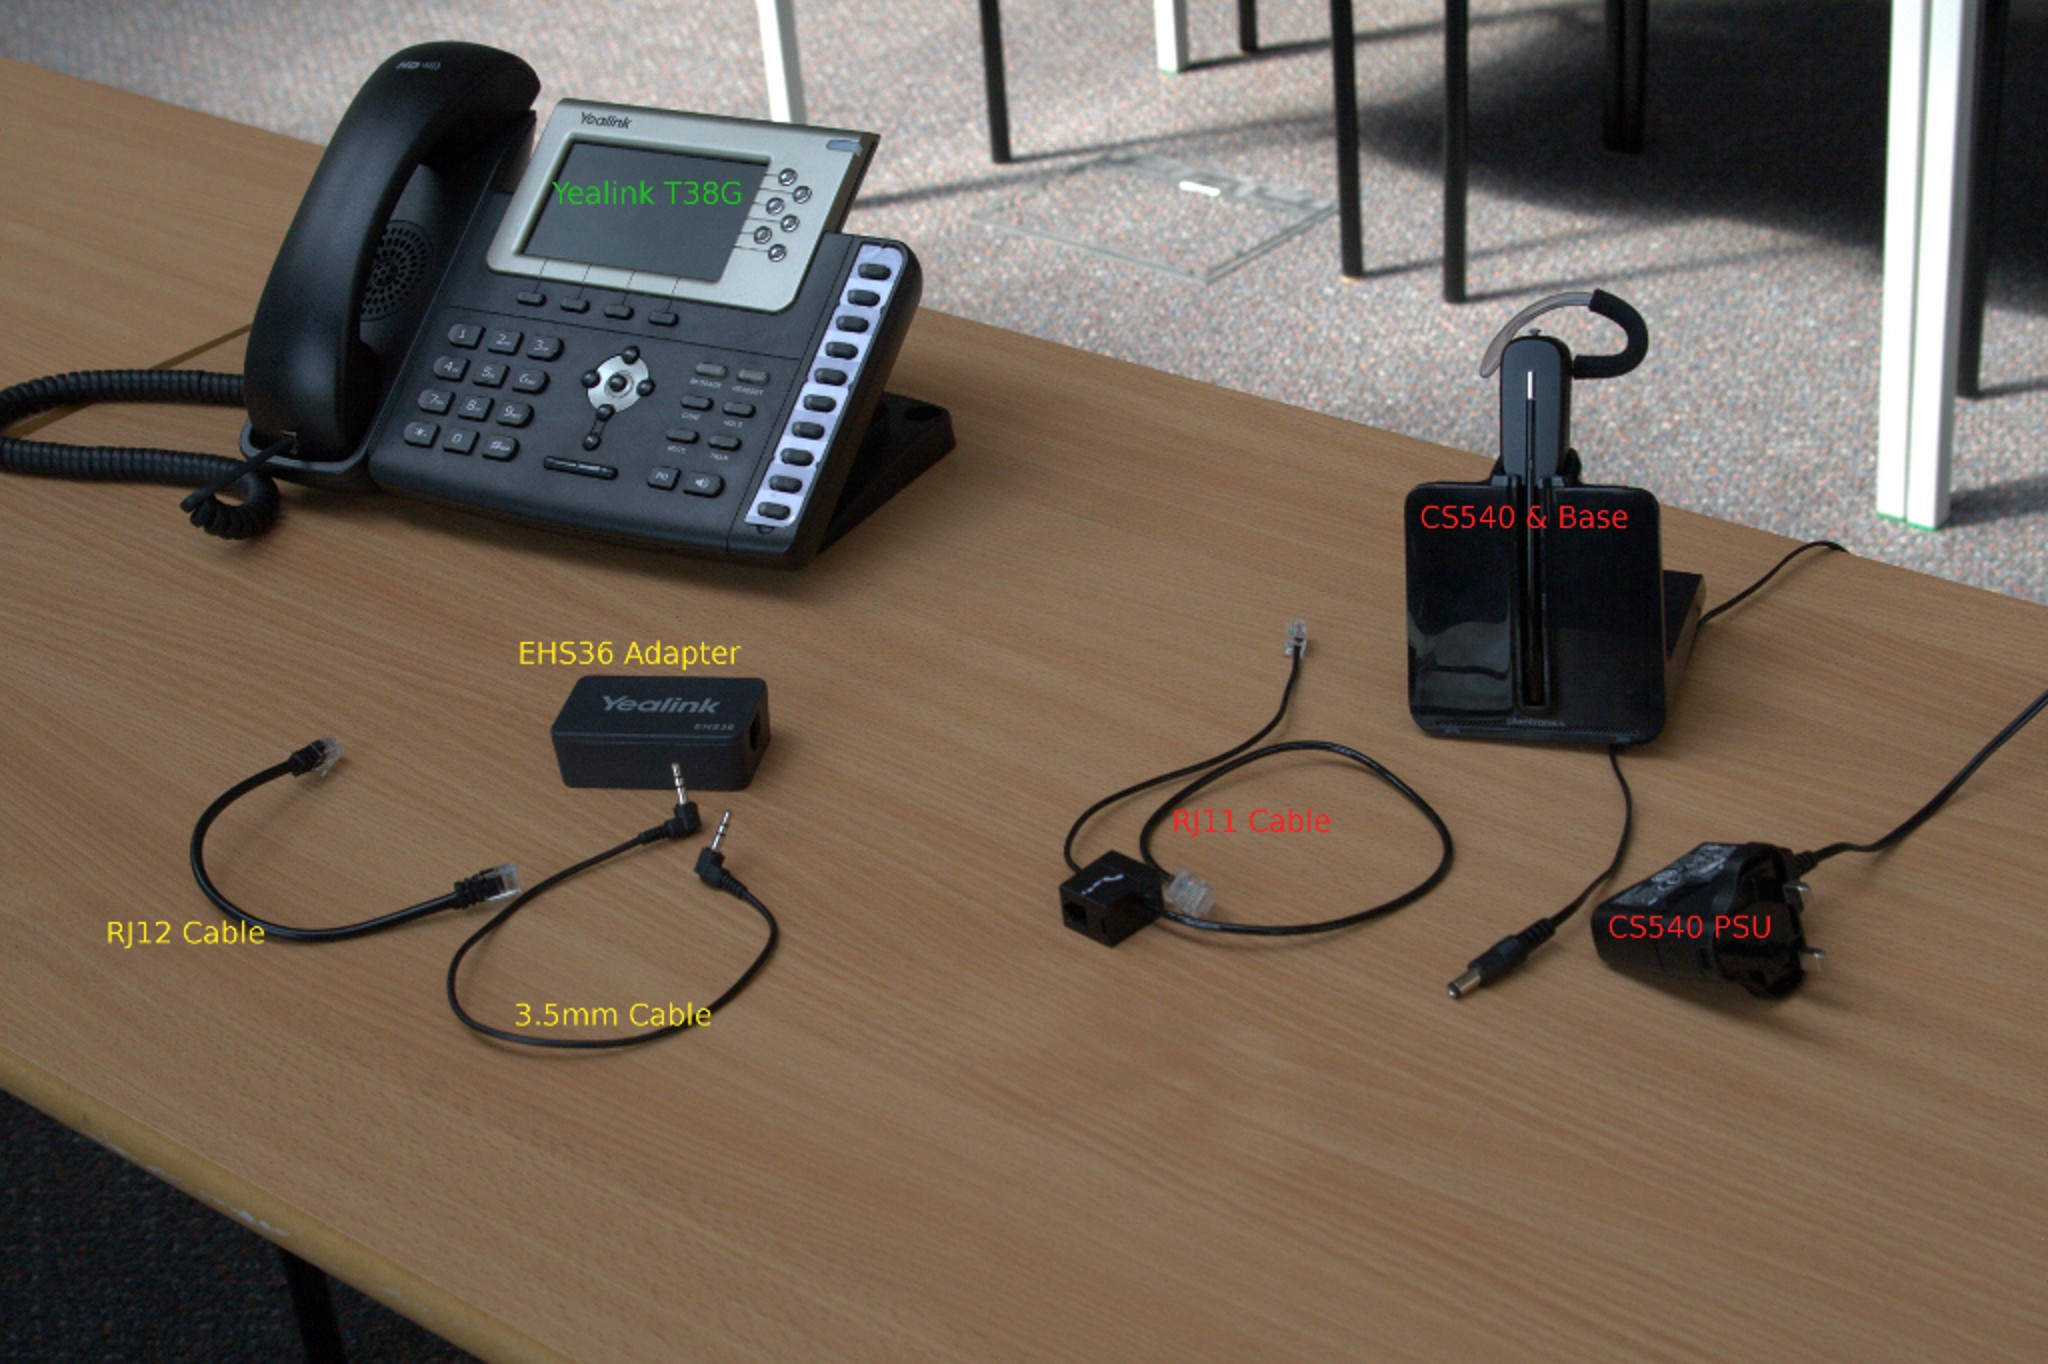
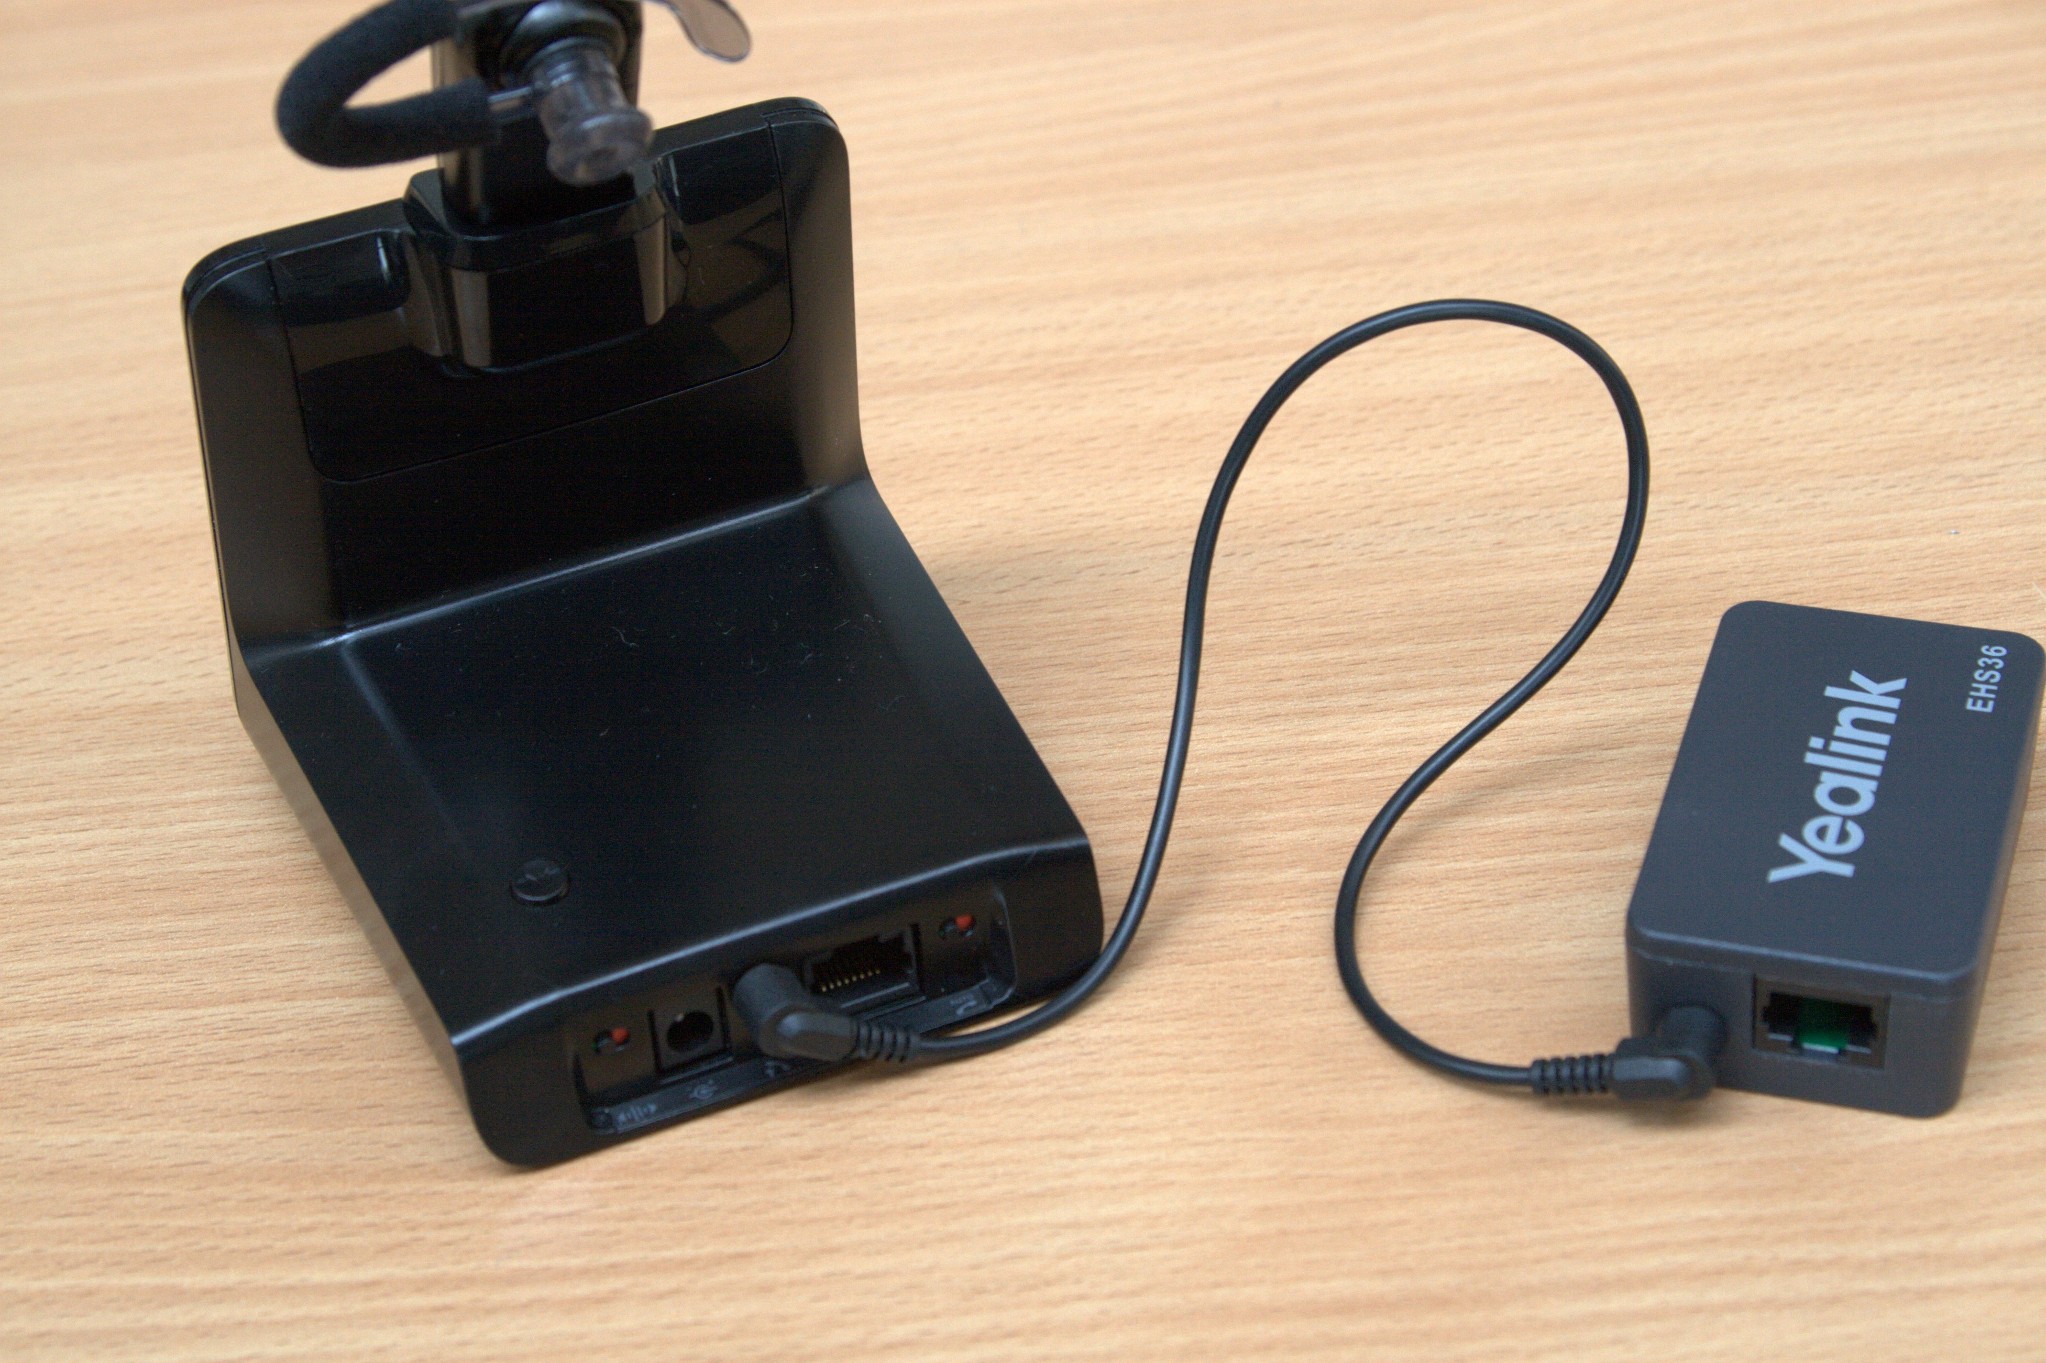
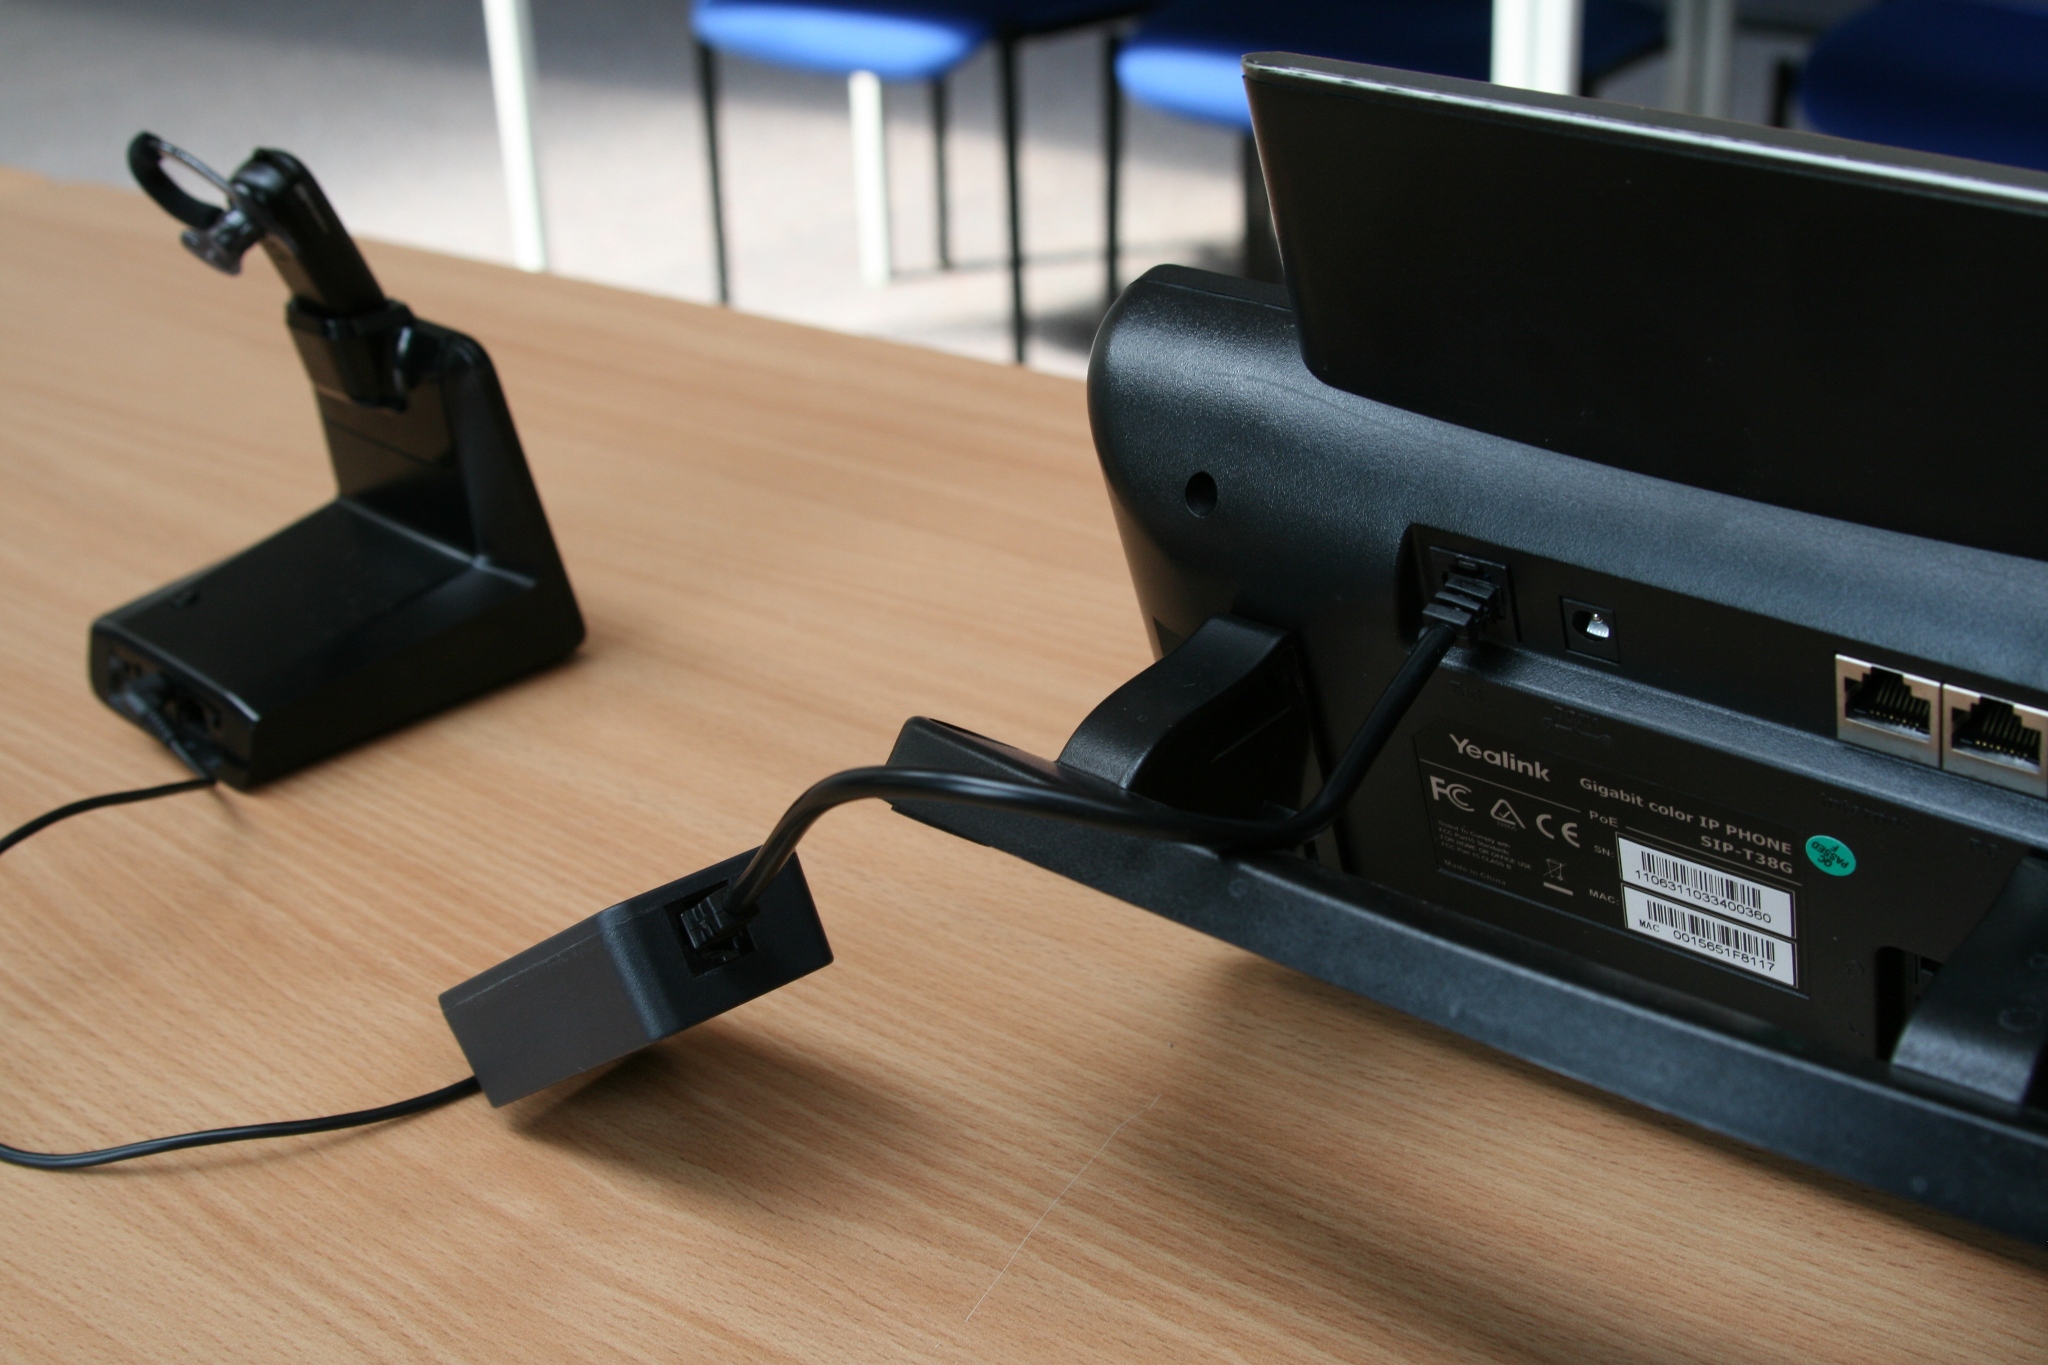
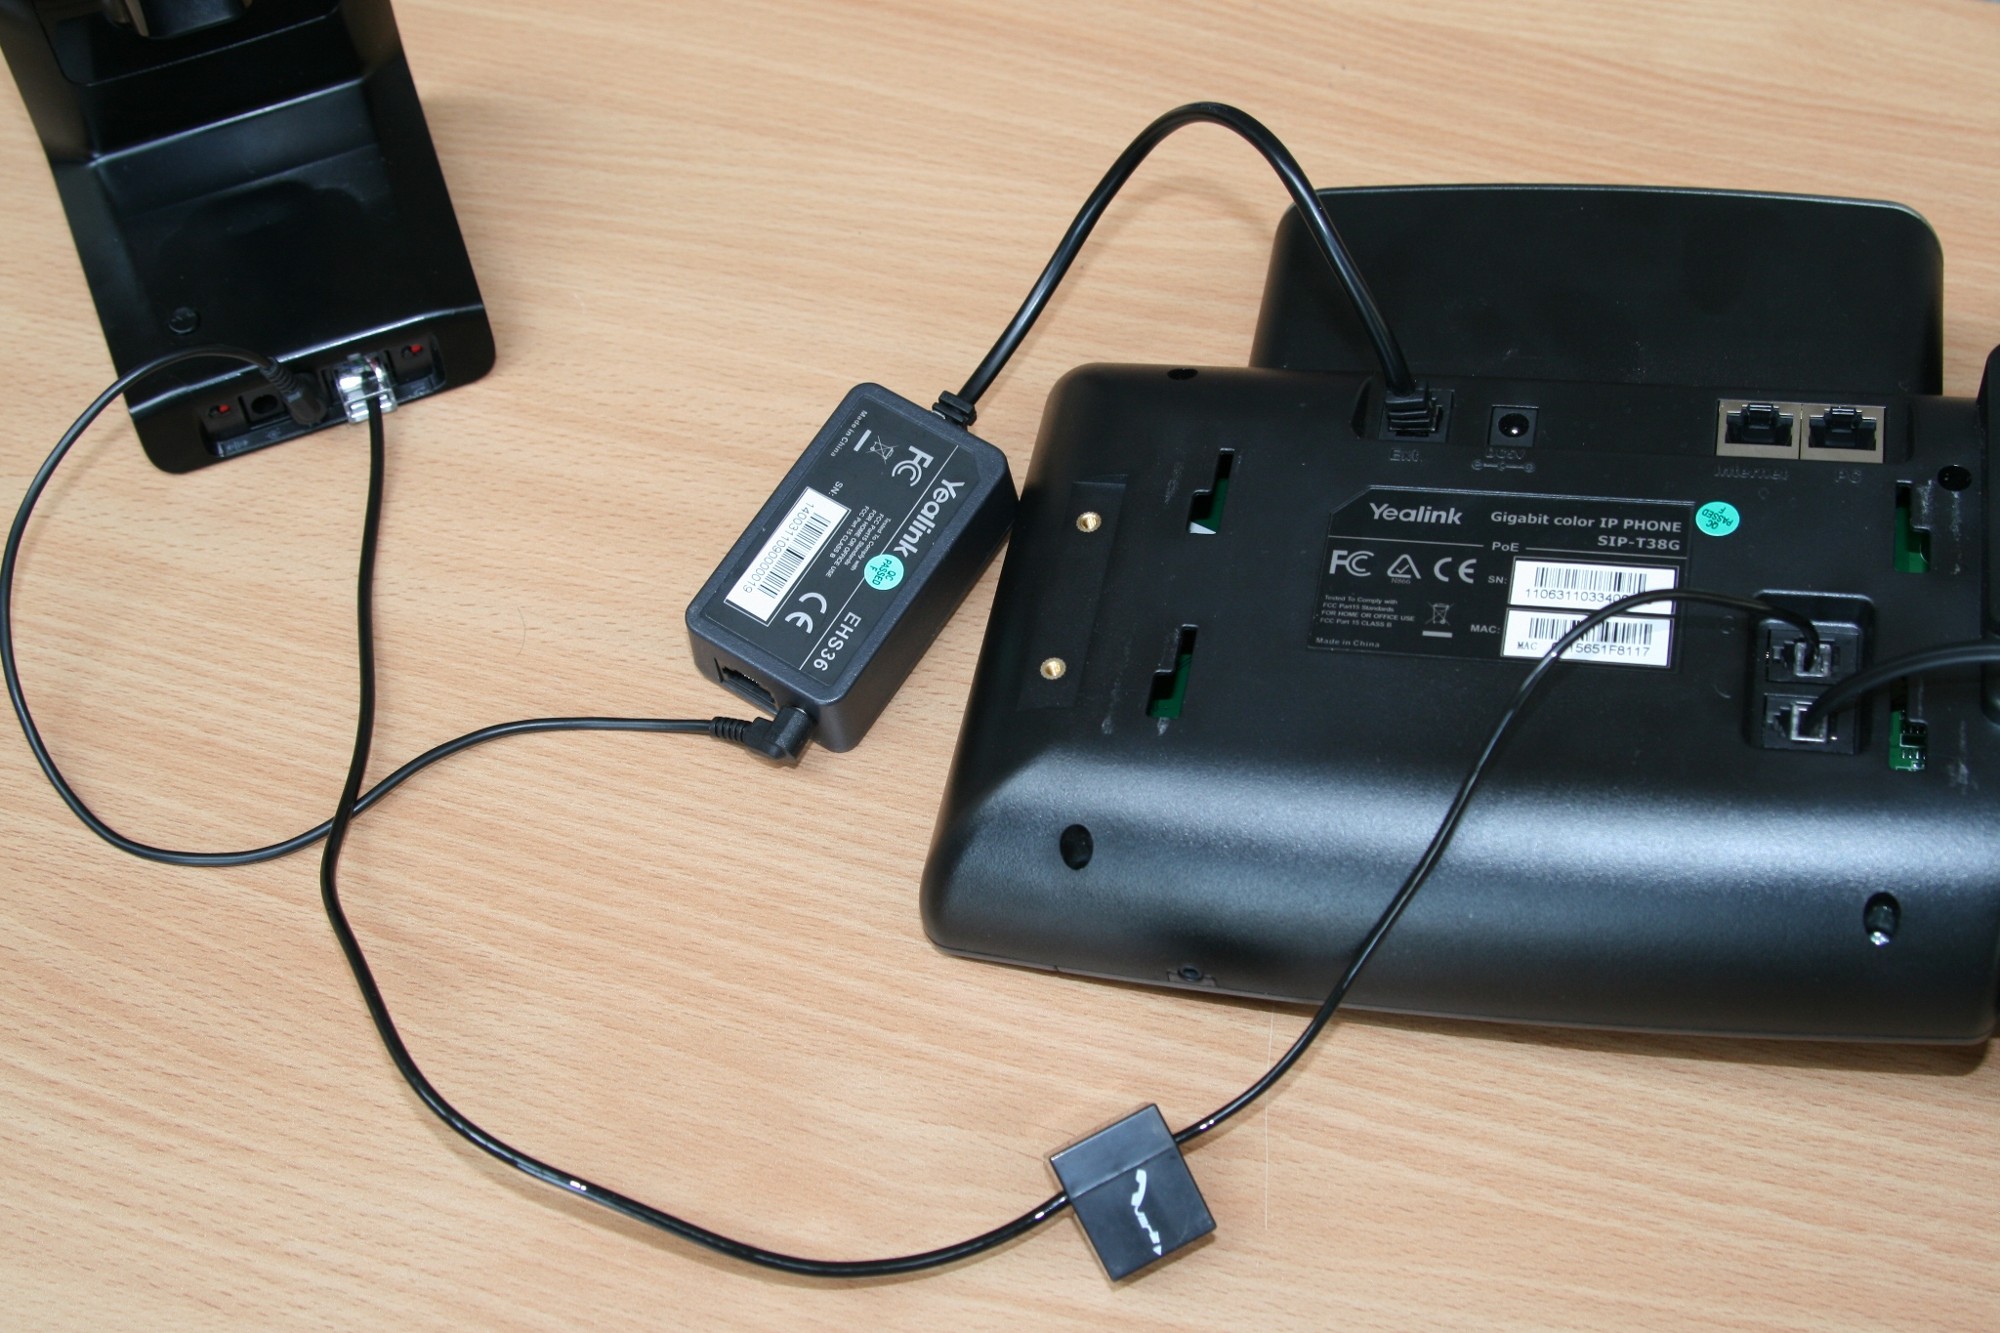
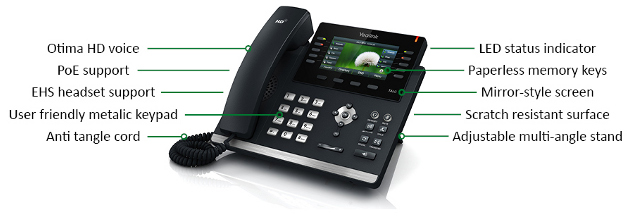
These sleek and elegantly designed handsets all feature a full-duplex speakerphone and Yealink’s Optima HD voice system providing rich, clear, life-like audio. Plus, the days of messy paper inserts are finally over, all the three models have between 6 & 10 BLF keys that can scroll to 3 pages, providing functionality for up to 27 buttons.

The phones also represent a sensible investment, with the T42G and T46G supporting POE with dual Gigabit Ethenet ports. The T41P also features PoE support but is designed for the more cost-efficient 10/100M Ethernet networks.

T4XX Features
The T42GN and T46GN are in stock now and the T41PN is expected to arrive in September.

If you have any questions please speak to the Sales Team on on 01484 840048 or send an email to contact@provu.co.uk

Algo 8180 SIP Alerter: Seven Advantages over ATA based PA Solutions

algo8180 warehouse

Why should you be interested in the ALGO 8180 SIP Alerter? What makes it special?

Moving over to IP communications can often lead to connecting existing analogue PA systems to a new IP system by using an ATA (analogue telephone adaptor). But there are significant advantages in deploying an all-in-one IP Solution.

The Algo 8180 eliminates the need for an ATA offering new capabilities of performance, scalability and user experience.

Seven advantages over ATA based Door Entry Solutions:

1. Easy to install
The 8180 connects to your IP network as just another endpoint. Installation and set up are are as easy as adding an IP phone to your system and it is powered via the network cable from a POE switch.

2. Web interface
Provisioning and administering changes to the 8180 can be carried out any time via its intuitive web interface. No need to physically go to the device to make changes.

3. Ambient Noise Compensation
The 8180 microphone listens to the ambient noise and automatically adjusts output volume. Perfect for variable environments like workshops, classrooms and cafeterias.

4. Effective Ring Tones
No more shrill high frequency ring tones. Choose from a wide range of pre-loaded WAV files or up-load your own ring tones to suit your own specific business environment.

5. Multicast Scalability
The 8180 can generate a multicast audio stream to additional 8180s on the network for additional loud ringing, paging or announcements. No need for any central amplifier or paging server.

6. Paging, Loud Ringing & Announcements
The 8180 is a multi – capable speaker, serving effectively as a paging, loud ringing and PA announcement system all-in-one. Eliminating the need for multiple devices.

7. Talk-back
The 8180 microphone supports talk back in page mode for two way communication and verification.

The Algo 8180 is an all in one IP paging solution eliminating the need for multi component solutions and associated wiring.


Further information about the ALGO 8180 including datasheets

The Algo 8180’s are in stock. If you have any questions please call the Sales Team on 01484 840048 or send an email to contact@provu.co.uk.

How to: Connect a Plantronics CS540 with a Yealink Phone

This is a step-by-step guide of how to successfully connect a Plantronics CS540 to a Yealink SIP phone (Compatible with T26P, T28P, T38G).

You should have:
– Plantronics CS540 Headset
– Yealink Handset with EHS capabilities
– Yealink EHS36 adapter.

(For a full list of headset and phone compatibility please view our headset compatibility chart)

The image below shows the contents of each box that will be required for this setup. They have been labelled for ease of idenitification and grouped according to which box you will find them in -see the key below.

Green – Yealink T38G Box
Yellow – Yealink EHS36 Box
Red – Plantronics CS540 Box

Step 1:
Once you have the correct parts ready, the next step is to connect the 3.5mm cable from the Plantronics base unit, to the EHS36 box. You can’t really go wrong here as they will only fit into one slot on each unit, but the picture below highlights where to connect them.

Step 2:
Connect the RJ12 cable from the EHS36 box to the EXT port on the back of the T38G. This port should be clearly labelled on the phone. See the picture below for illustration.

Step 3:
Connect the Plantronics RJ11 cable from the base unit to the Headset port on the back of the T38G. This port is labelled with a small headset icon, it is located next to the Receiver port, please make sure these are put into the correct slots. Again, the picture below shows how they should be connected.

That’s it! Power up the phone and the Plantronics base if you have not done so already. If this is a new purchase please allow a short time for the headset to charge before use. To charge simply place it onto the base in the very obvious slot.

If you have any problems after following this guide, please email support@provu.co.uk with details of your issue and a member of the technical team will be happy to advise.