Browse Tag

s700

Sangoma s700

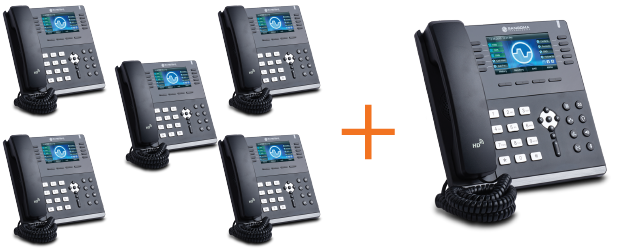
Buy 5 Sangoma s700 IP Phones – Get 1 FREE!

We’ve teamed up with Sangoma to bring our resellers a brand new promotional offer! Available throughout May and June, purchase five s700 IP deskphones and receive one for free.

Sangoma’s s700 IP executive-level phone offers a feature-rich device. With 6 SIP accounts, 5-way conferencing, 45 programmable soft keys and a 4.3″ full colour display, the s700 marks the most advanced model in the Sangoma phone range.

How Sangoma s700 is different to the competition?

  • Out-of-the-box Zero Touch Provisioning – Only Sangoma provides Zero Touch provisioning with FreePBX / PBXact.
  • EndPoint Manager included – Lets your users control global settings, program their phone keys, map extensions, upload images, download new firmware, and much more.
  • Full Integration with Phone Apps – Enables users to easily control complicated features directly from their phones.


To take advantage of this offer, simply contact our sales team on 01484 840048 or email contact@provu.co.uk

Sangoma PBXact UC – Enabling Phone Apps

Sangoma’s PBXact UC systems enable you to remotely manage deployed phones from your computer, but did you know there’s also a range of Apps available, designed to enhance the capabilities of Sangoma IP phones? We’ve put the following step-by-step guide together to enable you to discover how you can start utilising the great features available.

Please note that this guide shows you how to enable Phone Apps, it doesn’t show the process of creating an extension. If you would like to find out how to create an extension, please see our earlier blog post on how to create an extension using PBXact

Step 1:
You will need to start by web browsing to the IP address of your Sangoma PBXact UC system. If you don’t already know the IP address of the PBXact UC system, you may need to log into your router to view a list of active network devices.

Step 2:
Once you have browsed to the IP address of your PBXact UC system, you should see the following options:

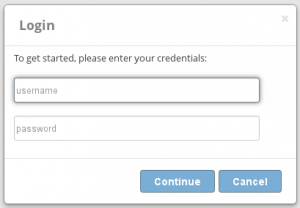
You will need to go ahead and select the ‘PBX Admini
stration’ option. You should then be prompted to enter a username and password in order to login to the main interface of the system.

If you don’t know the username and password, you may need to consult an administrator or relevant person to help you with this.

Step 3:
Providing you have entered the correct username and password, you should now see the homepage showing the ‘System Overview’, ‘PBXact Statistics’, ‘Uptime’ and options at the top of the page.
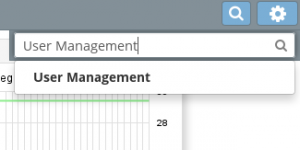
You can either hover over ‘Modules’ located at the top of the screen in ‘Advanced Mode’ and select ‘User Management’, or use the magnifying glass on the right hand side and search for ‘User Management’ and select the option when it appears below the search field.

Step 4:
You should now see the ‘User Manager’ screen which may list users below if you already have users registered on the system.
Your screen should look like the screenshot to the right.

Step 5:
Please note that this step will involve creating a new user. You will need to click on the ‘Add’ button as shown in the screenshot above.
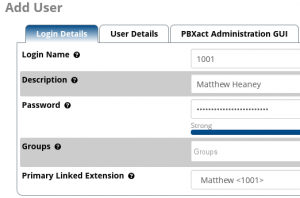

This should then take you to the screenshot shown above. You will then need to enter a ‘Login Name’, ‘Password’ and if you are linking this to an extension that already exists on the system, you will need to select the ‘Primary Linked Extension’ which should display a drop down list of extensions. Please note that extensions already assigned to other users will not be displayed in the drop down list.

Step 6:
Using the navigation bar under ‘Add User’, you will need to navigate to the ‘Phone Apps’ section, as can be seen below.

When you navigate to ‘Phone Apps’, you should see the ‘General’ section underneath and a section called ‘Allow Access’. You will need to change this option to ‘Yes’. This allows access to the Phone Apps for the user you are editing.

Step 7:
Depending on which Phone Apps you would like to set up for the user, you will need to navigate across the different tabs and enable the applications that you would like to assign to that particular user.

If you want to enable access to call queues, you will need to navigate to ‘Queues’ and change ‘Enable Queue Access’ to ‘Yes’. If you would also like to setup queue agent access, you will need to change ‘Enable Queue Agent Access’ to ‘Yes’. You will then also need to select the queues from a list under ‘Allowed Queues’. Please see the following screenshot below that shows this:


As you can see from the screenshot above, there is ‘TestQueue <6000>’ is shown in the list under ‘Allowed Queues’. Please note that you must have created a queue before hand in order for it to be shown in the list.

Step 8:
You may want to enable the login and logout feature for that user so that they can log out of the Sangoma IP phone once they have finished using it. In order to do this, you will need to navigate to ‘Other Apps’ and change ‘Enabled Login/Logout Access’ to ‘Yes’. Please see below a screenshot that shows this:

You may also want to allow Do Not Disturb (DND) depending if this is required or not. You can simply change the options that you would like to enable to ‘Yes’. Please note that additional configuration may be required when enabling certain Phone Apps.

Step 9:
Once you have finished configuring the user with Phone Apps, you can go ahead and submit your changes by pressing the ‘Submit’ button located near the bottom right hand side of the page.

You should then be taken back to the ‘User Manager’ section which shows you a list of users. You will then need to click ‘Apply Config’ which should be displayed near the top right hand side of the page. This writes the changes made to the PBXact UC system.

That’s the end of the configuration process.

Providing you have a valid extension and user set up, you should now be able to see the Phone Apps on the phone once provisioned/configured correctly.
Provision Sangoma S700 IP Phone using Sangoma portal

You may or may not be aware that you can provision your Sangoma phones using the re-direction service which is available via the Sangoma portal. If you are interested in finding out how to provision your Sangoma phones, please follow the guide below:

Step 1:

You will need to start by navigating to the Sangoma portal which can be accessed by visiting the following link listed below:

https://portal.sangoma.com/

Please note, if you do not already have an account for the Sangoma portal, you will need to sign up for one. This can be done by accessing the following link listed below:

https://portal.sangoma.com/index.php/login/register

Please note that the registration link above will also list some important information regarding the Sangoma portal.

Step 2:

Once you have logged into the Sangoma portal, you should see the welcome page and also a navigation bar on the left hand side. Using the navigation bar, you will need to click onto ‘Products’ which should display a sub list with an option for ‘Sangoma Phones’. You will then need to click onto ‘Sangoma Phones’ which should display another sub list, where you can select ‘Register’.

Step 3:

You should now see a screen for registering a Sangoma phone. For this part you will need to find out the MAC address of the phone that you are wanting to register.

If you are able to web browse to the IP address of the Sangoma phone, this could be the easiest way as you can simply copy and paste the MAC address onto the Sangoma portal.

If you don’t know the IP address of the phone, you can obtain this by either web browsing to the IP address of the router and then looking for devices on the network, or, if you have the phone in front of you, you can obtain the IP address by pressing the tick button located at the centre of the arrow navigation keys, and then by pressing the tick button again on the ‘Information’ tab. You should then see the information page displaying the IP address under ‘IPV4’.

Step 4:

Once you have obtained the IP address, you will need to browse to that IP address using a web browser. By default, you will be prompted to enter a username and password before you can access the interface of the phone. The default username and password is ‘admin’. Please ensure that you change the default password for security reasons.

Once you have logged into the web interface, you should see the status page that displays a variety of information about the phone. You should see the MAC address under the ‘Network’ section. You will need to copy the MAC address, then navigate back to the Sangoma portal and paste it into the registration field.

Step 5:

Once you have pasted the MAC address into the registration field, you will need to press the submit button located next to the MAC address field. Providing the MAC address you have entered is valid and doesn’t already exist on the system already, you should see a message appear in green to show that your phone has been successfully registered.

Step 6:

You may see some phone details including the MAC address, manufacture date and more listed on the screen. You should see a ‘General Information’ section which will ask for the company name to assign the phone to. You will need to ensure that the correct company name is selected. You can then enter a description in the box below such as ‘Sangoma S700 IP Phone’ depending on the phone you are registering.

Step 7:

Below the description box, there should be a check box to ‘Enable Redirection’. You will need to check this box and some options should be displayed below. The ‘Redirection Type’ should be set to ‘IP/FQDN’. The ‘IP/FQDN protocol’ should be set to ‘http://’. The ‘IP/FQDN address should be blank by default. You will need to enter the IP address of the Sangoma PBXact UC system in this field followed by the provisioning port number e.g. ‘192.168.1.60:83’. Please ensure that you don’t include ‘http://’ at the beginning of the ‘IP/FQDN address’ field as the protocol option above should already be set.

Once the above options have been set correctly and the relevant information has been filled in, you can then go ahead and submit the changes using the ‘Submit’ button at the bottom of the page.

You page should then reload and display a green box stating that the changes have been updated. You will then need to reboot the phone in order for the provisioning process to start. You may want to factory reset your Sangoma phone if you want to overwrite the existing configuration.