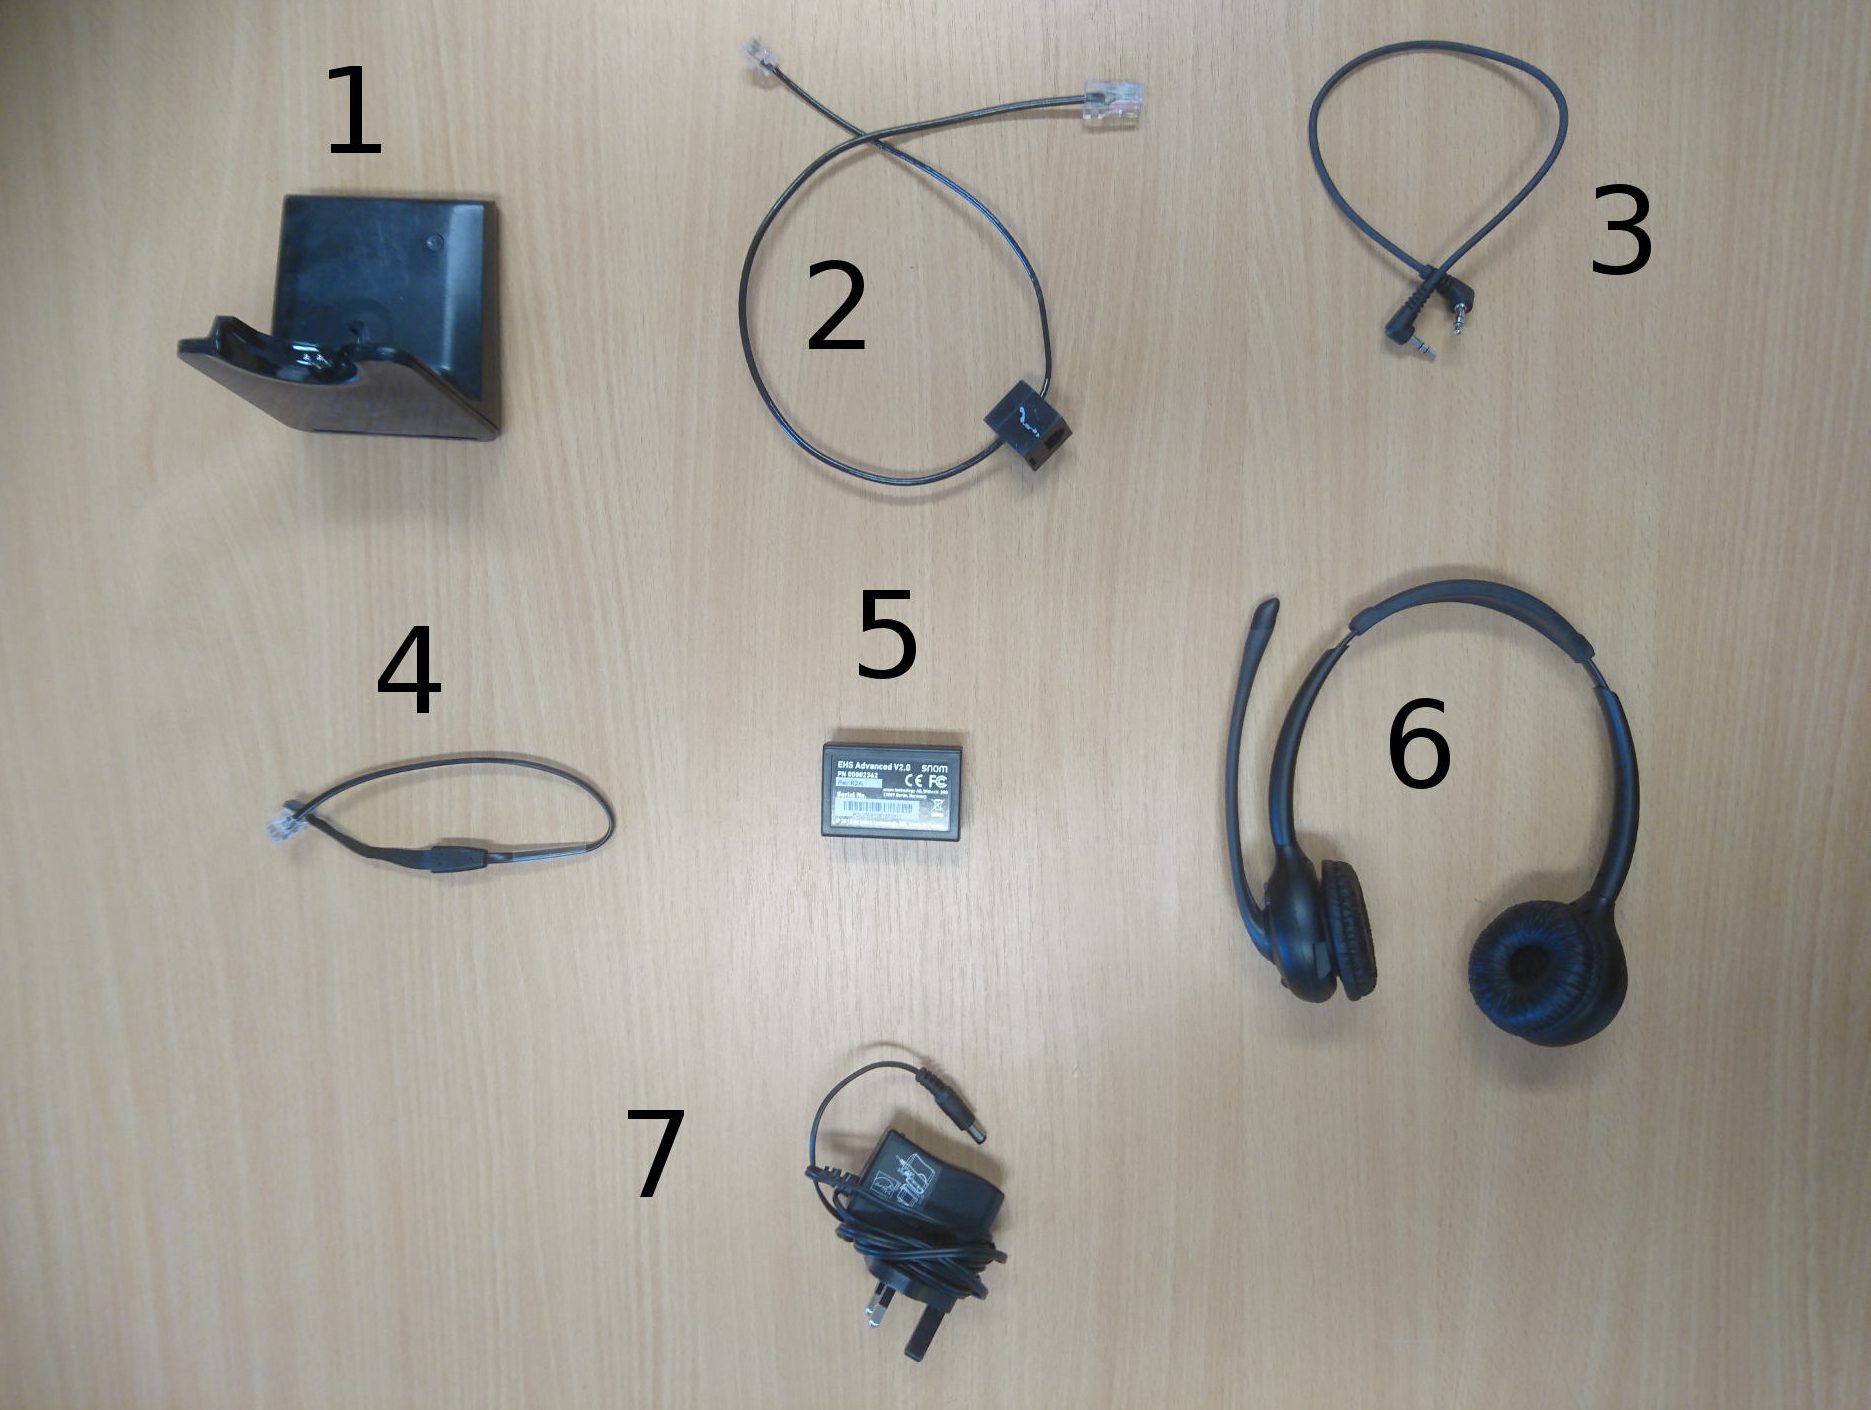
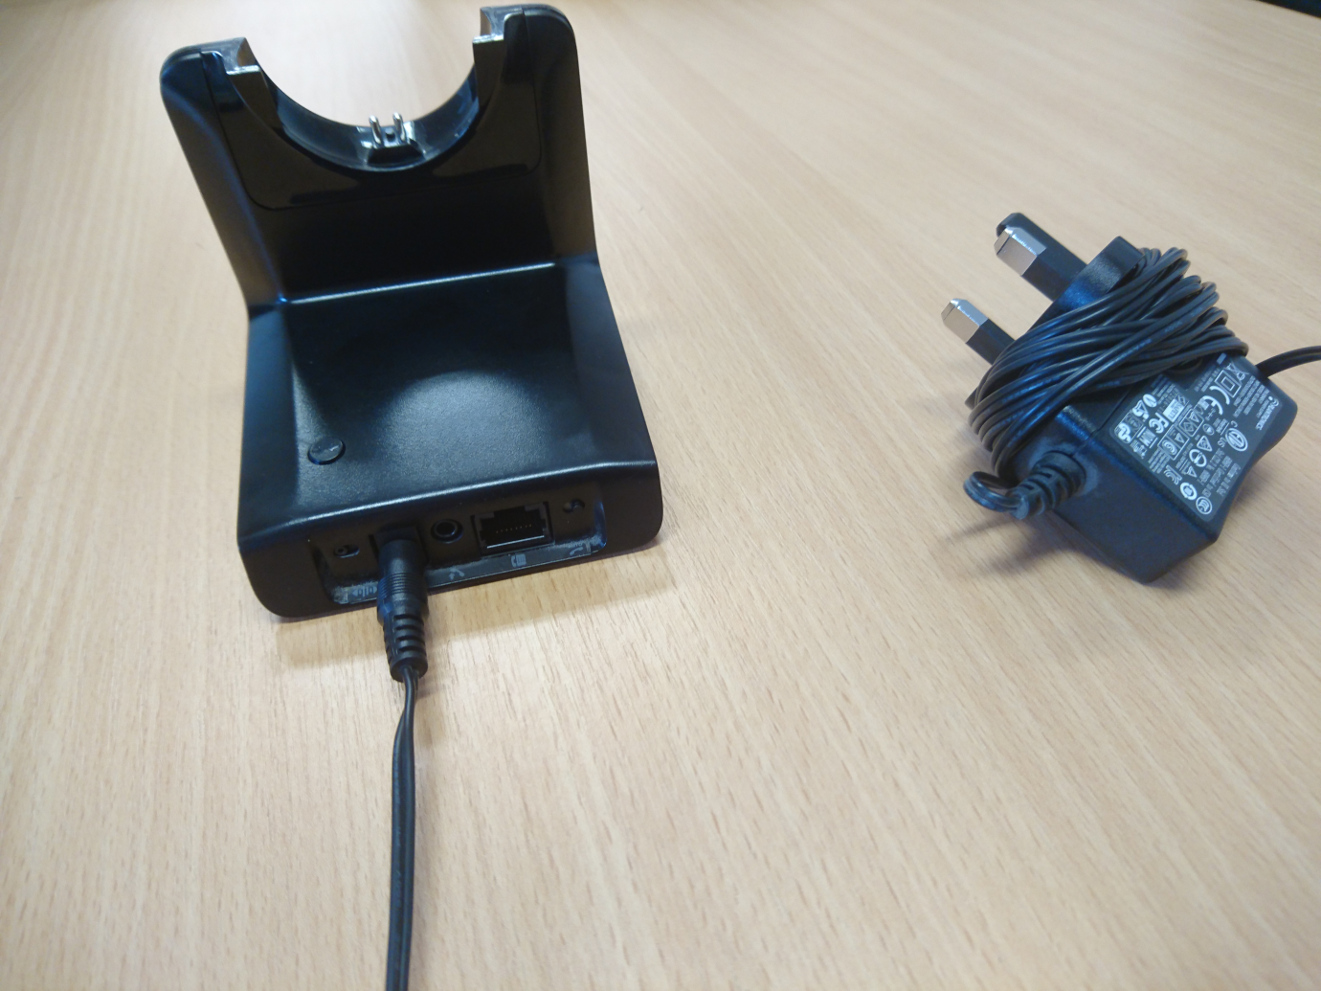
Browse Author

William Dobson

Gigaset DX800A Call Transfer Guide

Configuration:

  1. Hold down a memory key for a few seconds until the function menu appears.
  2. Scroll down and select ‘R Function’.
  3. This will map the function to that memory key.
  4. When you want to transfer a call, press the memory key and a screen will appear. 
  5. Type in the number of the phone you want to transfer the call to and press the memory key again.
  6. You will get a screen like this to confirm the transfer has been successful:


How to configure Snom 720 with Plantronics CS520 and EHS Advanced V2.0

List of Components:

  1. Plantronics Base
  2. Plantronics Cable
  3. 3.5mm DC Jack
  4. Snom 4 Pin Connector
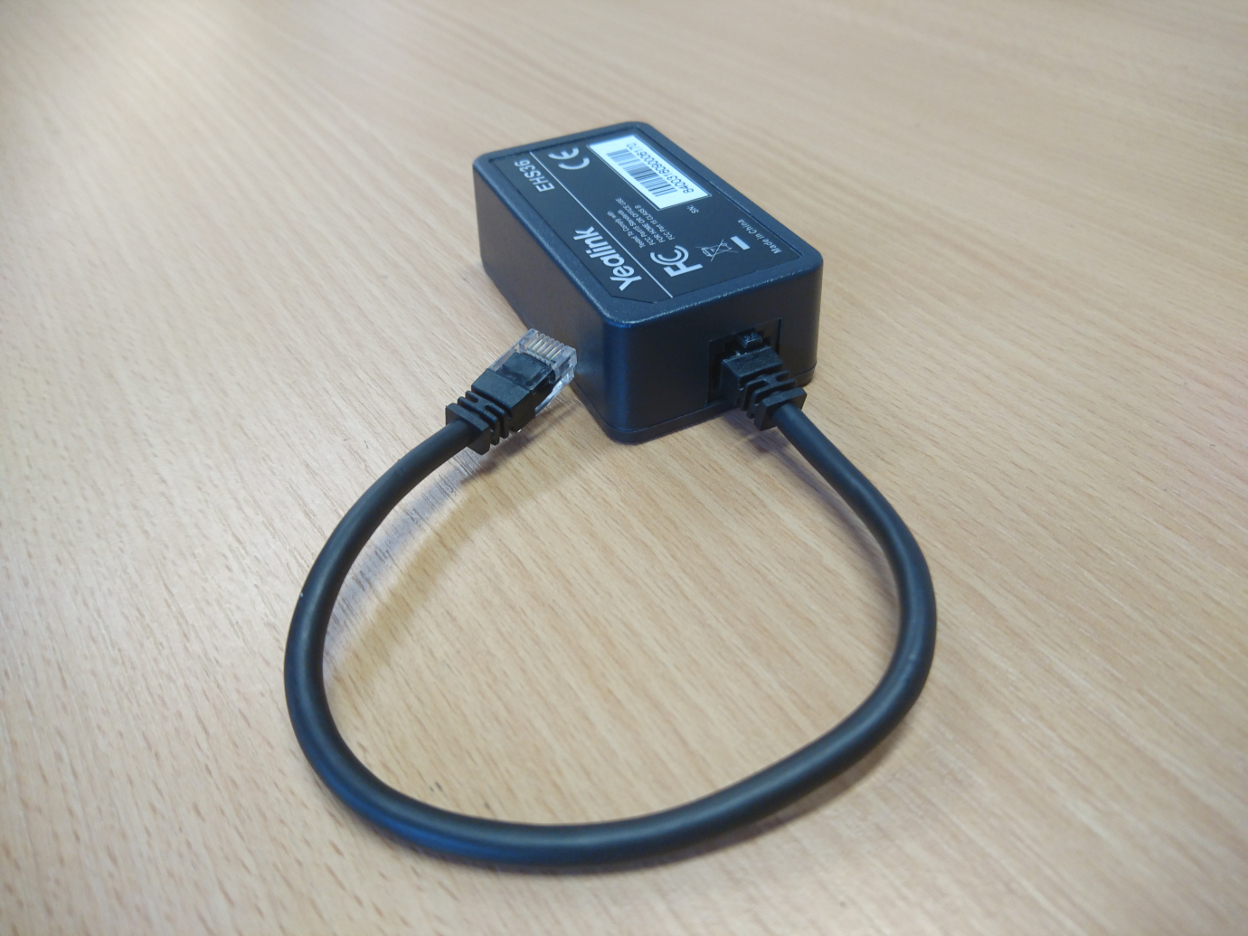
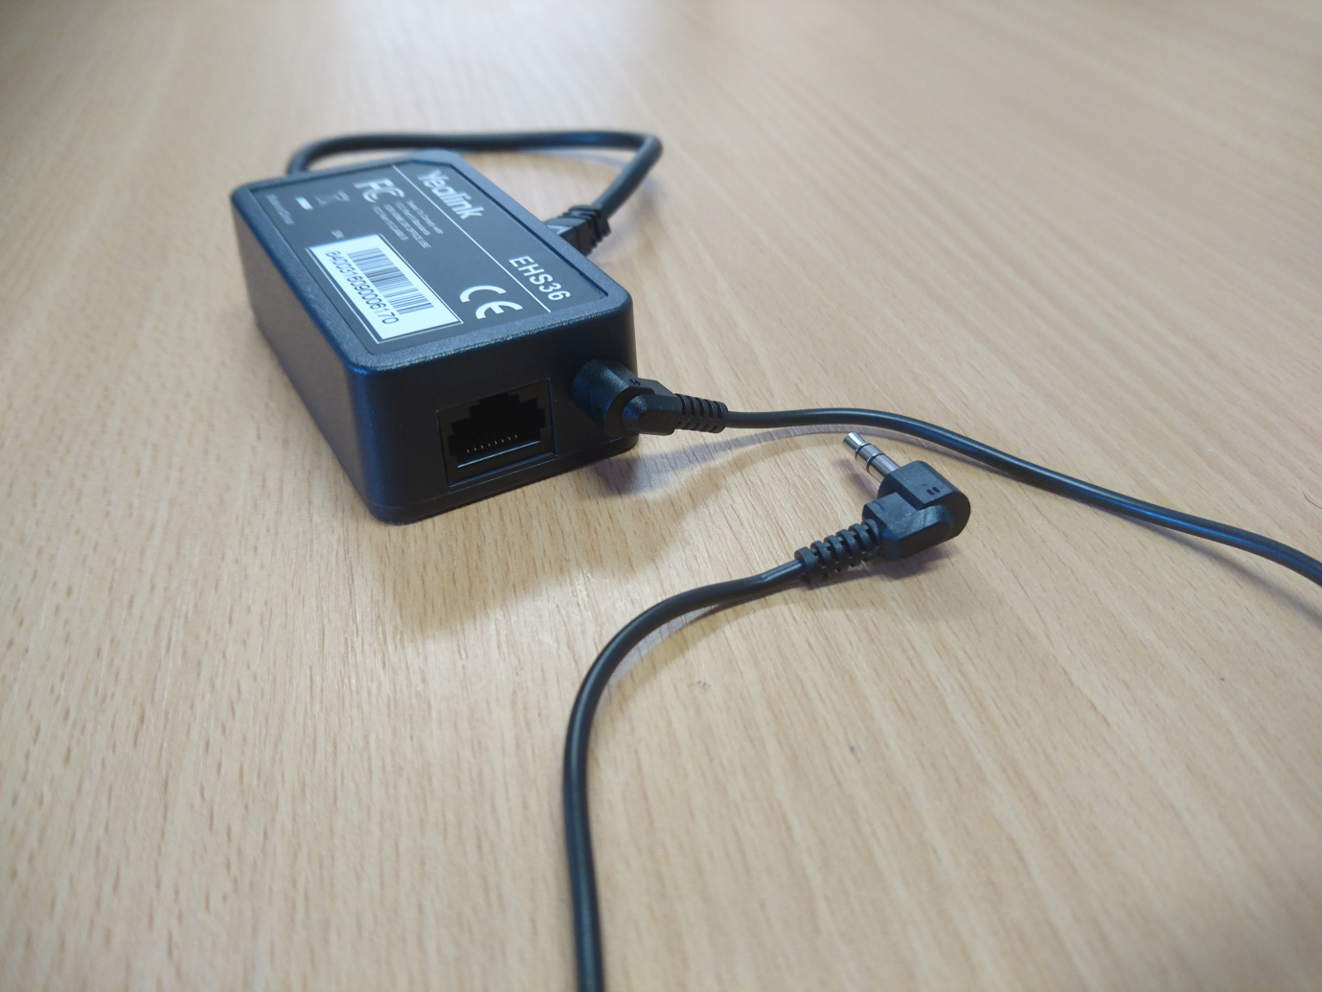
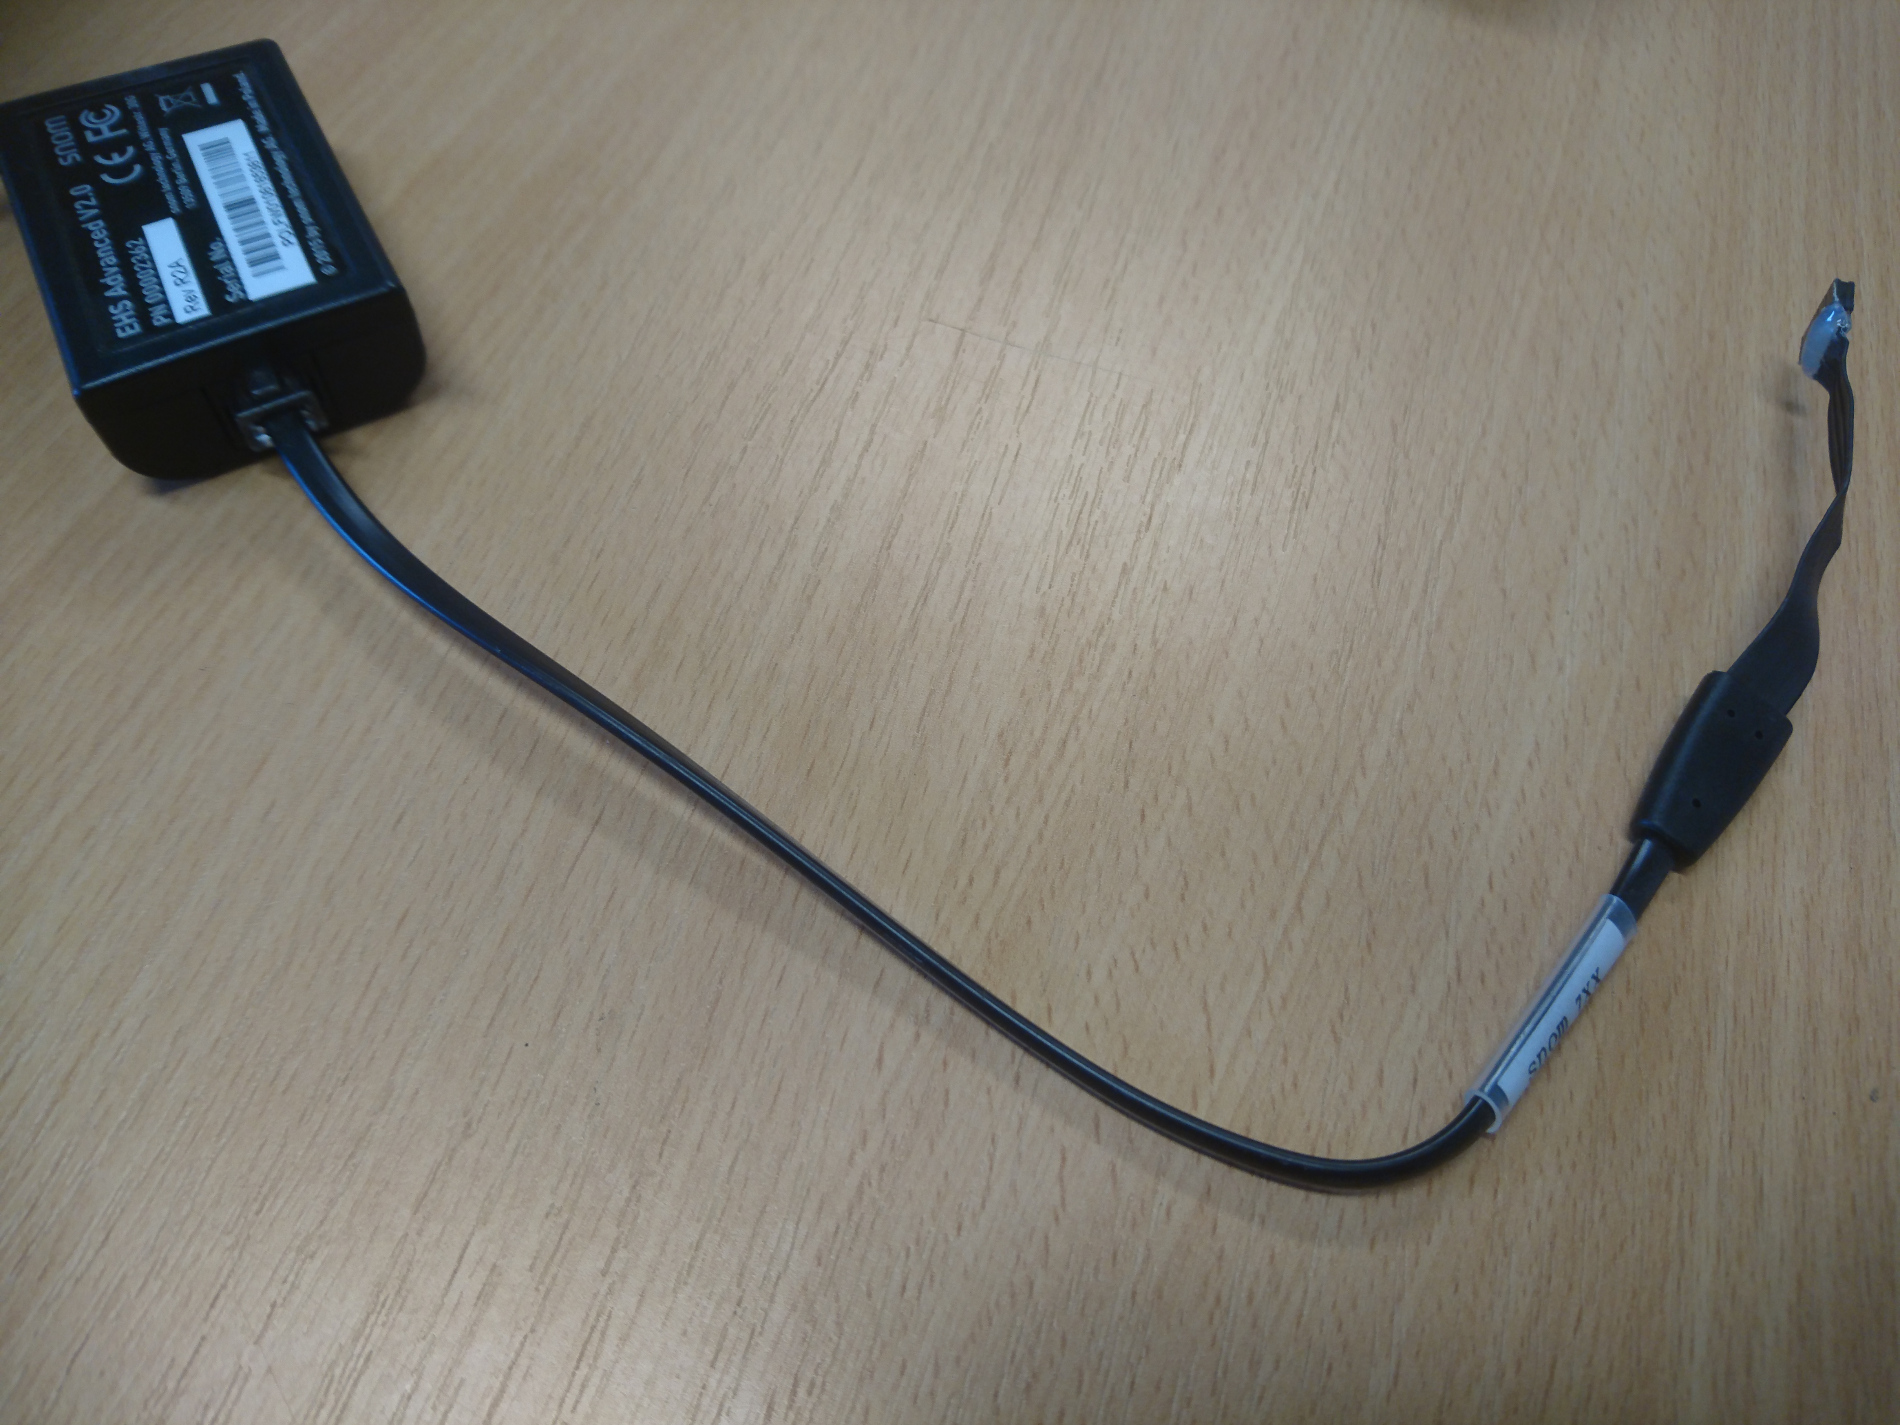
  5. Snom EHS Advanced V2.0 Adapter
  6. Plantronics Headset
  7. Plantronics Base Power Supply

Configuration:

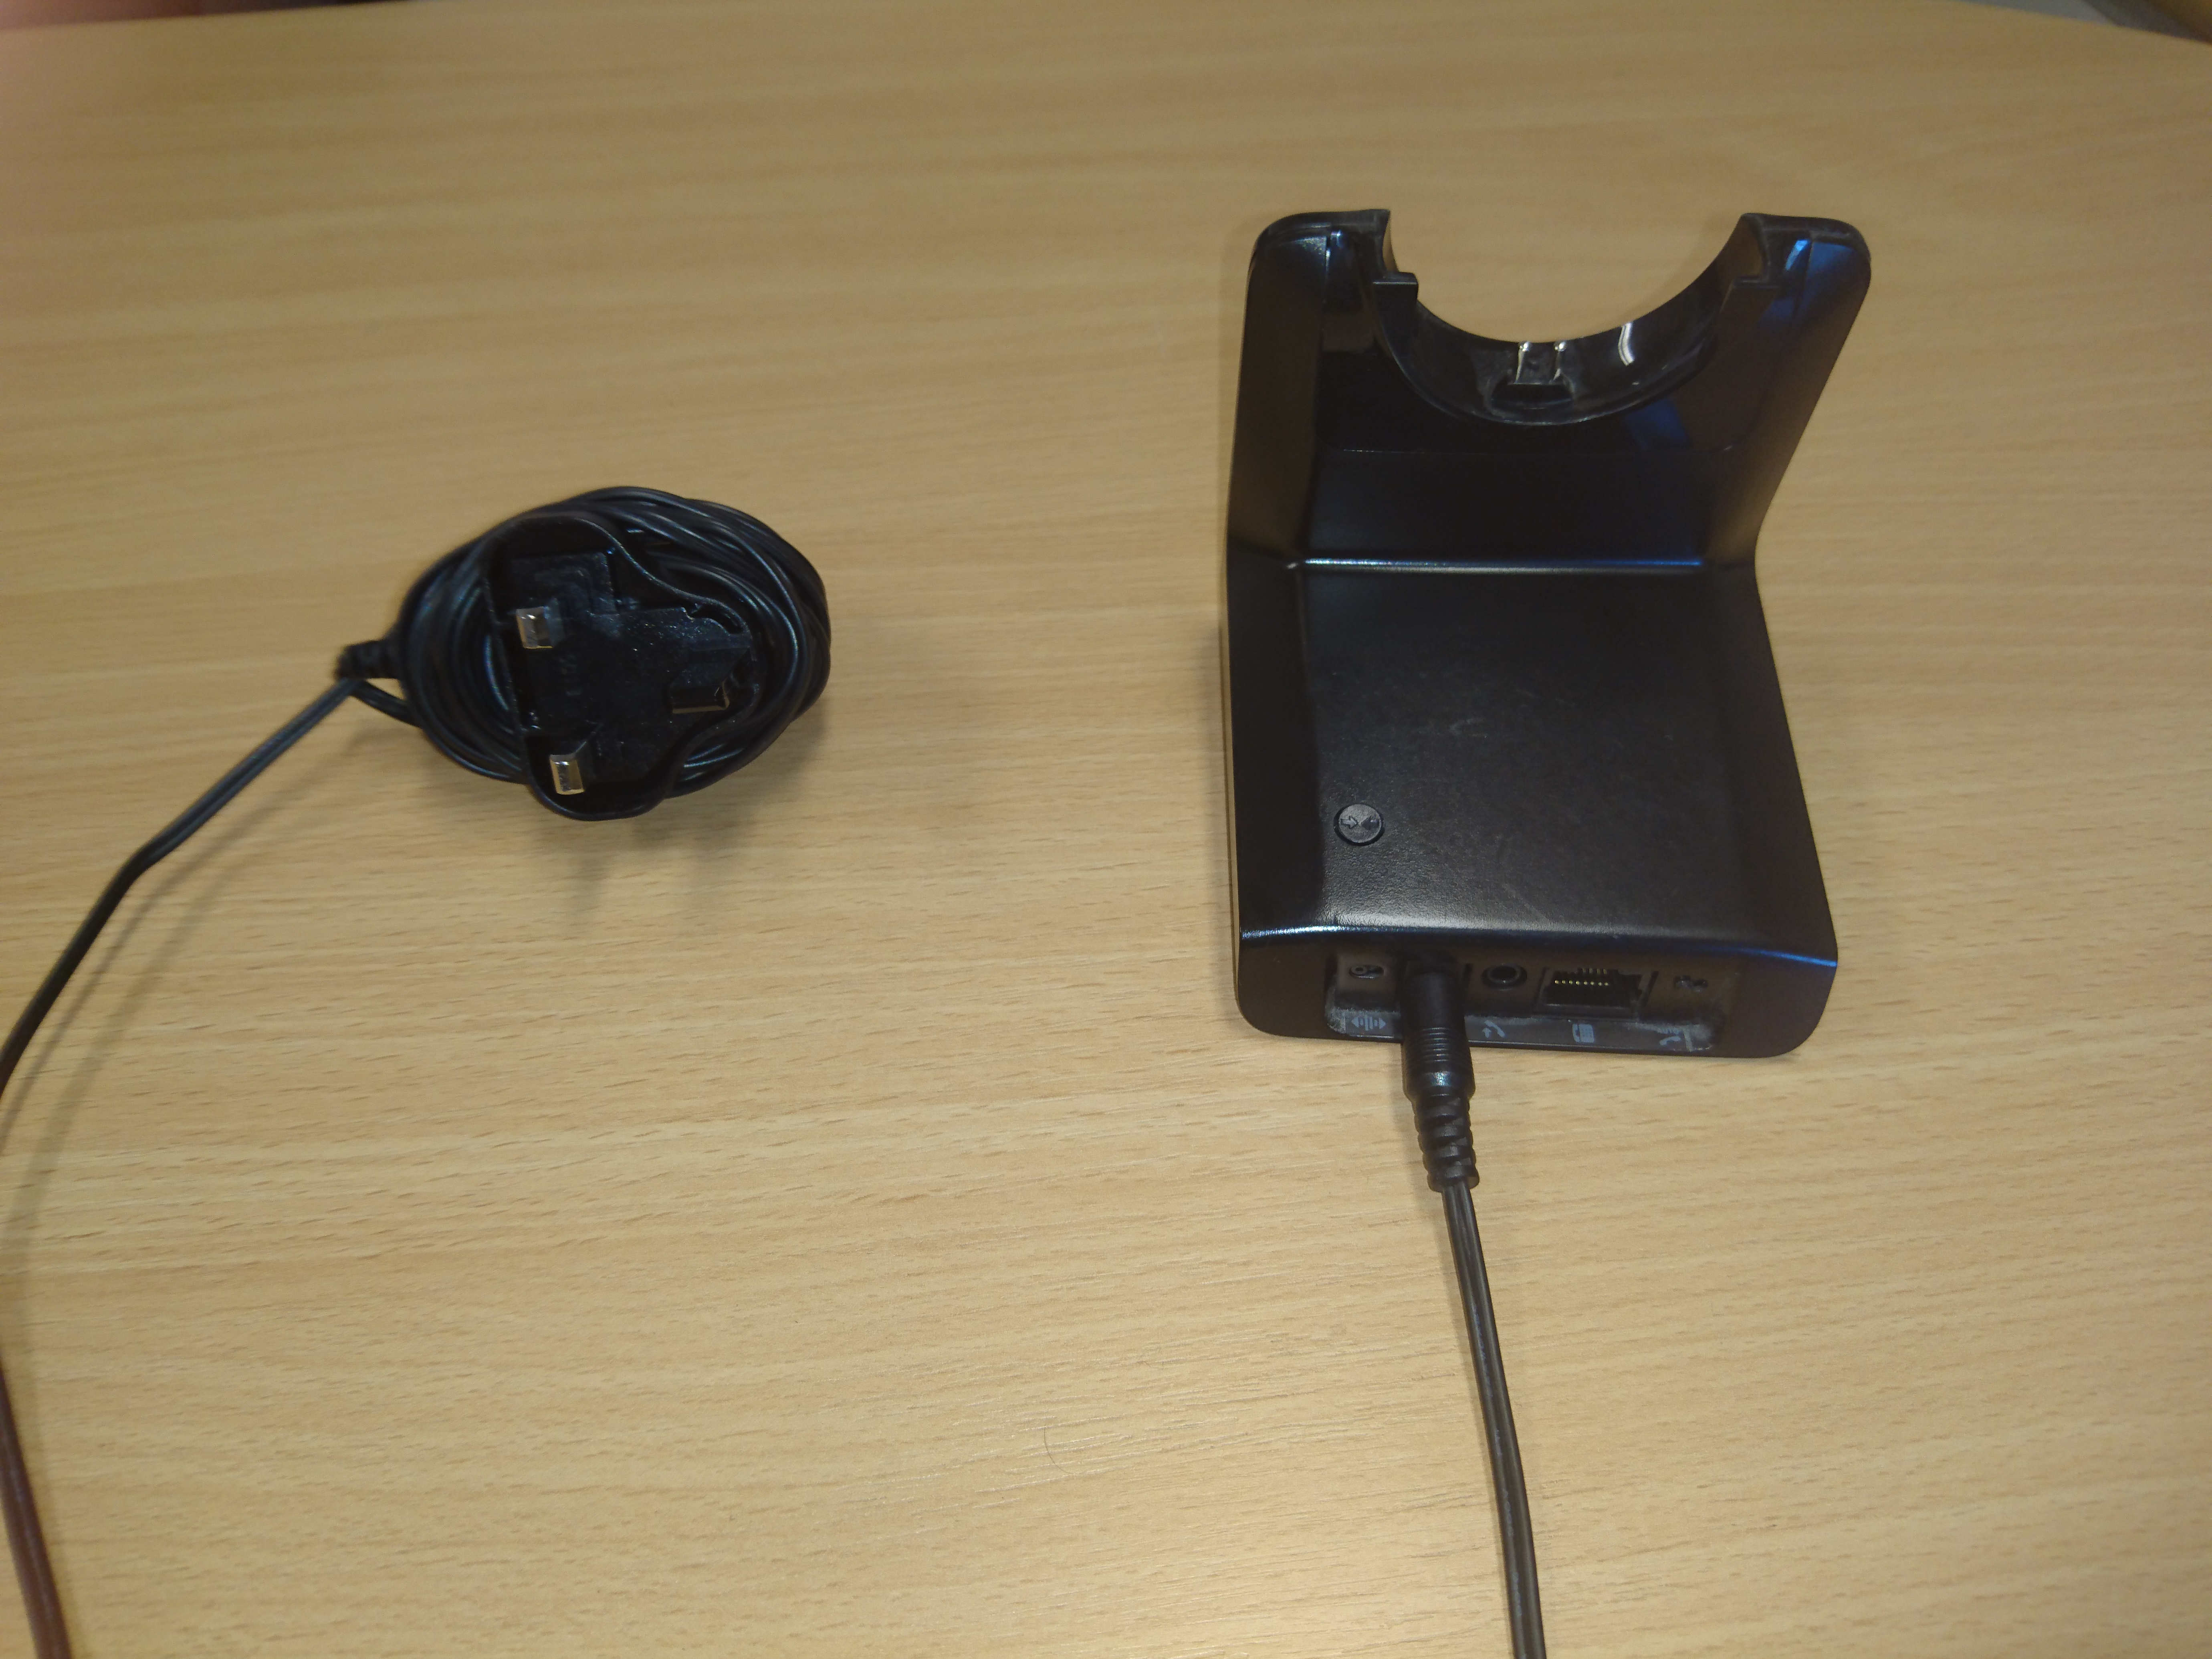
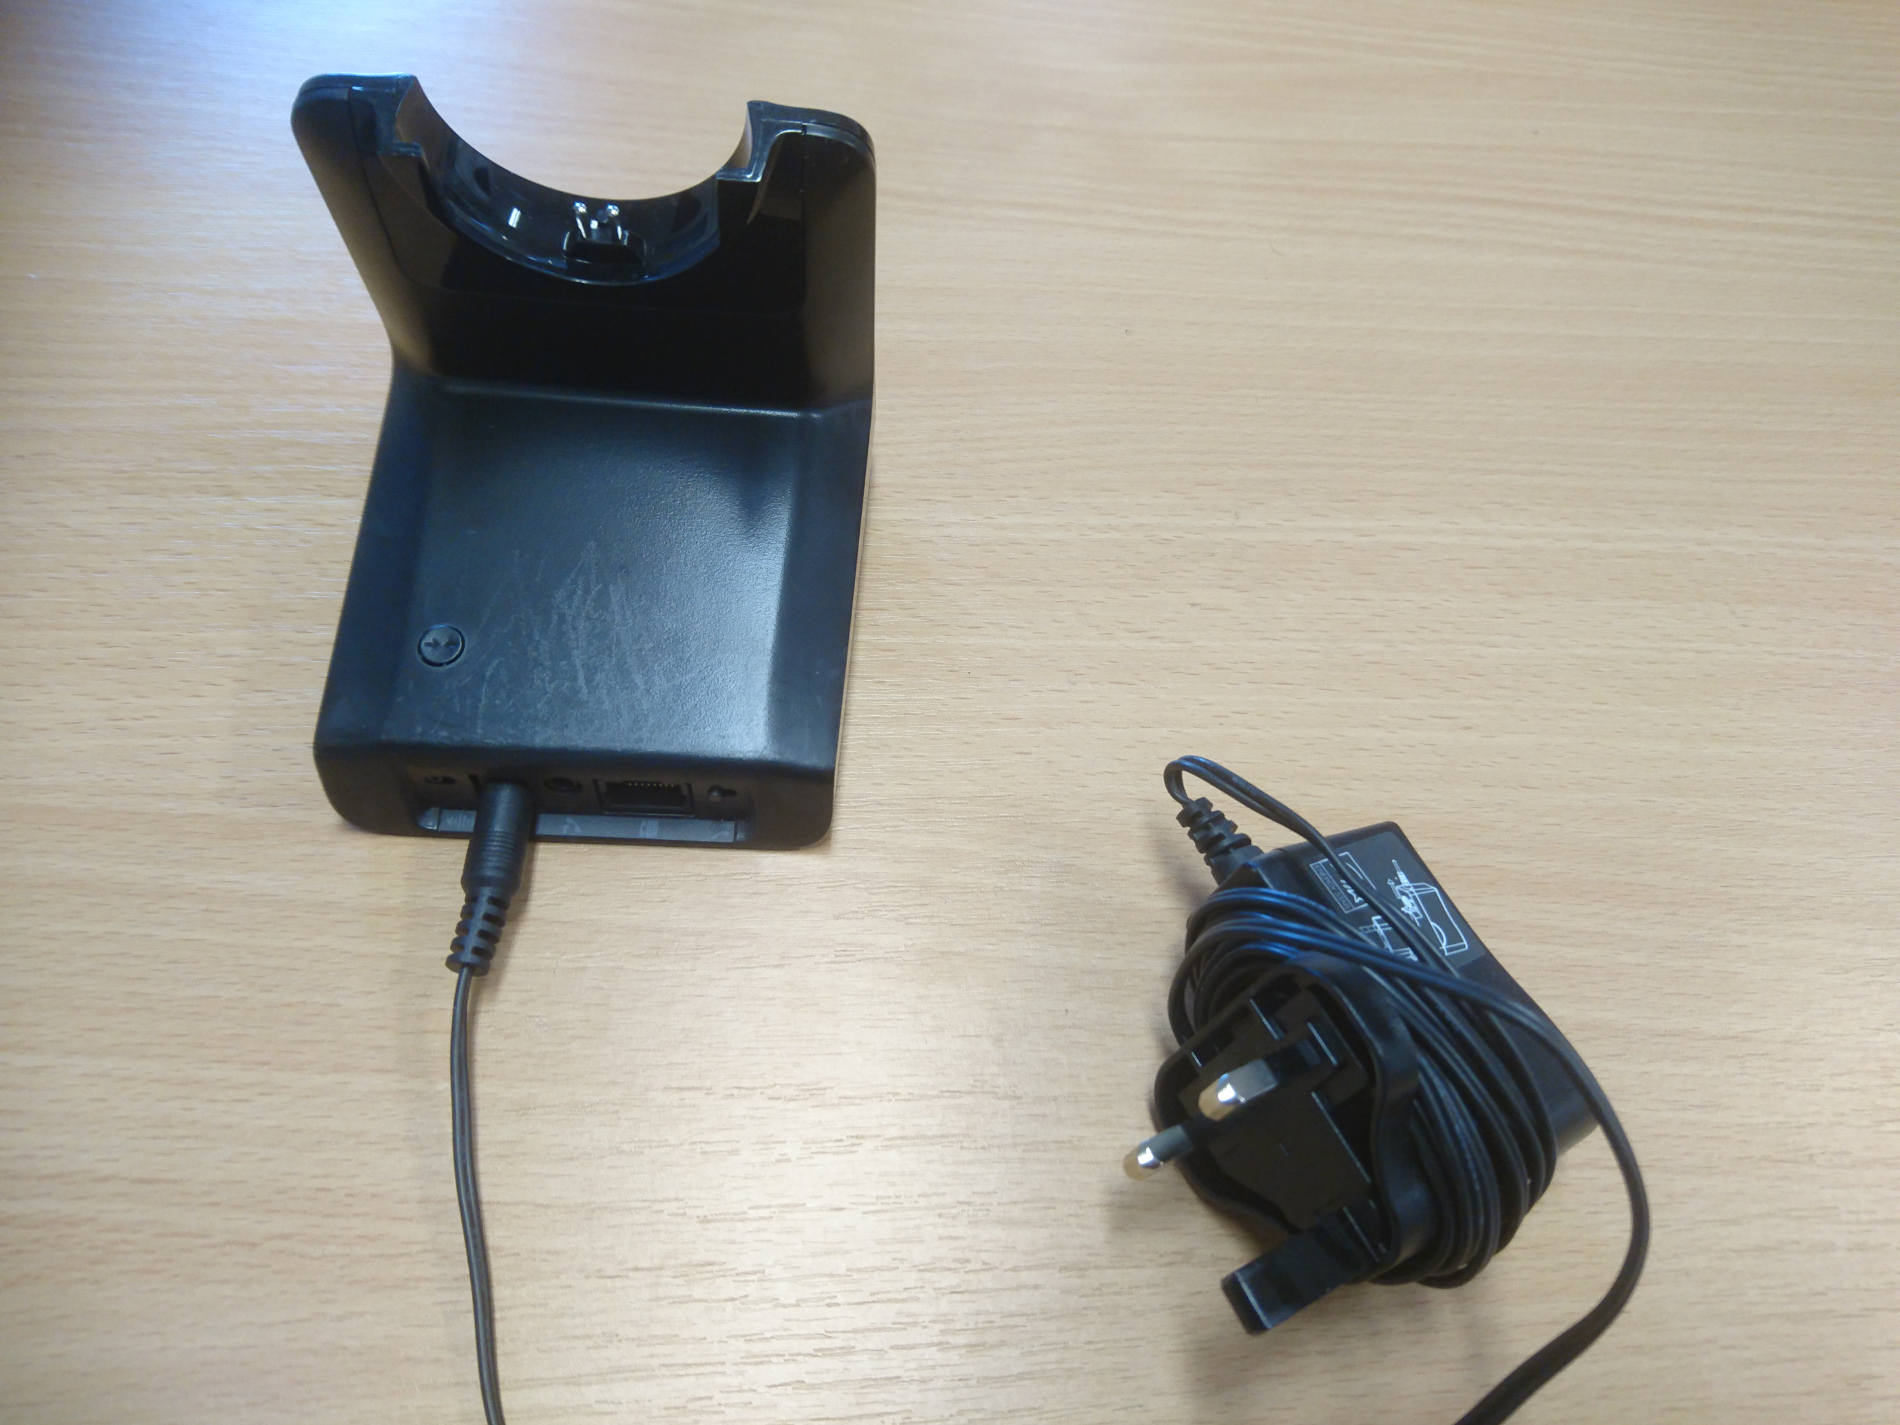
  1. Connect the Plantronics Base(1) to the Plantronics Base Power Supply(7).

2. Connect the Snom EHS Adapter(5) to the 3.5mm DC Jack(3). Note that only the DC Jack goes into this end of the EHS Adapter, you do not need to plug anything else into this end.

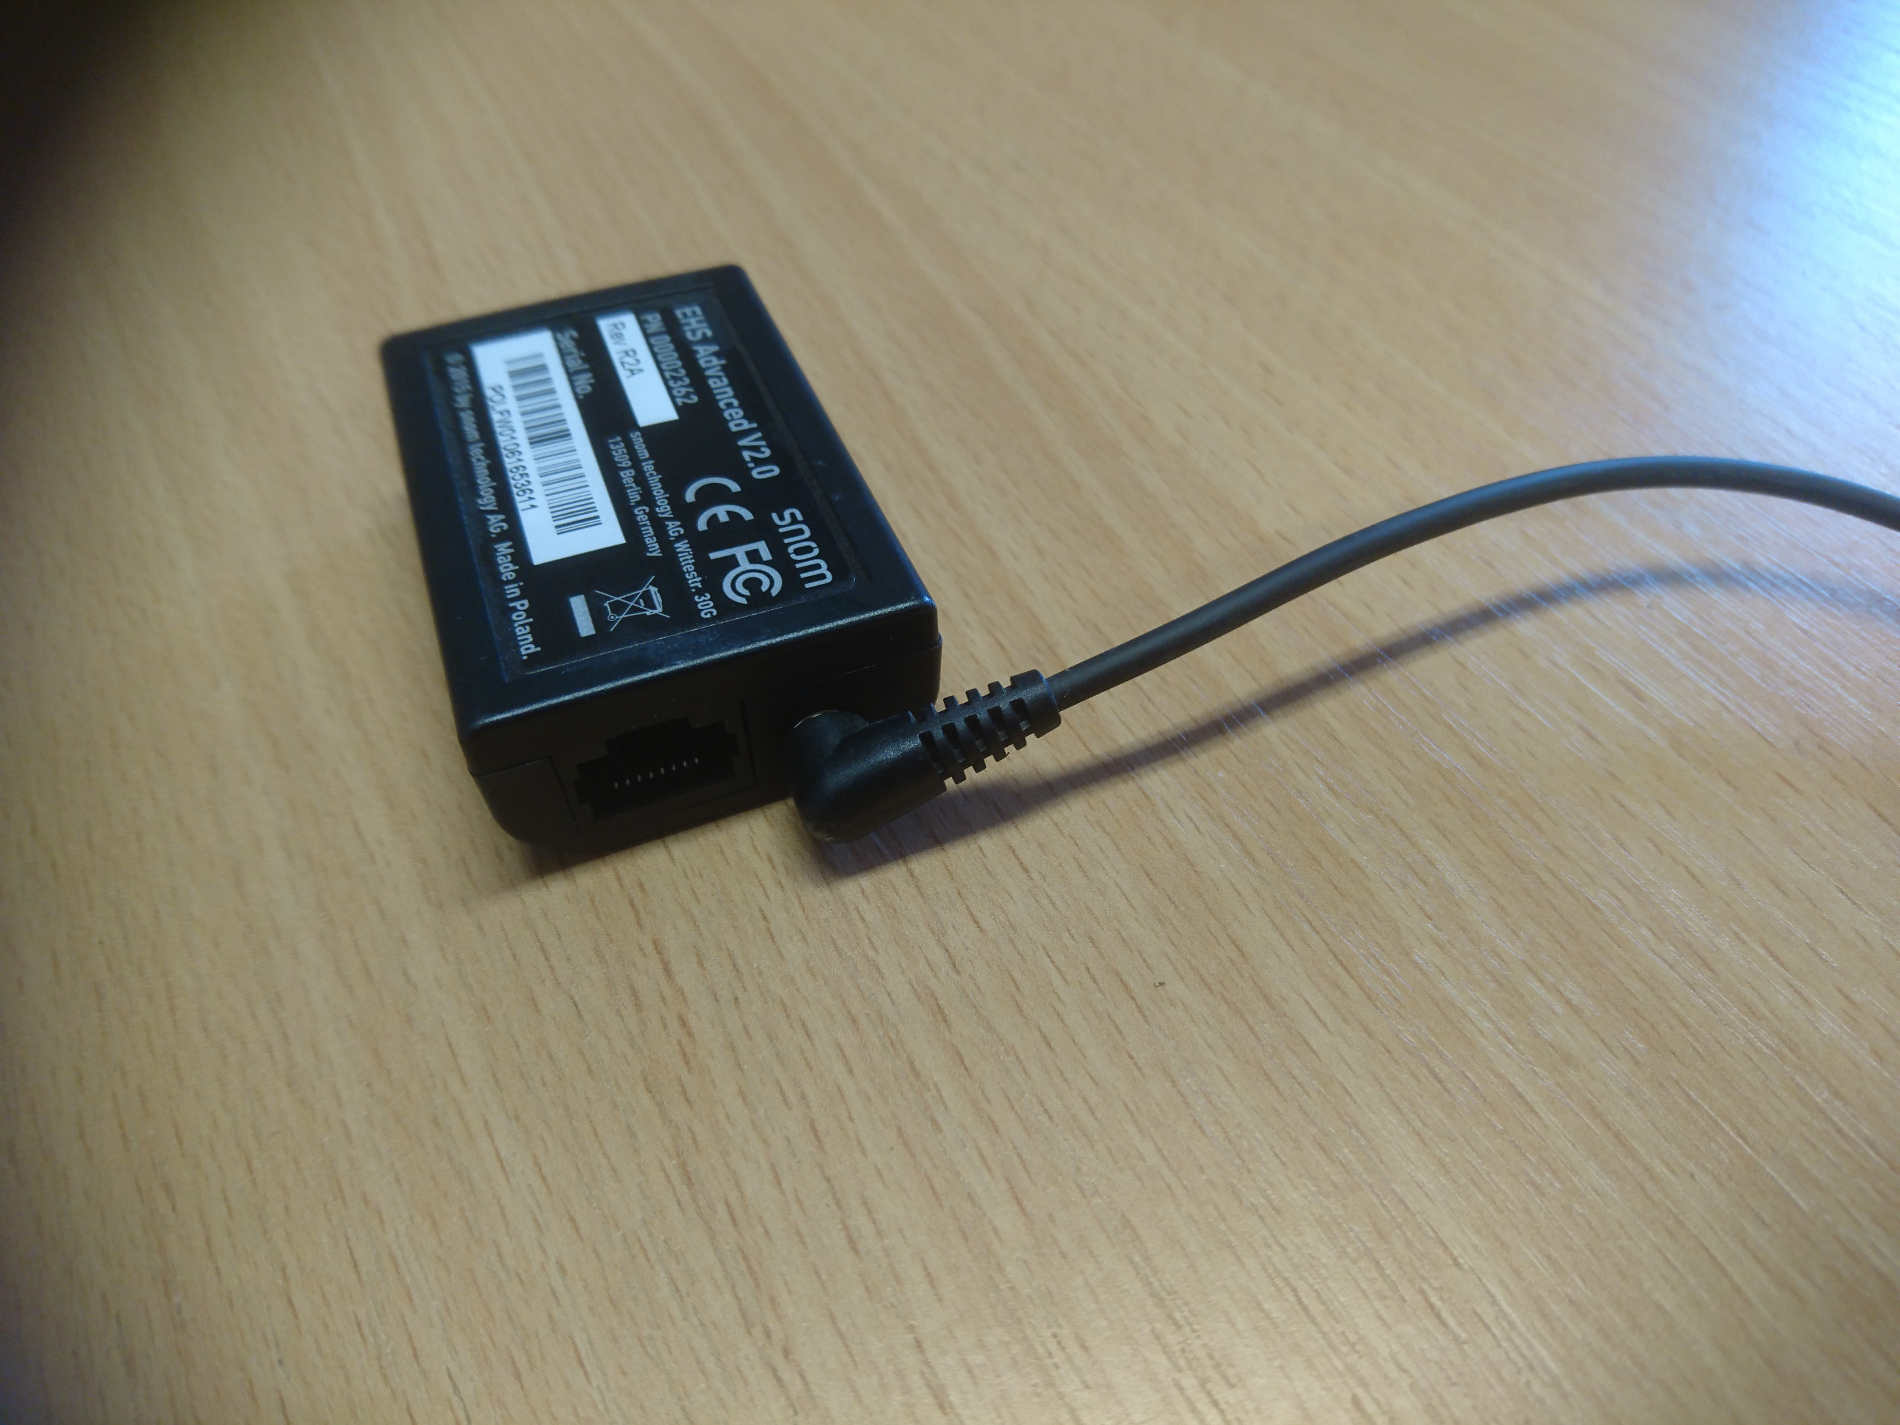
3.  Connect the Snom EHS Adapter(5) to the Snom 4 Pin Conector(4).

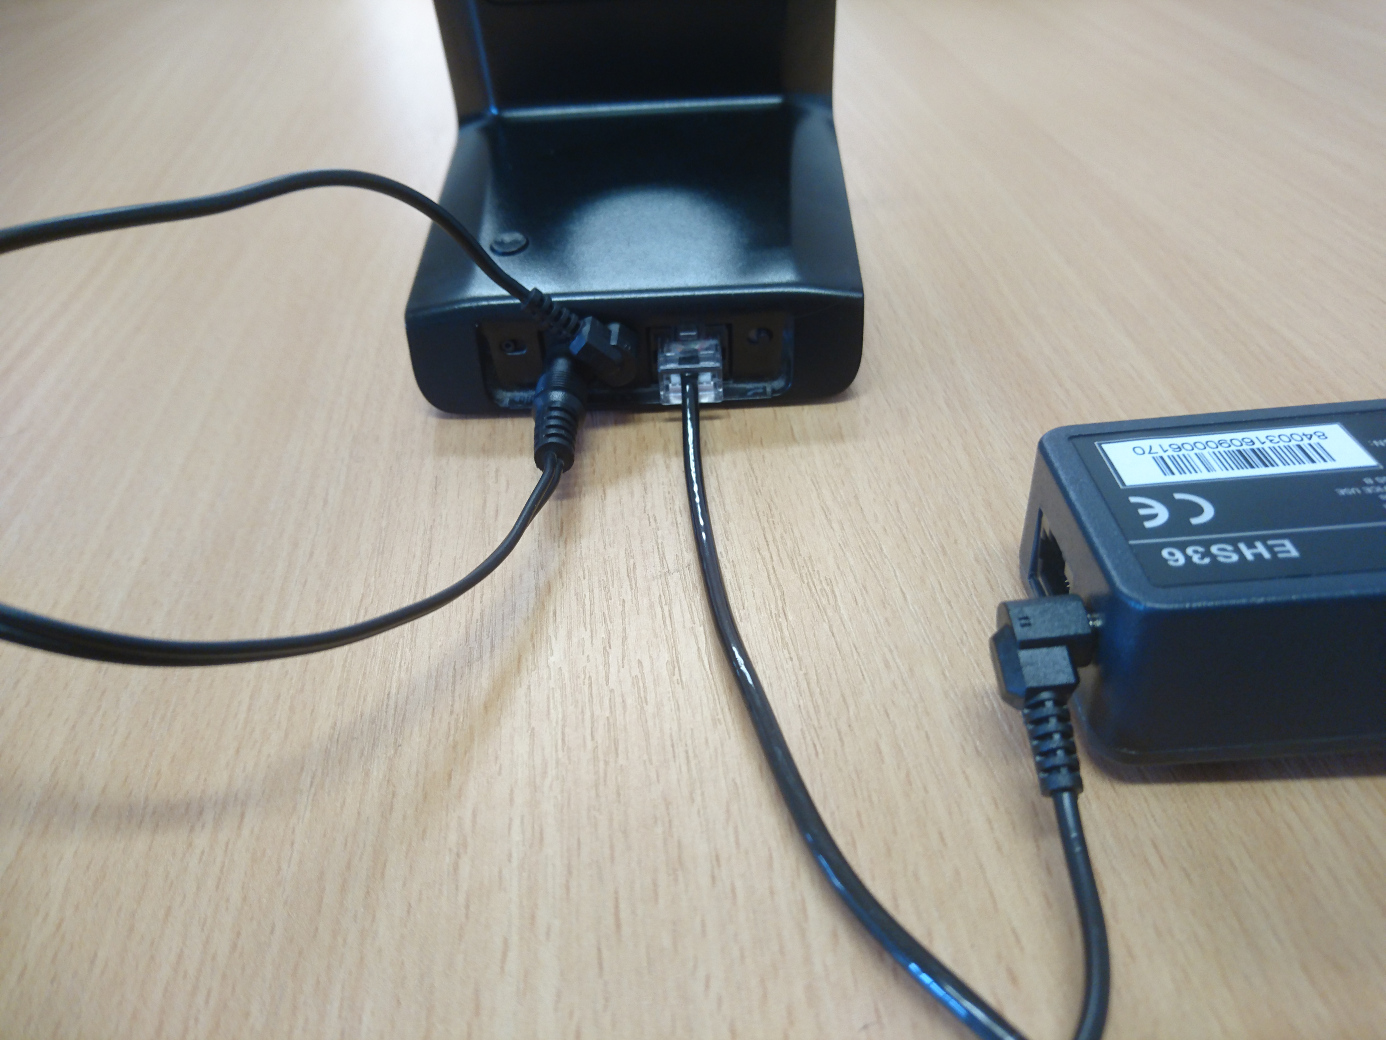
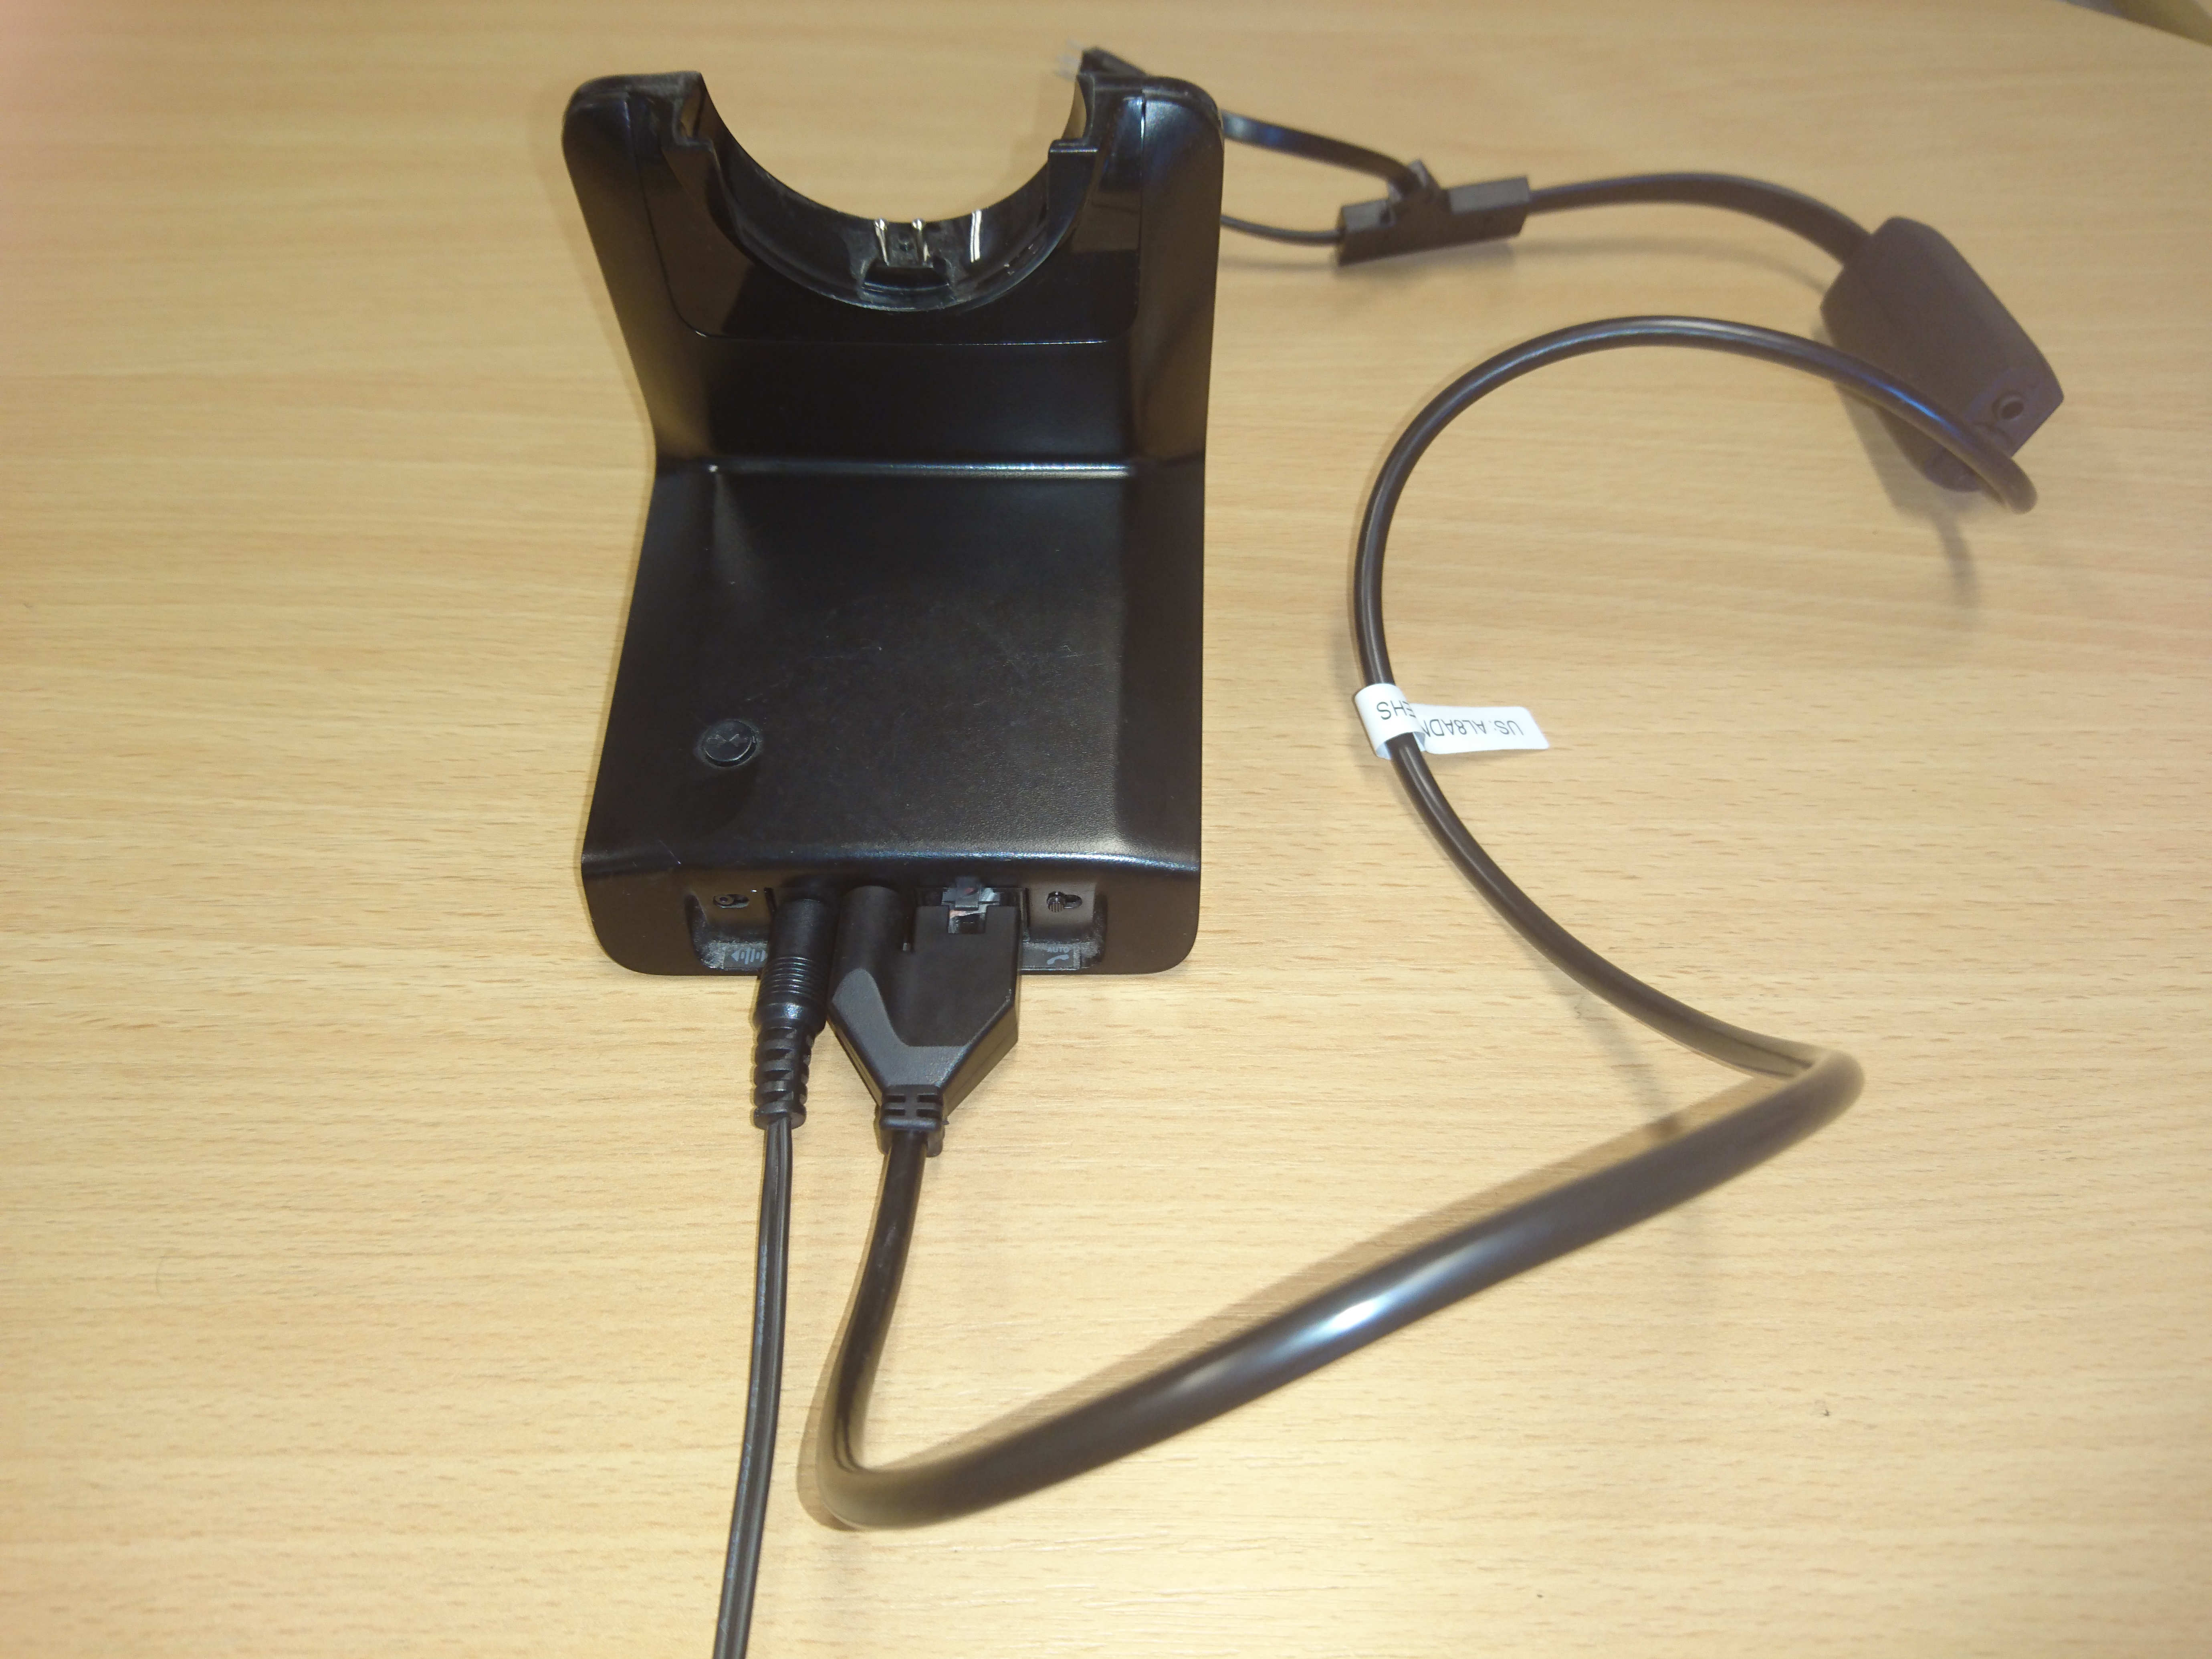
4. Connect the other end of the 3.mm DC Jack(3) into the back of the Plantronics Base(1).

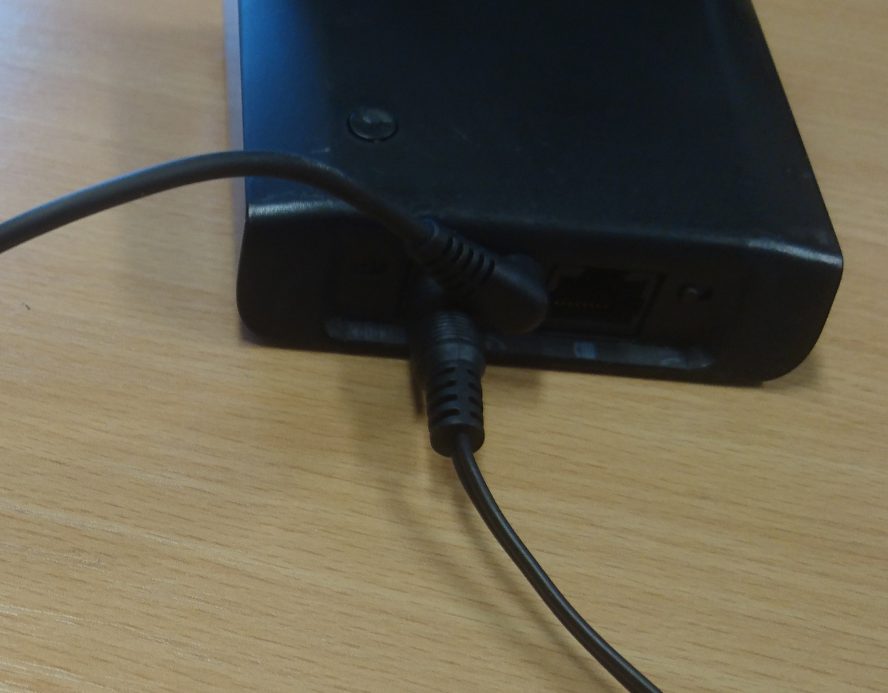
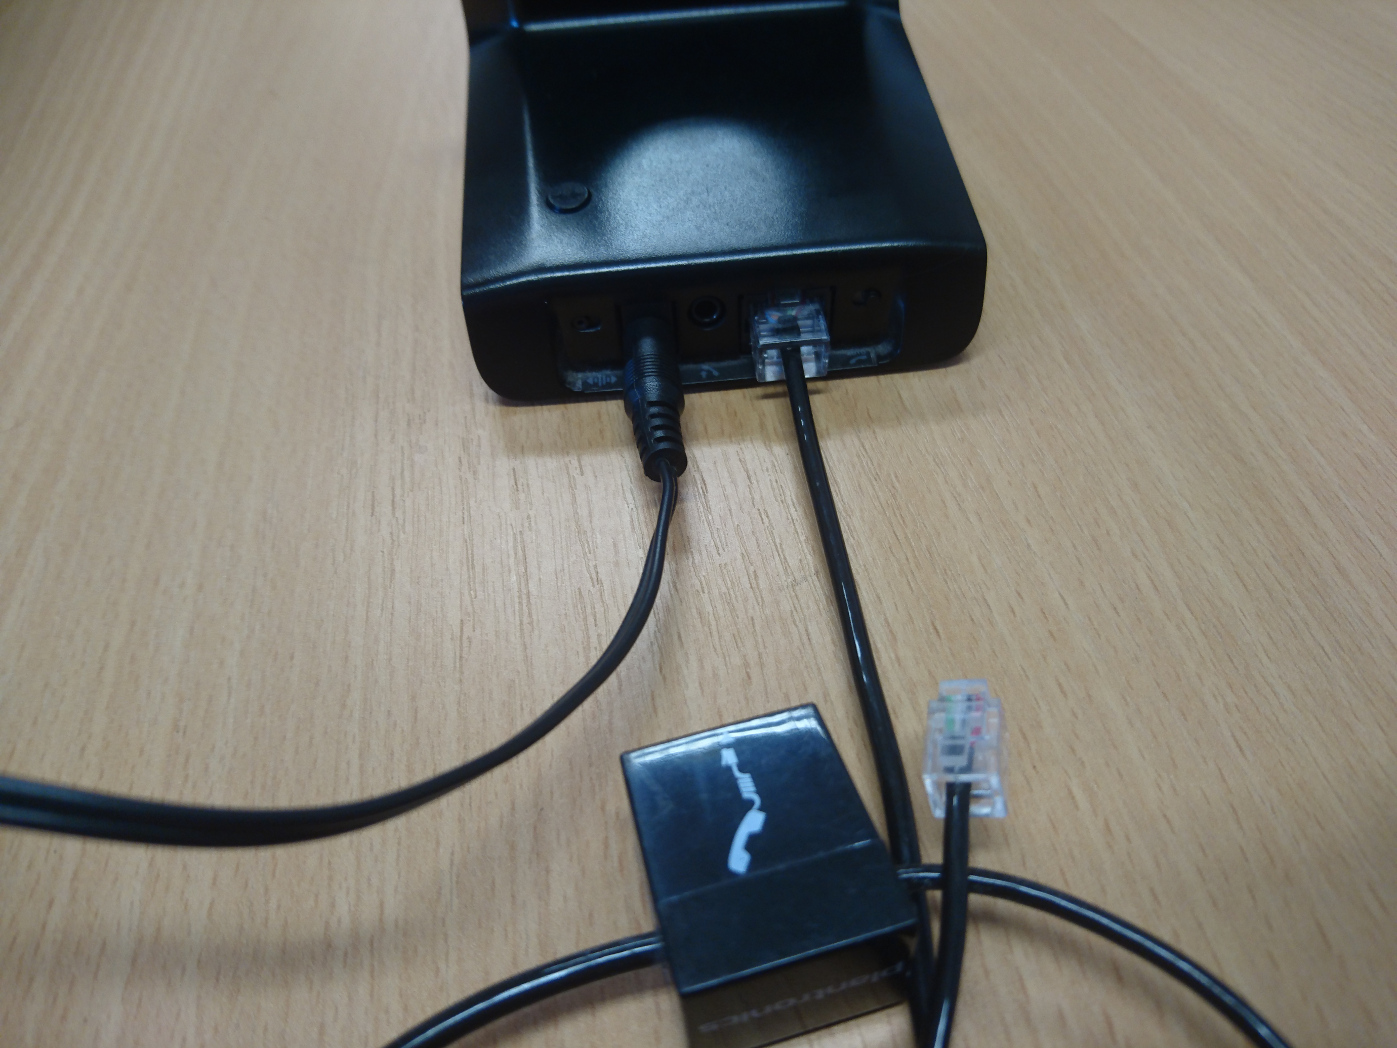
5. Connect the Plantronics Cable(2) to the back of the Plantronics Base(1).

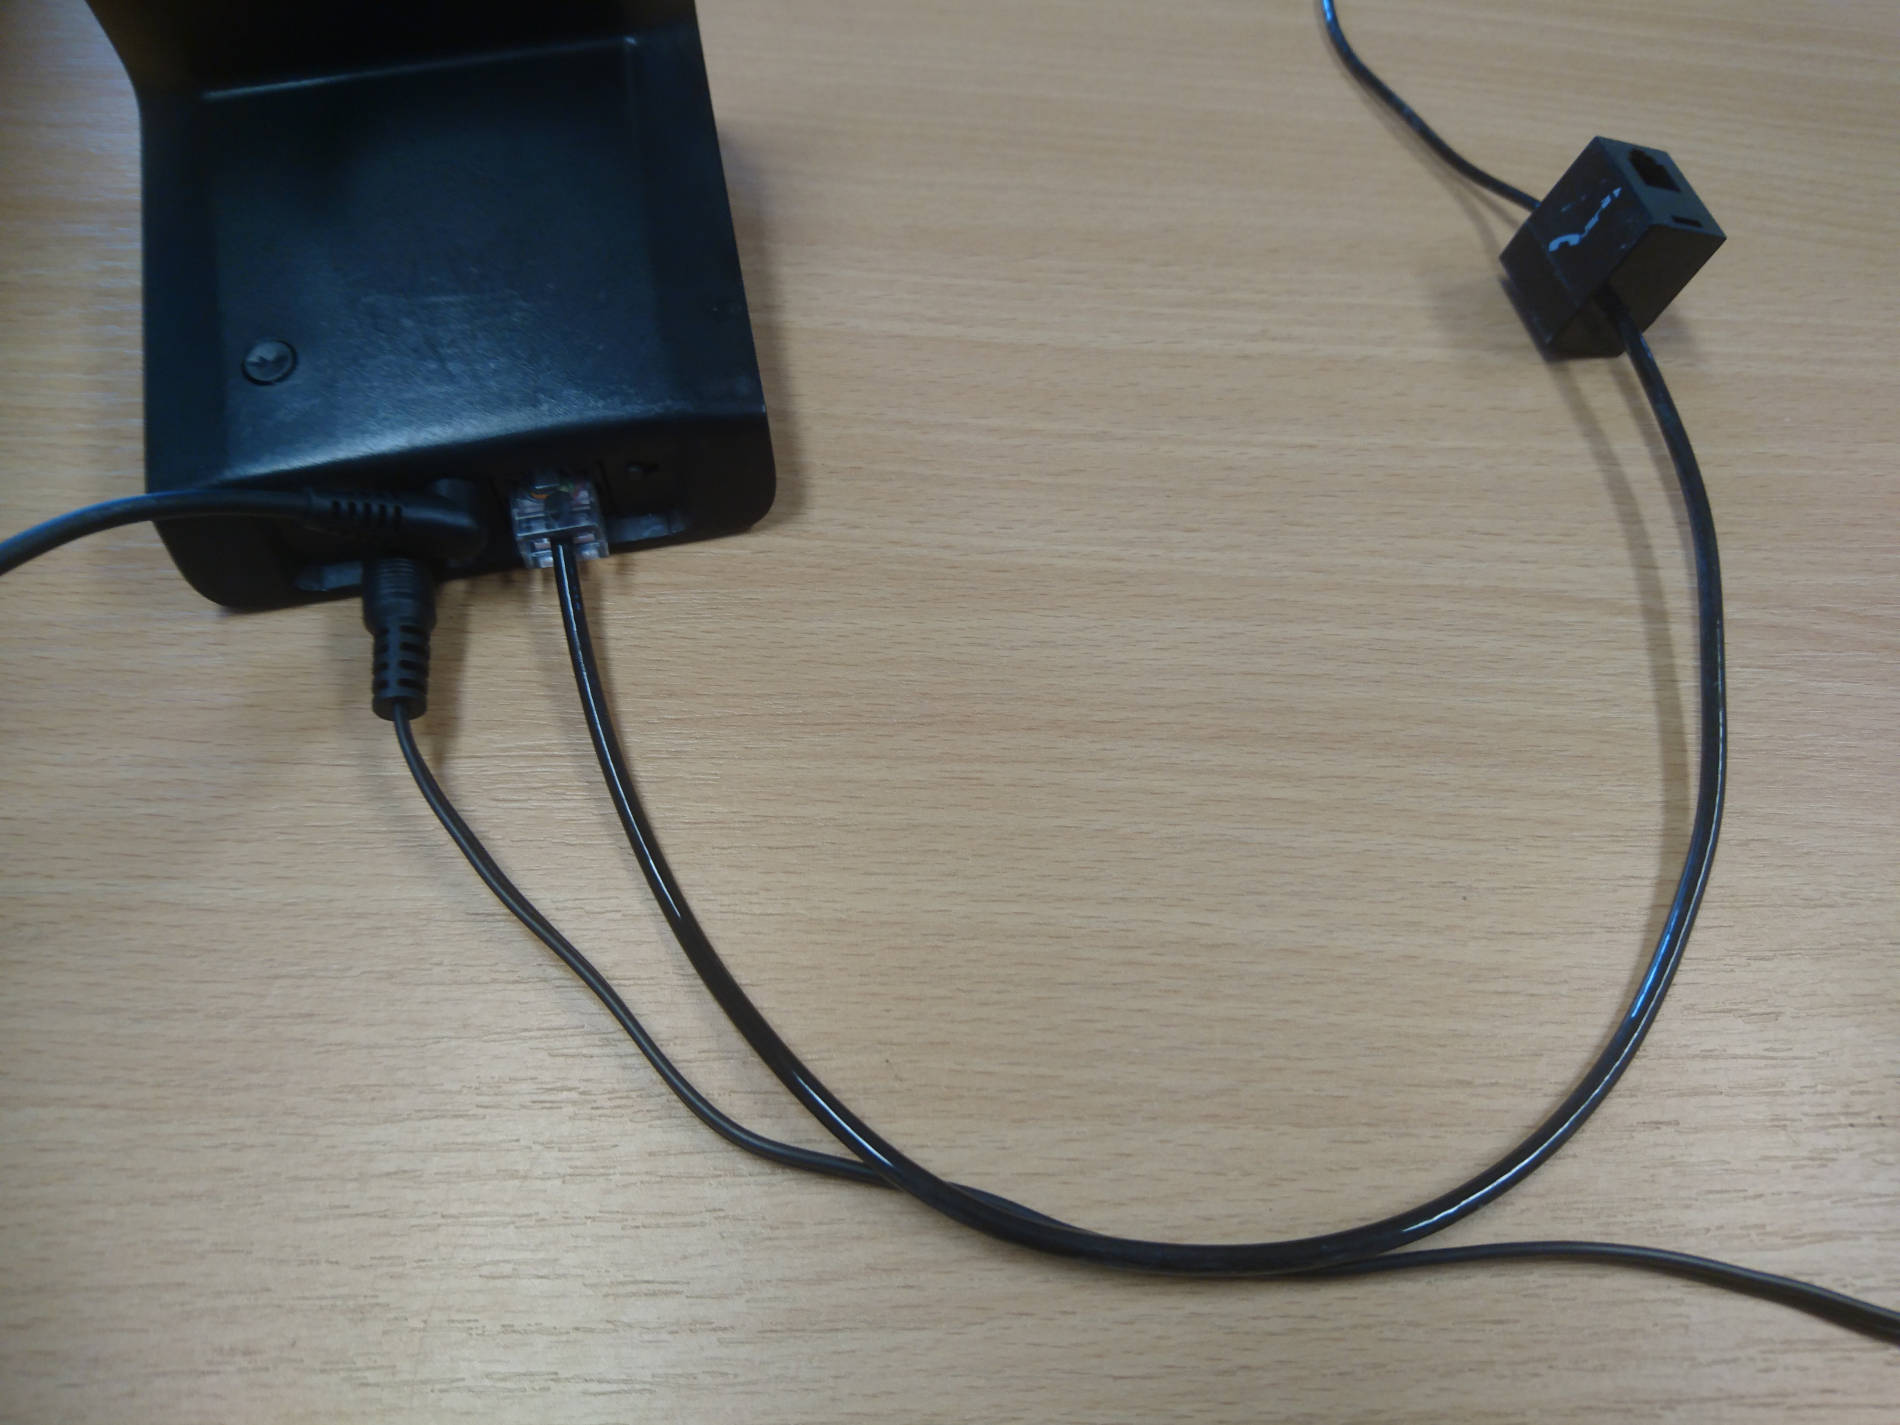
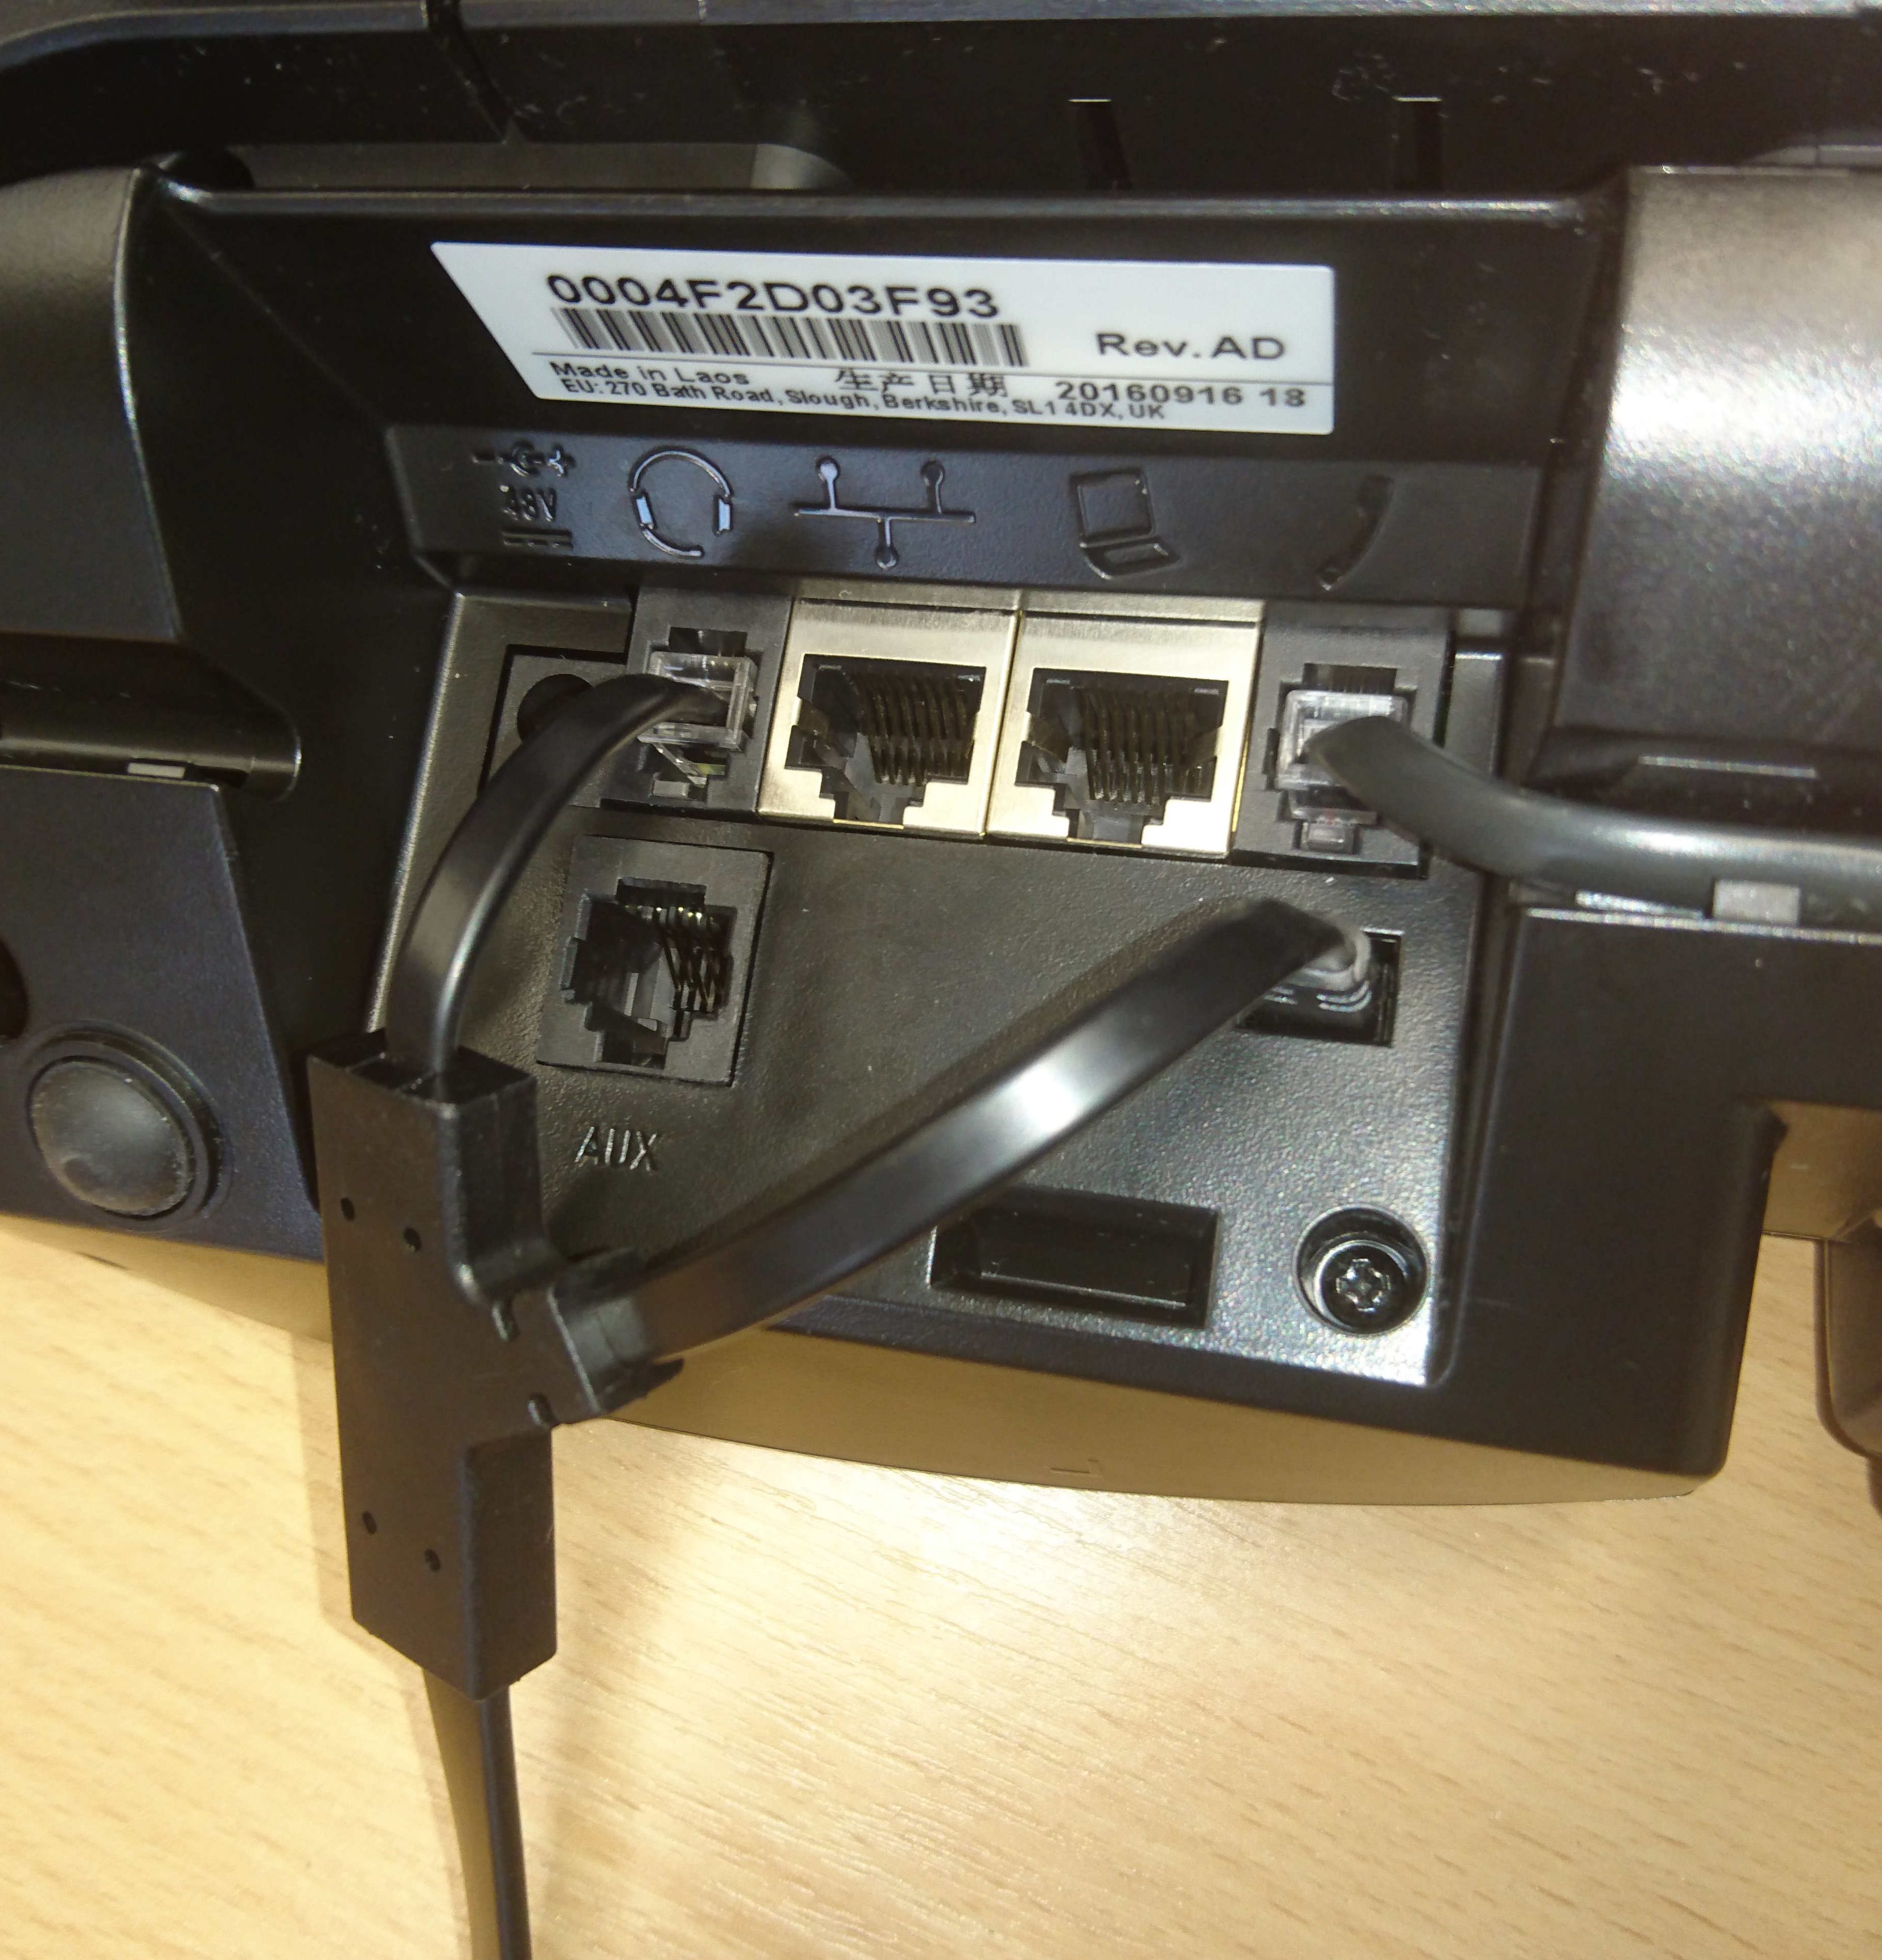
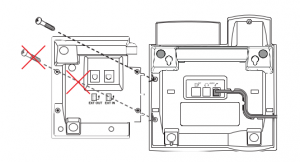
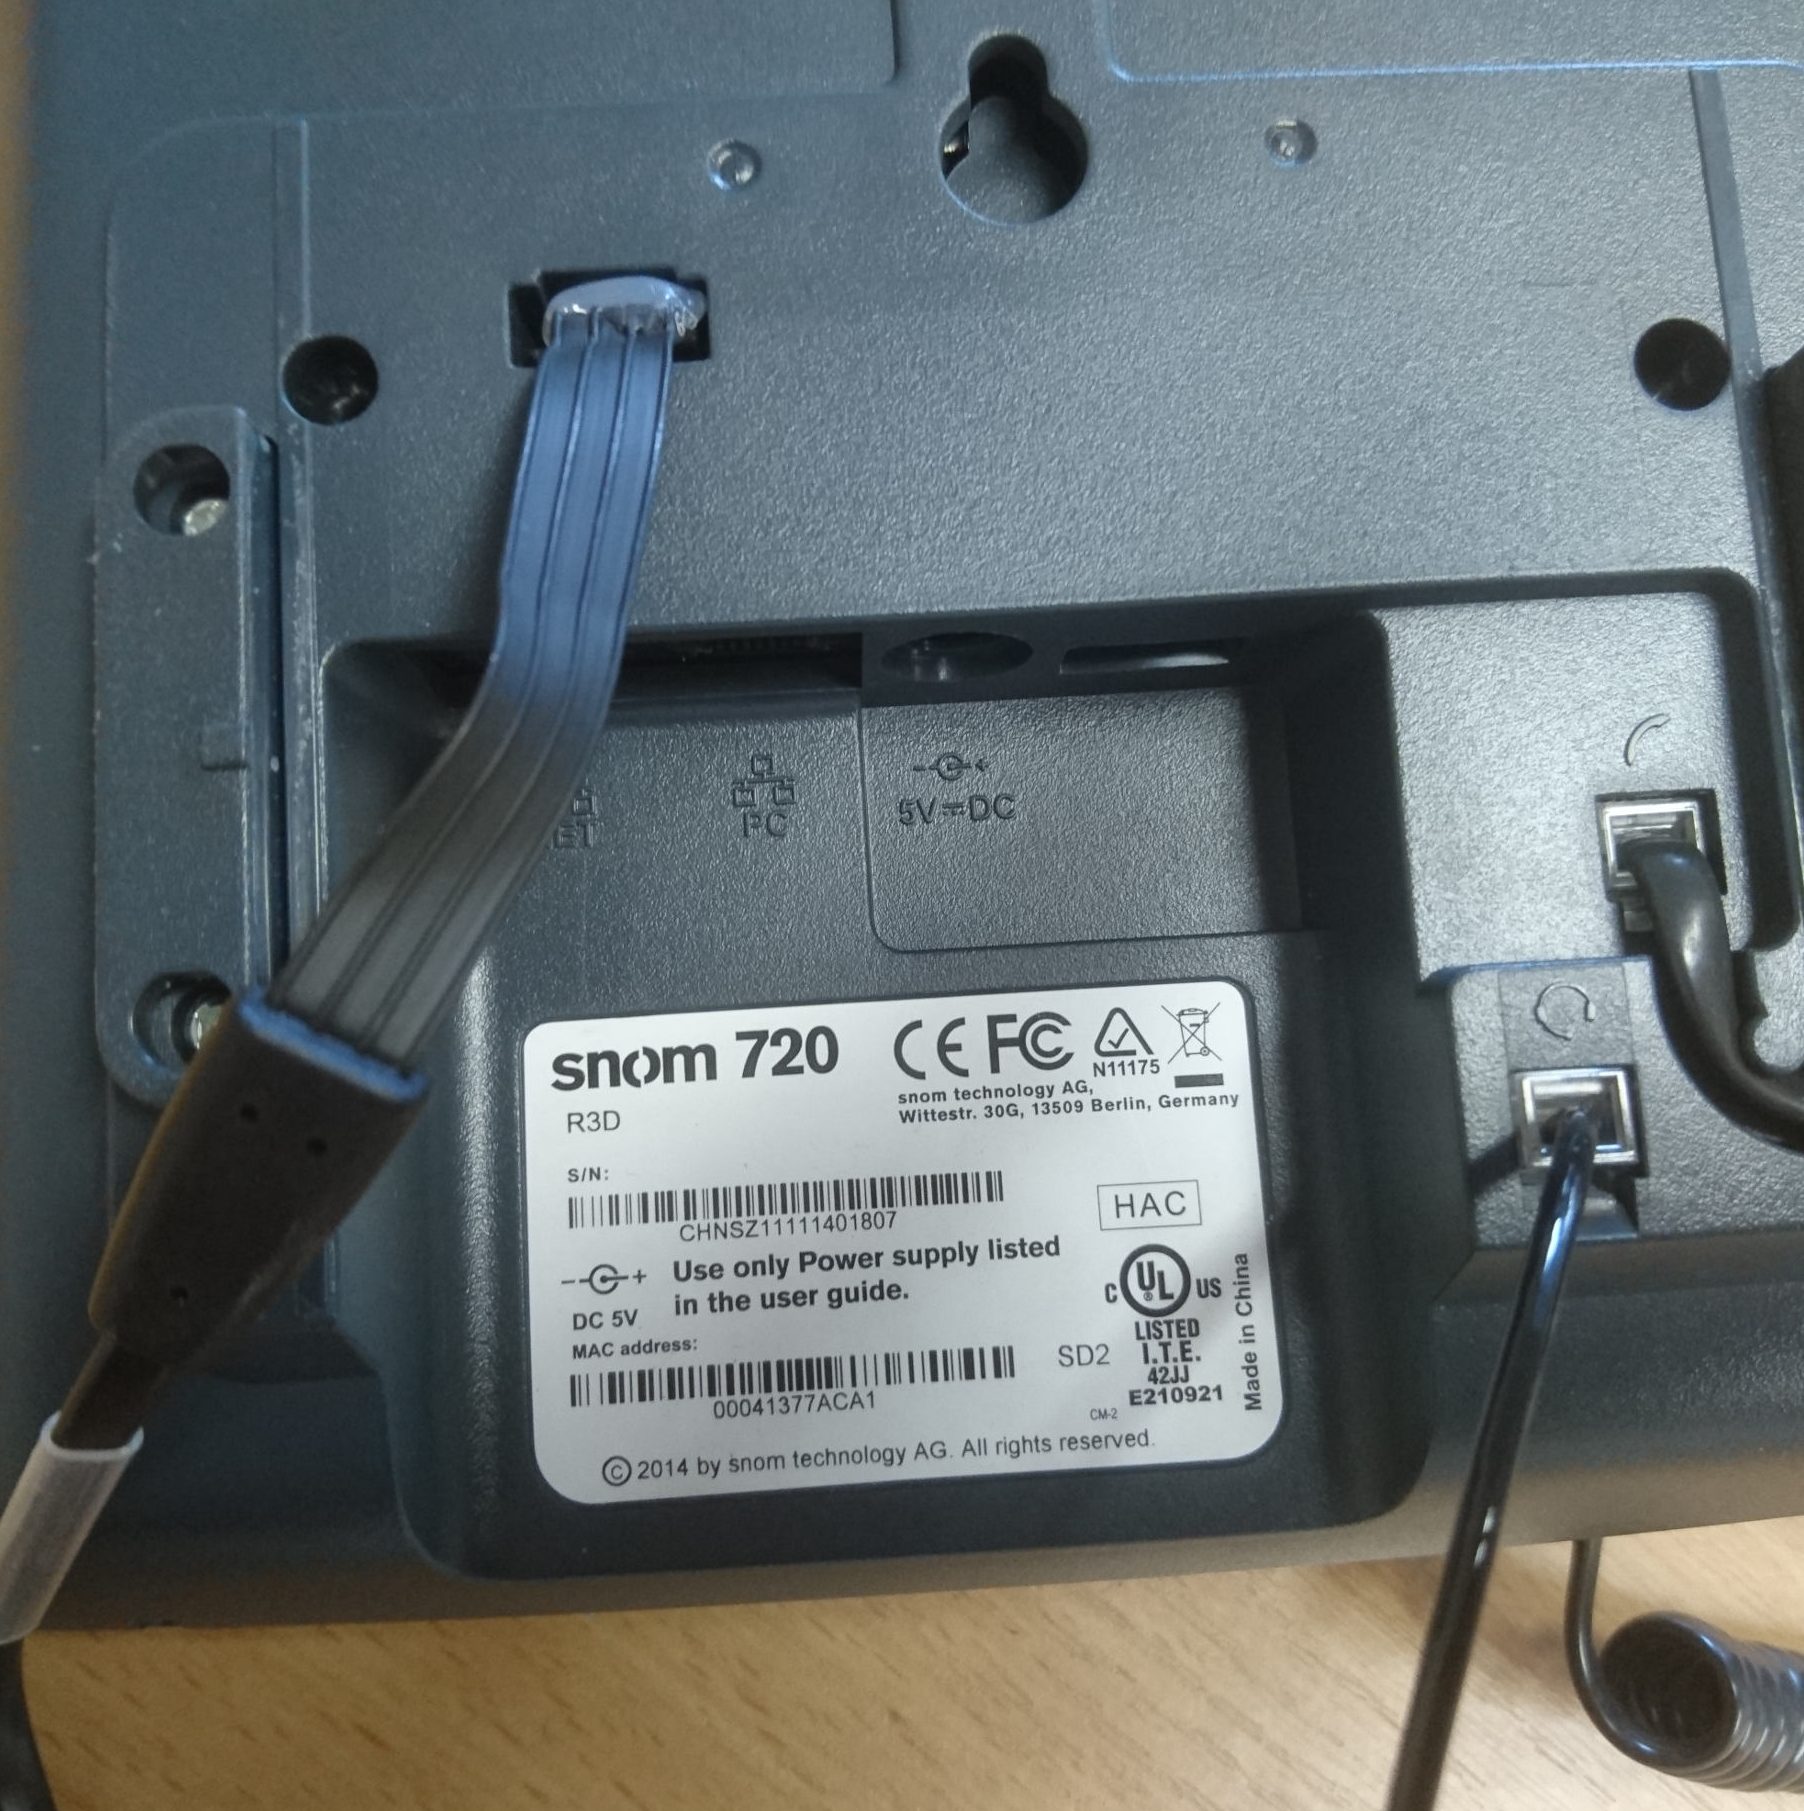
6. Connect the other end of Snom 4 Pin Connector(4) into the slot in the picture below. Then connect the other end of the Plantronics Cable(2) into the Headset port, making sure you Do Not put it into the handset port by mistake.

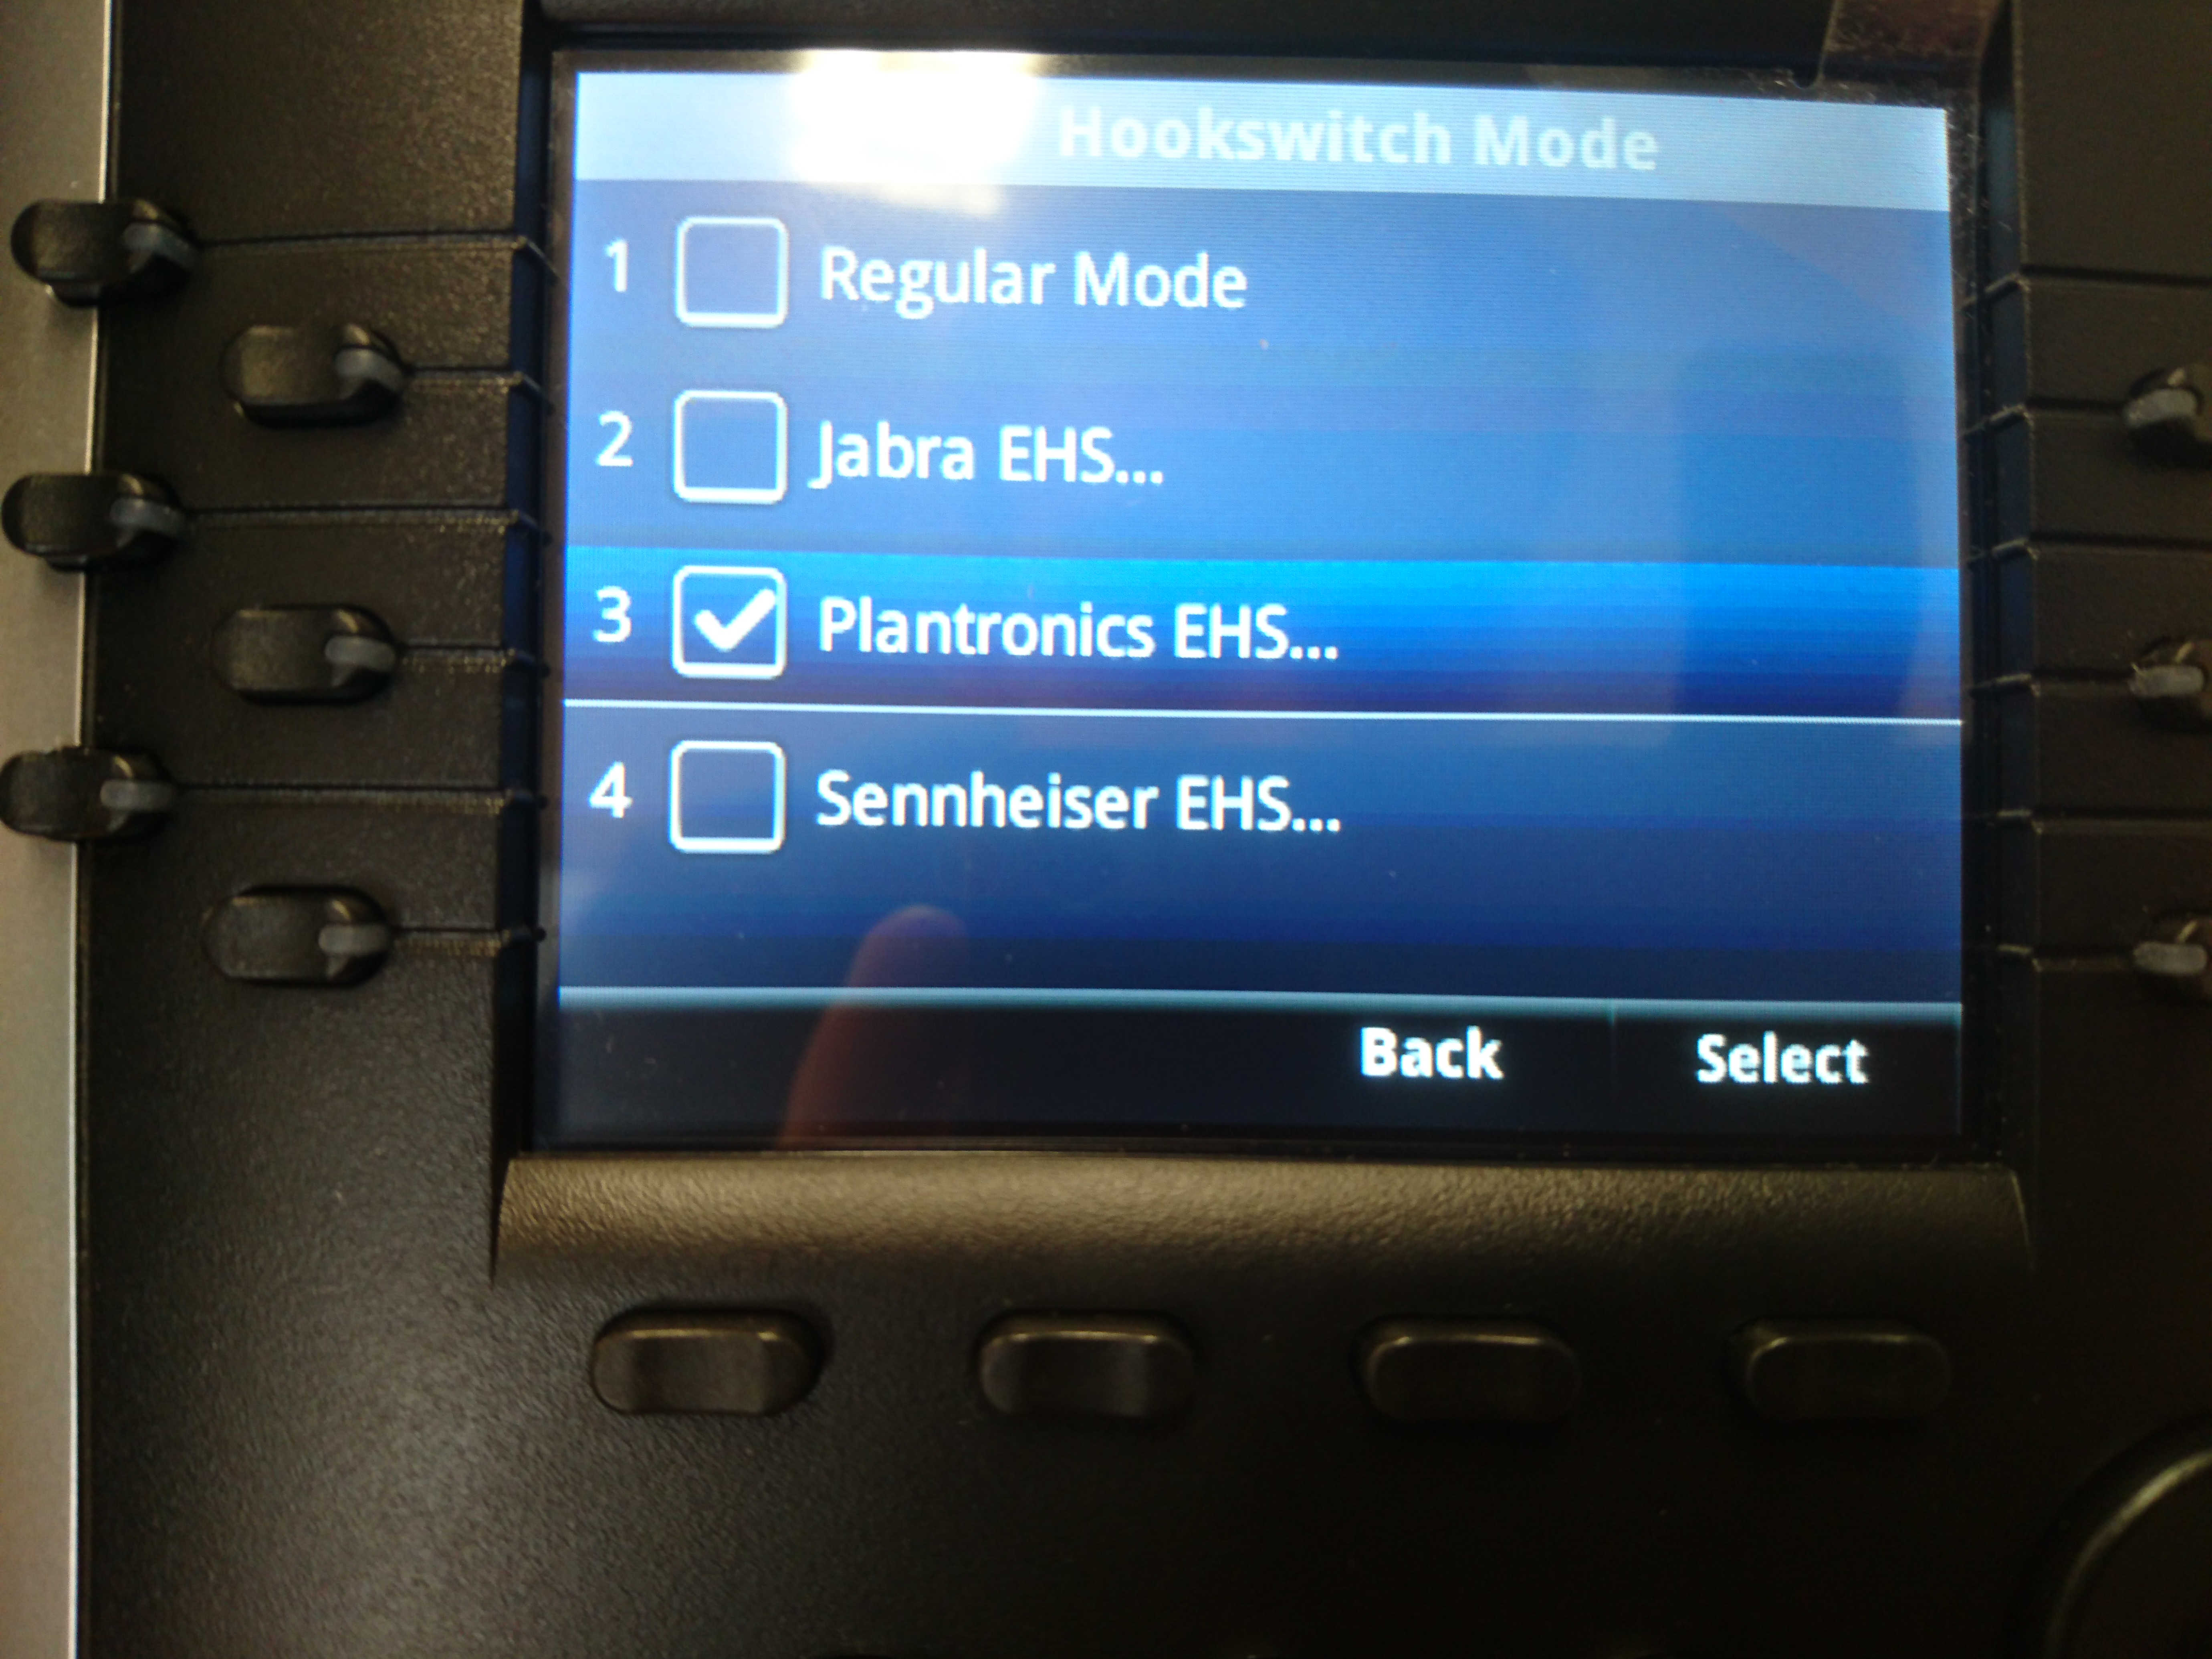
7. Check the Dial settings on the bottom of the Plantronics Base(1) to make sure that they match the picture below. 

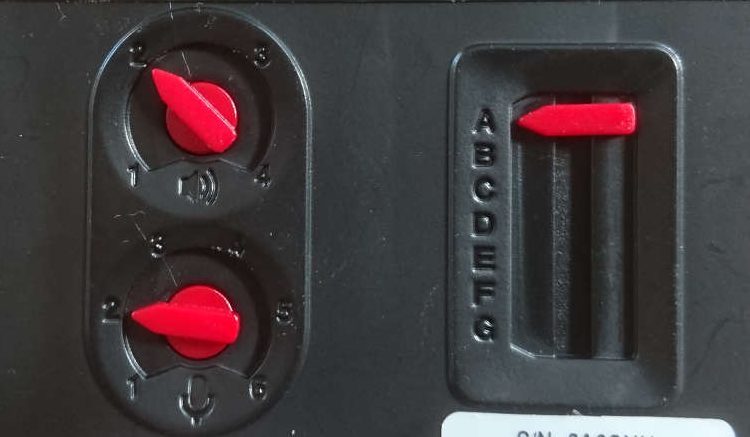
8. The headset should be ready to use. No phone settings should need to be changed, just make sure that all connections are secure and that you have power to the headset base.

How to configure Yealink T46G with Plantronics CS520 and EHS36

List of Components:

  1. 3.5mm DC Jack
  2. Plantronics phone cord
  3. Plantronics CS520 Headset
  4. Yealink EHS36 Adapter
  5. RJ12 Cord
  6. Plantronics Base
  7. Plantronics Base power supply

Configuration:

  1. Connect the RJ12 Cord (5) to the Yealink EHS36 Adapter(4).

2. Connect the 3.5mm DC Jack(1) to the Yealink EHS36 Adapter(4). Note that you only need the DC Jack in this end, you do not need to fill this socket.

3. Connect the Plantronics Base(6) to the power supply(7).

4. Connect the Plantronics phone cord(2) to the Plantronics Base(6).

5. Connect the 3.5mm DC Jack(1) to the Plantronics Base(6).

6. Connect the RJ12(5) to the EXT port on the back of the Yealink T46G. Then connect the Plantronics phone cord(2) to the headset port on the back of the phone; making sure you don’t put it in the handset port by mistake.

You shouldn’t need to change any of the settings in the phone as the Yealink EHS36 should work out of the box. However, you will want to check that on the bottom of the Plantronics base that the Dial’s are set correctly. This should be the correct setting for the dials :

How to configure Polycom VVX410 with Plantronics CS520 and EHS APP-51

List of Components: 

  1. Power connector for Plantronics Base
  2. Plantronics Headset
  3. APP-51 EHS Adapter
  4. Plantronics Base

Configuration:

  1. Connect the power connector (1) to the Plantronics Base (4) via the back of the base.


2. Connect the EHS Adapter (3) into the back of the Plantronics Base (4).

3. Connect the other ends of the EHS Adapter (3) into the back of the Polycom VVX410. Make sure that you connect the cable to the headset port and not the handset port by mistake.

4. In order to make sure that the headset works correctly with the phone you need to go to :

Settings > Basic Settings > Preferences > Headset Mode > Select Plantronics EHS Mode.

5. Make sure that the Dial settings on the bottom of the Plantronics base are set correctly. The correct Dial settings are below:

The headset should now work with the Polycom phone.

Cisco IP 8800 Key Expansion Module Key Programming

With the Cisco 8880 Expansion Module you are able to program keys to show names of other phone users.

The key settings can be found in the web interface of the phone on the “Unit1-3” tabs depending on how many extension modules you have.


The code to display a name on the extension module is “fnc=blf+cp;sub=5070@$PROXY;ext=5070@$PROXY;nme=Name”.

The “;nme=Name” is where you can type the text you want to appear on the extension module.

The “;sub=5070” and “;ext=5070” is where the extension number must go.


How to configure BLF keys on Cisco CP-7800/8800 series

To set up BLF keys, first go onto the web interface. Then go to Admin Login > Advanced.    admin

Then go to Voice > Phone.

voice


You should then have all the line settings.


To set up a BLF key you must first know which extension you want the button to call. For example I am going to use 1001. Where it says the extension number you must select the option ‘Disabled’.


disabled

Next you must add the BLF syntax to ‘Extended Function’. Which in this case would be ‘fnc=blf+sd;sub=1001@$PROXY;ext=1001@$PROXY’.

‘sub=1001’ is the number which you are subscribing to. ‘ext=1001’ is the extension number. ‘@$PROXY’ tells the phone to subscribe using the sip server of the extension that is registered on the phone.

So in order to make it function all you need to do is change the subscriber ID and extension ID to match the phone you want it to ring.


How to connect a Snom V2.0 Expansion Module to a D315/D305 Phone

screenshot-from-2016-11-07-134102

Connecting a V2.0 Expansion Module to a D315 or D305 phone:

If you have an Expansion Module V2.0 (discontinued product), you can use it with the D315 and D305 phones by connecting it to the phone‘s EXT connector , but please note and make sure to heed the following warning:

Warning: Attach the module to the phone with one screw only, using the top hole. Using a screw in the
bottom hole will damage the phone‘s PCB!    screenshot-from-2016-11-07-134214

Snom D710/D715 – DND Display Differences

For Snom phone models 710/715, there is a slight display difference when using the DND mode on phones using the 8.7.5.35 firmware. With previous versions of firmware, when DND was active, a banner would be displayed across the screen; with 8.7.5.35 and newer versions, this is not the case. Instead, it just displays a small message.
no dnd
In order to fix this problem:
1. Copy all of the following URL: 

PhoneHasTextMessages PhoneProvisioningFailed

2. Replace “phoneIPaddress” with that of the phone you are using.

3. Enter into your web browser and it should fix the problem. The DND message should now look like the one below.

dnd