If you have recently adopted a Technicolor router on to Prosys then you will need to follow the below steps to get your router up and running on our provisioning server.
If you are adopting a DGA0122 then you will need to download this specific firmware version here.
Step 1:
Login to the web interface of your Technicolor router using the Engineer details below:
Username = engineer
Password = (Access key found on the back of the router)
If router model isn’t a DGA0122 then skip the next 2 steps and go to Step 4.
Step 2:
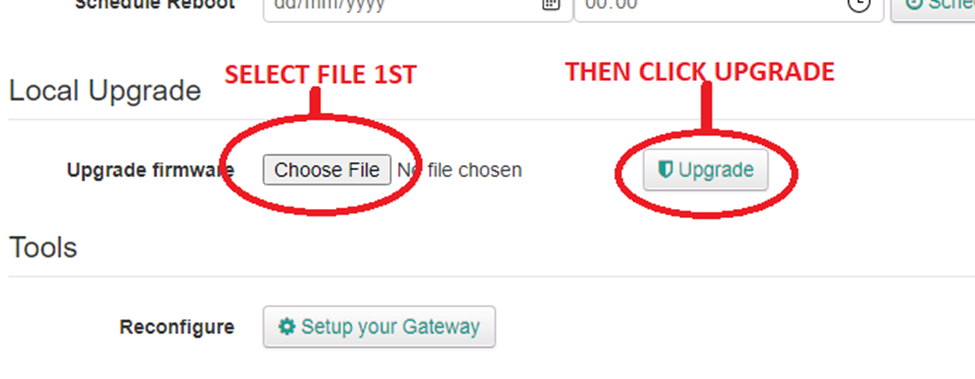
Once logged in go to System Info > Configuration tab > Local Upgrade > Choose File > Upgrade as shown below:
Step 3:
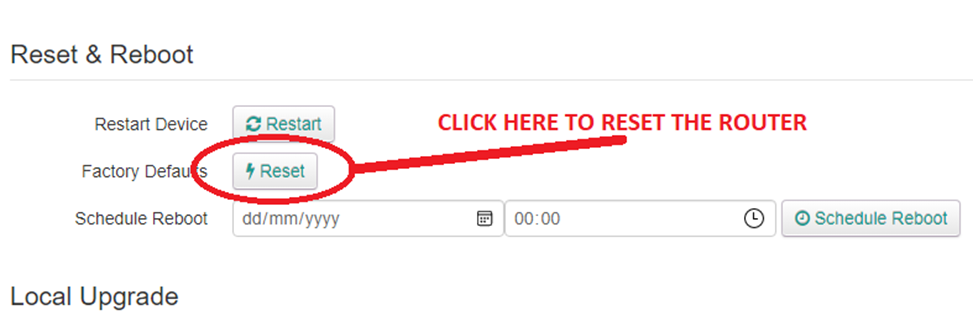
Once the upgrade has been completed you will need to factory reset the router by logging back in as engineer and going to > System Info > Configuration tab > and click Reset.
Step 4:
Time to put our provisioning URL into the router.
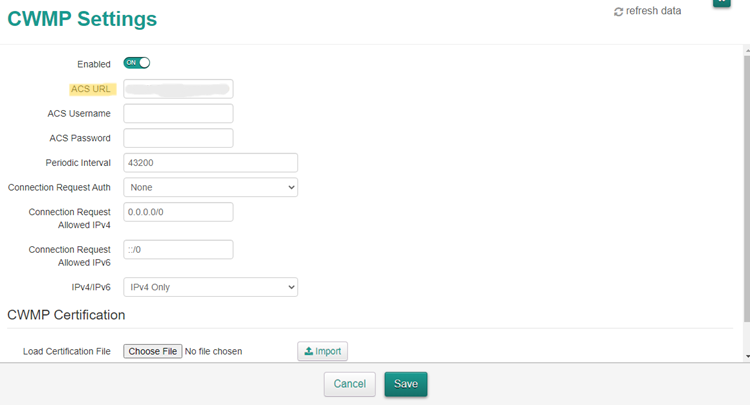
Once logged in as engineer go to CWMP, this will take you to the TR069 page.
In the ACS URL field enter your provisioning server URL and then click save and your done.
If you have any issues please either email support@provu.co.uk or call 01484840048 option 2 for support.
It is still possible to access the old-style web user interface of the D862 and D865 by navigating to the IP address of your phone with “http” and port “3112”:
Example: http://192.168.1.15:3112
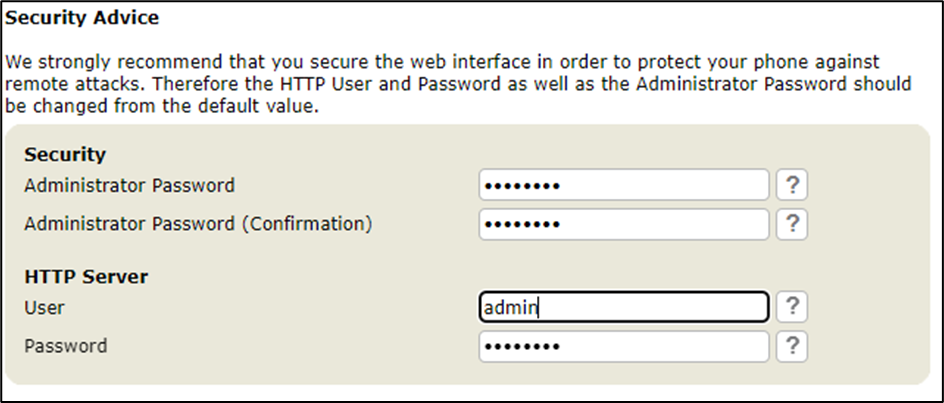
Securing the old-style interface
Once you have accessed the old-style web user interface, it will display security advice where you can setup a HTTP user, HTTP Password and an administrator password to secure your device. If you accidentally navigate away from this page, you can go to ‘Advanced > QoS/Security’ and configure these settings from there:
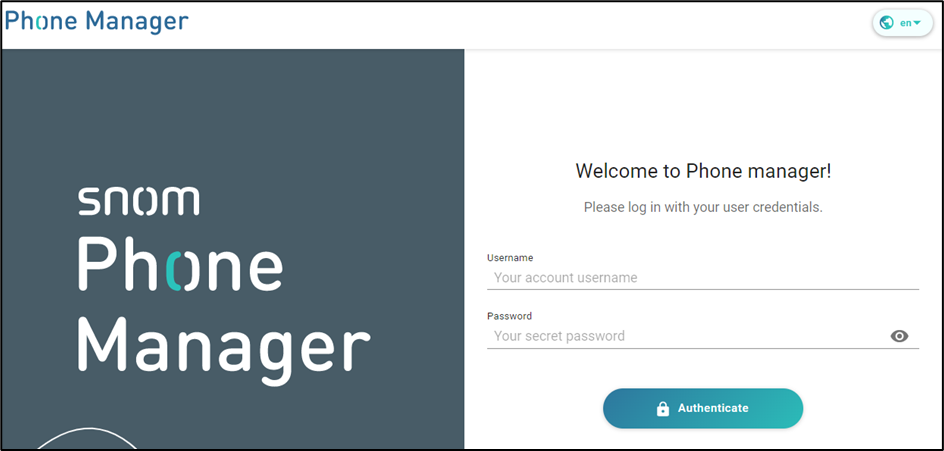
How to login to the new web user interface and secure it.
You’ve received your new Snom phone, you’ve plugged it into the network, it has obtained its IP address. You enter this into your web browser and you are presented with this login page. There’s no default username or passwords here so go ahead and click the ‘Authenticate’ button to login.
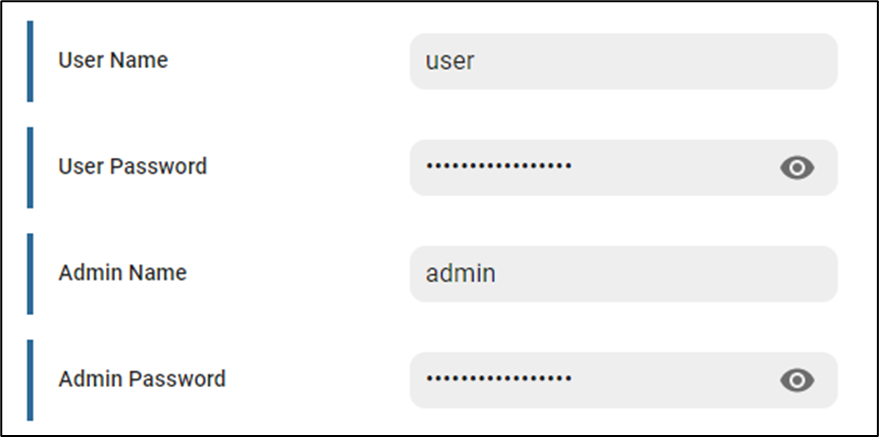
Once logged in, you will see some warnings saying a password has not been set for the ‘admin’ and ‘user’ account. To configure these, go to ‘Security > Advanced’ and populate the fields below and click ‘Apply’.
New provisioning parameters for a new interface
Due to the Snom D862 and D865 having a new web user interface to manage the devices, there are also new provisioning parameters to secure them.
Turning off admin mode will restrict unauthorised access to admin settings such as performing a factory reset, changing SIP credentials etc.
Web user interface method
To turn admin mode ‘off’ via the web user interface go to ‘Advanced > QoS/Security’ and set “Administrator mode” to ‘off’ and click ‘save’. – Default pin is ‘0000’ but ensure this is changed to secure your phone even further.
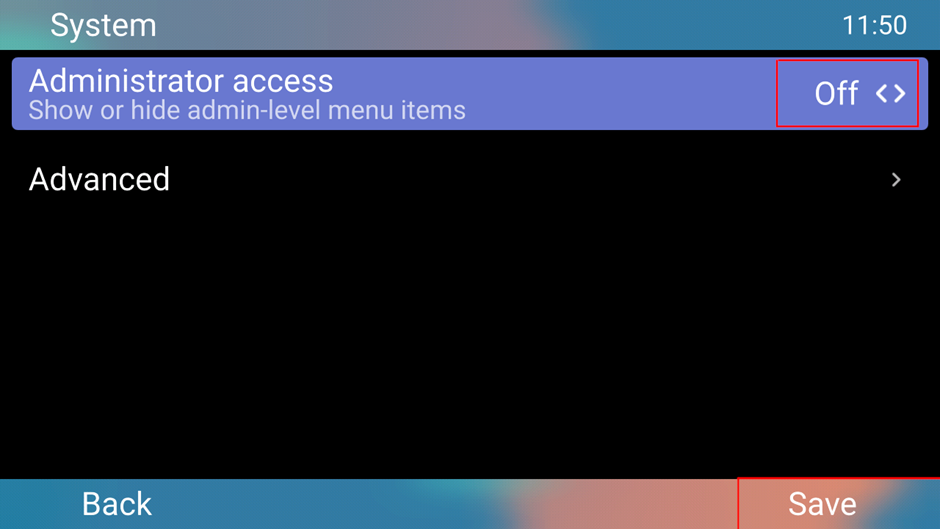
Phone user interface method
You can turn ‘admin’ mode off on the phone user interface by accessing the following:
‘Menu > System > Administrator Access = Off > Save’
I hope this blog helps you to get started with your new devices. If you need any further support with the new Snom D8xx series, please contact us on: 01484 840048, our support team will be happy to help you with any queries you may have.
As we edge closer to the summer holidays, it’s a good time to think about those more complex installs. With many (lucky!) people away from the office and schools closed, it can be a great time to complete your installations with minimal disruption. The best part is, we can take care of it for you!
Installation Services Available Through ProVu
White Label Survey & Installation
Adding IP access control, video and audio solutions to your portfolio can transform your offering. We have experts on-hand ready to help you ensure the successful installation of these products. Helping you to maximise the opportunities out there and enrich your customers’ experience with a seamlessly integrated all IP solution.
We can arrange for a 2N or Algo installation specialist to visit the installation site, recommend the best products for the job and even complete the install for you.
DECT Handset Pairing, White Label Surveys & Installation
Looking to simplify your DECT installs? We can pre-pair your DECT handsets to the corresponding base station and assign extension numbers to individual handsets before it arrives on site.
Unsure of what it is you need? A DECT survey can help to ensure your solution will work exactly ad intended. We can even arrange for an engineer to complete the install for you!
Remote Installation
For those carrying out your own install why not book a remote installation slot with a member of our Technical Support Team? Giving you added peace of mind that our dedicated and knowledgeable engineers are only a phone call away.
Pre-Sales Support
Our team of experts are on hand to suggest the best products and set up locations to make sure you project runs smoothly. We can also assist you with pre-sales compatibility and interoperability testing. Enabling you to find out what will and won’t work for your projects before committing to the purchase.
Whatever your requirements, our award-winning team are on hand to support you. Maximise the opportunities available with our installation and support services today.
There’s been a lot of talk about upgrading phone systems in preparation of the ISDN switch off, but what about your customers’ access control systems? With many door entry solutions utilising analogue lines, there’s a huge opportunity out there to upgrade these devices.
Compatible with some of the world’s leading platforms including Broadsoft, Cisco Webex, 3CX, Asterisk and Skype for Business. 2N devices can be integrated with existing systems, helping to create a seamless solution.
What’s more, we have a range of services available to help simplify your 2N fulfilments. Whether you’re looking for assistance in designing an access control solution, white labelled installation or simply finding our more about where to start get in touch with our team today.
2N on Air
Register today to join 2N on Air; an intuitive online session designed to provide you with the latest information on access control products, trends and tips for 2022.
Reserve your free space on this hands-on edition of 2N on Air.
Hold press the power key on BH72 about 5s to enter the pairing mode. The power light will flash red and green.
Step 3:
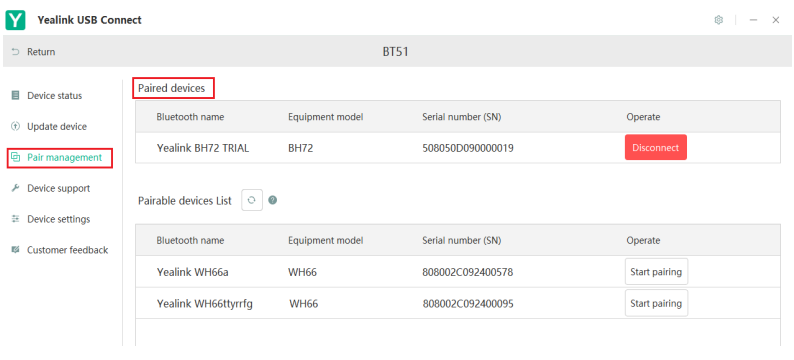
Click the Pair management of BT51 in Yealink USB Connect, click Refresh in the list of Pairable devices List, select the Bluetooth name of the headset and click Start pairing.
If it is paired successfully, it will be shown in Paired devices list.
Note:
You need to take out the BT51 and BH72 headset to pair one by one, then put the BH72 and BT51 back to the original box accordingly after being paired.
Last week marked our first physical event in over 16 months. Members of our team were estatic to head down to London to attend the Channel Champions Awards where we were named Technical Support & Engineering Team of the Year!
Our Technical Team have always played a pivotal role in our business. The level of support we provide and the knowledge our team share is second to none. We couldn’t be more proud to have won such a prestigious award and see our Technical Team finally recieve the recognition they deserve.
ProVu’s Tech Team receive the Channel Champions Award
But what is it that makes our Technical Team one of our greatest assets?
We thoroughly test every product we supply before it goes on sale, this enables us to provide an excellent level of support and iron out any potential problems we identify before it becomes a problem for our partners.
We work closely with many of our vendor partners. This enables us to provide feedback on future product developments and to also quickly resolve any issues which may need to be rectified by the manufacturer themselves.
Pre-staged set ups; this service has proved incredibly valuable over the last 16 months. Our team can configure devices prior to shipping so they work out-of-the-box enabling installs to take place without any delays.
Remote support; whether you’re looking to install a new product range or would like to offer your installers an extra peace of mind, our team are on hand to provide remote assistance. This has proved incredibly valuable to resellers wanting to install more complex products.
Faster repairs and replacements, our team are proactive in ensuring you recieve the fastest resolution available.
Interop testing; whether it’s checking headset compatibility or ensuring the relevant code is added to your PBX to ensure headset compatibility with your softphone, our team can help.
Post support services: We provide a customer-centric approach and want to ensure you are supported throughout the duration of your deployments. We provide regular technical training courses enabling you to continue to support your customers.
ProVu do not just support the products it sells, we support our customers. We take a customer-centric approach to enable our partners to be more efficient, effective, increase sales and retain margin.
Regardless of where the fault lies, our team go out of their way to fix the issues that are presented to them.
We are delighted to have been named winners in the Channel Champions Awards and look forward to continuing to support our partners with the same level of care and expertise.
If desired on your Yealink Teams phone you can set a screen lock to prevent unauthorized people from making changes to your device, scheduled meetings or prevent them from making outbound calls. When the screen is locked you can still answer incoming calls.
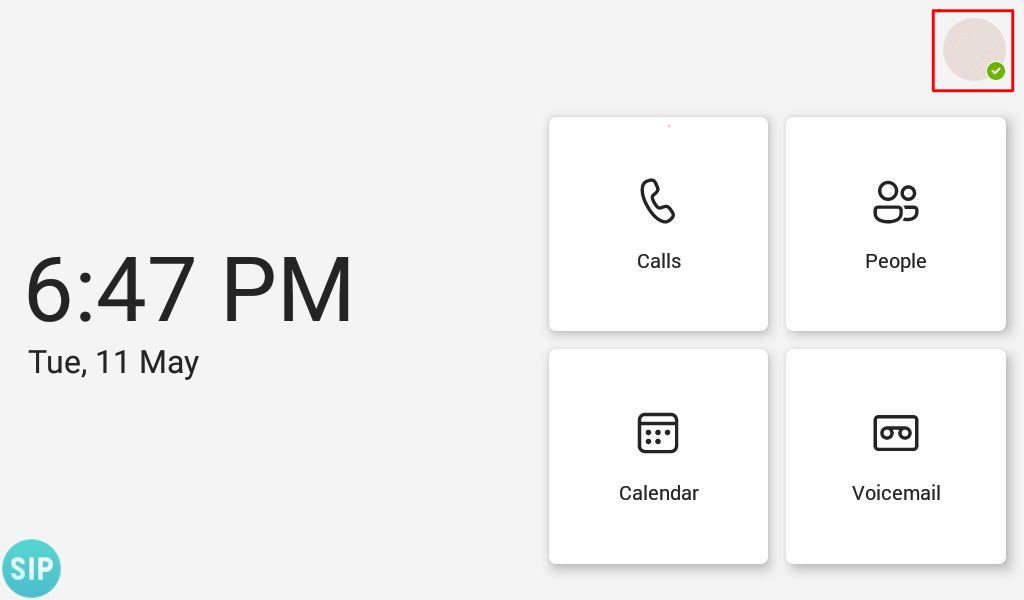
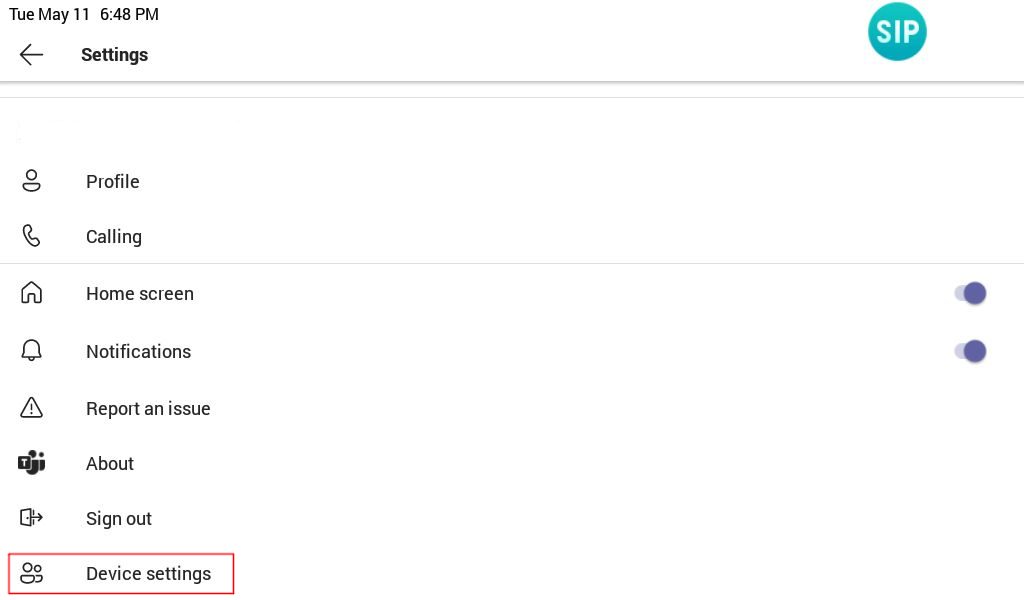
Step 1 – Press your account icon in the top right hand corner where it shows your account’s presence status
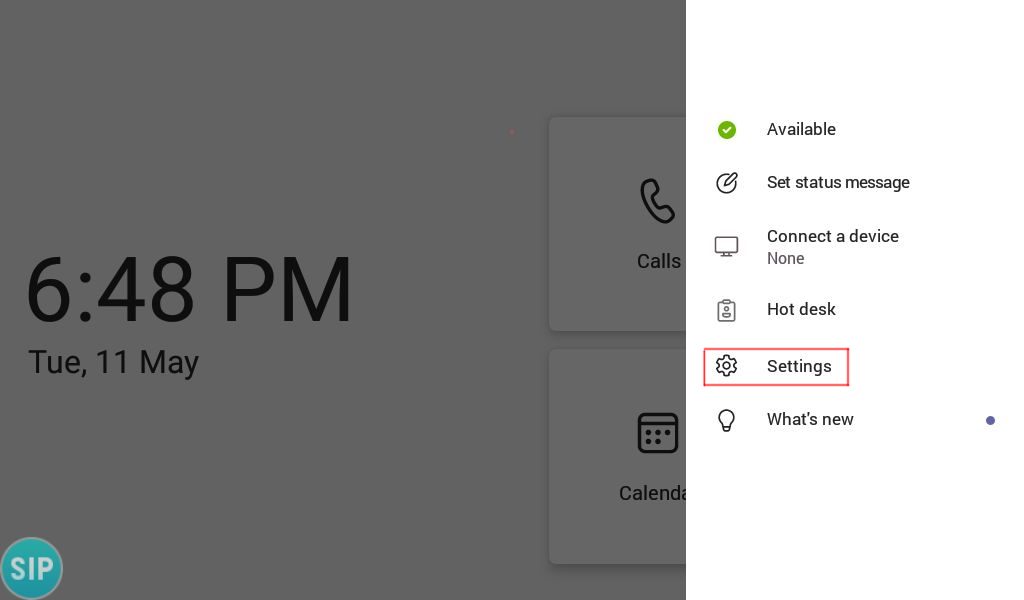
Step 2 – Select ‘Settings’
Step 3 – On the settings page scroll down and select ‘Device Settings’
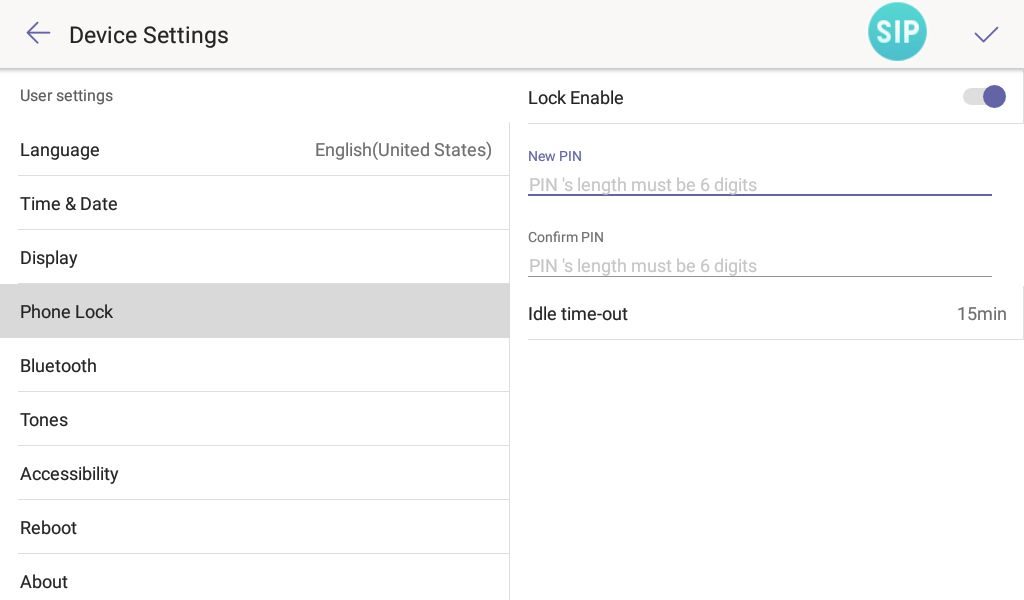
Step 4 – On the ‘device settings’ page find ‘Phone Lock’ and move ‘Lock Enable’ to the ‘ON’ position. Once you have done that enter a PIN with the minimum length of 6 digits, and then enter the digits again to confirm them. You may also wish to decrease the idle time-out to something less that 15 minutes as there’s no way to manually lock the device.
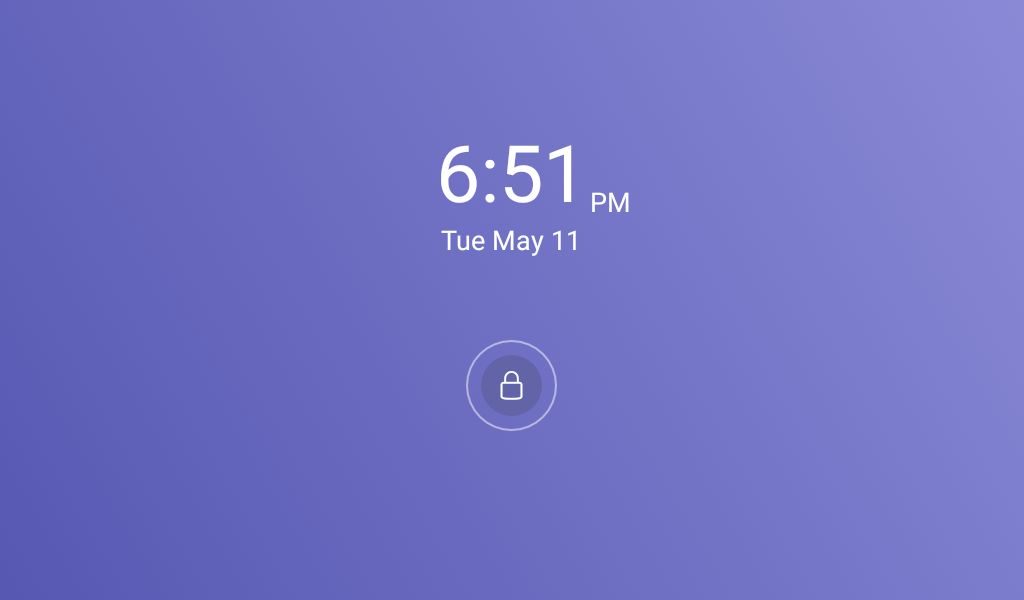
Step 5 – When your phone screen locks it should change to the one shown in the image below, press the padlock icon and enter your pin to unlock to the device.
If you would like to disable screen lock, go to ‘Settings’ > ‘Device Settings’ and change ‘Phone Lock’ to disabled. If your device is forcibly being set with a screen lock you must speak to your system administrator about getting it disabled.
If you have purchased your Yealink Team’s devices from ProVu and you are having difficulty with this blog post, or anything else related to your device please send an email to support@provu.co.uk explaining your issue.
The following blog post was done with a T56A running firmware version 58.15.0.124. The same steps should apply to the following models on the latest firmware version: T55A, T56A, T58A, CP960, MP54, MP56, MP58
You can enable hybrid mode directly through the web user interface of the Teams device. This allows you to use a SIP account to make and receive calls, as well as using your Teams account.
Part 1 – Enable Hybrid mode
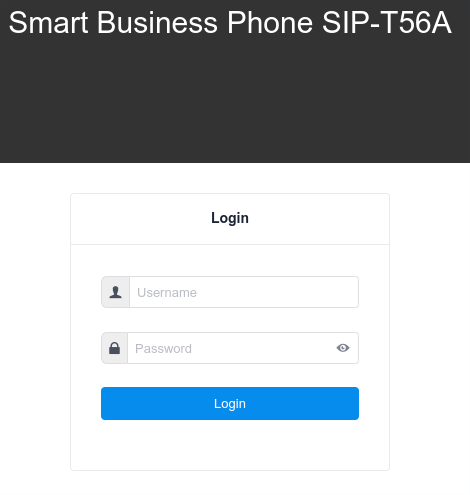
Step 1 – Access the web user interface of the phone by entering the IP address of the device in to a web browser. You need to specify ‘https’ and port ‘443’, (Example: https://192.168.1.15:443) in order for the login page to load otherwise you will see an error saying this site cannot be reached.
Step 2 – Once you are presented with the login page for the web user interface, login to the device. By default the credentials are ‘admin’ for the username and password.
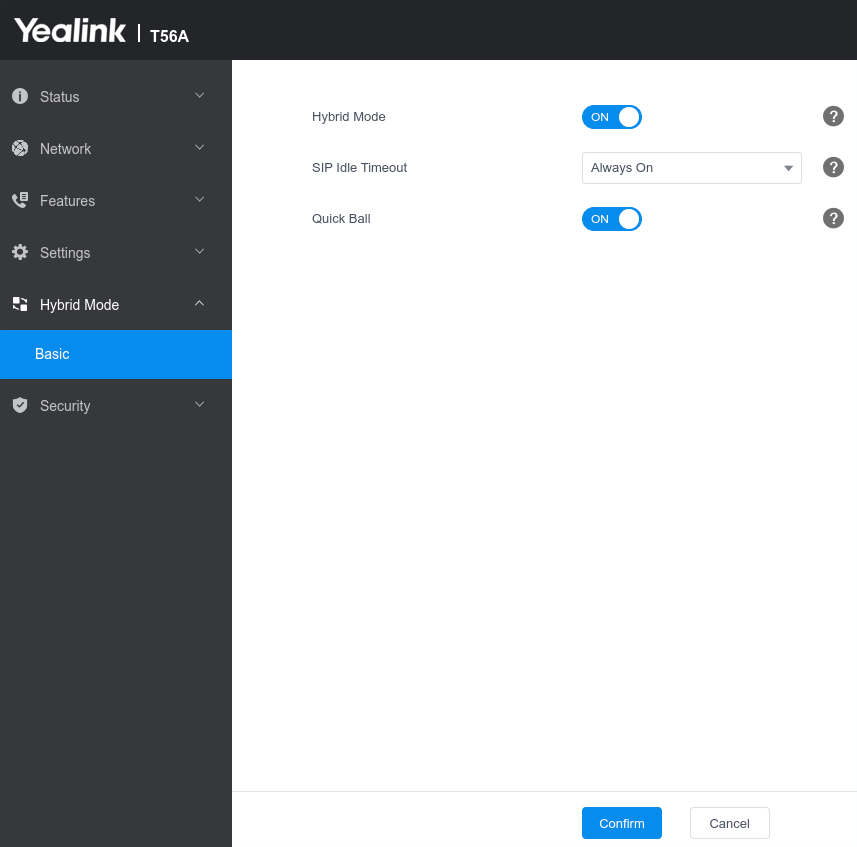
Step 3 – Select Hybrid mode down the column to the left and choose basic. When the page loads move the ‘Hybrid Mode’ slider to ‘ON’.
You will then be presented with two settings, SIP Idle timeout and Quick Ball. The SIP Idle timeout configures if the device should revert back to teams mode after a period of inactivity. The Quick Ball mode is a handy setting that when enabled presents a little button on the screen to flick between teams mode and Hybrid (SIP) mode.
Step 4 – Once you are happy with the settings picked click confirm and the phone will restart.
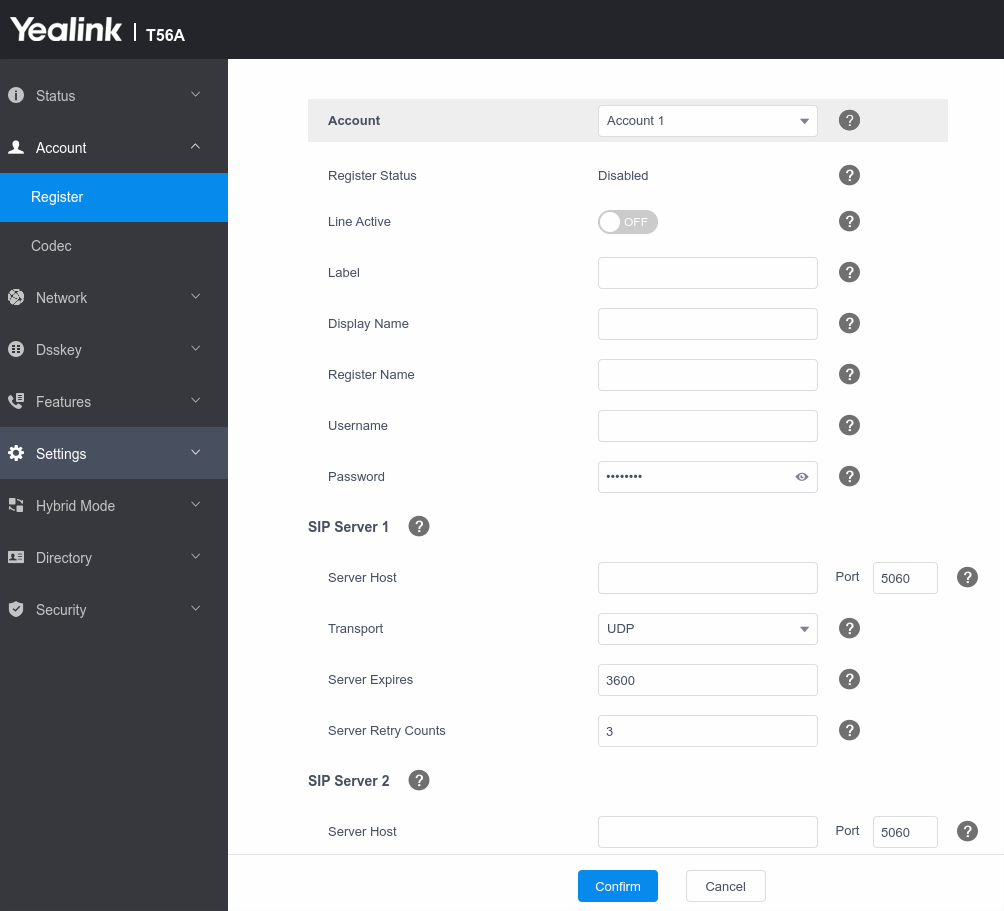
Step – 5 Once the phone has restarted login to the web user interface and click ‘Account’ to setup your SIP account on this device.
Note: If you have Quick Ball turned off, you will need to follow the steps below to access Hybrid mode from the phone user interface otherwise you can easily flick between the two modes via the Quick Ball.
Part 2 – Access SIP (Hybrid mode) from the Phone User Interface
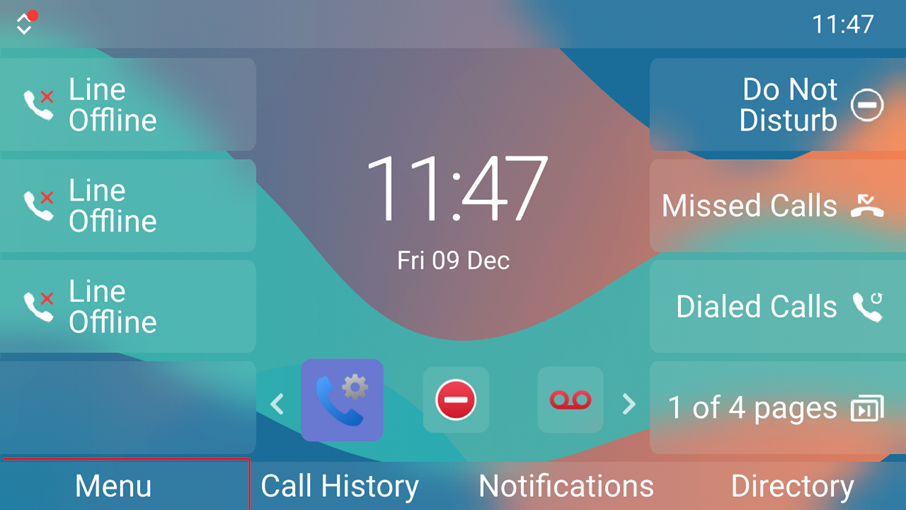
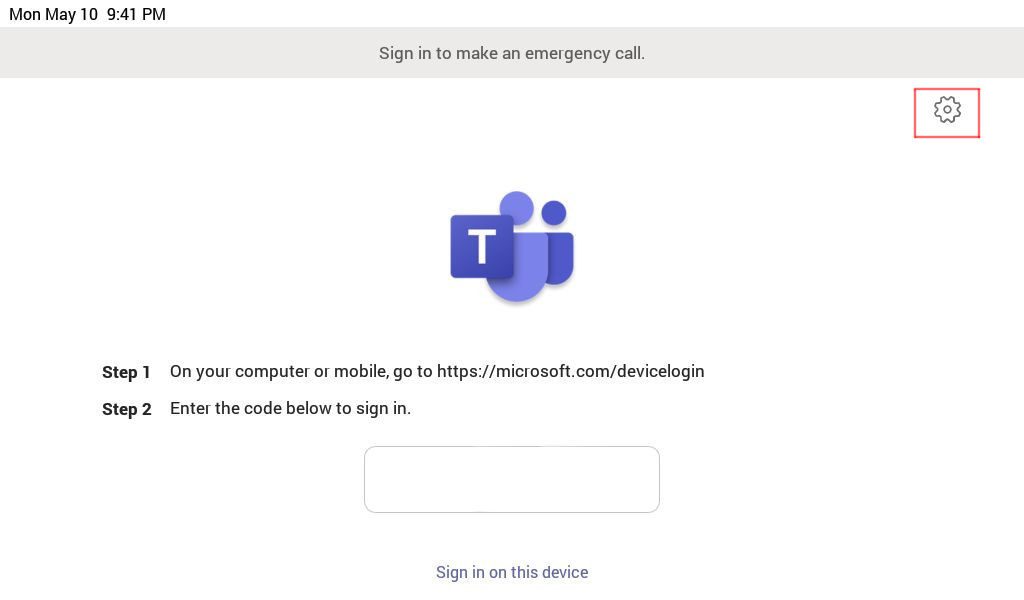
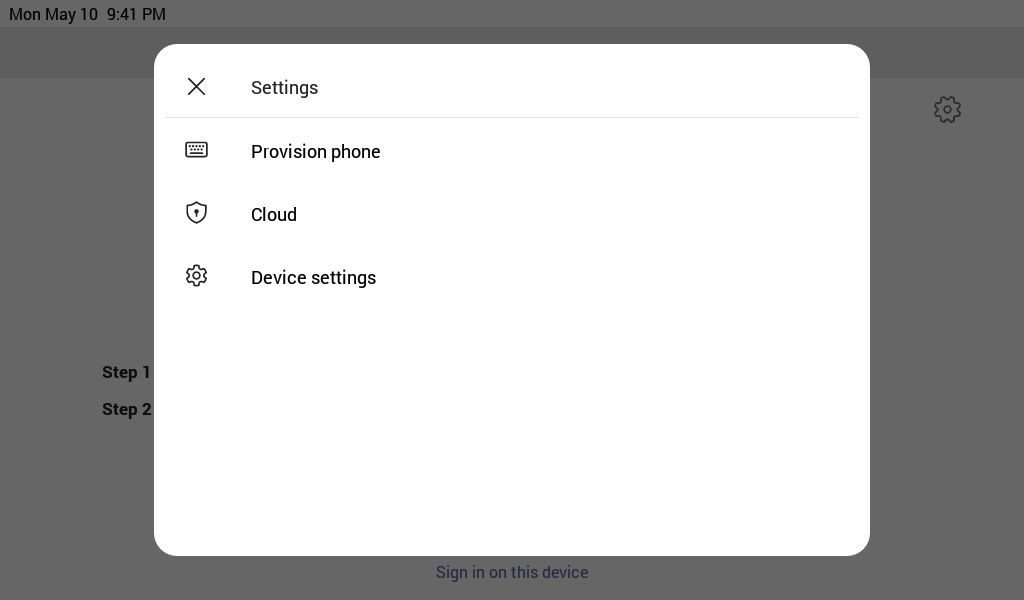
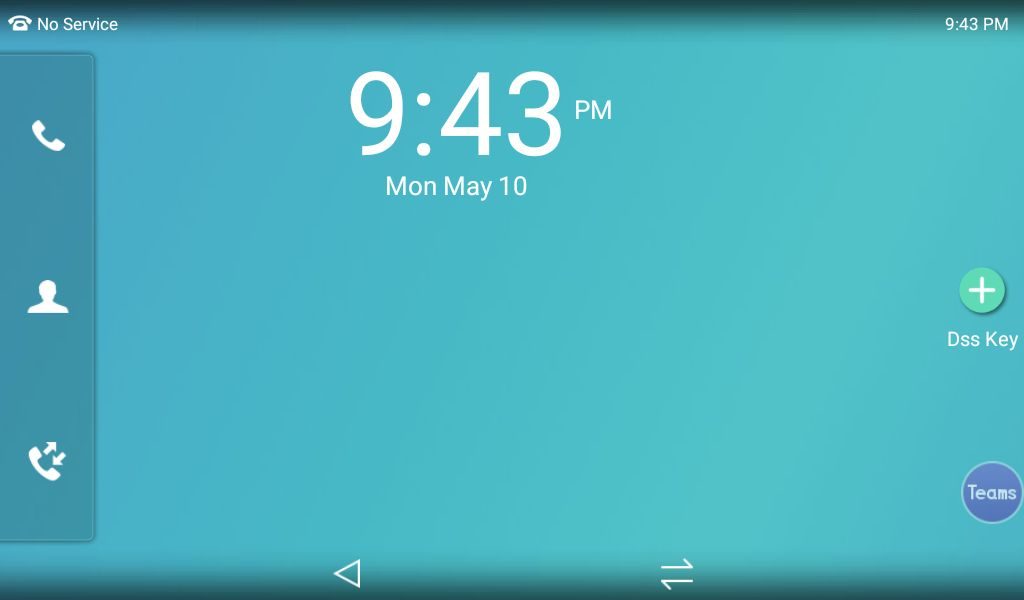
Step 1 – From the settings menu go to ‘device settings’, or when on the sign in screen click the cog symbol highlighted in the image below.
Step 2 – When the new page opens click ‘Device settings’
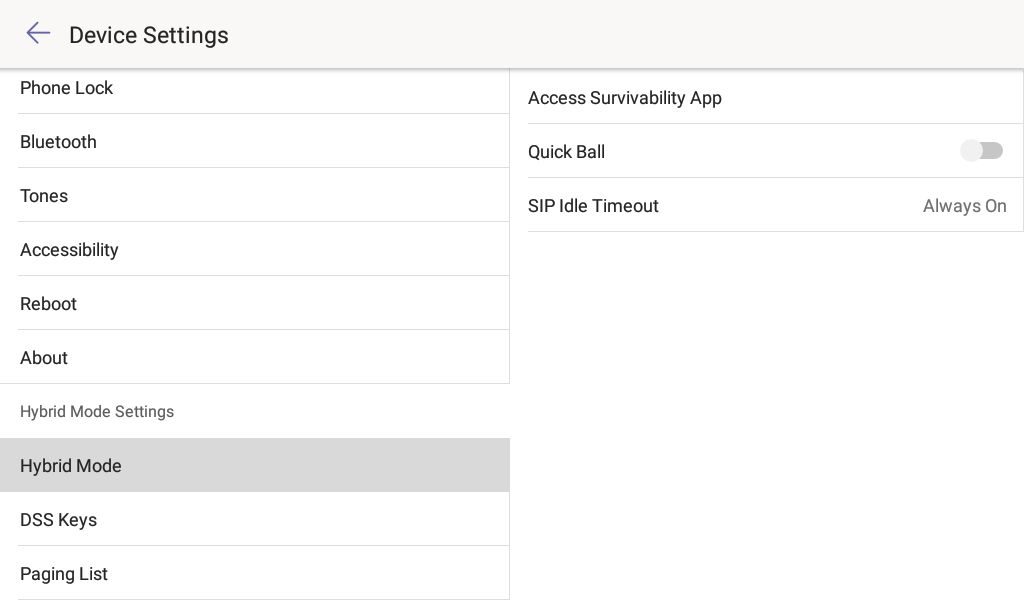
Step 3 – Once on the ‘device settings’ page scroll down to ‘Hybrid Mode’ and you should see the page as shown in the image below. To proceed to access ‘Hybrid mode’ click ‘Access Survivability App’
If you would like to quickly switch between your teams and SIP account I would recommend turning on the Quick Ball feature. This will allow you to change between Teams mode and Hybrid mode at the click of a button. The ‘SIP Idle timeout’ configures if the device should revert back to teams mode after a period of inactivity.
Step 4 – Once you have clicked Survivability you will see a similar screen to the one below and if you have an account registered you can start placing and receiving calls.
In the image below you can see a little circle in the bottom right corner saying teams. This is the Quick Ball to easily change modes, otherwise press the two lines at the bottom of the screen to go back to teams mode and follow the steps above to get back in to hybrid mode.
If you have purchased your Yealink Team’s devices from ProVu and you are having difficulty with this blog post, or anything else related to your device please send an email to support@provu.co.uk explaining your issue.
This blog post was created with a T56A on firmware version 58.15.0.124 but the process should be the same across all Teams desk phones. In order to login to a Yealink Teams device, you need a certain subscription as outlined in this blog post.
Method 1 – Using an internet capable device with a login code
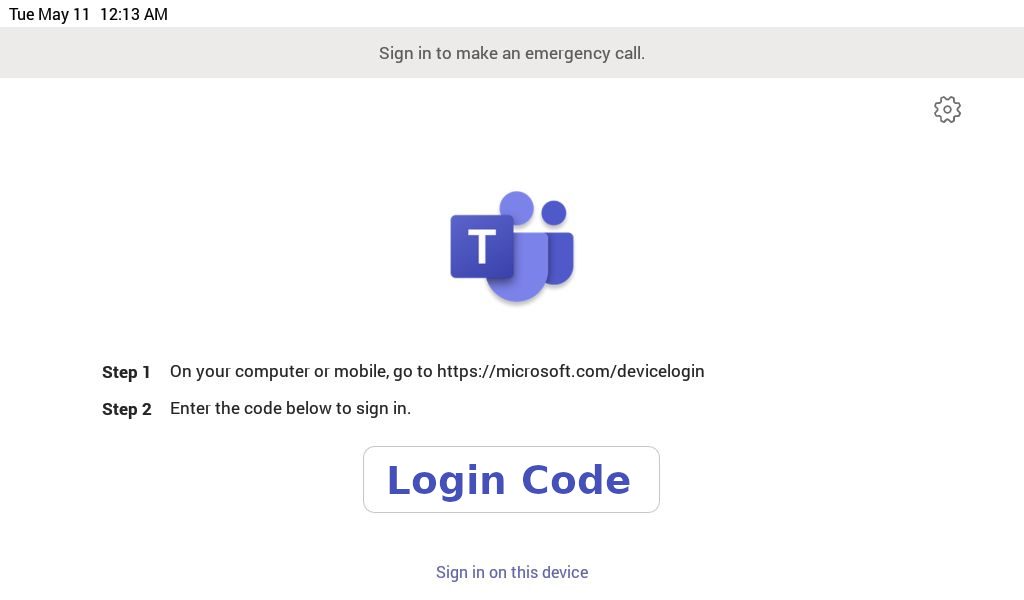
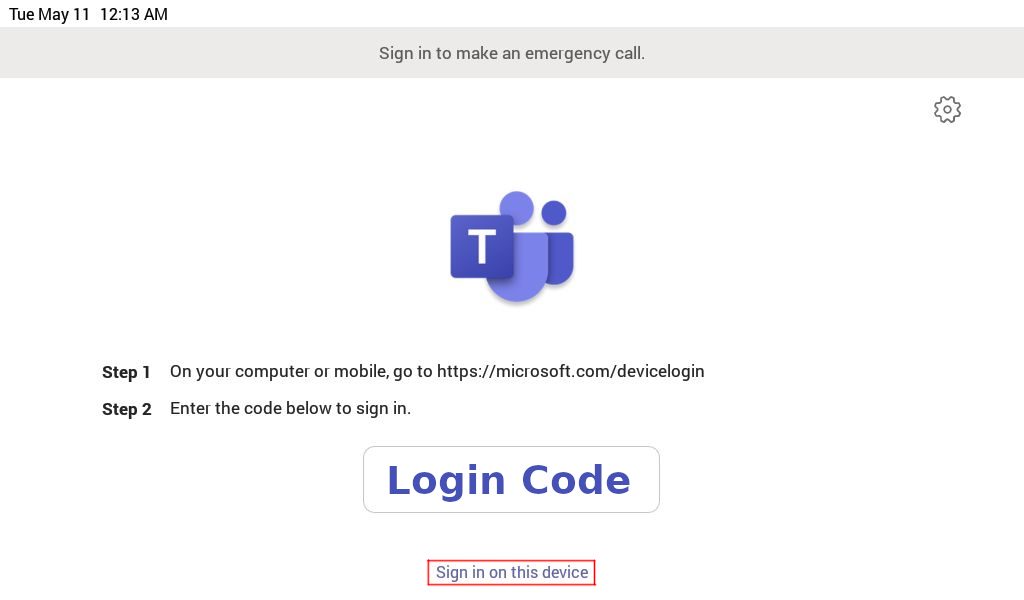
Step 1 – Follow the instructions on the login page of your Yealink Teams device, example shown in the image below, it tells you to web browse to the following URL on an internet capable device: https://microsoft.com/devicelogin
Step 2 – Once you’ve browsed to that URL enter your login code from your devices login screen.
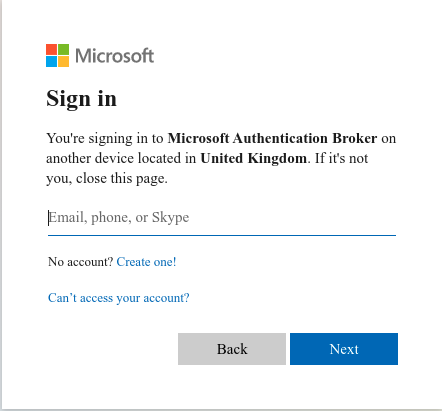
Step 3 – Once you’ve entered the code, you will be presented with a page to enter your email address.
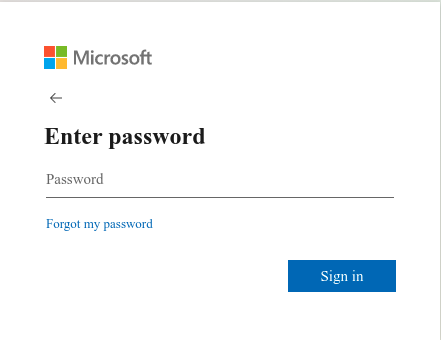
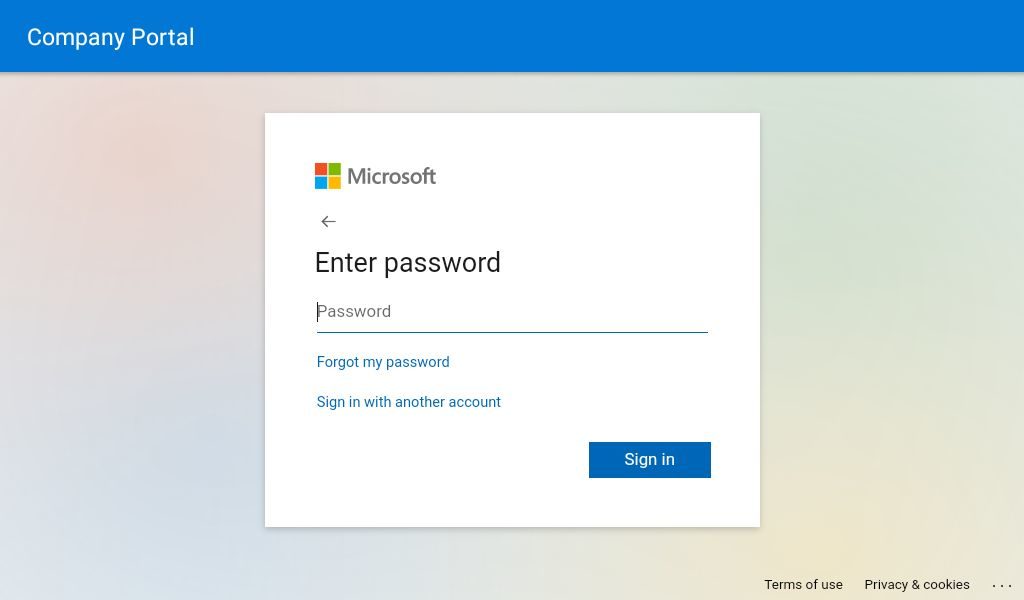
Step 4 – Once you’ve entered your email address, you will then be asked to enter your password for this account.
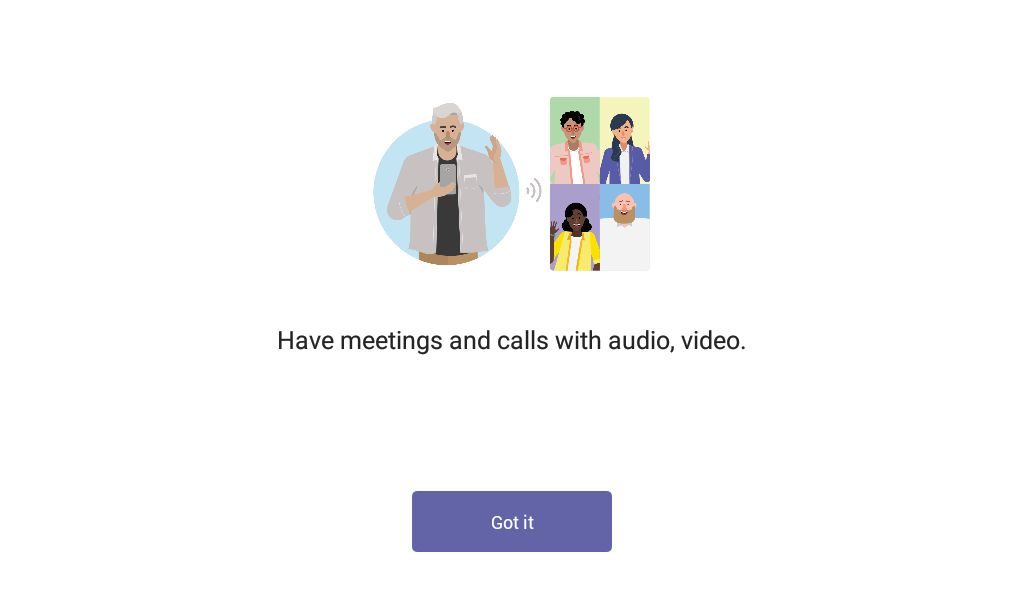
Step 5 – Once you have done that, your phone will automatically sign-in to your teams account and the web page will tell you to close the page. If your phone is nearby you may see it automatically start to log you in and then your phone will display this page. Click ‘Got it’ to start making or receiving calls.
Method 2 – Using the phones user interface
Step 1 – On the device’s login page, press “Sign in on this device”
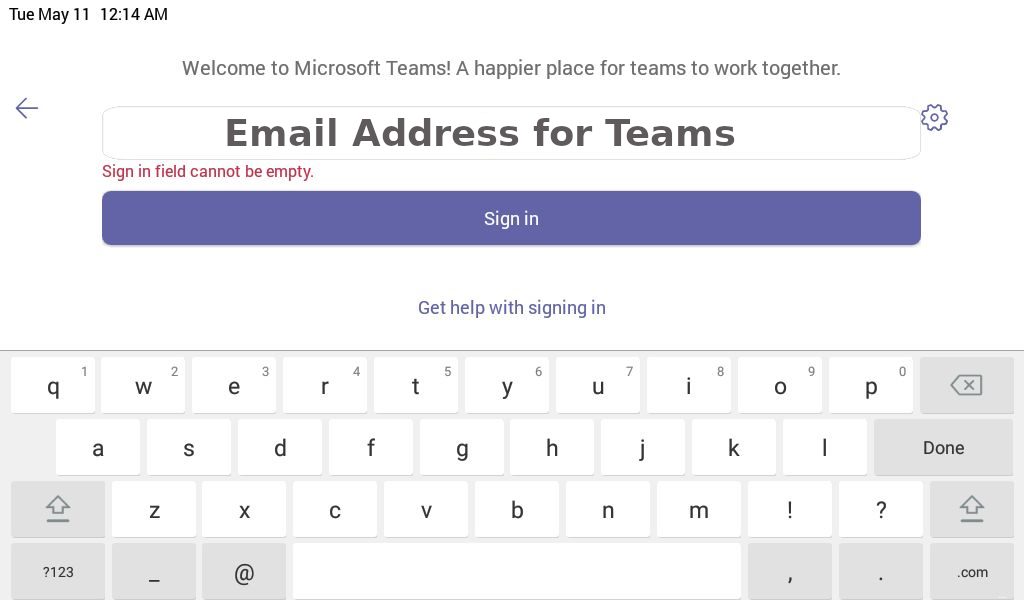
Step 2 – Once you have done that a new screen will load asking for your to enter your Microsoft Teams email address, Once you have done that click the sign in button.
Step 3 – Another screen will then load asking you to enter the password for the Microsoft Teams account you are trying to sign in with.
Step 4 – Once you have done that, it will cycle through some more screens and eventually, it will have signed in to your Teams account on this device. Click ‘Got it’ and you can start to make and receive calls.
If you have purchased your Yealink Team’s devices from ProVu and you are having difficulty with this blog post, or anything else related to your device please send an email to support@provu.co.uk explaining your issue.
At the time of writing, and to the best of our knowledge these are the requirements to be able to log in to a Yealink Teams device with a Microsoft Teams account.
You will need one of the following Microsoft subscriptions, but these do not allow PSTN calling. It’s only possible to communicate with other Teams users on your system. Please also note you can not login with a free to use Microsoft Teams account.
Supported Microsoft Teams Subscriptions:
Microsoft 365 Business Basic
Microsoft 365 Business Standard
Microsoft 365 Business Premium
Microsoft 365 E3 or A3
Office 365 E3 or A3
If you want to place PSTN calls you will also need an additional subscription to the Microsoft 365 Business Voice service (available for qualifying plans only) or have a Microsoft 365 E5 service.
Please be aware that Microsoft 365 and Office 365 are not the same.
Below are some links so you can compare the available services, but make sure to read the small print to fully understand which services are offered and which are excluded with the plan. If you are still unsure I’d recommend reaching out to Microsoft and explaining your interest and requirements.
Important: Additional Microsoft plans are required for the Yealink Microsoft Teams Rooms Systems. This page can be used to identify which plan you will need.