2N External RFID reader for 125kHz & 13.56MHz How-to Guide

In order to use the 2N RFID reader you need to install the correct driver software.  This is only available for Microsoft Windows and can be downloaded from this page:

https://www.2n.cz/en_GB/products/access-control/2n-access-unit#tab-2

Scroll down to the Documents section and you’ll see the driver listed in the “Software & Firmware” list.

Once installed, you will see an icon in the task bar on your computer:

Right click this and select “Settings”.  This window will pop-up:

The device field may be empty, make sure you have the USB reader plugged in:

You may need to click refresh in the settings window.  Make sure you have the correct device selected before clicking “OK” to close that window.

Now you can use the reader to scan compatible RFID/NFC cards into the 2N Access Commander software or in the web interface for 2N intercoms and access control devices.

For example, in the web interface for an Access Control unit:

Click on the card icon and you will be prompted to scan a card:

That’s it, you’ll now be able to use that device to open the door.

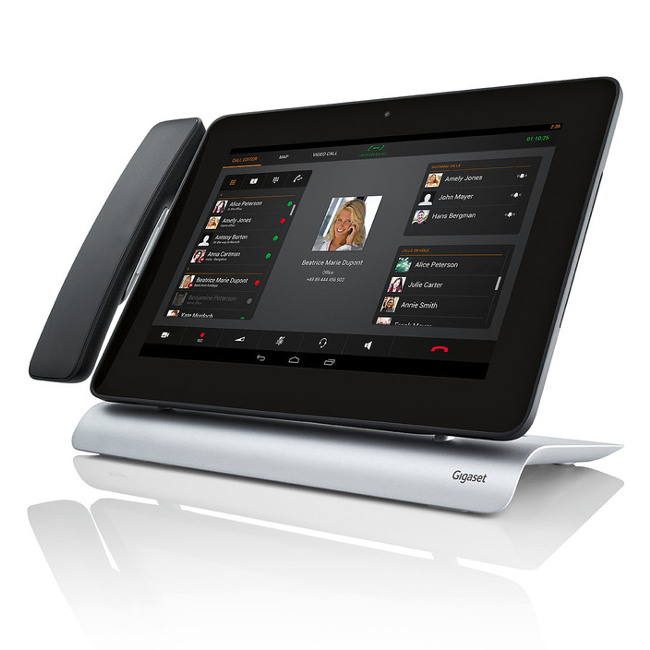
Gigaset DX800A Call Transfer Guide

Configuration:

  1. Hold down a memory key for a few seconds until the function menu appears.
  2. Scroll down and select ‘R Function’.
  3. This will map the function to that memory key.
  4. When you want to transfer a call, press the memory key and a screen will appear. 
  5. Type in the number of the phone you want to transfer the call to and press the memory key again.
  6. You will get a screen like this to confirm the transfer has been successful:


ProVu Win 2 Comms Dealer Sales & Marketing Awards!

It’s that time of year again when we don the ‘posh frocks’ and kick off the year’s Channel awards. One of the first industry awards in our calendar is the Comms Dealer Sales and Marketing Awards, for which we were shortlisted for five awards! Designed to celebrate the work and achievements of Sales and Marketing teams throughout the Channel, the awards are a great event to celebrate success throughout the industry.

Taking place at the Park Lane Hotel on 4th May myself, our Managing Director, Darren and Sales Team Leader, Anna travelled down to London to attend the awards. Having been shortlisted for five awards, we were sceptical about how we may perform; all 5 awards had strong competition and following our success at last year’s awards, we didn’t think we’d do it again.

Much to our delight, we were named winners of the following awards:

  • Distributor Channel Sales Team of the Year
  • Distributor Channel Marketing Campaign of the Year

We were also thrilled to be highly commended for the Distributor Marketing Team of the Year award.

The last 12 months have seen some great achievements for the ProVu team, with yet another record-breaking year in the bag. We are continuously striving to bring more to the Channel and develop our services. But, for us, there are four core messages that we believe stood out to the judges.

  • We have an incredibly dedicated, passionate team who carry out everything in-house; we do not outsource anything we do.
  • We listen to and value our partners’ feedback, enabling us to tailor our services and develop our sales and marketing strategies in response to this.
  • We hold strong relationships with all of our vendor partners, by working with them closely, we are able to offer them marketing support and run joint marketing campaigns for maximum ROI.
  • We’re a great team and we know our stuff – did you know that over 50% of our team are trained technical engineers?

Compared to many of our fellow entrants, we are a very small team – to be named among them is a great achievement in itself!

We would like to congratulate all finalists and thank our Channel and vendor Partners for your continued support over the past year. But most of all, well done to each and every member of the ProVu team, without your hard work and determination this simply would not have been possible! Here’s to another great year!

Installation guide for 2N® 2Wire Kit

The 2N 2Wire adapter kit is extremely useful. Giving you the capacity to use exisiting 2 wire cable runs to connect IP devices to a network and power the device via PoE.

But it’s worth doing your homework so you can get the most out of them.

To help with this we have created this guide to help you get to grips with using them.

Essentially they are plug and play straight out of the box but……. this depends on how you want to use them.

Each 2Wire kit comes with two adapters and one power supply.

The solution works fundamentaly using a Master and Slave approach.

Any adapter that you connect the power supply to will become a Master.

Any adapter that you then connect to the Master via the 2wire connection becomes a Slave.

The Master should be connected to the network and the Slave connected to the IP device.

Any Master adapter can have up to 4 slaves connected to it.


Here we will look at three use case scenarios.

  1. Where a single Master & Slave set up is required on a single network.
  2. Where a single Master & multiple Slave set up is required on a single network.
  3. Where multiple Master & Slave set ups are required on a single network.

For the first two scenarios, where only a single Master adapter is required, the 2Wire kit is simply plug and play.

PLEASE BE AWARE that in the case of scenario 3, where multiple Master adapters are required on a single network, a pairing procedure must be executed.

If you connect multiple Master adapters to a single network without performing the necessary unpairing/pairing procedures YOU MAY EXPERIENCE NETWORK CONFLICT ISSUES.

Good thing is….. the unpairing/pairing procedure is very simple. Here we will guide you through it.


First let’s take a look at how to connect a single Master and Slave set up.

This is the simplest configuration and works straight out of the box.

Just make sure you connect the 2 wire correctly to each adapter. Positive to positive & negative to negative.


Now let’s take a look at how to connect multiple Slaves to a single Master.

This is similar to a single Master / Slave configuration in that it works straight out of the box. Multiple Slaves can be wired into a single Master.

Again make sure to connect the 2 wire correctly to each adapter. Positive to Positive & negative to Negative.


Finally we have the multiple Masters & multiple Slaves on a single network configuration.

If this configuration is required and you are installing multiple Master adapters on to a single network, it is very important to perform an unpairing/pairing procedure. If you do not you may experience network conflict issues.


Unpairing and Pairing your adapters

Each adapter has a small hole labelled ‘Grp’. There is a button inside this hole that is used to initiate the unpairing/ pairing procedures.

To access the button you will need a small screwdriver or similar tool.

To perform unpairing/pairing procedures the adapters must be powered.

So you must connect the power supply to the Master and connect the Slave via the 2 wire connection.

But DO NOT connect them to the network or the IP device….. yet.

To unpair an adapter press and hold the ‘Grp’ button for 10 seconds, until you see all lights on the adapter go off.

After unpairing is complete you should see only the power light illuminated.

You should do this on all adapters before attempting a pairing procedure.

To perform a pairing procedure press and hold the ‘Grp button for 2 seconds. When you release the button the ‘TWP’ light will begin steadily blinking letting you know that the adapter is in ‘seek’ mode and is looking for another adapter to pair to.

Once an adapter has found another adapter to pair to the ‘TWP’ will become static, letting you know pairing is complete.

In a single Master & single Slave pairing it doesn not matter which adapter you put into pairing/seek mode first.

But if you wish to have multiple Slaves connected to a single Master, then you must connect all Slaves via the 2Wire connection to the Master first, then run individual pairing procedures for each connected Slave.

To do this you must initiate the pairing/seek mode on the Master first and then the first Slave.

Then repeat this for each Slave connected to the Master.

But remember, unpairing & pairing is only needed when installing more than one Master adapter on a single network. 


Thanks for reading.


New updated Yealink wired headset

The Yealink YHS32 has been discontinued and replaced by the new YHS33.

What are the differences?

Improved audio quality:
Yealink has upgraded the quality from narrowband to wideband audio which brings users a more natural sound for clearer conversations.

Distinctive new design:
The new design makes it easier to adjust the distance between the headset’s microphone and the user’s mouth.

New materials:
The featherweight ear pads are made from biomimetic protein-based leather (leatherette) for added comfort.

Partner Event 24th May 2017: Supercharge your 3CX sales with Snom

We’re teaming up with Snom and 3CX to host a new Spring partner event; Supercharge your 3CX sales with Snom.

Taking place at the Etrop Grange Hotel, Manchester Airport on the 24th May 2017 – the event is designed to equip you with the knowledge to successfully position and sell integrated PBX and telephone systems to small and medium-sized businesses.

To join us simply register for free below.

Discover more & Register now

Buy 5 Sangoma s700 IP Phones – Get 1 FREE!

We’ve teamed up with Sangoma to bring our resellers a brand new promotional offer! Available throughout May and June, purchase five s700 IP deskphones and receive one for free.

Sangoma’s s700 IP executive-level phone offers a feature-rich device. With 6 SIP accounts, 5-way conferencing, 45 programmable soft keys and a 4.3″ full colour display, the s700 marks the most advanced model in the Sangoma phone range.

How Sangoma s700 is different to the competition?

  • Out-of-the-box Zero Touch Provisioning – Only Sangoma provides Zero Touch provisioning with FreePBX / PBXact.
  • EndPoint Manager included – Lets your users control global settings, program their phone keys, map extensions, upload images, download new firmware, and much more.
  • Full Integration with Phone Apps – Enables users to easily control complicated features directly from their phones.


To take advantage of this offer, simply contact our sales team on 01484 840048 or email contact@provu.co.uk

How to configure Snom 720 with Plantronics CS520 and EHS Advanced V2.0

List of Components:

  1. Plantronics Base
  2. Plantronics Cable
  3. 3.5mm DC Jack
  4. Snom 4 Pin Connector
  5. Snom EHS Advanced V2.0 Adapter
  6. Plantronics Headset
  7. Plantronics Base Power Supply

Configuration:

  1. Connect the Plantronics Base(1) to the Plantronics Base Power Supply(7).

2. Connect the Snom EHS Adapter(5) to the 3.5mm DC Jack(3). Note that only the DC Jack goes into this end of the EHS Adapter, you do not need to plug anything else into this end.

3.  Connect the Snom EHS Adapter(5) to the Snom 4 Pin Conector(4).

4. Connect the other end of the 3.mm DC Jack(3) into the back of the Plantronics Base(1).

5. Connect the Plantronics Cable(2) to the back of the Plantronics Base(1).

6. Connect the other end of Snom 4 Pin Connector(4) into the slot in the picture below. Then connect the other end of the Plantronics Cable(2) into the Headset port, making sure you Do Not put it into the handset port by mistake.

7. Check the Dial settings on the bottom of the Plantronics Base(1) to make sure that they match the picture below. 

8. The headset should be ready to use. No phone settings should need to be changed, just make sure that all connections are secure and that you have power to the headset base.

Konftel 300Wx firmware upgrade

When using a Konftel 300Wx with a Gigaset N300IP or N510IP it may be necessary to upgrade the 300Wx to the latest firmware.  If you are having problems making or receiving calls this should sort it.

  1. Go to go the Konftel firmware download page: http://www.konftel.com/Support/Upgrade
  2. Select “Konftel 300Wx” and scroll down to the bottom of the page
  3. Download the latest firmware version for use with SD card.  The version is 1.9.8 at the time of writing
  4. Then download the “DECT module” firmware.  The version of this is 932 at the time of writing
  5. Put both files onto a FAT formatted SD card in the root folder
  6. Insert the SD card into the 300Wx, navigate to the settings menu and select the upgrade mode option
  7. Press and hold the “hold” key on the 300Wx (bottom left of the keypad)
  8. Follow the instructions on screen
  9. Once the firmware image upgrade has completed, go back into “menu” -> “Settings” -> “Upgrade Mode” and this time select DECT
  10. Wait approx 3 minutes for the upgrade to complete
  11. Finally, reboot the 300Wx