Supported Yealink Models
SIP-T54S, T52S, T48G, T48S, T46G, T46S, T42S, T41S, T29G, T27G.
Enabling USB call recording
By default this feature is disabled, if you wish to use a USB stick to record calls you need to enable the following parameter:
features.usb_call_recording.enable
Valid Values: 0 or 1
1 = ON
0 = OFF
Note: this feature cannot be enabled via the web user interface or via the phone directly. It can only be done by a provisioning parameter.
If you are having your Yealink devices provisioned by ourselves and would like to use this feature just drop us an email and we can apply this to your template.
Uploading a CFG file
If you aren’t able to provision this setting to the device you can add the settings below to a plain-text file and upload it directly to the unit from a PC and it will enable the feature:
#!version:1.0.0.1
features.usb_call_recording.enable = 1
Remember to save the text file as “.cfg”
To upload the config file login to the web user interface of the phone and go to “Settings” > “Configuration” > Select the “Choose File” button next to “Import CFG Configuration File” and select the file on your PC > After selecting the file press the “Import” button for it to upload.
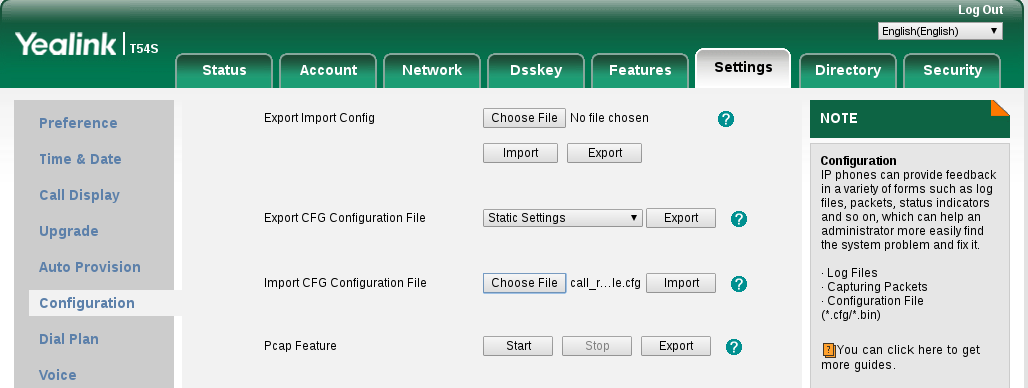
After the file has been uploaded the setting will be enabled.
Using USB call recording
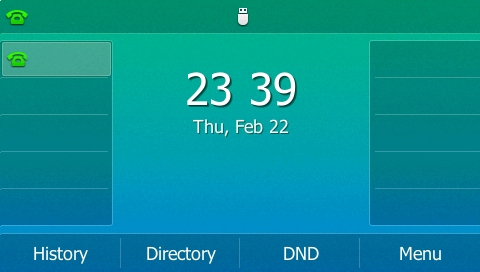
1) Connect the USB stick to the phone and it will display a message saying “USB Flash Drive Connected” and display a logo of a USB Stick in to middle of the screen like above. (This will appear even if the setting is not enabled)
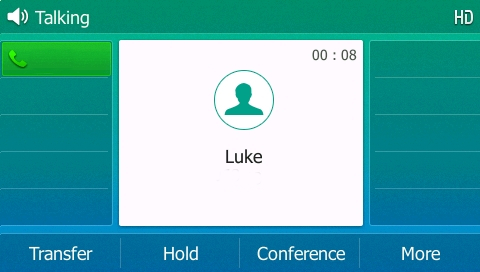
2) To use the feature during a call you will now notice a “More” soft-key appears. If you press this, you will get the option to start recording the call.
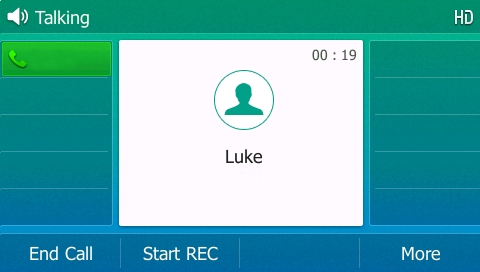
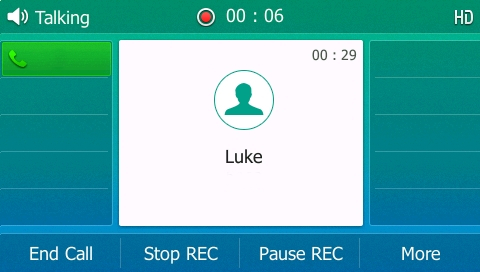
3) Press the “Start REC” button then you will have the option to pause or stop the recording. If you pause the recording you will have the option to start again or stop.
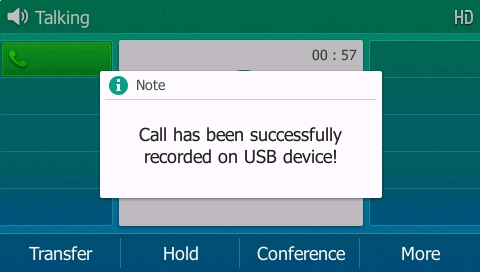
4) If you press the stop option you will see a notification saying the recording has successfully been saved.
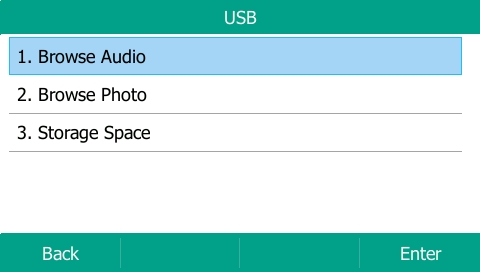
5) To listen to the recording either disconnect the USB and connect it to a computer or alternatively press the “Menu” button whilst the phone is not on a call and press enter on the “USB” option.
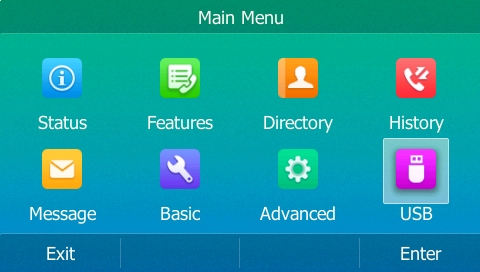
6) Then Select “Browse Audio”
7) Then select an audio file and press play:

8) The recording will then automatically start playing. You can pause, rewind and fast forward the recording.