Browse Tag

T27G

Yealink T27G

Yealink – Adjusting the sending volume (outgoing volume) on the T2, T4 and T5 Series Phones

You may be getting reports from your customers saying that when they are on a call, the opposite party is telling them that their audio is too quiet, or maybe even too loud when they talk. Usually this isn’t a problem because the opposite party can adjust the volume of the person calling with their own phone, but what if the opposite party has already done that and it’s still too quiet or too loud?

If that is the case then you may be able to adjust three settings on the Yealink device. These can found on the web user interface by going to the ‘Features’ > ‘Audio’ page and adjusting the settings in the image below outlined in green.
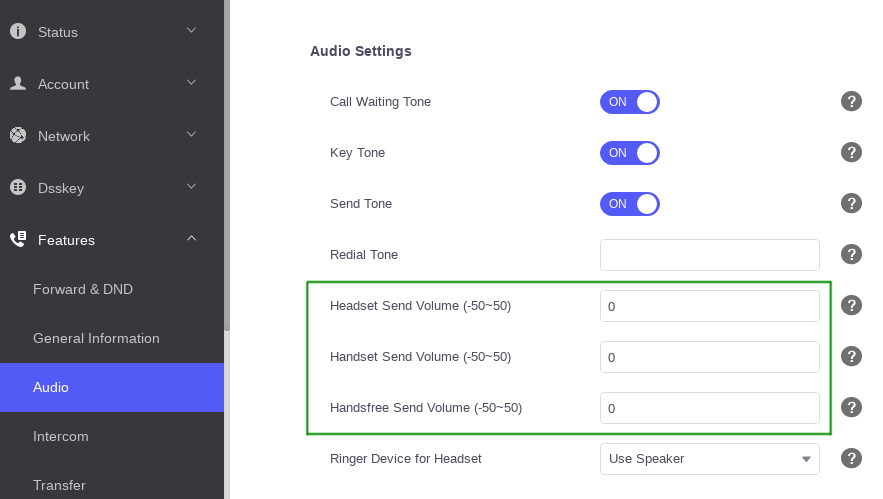
An alternative way to think what these settings do is adjusting how sensitive the microphone is on the device. You can adjust the handset, headset and handsfree sensitivity to be weaker or stronger. The valid values are between -50 and 50. The higher the value, the louder it should be. The lower the value, the quieter it should be.

When adjusting this setting it is important to be cautious. Incorrectly configuring the value can have adverse effects on the audio quality so it’s advisable to gradually increase or decrease the value until you find the right spot.

If you control your own provisioning server and would like to configure this remotely you can use the provisioning parameters below:

voice.headset_send
voice.handset_send
voice.handfree_send

Hopefully after adjusting these settings it resolves the issue and provides a better experience for the end-user and the opposite party on the calls.

For further technical assistance with your Yealink devices please contact our support team by emailing support@provu.co.uk.

Yealink USB Call Recording

Supported Yealink Models

SIP-T54S, T52S, T48G, T48S, T46G, T46S, T42S, T41S, T29G, T27G.

Enabling USB call recording

By default this feature is disabled, if you wish to use a USB stick to record calls you need to enable the following parameter:

features.usb_call_recording.enable
Valid Values: 0 or 1
1 = ON
0 = OFF

Note: this feature cannot be enabled via the web user interface or via the phone directly. It can only be done by a provisioning parameter.

If you are having your Yealink devices provisioned by ourselves and would like to use this feature just drop us an email and we can apply this to your template.

Uploading a CFG file

If you aren’t able to provision this setting to the device you can add the settings below to a plain-text file and upload it directly to the unit from a PC and it will enable the feature:

#!version:1.0.0.1
features.usb_call_recording.enable = 1
Remember to save the text file as “.cfg”

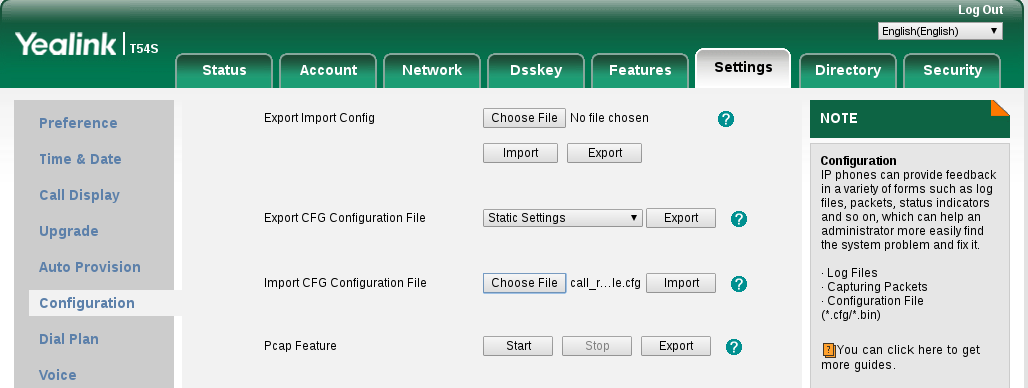
To upload the config file login to the web user interface of the phone and go to “Settings” > “Configuration” > Select the “Choose File” button next to “Import CFG Configuration File” and select the file on your PC > After selecting the file press the “Import” button for it to upload.

After the file has been uploaded the setting will be enabled.

Using USB call recording

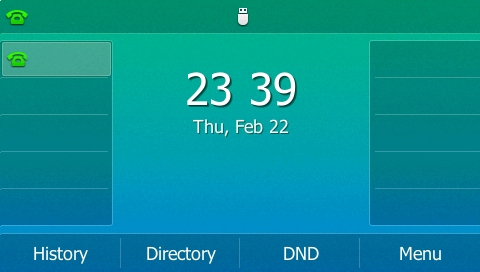
1) Connect the USB stick to the phone and it will display a message saying “USB Flash Drive Connected” and display a logo of a USB Stick in to middle of the screen like above. (This will appear even if the setting is not enabled)

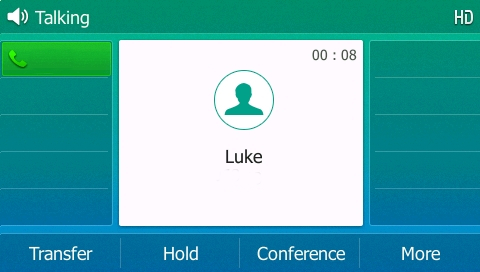
2) To use the feature during a call you will now notice a “More” soft-key appears. If you press this, you will get the option to start recording the call.

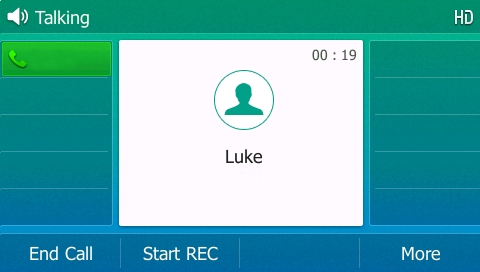
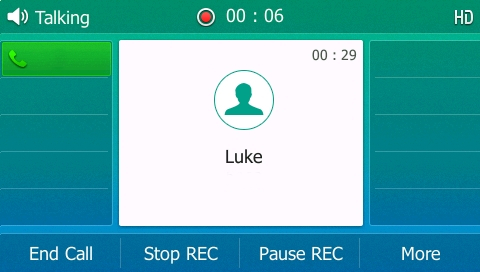
3) Press the “Start REC” button then you will have the option to pause or stop the recording. If you pause the recording you will have the option to start again or stop.

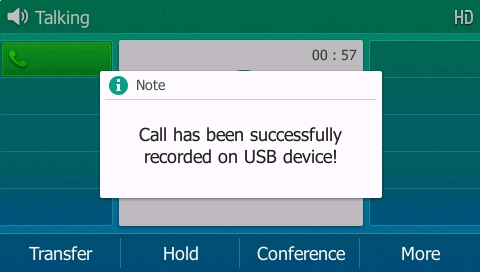
4) If you press the stop option you will see a notification saying the recording has successfully been saved.

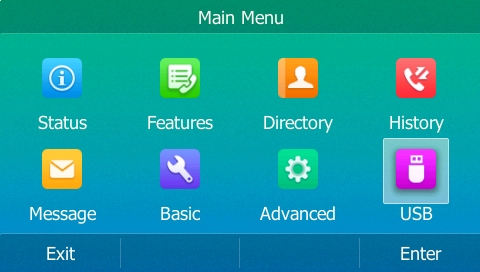
5) To listen to the recording either disconnect the USB and connect it to a computer or alternatively press  the “Menu” button whilst the phone is not on a call and press enter on the “USB” option.

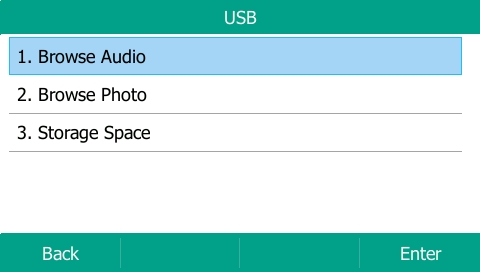
6) Then Select “Browse Audio”

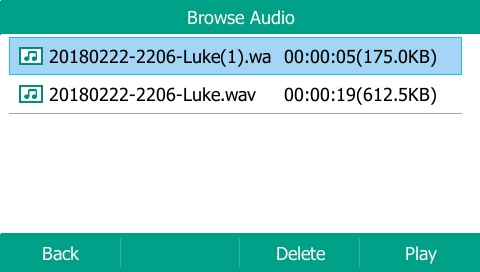
7) Then select an audio file and press play:

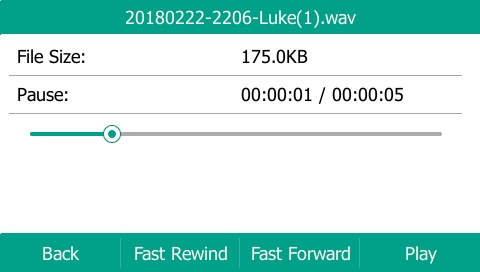
8) The recording will then automatically start playing. You can pause, rewind and fast forward the recording.

Yealink Provisioning: Common file mapping

This is perhaps more of a reminder to me for future reference, however, it may be useful for others too!

When a Yealink phone provisions, it requests a common provisioning file and a MAC specific one. The common one is referred to as such because each model requests a file which is unique to it.

Here are the Yealink models alongside the requested common files:

Model Common file Firmware code
CP860 CP860 y000000000037.cfg 37
T18P T18 y000000000009.cfg 18
T19P T19 y000000000031.cfg 31
T19P_E2 T19_E2 y000000000053.cfg 53
T20P T20 y000000000007.cfg 9
T21P T21 y000000000034.cfg 34
T21P_E2 T21_E2 y000000000052.cfg 52
T22P T22 y000000000005.cfg 7
T23G T23 y000000000044.cfg 44
T26P T26 y000000000004.cfg 6
T27P T27 y000000000045.cfg 45
T28P T28 y000000000000.cfg 2
T29G T29 y000000000046.cfg 46
T32G T32 y000000000032.cfg 32
T38G T38 y000000000038.cfg 38
T40P T40 y000000000054.cfg 54
T41P T41 y000000000036.cfg 36
T42G T42 y000000000029.cfg 29
T46G T46 y000000000028.cfg 28
T48G T48 y000000000035.cfg 35
VP530 VP530 y000000000023.cfg 23
VP530 VP-T49 y000000000051.cfg 51
W52P W52 y000000000025.cfg 25
W56P W56 y000000000025.cfg 25

Phew.. that should just about do it!

How to: Connect a Plantronics CS540 with a Yealink Phone

This is a step-by-step guide of how to successfully connect a Plantronics CS540 to a Yealink SIP phone (Compatible with T26P, T28P, T38G).

You should have:
– Plantronics CS540 Headset
– Yealink Handset with EHS capabilities
– Yealink EHS36 adapter.

(For a full list of headset and phone compatibility please view our headset compatibility chart)

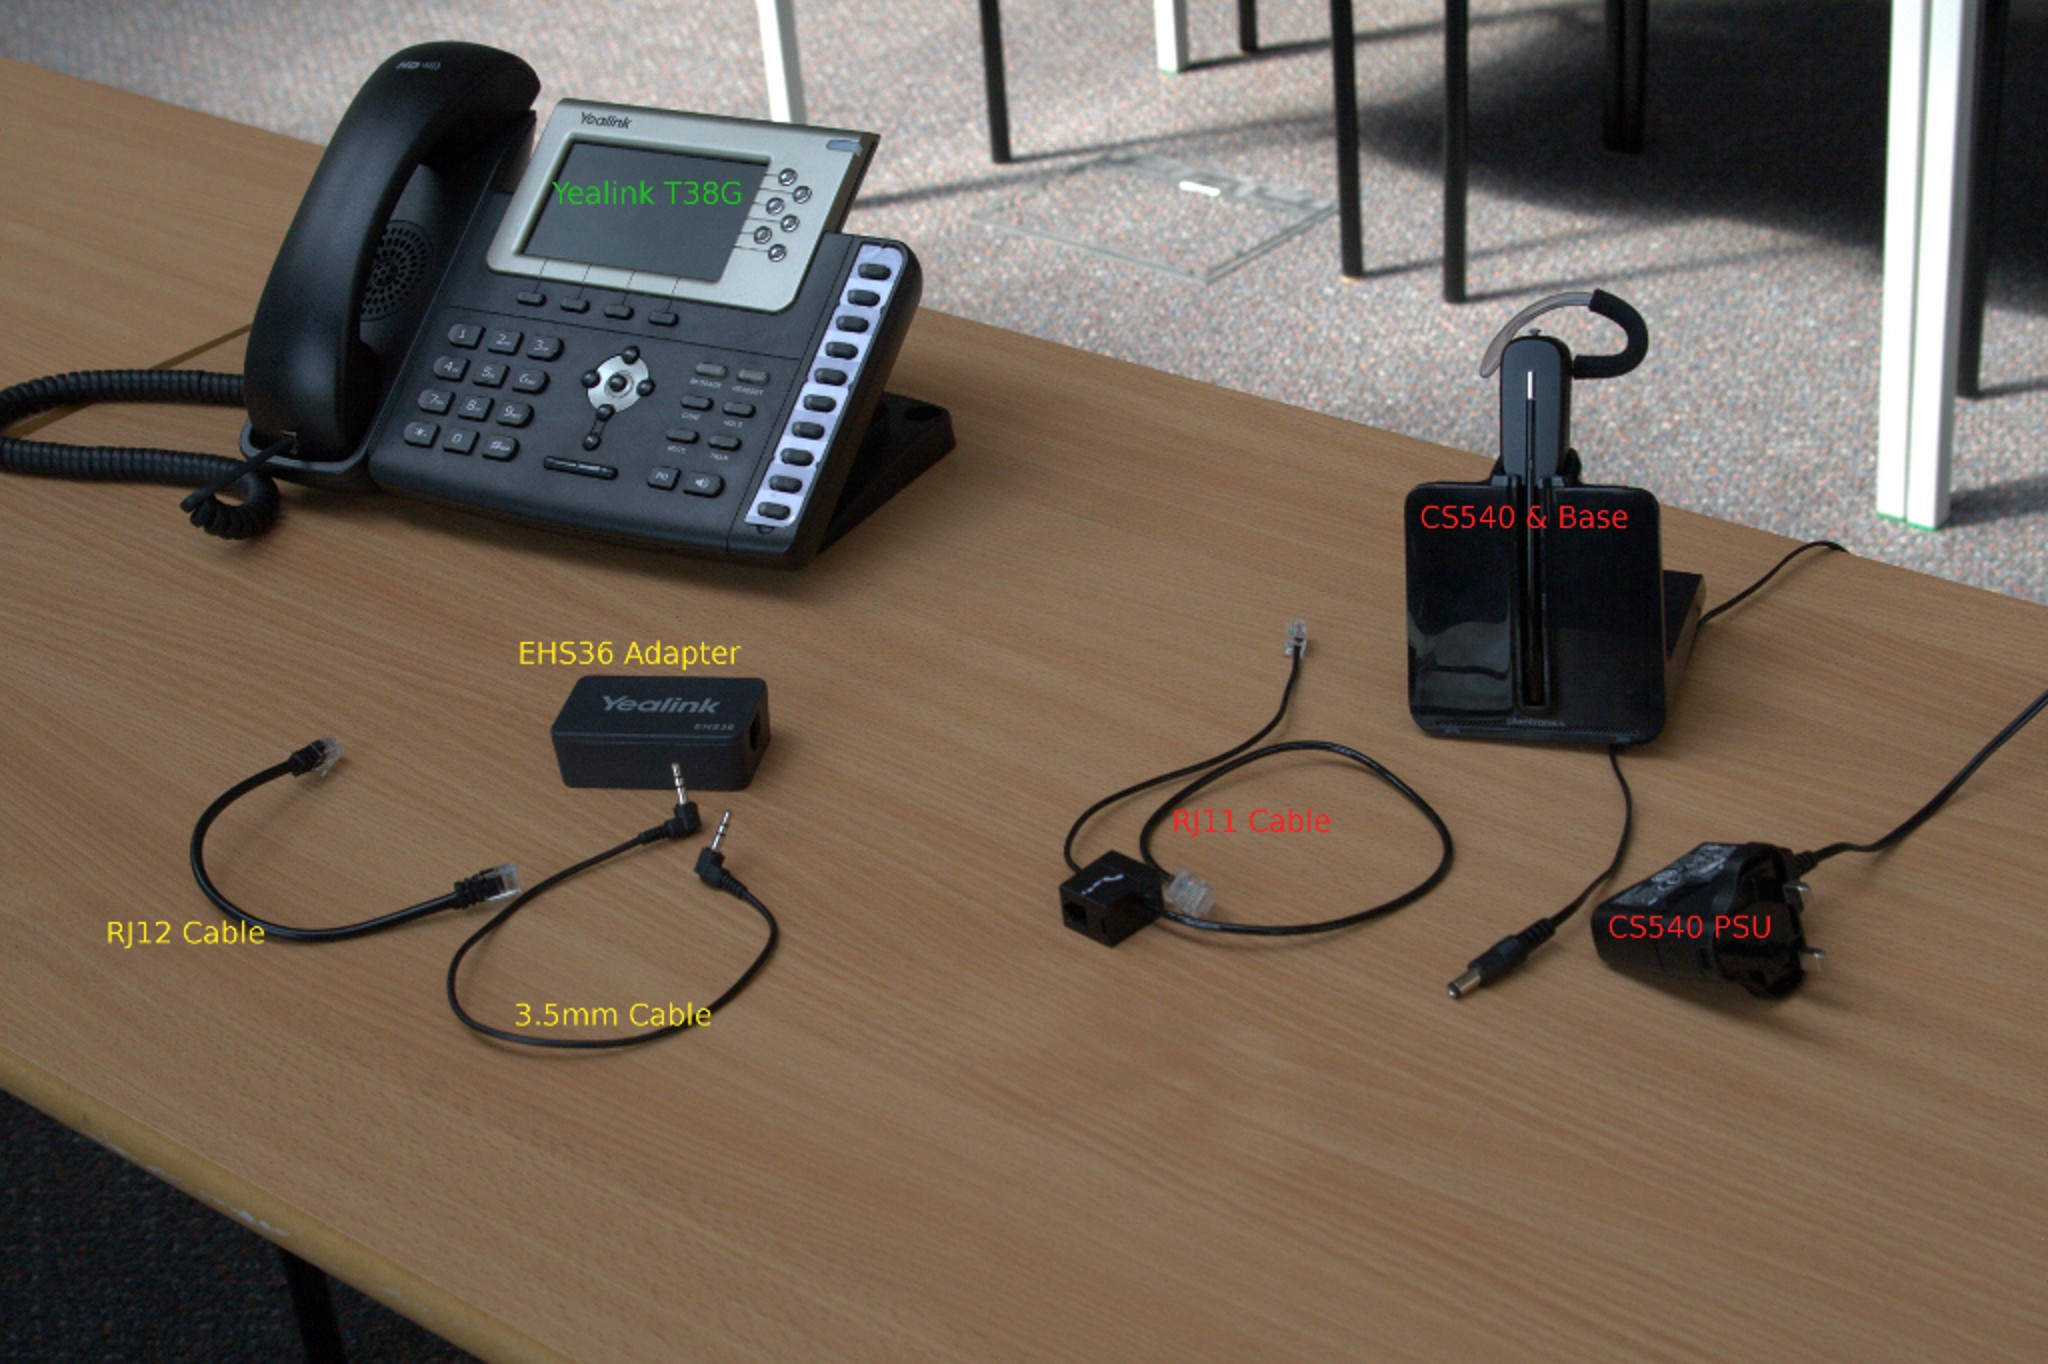
The image below shows the contents of each box that will be required for this setup. They have been labelled for ease of idenitification and grouped according to which box you will find them in -see the key below.

Green – Yealink T38G Box
Yellow – Yealink EHS36 Box
Red – Plantronics CS540 Box

Step 1:
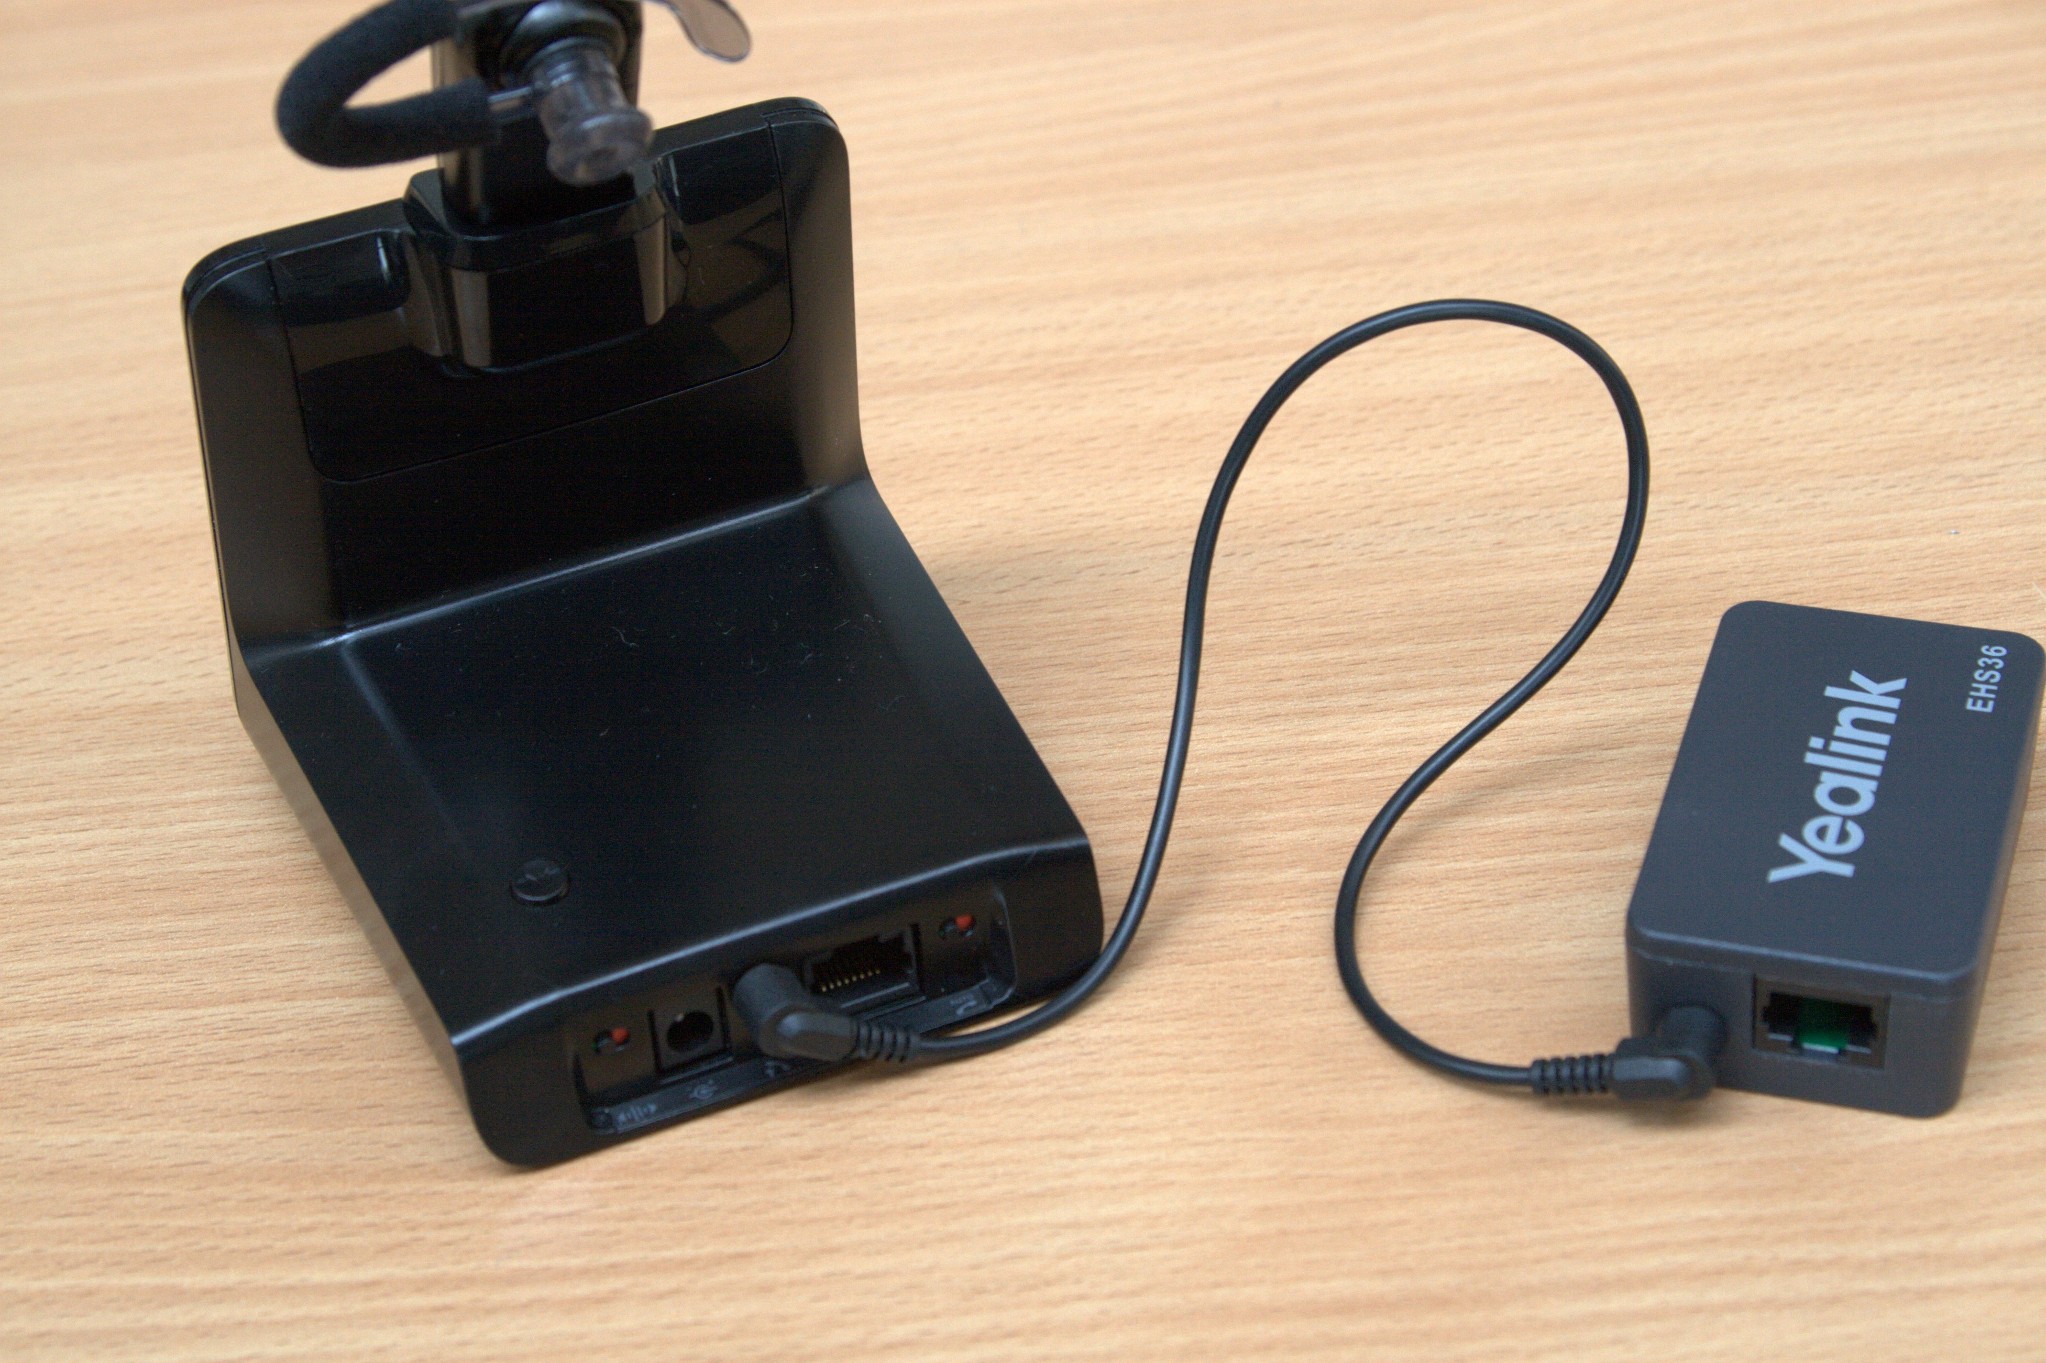
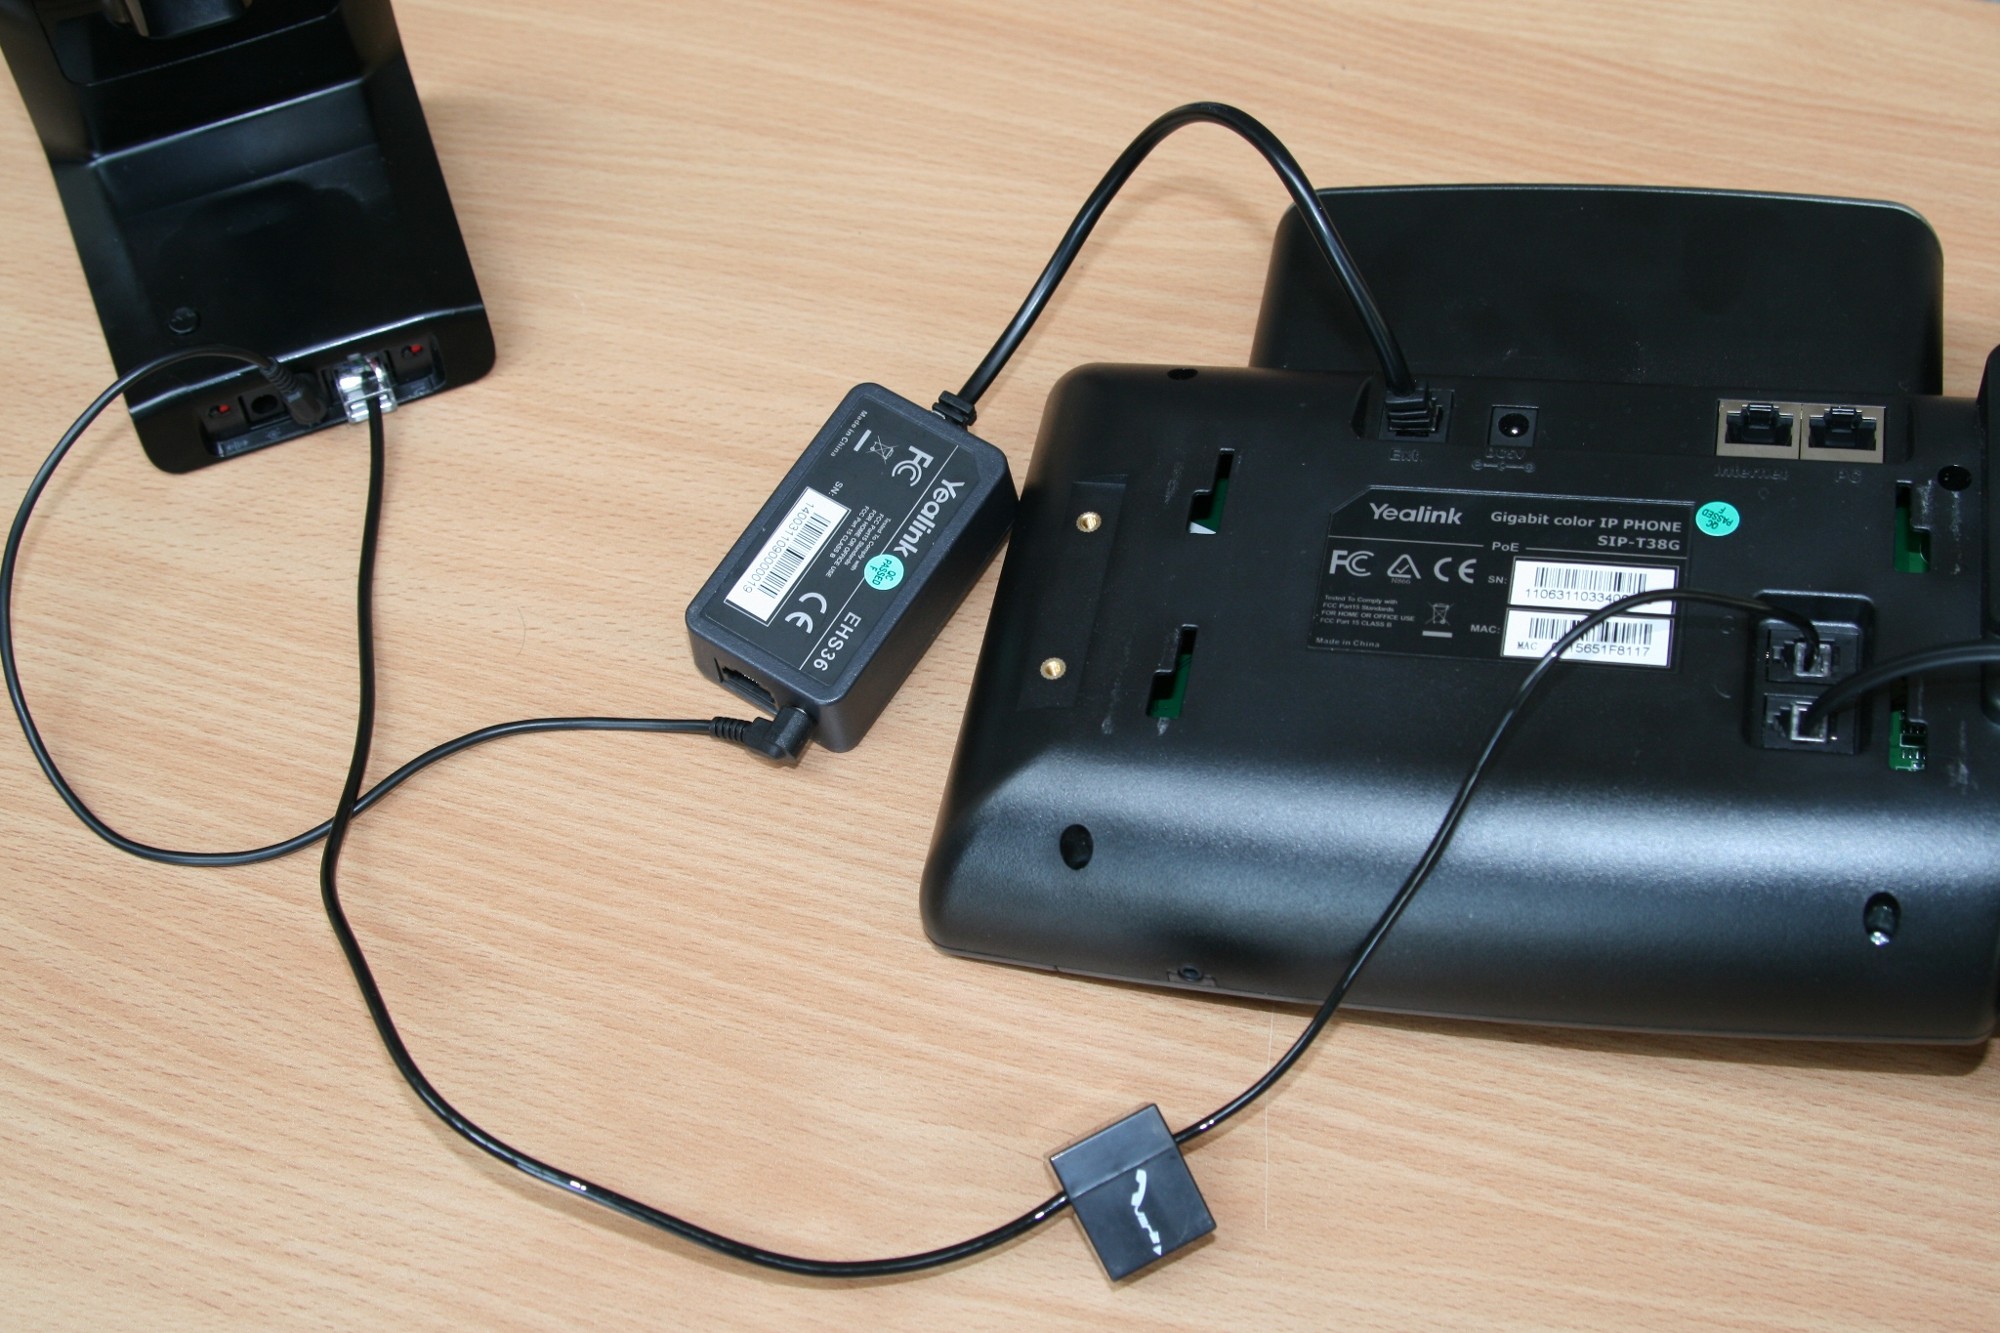
Once you have the correct parts ready, the next step is to connect the 3.5mm cable from the Plantronics base unit, to the EHS36 box. You can’t really go wrong here as they will only fit into one slot on each unit, but the picture below highlights where to connect them.

Step 2:
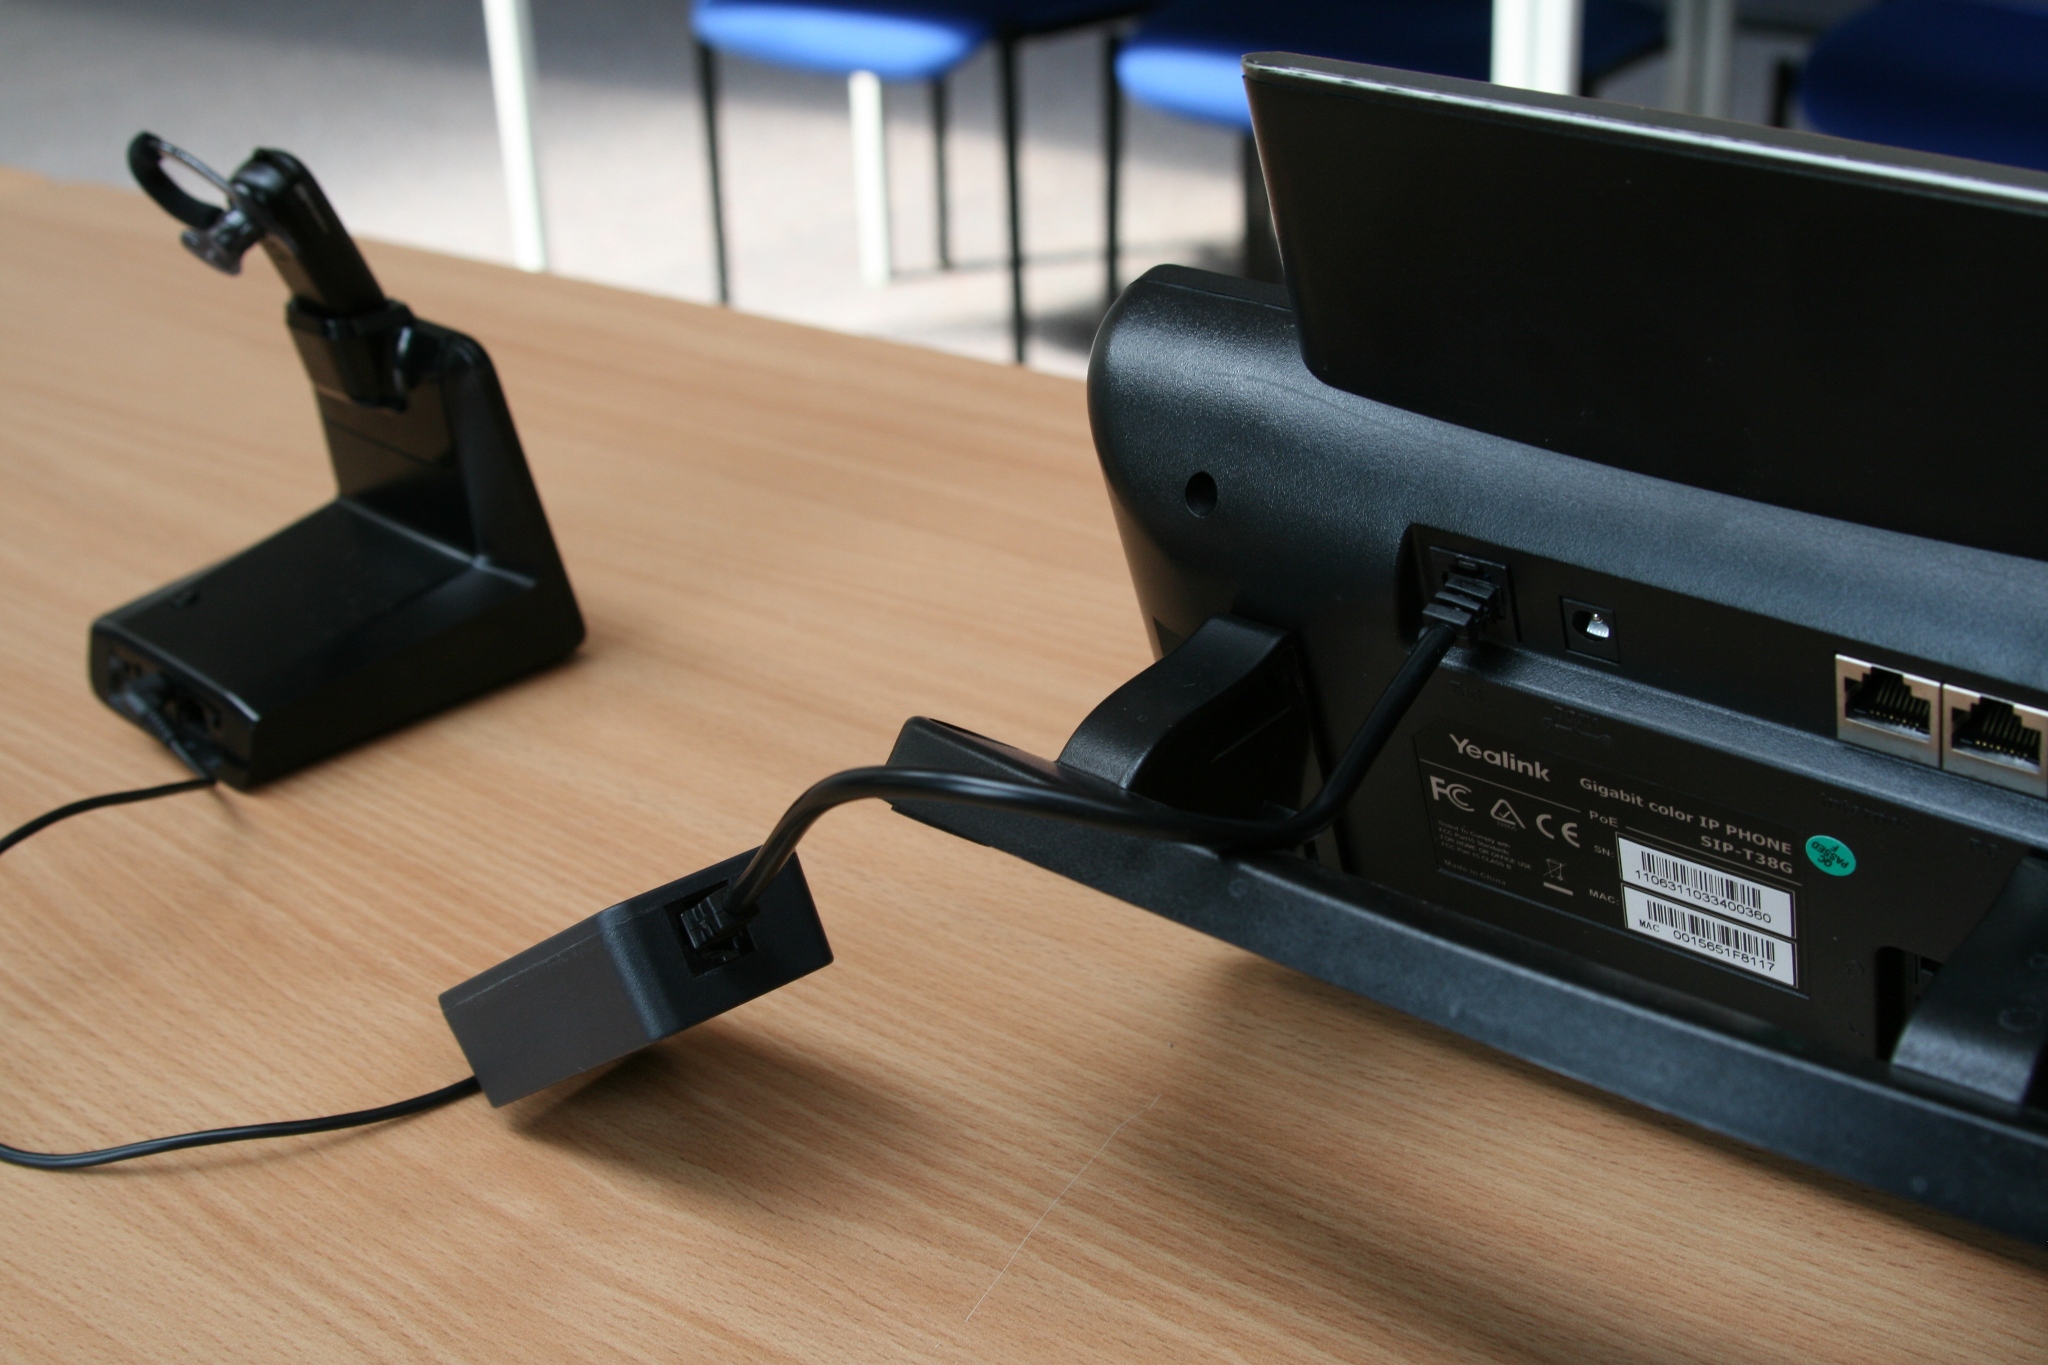
Connect the RJ12 cable from the EHS36 box to the EXT port on the back of the T38G. This port should be clearly labelled on the phone. See the picture below for illustration.

Step 3:
Connect the Plantronics RJ11 cable from the base unit to the Headset port on the back of the T38G. This port is labelled with a small headset icon, it is located next to the Receiver port, please make sure these are put into the correct slots. Again, the picture below shows how they should be connected.

That’s it! Power up the phone and the Plantronics base if you have not done so already. If this is a new purchase please allow a short time for the headset to charge before use. To charge simply place it onto the base in the very obvious slot.

If you have any problems after following this guide, please email support@provu.co.uk with details of your issue and a member of the technical team will be happy to advise.