If your Yealink device is in a boot loop or stuck on the Welcome initializing… Please Wait screen then you may need to preform a TFTP firmware recovery. This guide will show you how.
In the guide we will be using PumpKin TFTP Server but you can use any substitute you like.
Please note: ProVu are not liable for any issues caused by this download and please make sure that this is all setup on a LAN and not a WAN.
Step 1:
To acquire the firmware recovery files please contact support@provu.co.uk
Step 2:
Once you have the right firmware files you will need to setup your TFTP server.
Once you have downloaded and installed PumpKin from the link above you will be presented with the below page:
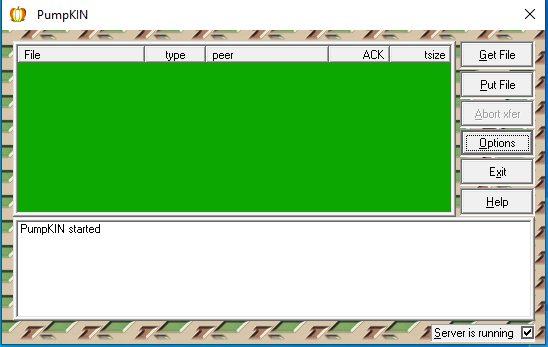
From here you will need to click on options which should bring up the following window:

On the above window you will need to set the TFTP filesystem root to the folder that you stored the firmware files in. In the example above I kept this in the Downloads folder but these can be stored anywhere you like.
You will also want to change the Read Request Behaviour to Give all files and the Write Request Behaviour to Take all files as shown in the screenshot above. Setting these options will allow the phone to request all the firmware files that it is looking for in the selected file path.
Once these have been set you can now click ‘OK‘ to save changes.
Step 3:
Putting your device into TFTP recovery mode. This may differ depending on what Yealink device you have so I have tried to cover them all in this guide for you.
T19, T2x, T3x, T4x, T5x
Step 1 – To recovery the above models you want to power off the device > press and hold the speakerphone button while powering on the device until you get to the following page:
Unless your phone has a USB port in which case you will see these 2 options before the above:
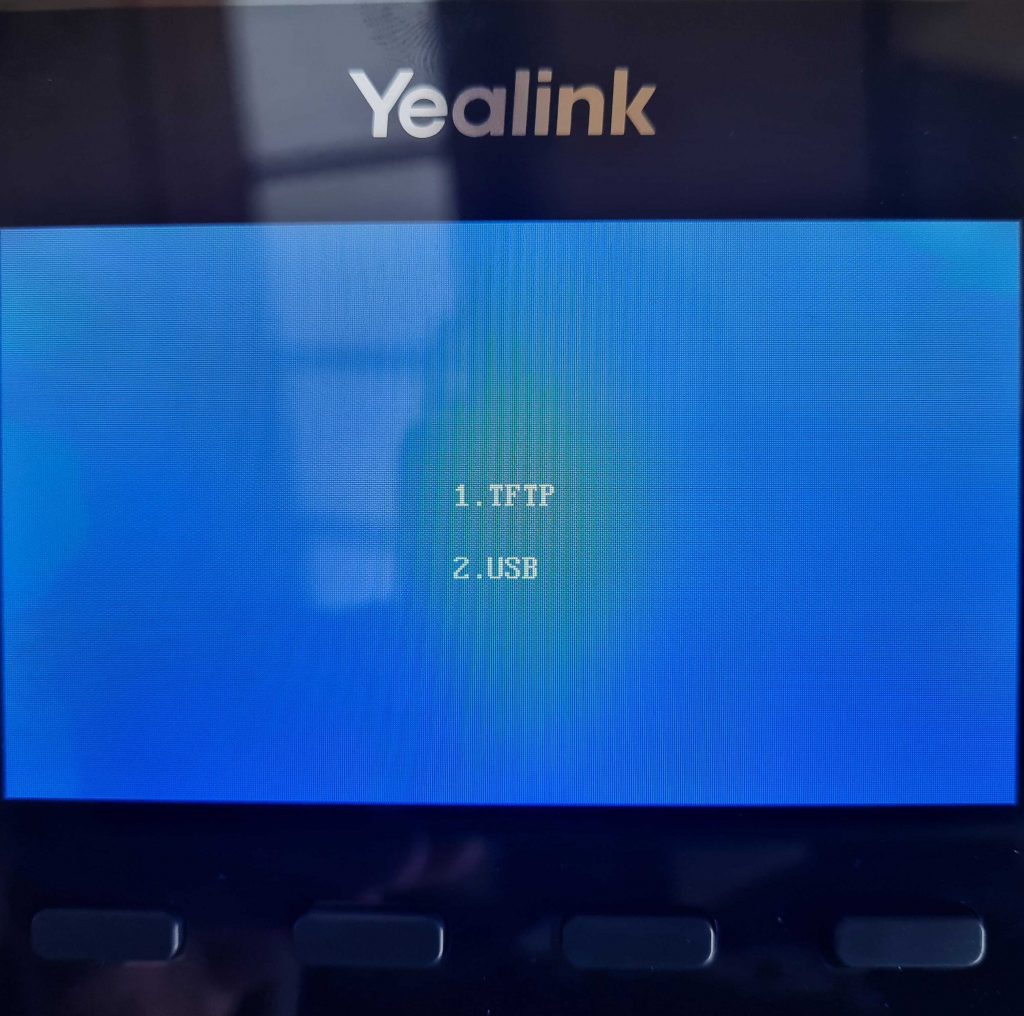
If you are presented with this page first then click on 1. TFTP option.
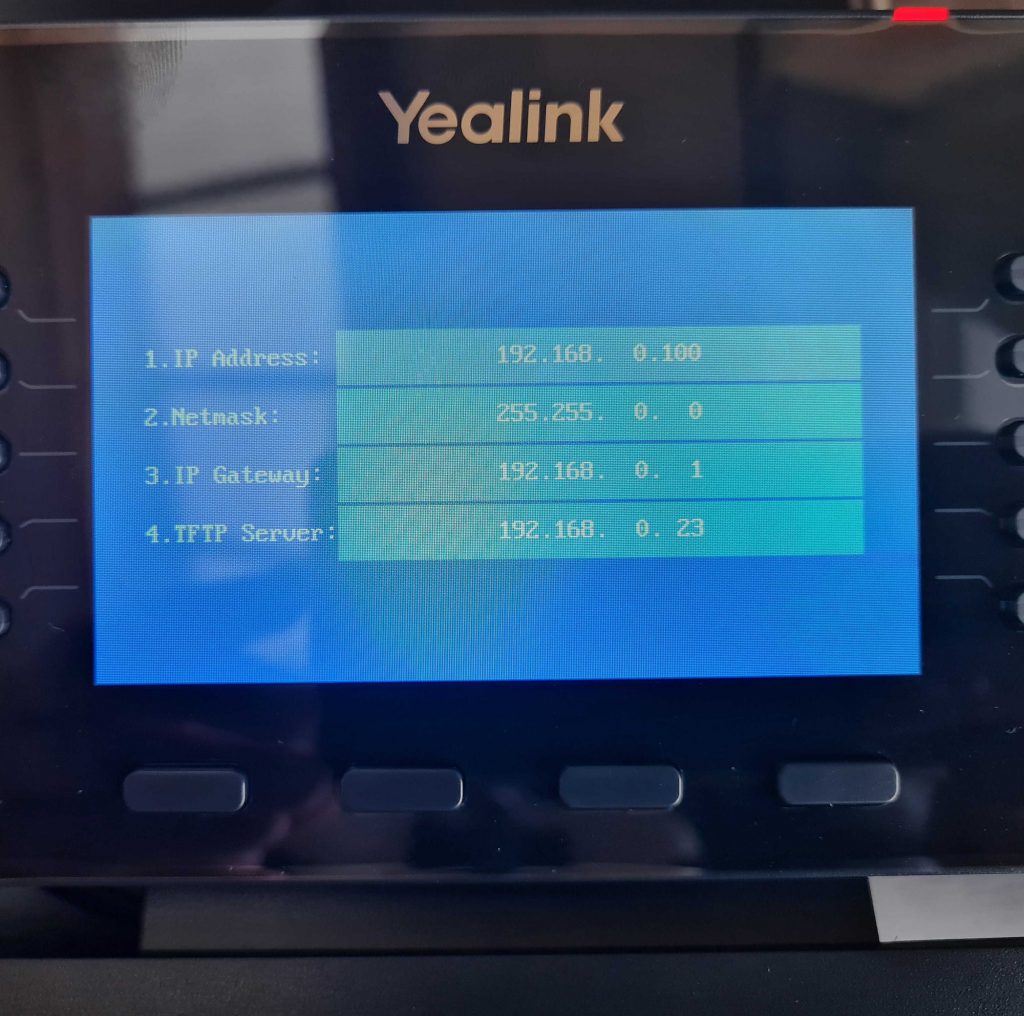
Step 2 – You should be on the page that has these four options:
- IP address
- Netmask
- IP Gateway
- TFTP Server
For these four options you will want to input the following:
- IP address – Any unused IP address that is available on your network.
- Netmask – For the netmask you will want to add the subnet mask of your network for example 255.255.255.0.
- Gateway – This will be the IP address of your router.
- TFTP Server – Finally this will be the IP address of the PC that is hosting PumpKin & Firmware files.
Once you have input these details press the ‘OK’ button on the handset, this will then start requesting the files that you downloaded and stored earlier.
Step 3 – Please note that this process can take a few minutes to complete. You should see Updating on the screen until eventually the phone reboots itself. If successful then once rebooted you should see the phones home screen as normal
If this was not successful then you should see a message such as Update failed, if that is the case then you will need to check your details and firmware file path and try again until successful.
W52P & W60B
Step 1 – To recover a DECT base station is a little different to a deskphone.
DECT equipment requests the files from a specific IP address so you will need to make sure that your PC that is hosting PumpKin is configured with the following information as per below:

Step 2 – During the recovery the base station should get an IP address of 192.168.0.100 and will request the firmware files from the IP address above (192.168.0.23)
To put the base station into recovery mode you will need to unplug the unit press and hold the paging button (only button on the base station) and power on the device while still holding the paging button until all the lights turn on one by one (Power, Network & Phone/Dect)
Step 3 – Just like the deskphone this will take a few minutes to complete. Once successfully complete the base should reboot and all lights on the base should be solid. The device should now get an IP address via DHCP and can now be accessible.
If you have any problems/issues with any of the above please contact support@provu.co.uk or call 01484 840048 option 2 for support.