If you have recently adopted a Technicolor router on to Prosys then you will need to follow the below steps to get your router up and running on our provisioning server.
If you are adopting a DGA0122 then you will need to download this specific firmware version here.
Step 1:
Login to the web interface of your Technicolor router using the Engineer details below:
Username = engineer
Password = (Access key found on the back of the router)
If router model isn’t a DGA0122 then skip the next 2 steps and go to Step 4.
Step 2:
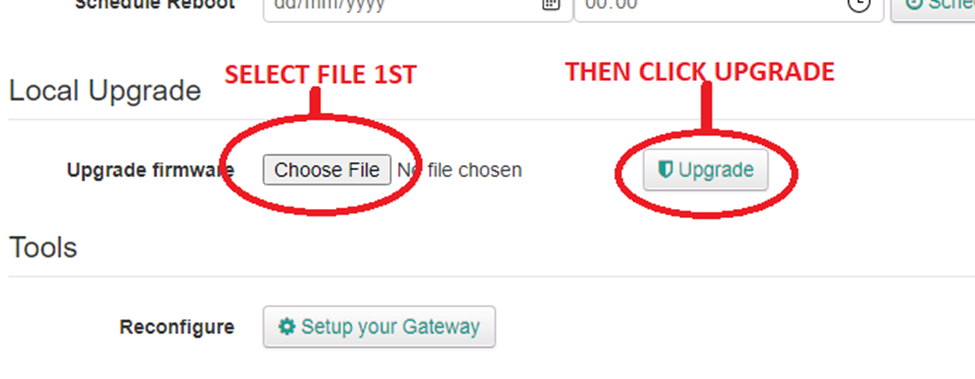
Once logged in go to System Info > Configuration tab > Local Upgrade > Choose File > Upgrade as shown below:
Step 3:
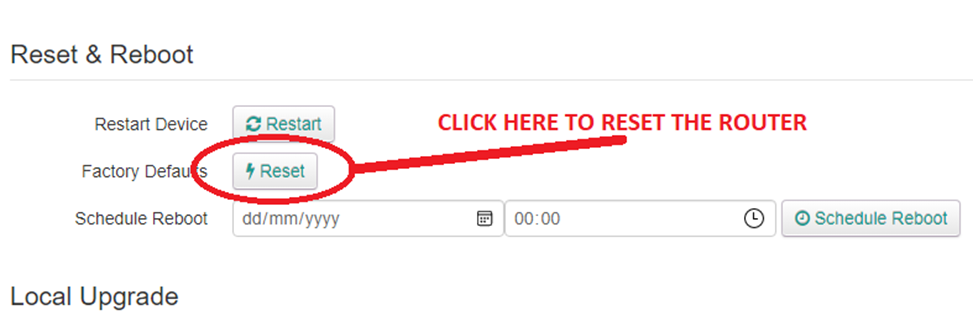
Once the upgrade has been completed you will need to factory reset the router by logging back in as engineer and going to > System Info > Configuration tab > and click Reset.
Step 4:
Time to put our provisioning URL into the router.
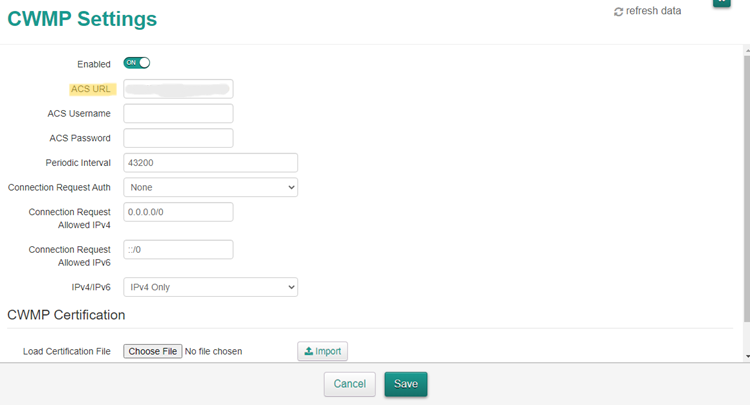
Once logged in as engineer go to CWMP, this will take you to the TR069 page.
In the ACS URL field enter your provisioning server URL and then click save and your done.
If you have any issues please either email support@provu.co.uk or call 01484840048 option 2 for support.
Hold press the power key on BH72 about 5s to enter the pairing mode. The power light will flash red and green.
Step 3:
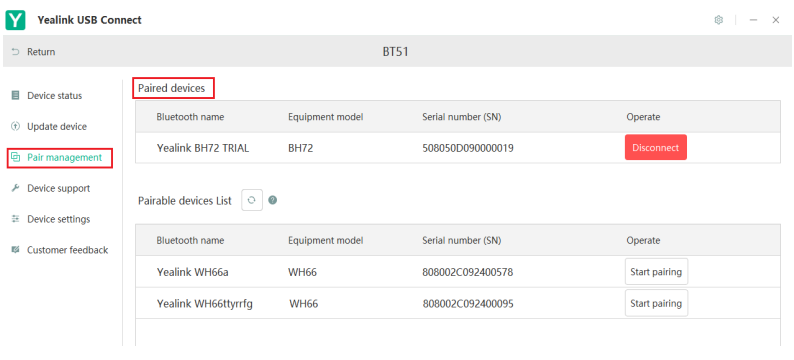
Click the Pair management of BT51 in Yealink USB Connect, click Refresh in the list of Pairable devices List, select the Bluetooth name of the headset and click Start pairing.
If it is paired successfully, it will be shown in Paired devices list.
Note:
You need to take out the BT51 and BH72 headset to pair one by one, then put the BH72 and BT51 back to the original box accordingly after being paired.
If your Yealink device is in a boot loop or stuck on the Welcome initializing… Please Wait screen then you may need to preform a TFTP firmware recovery. This guide will show you how.
In the guide we will be using PumpKin TFTP Server but you can use any substitute you like.
Please note: ProVu are not liable for any issues caused by this download and please make sure that this is all setup on a LAN and not a WAN.
Step 1:
To acquire the firmware recovery files please contact support@provu.co.uk
Step 2:
Once you have the right firmware files you will need to setup your TFTP server.
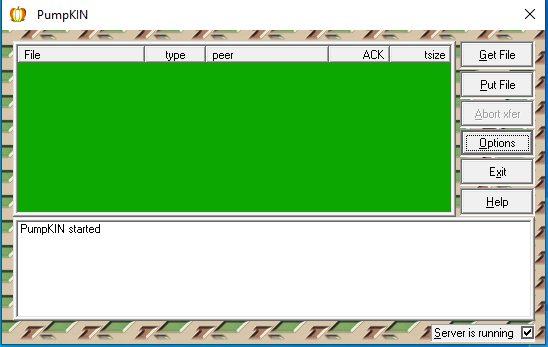
Once you have downloaded and installed PumpKin from the link above you will be presented with the below page:
From here you will need to click on options which should bring up the following window:
On the above window you will need to set the TFTP filesystem root to the folder that you stored the firmware files in. In the example above I kept this in the Downloads folder but these can be stored anywhere you like.
You will also want to change the Read Request Behaviour to Give all files and the Write Request Behaviour to Take all files as shown in the screenshot above. Setting these options will allow the phone to request all the firmware files that it is looking for in the selected file path.
Once these have been set you can now click ‘OK‘ to save changes.
Step 3:
Putting your device into TFTP recovery mode. This may differ depending on what Yealink device you have so I have tried to cover them all in this guide for you.
T19, T2x, T3x, T4x, T5x
Step 1 – To recovery the above models you want to power off the device > press and hold the speakerphone button while powering on the device until you get to the following page:
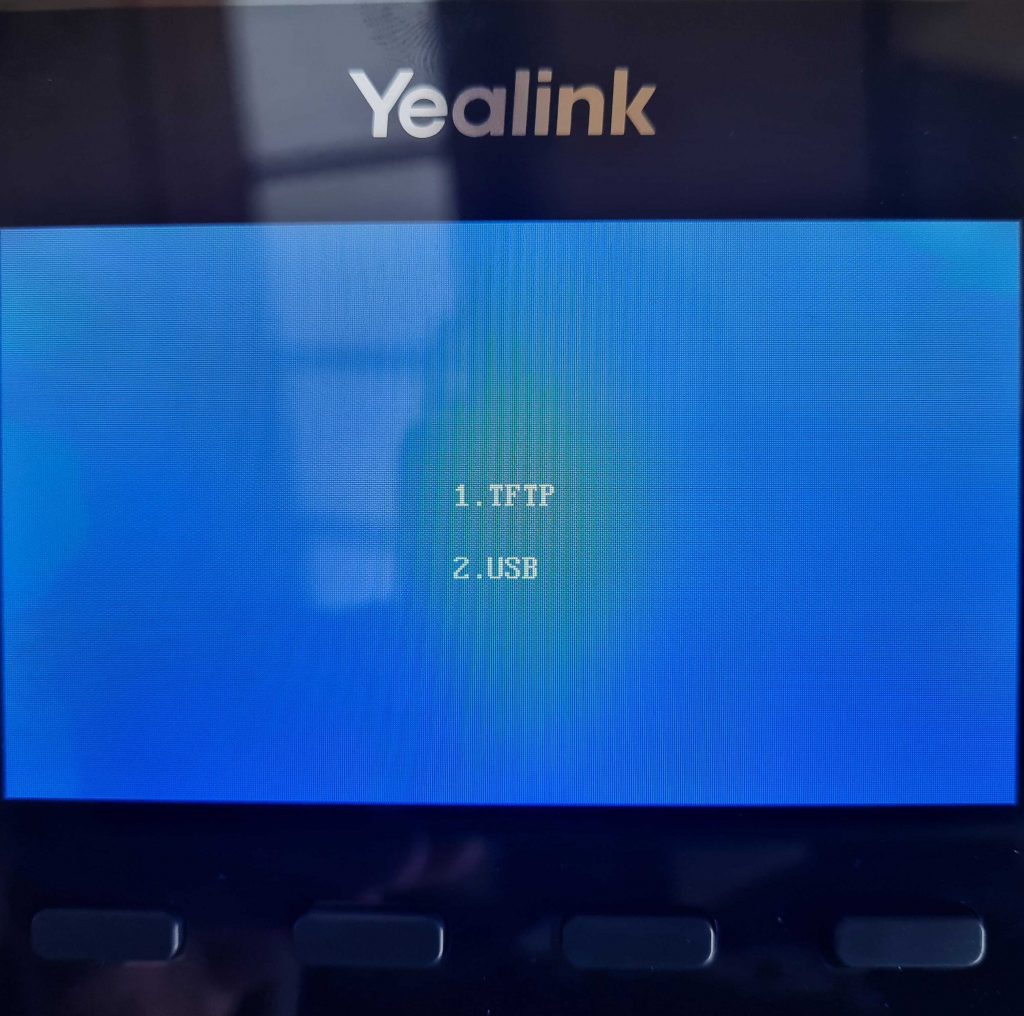
Unless your phone has a USB port in which case you will see these 2 options before the above:
If you are presented with this page first then click on 1. TFTP option.
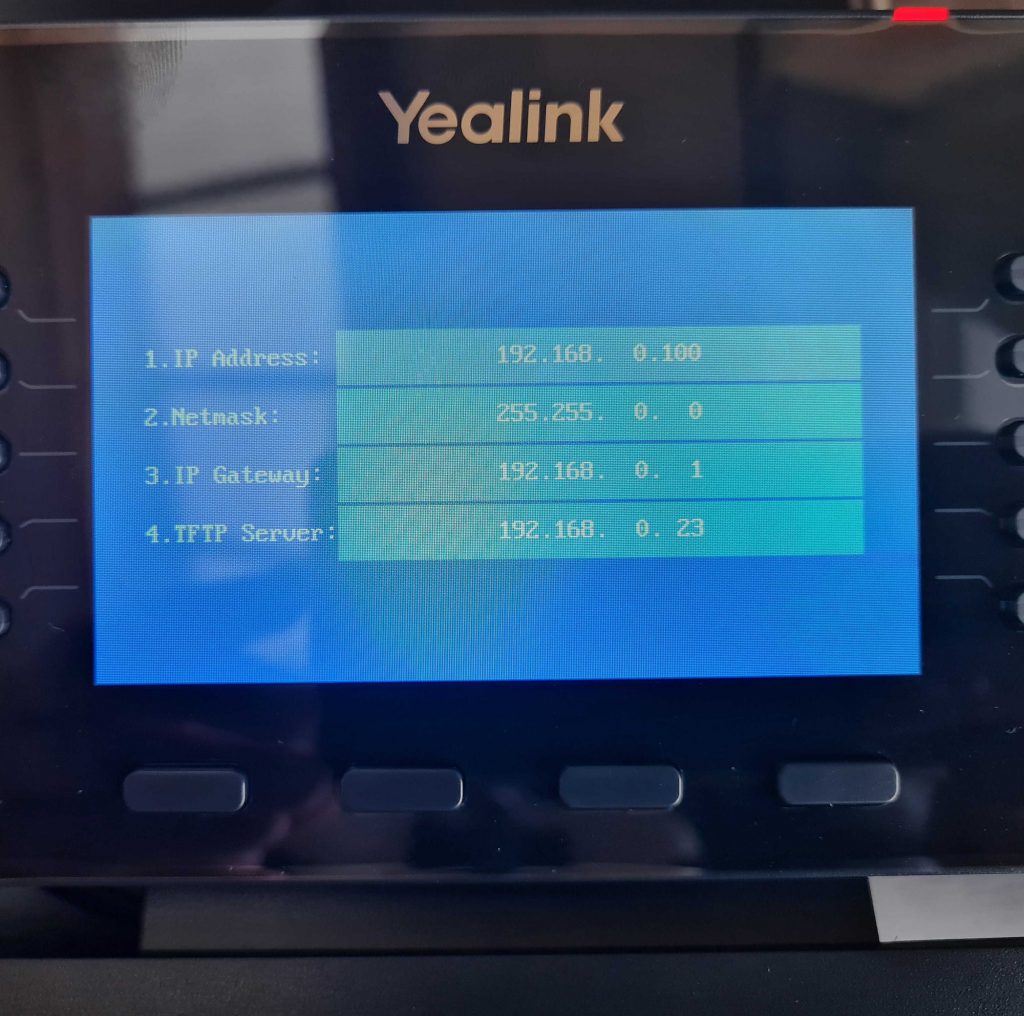
Step 2 – You should be on the page that has these four options:
IP address
Netmask
IP Gateway
TFTP Server
For these four options you will want to input the following:
IP address – Any unused IP address that is available on your network.
Netmask – For the netmask you will want to add the subnet mask of your network for example 255.255.255.0.
Gateway – This will be the IP address of your router.
TFTP Server– Finally this will be the IP address of the PC that is hosting PumpKin & Firmware files.
Once you have input these details press the ‘OK’ button on the handset, this will then start requesting the files that you downloaded and stored earlier.
Step 3 – Please note that this process can take a few minutes to complete. You should see Updating on the screen until eventually the phone reboots itself. If successful then once rebooted you should see the phones home screen as normal
If this was not successful then you should see a message such as Update failed, if that is the case then you will need to check your details and firmware file path and try again until successful.
W52P & W60B
Step 1 – To recover a DECT base station is a little different to a deskphone.
DECT equipment requests the files from a specific IP address so you will need to make sure that your PC that is hosting PumpKin is configured with the following information as per below:
Step 2 – During the recovery the base station should get an IP address of 192.168.0.100 and will request the firmware files from the IP address above (192.168.0.23)
To put the base station into recovery mode you will need to unplug the unit press and hold the paging button (only button on the base station) and power on the device while still holding the paging button until all the lights turn on one by one (Power, Network & Phone/Dect)
Step 3 – Just like the deskphone this will take a few minutes to complete. Once successfully complete the base should reboot and all lights on the base should be solid. The device should now get an IP address via DHCP and can now be accessible.
If you have any problems/issues with any of the above please contact support@provu.co.uk or call 01484 840048 option 2 for support.
The steps below will show you how to enable EHS both through the phones interface and the web interface on your Fanvil phone.
Phone Interface
Step 1:
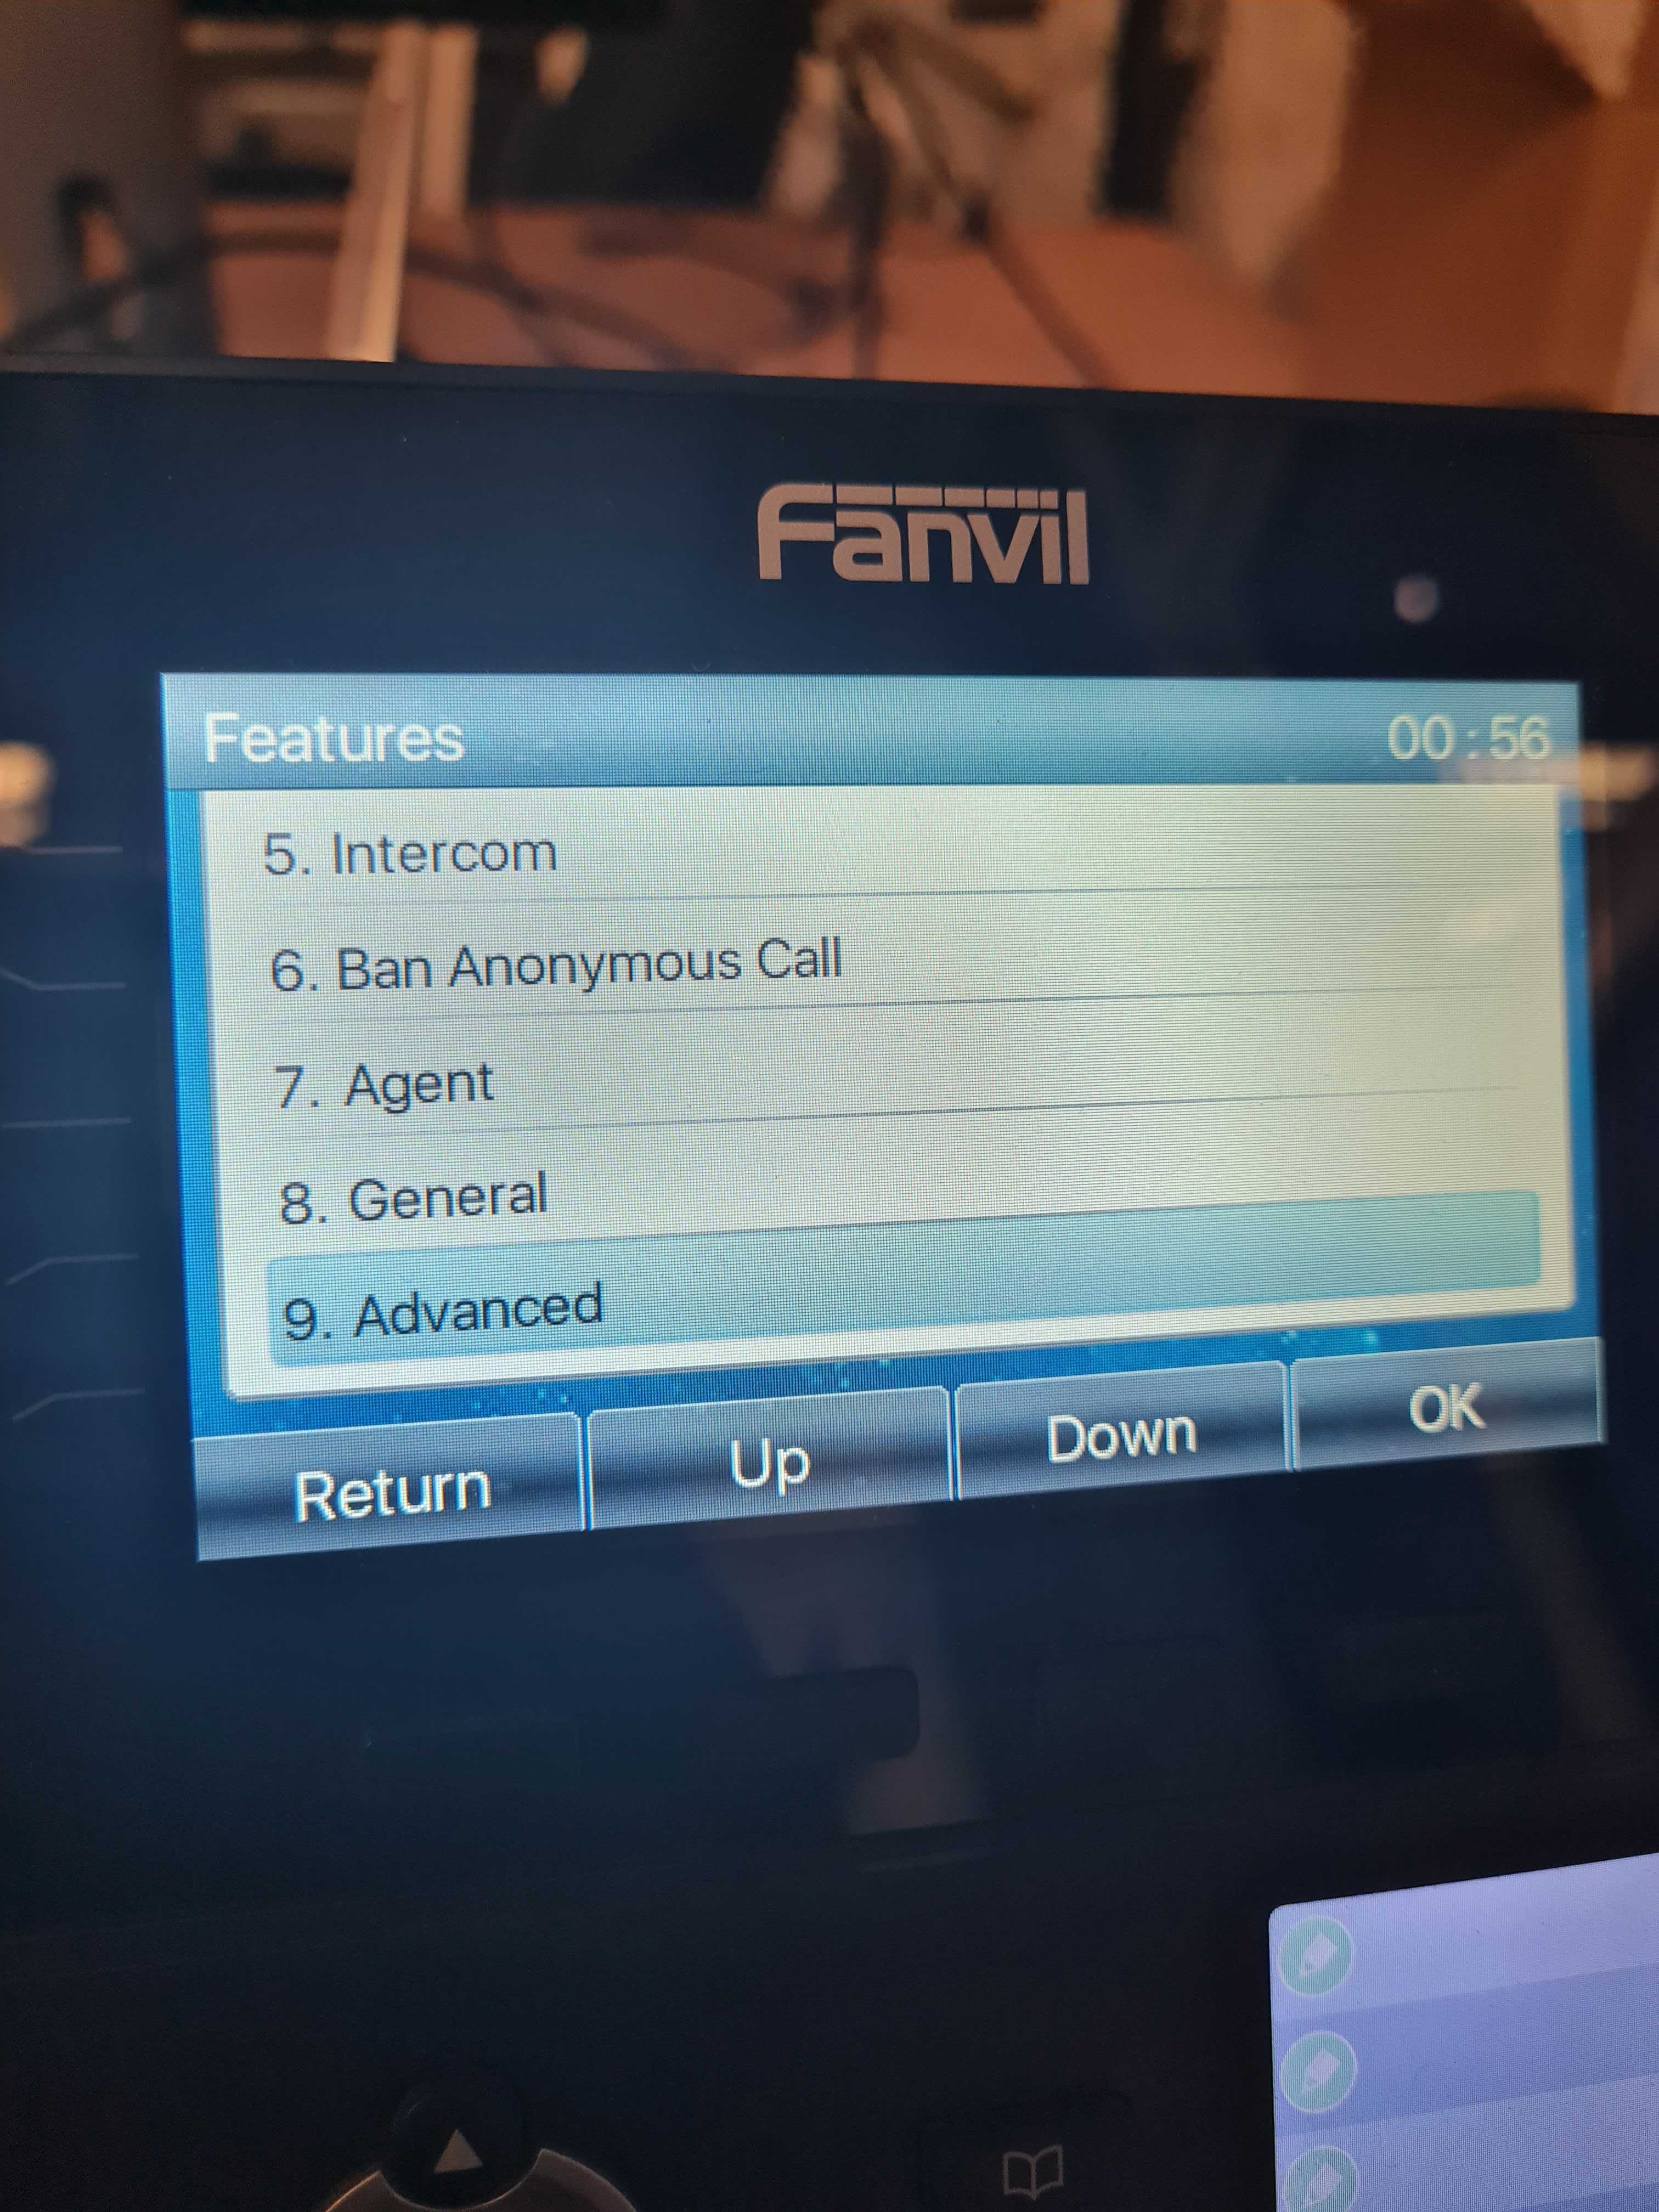
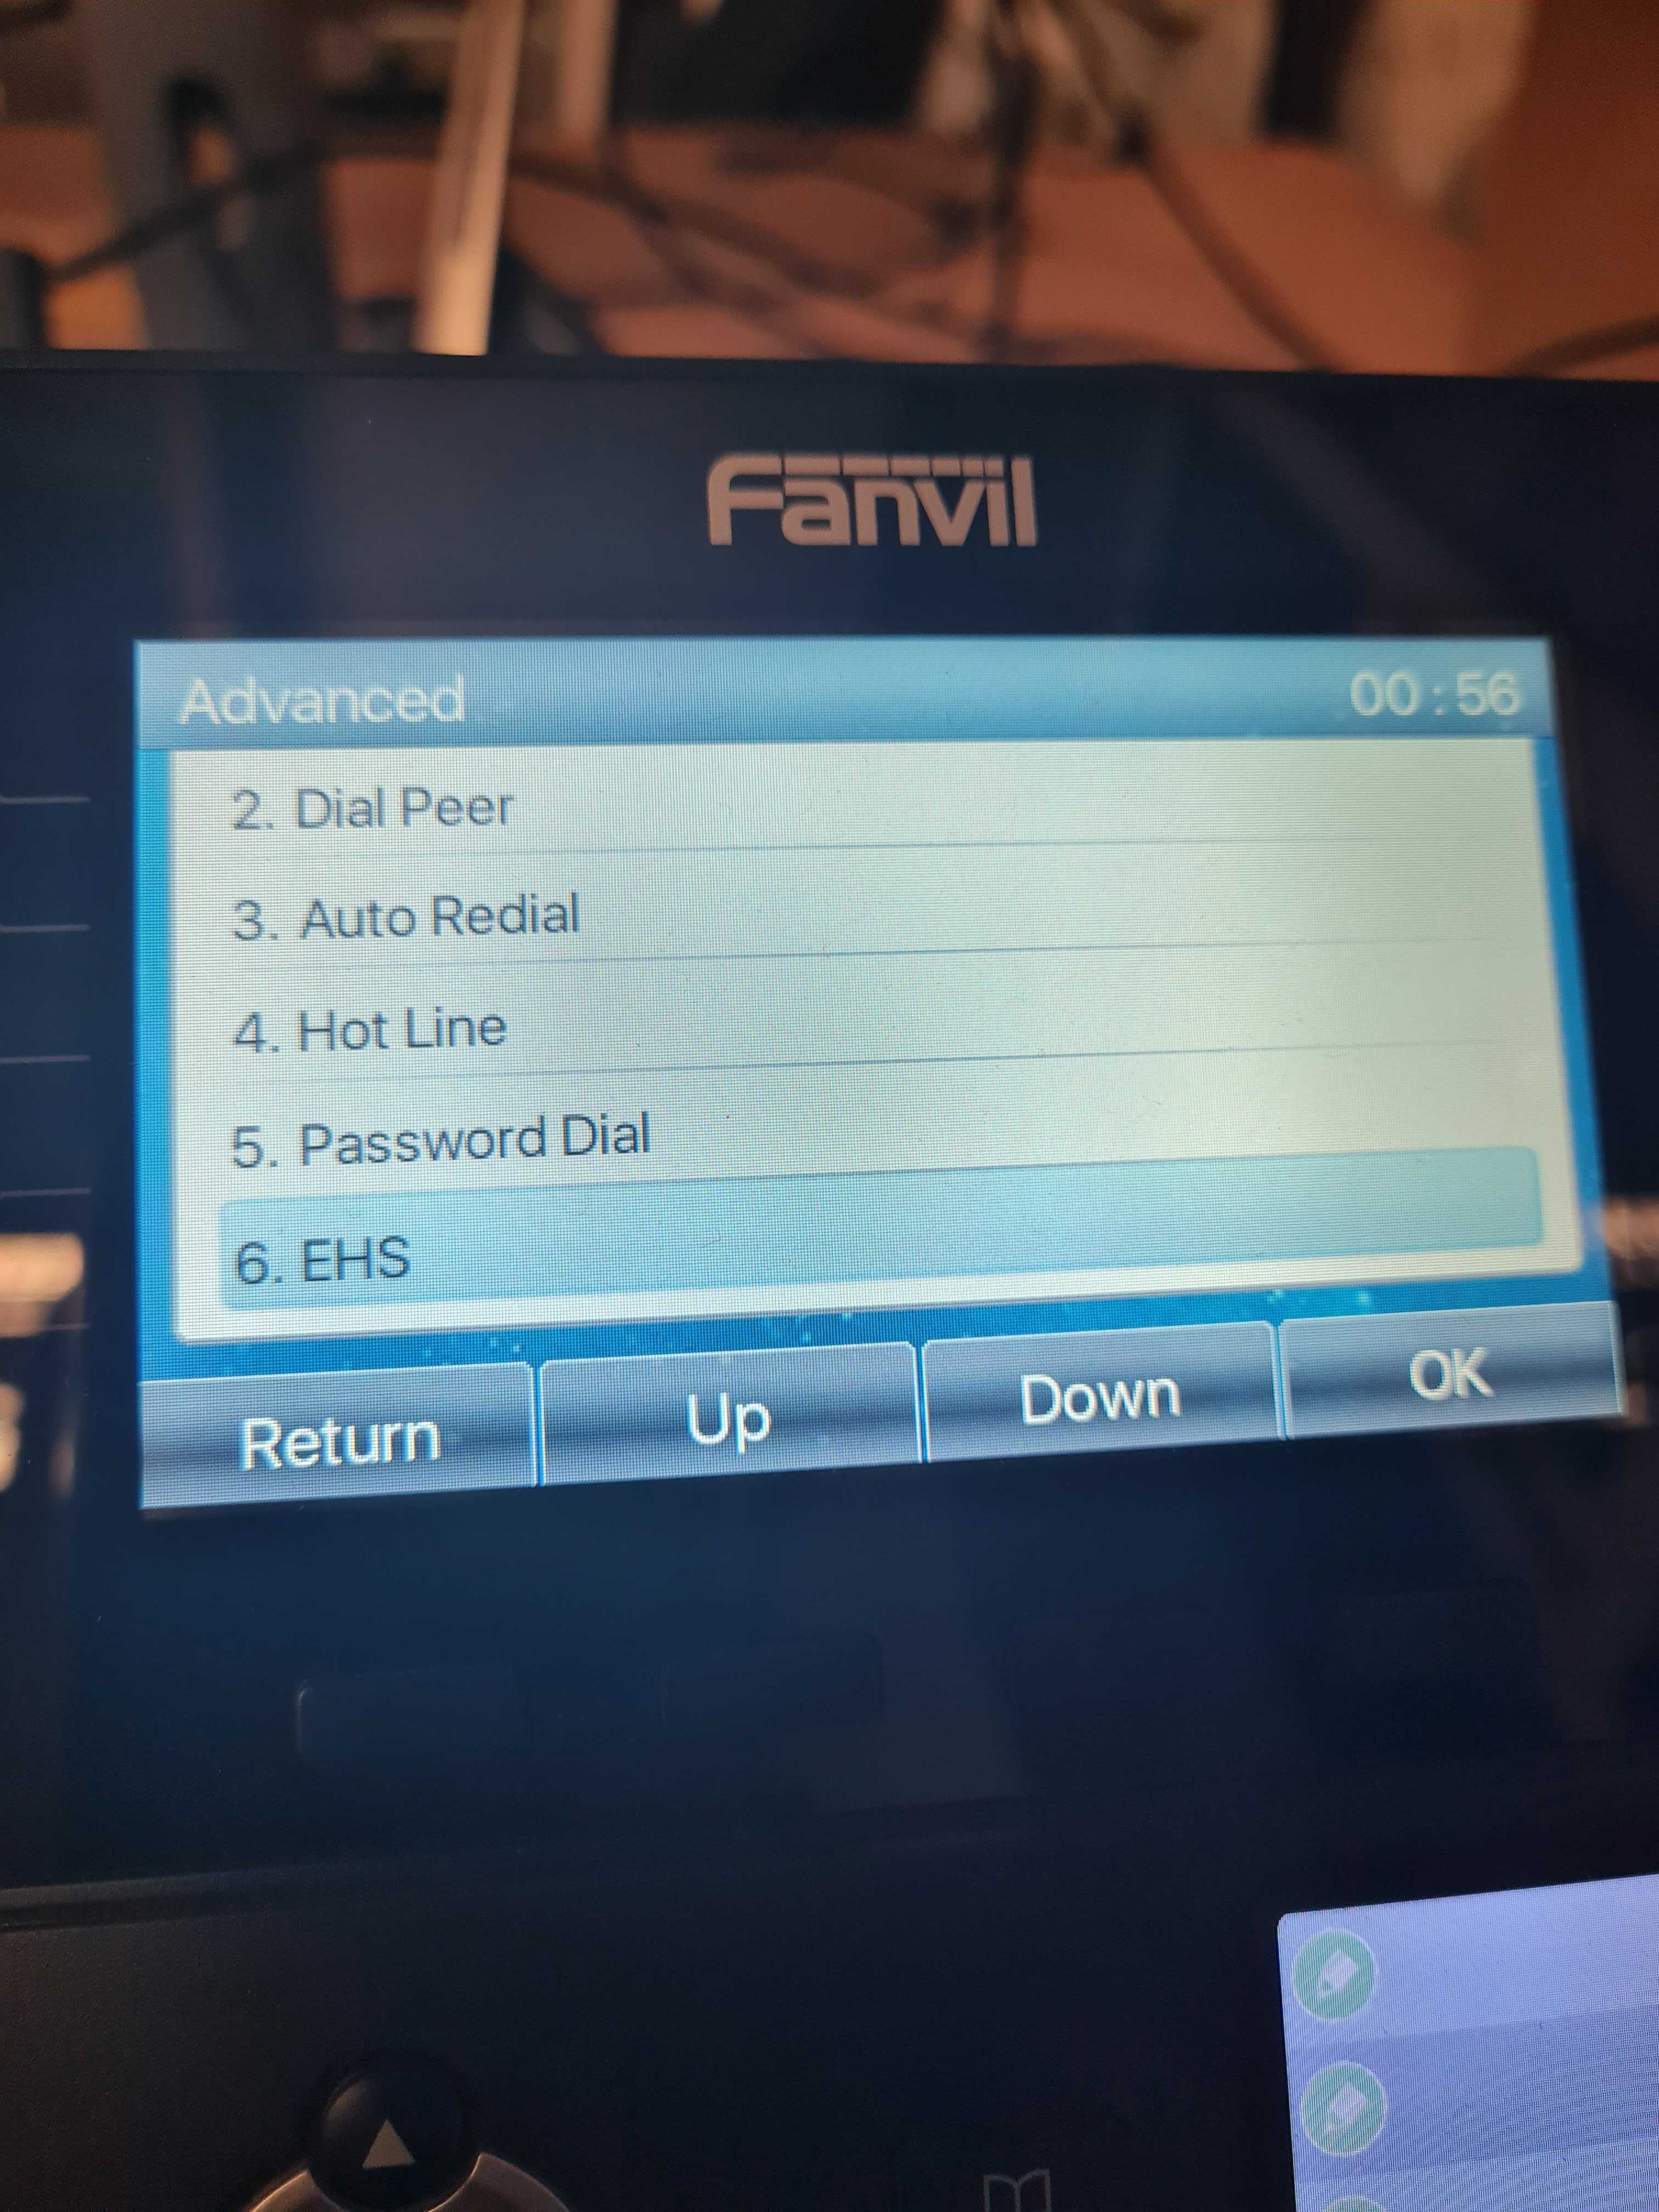
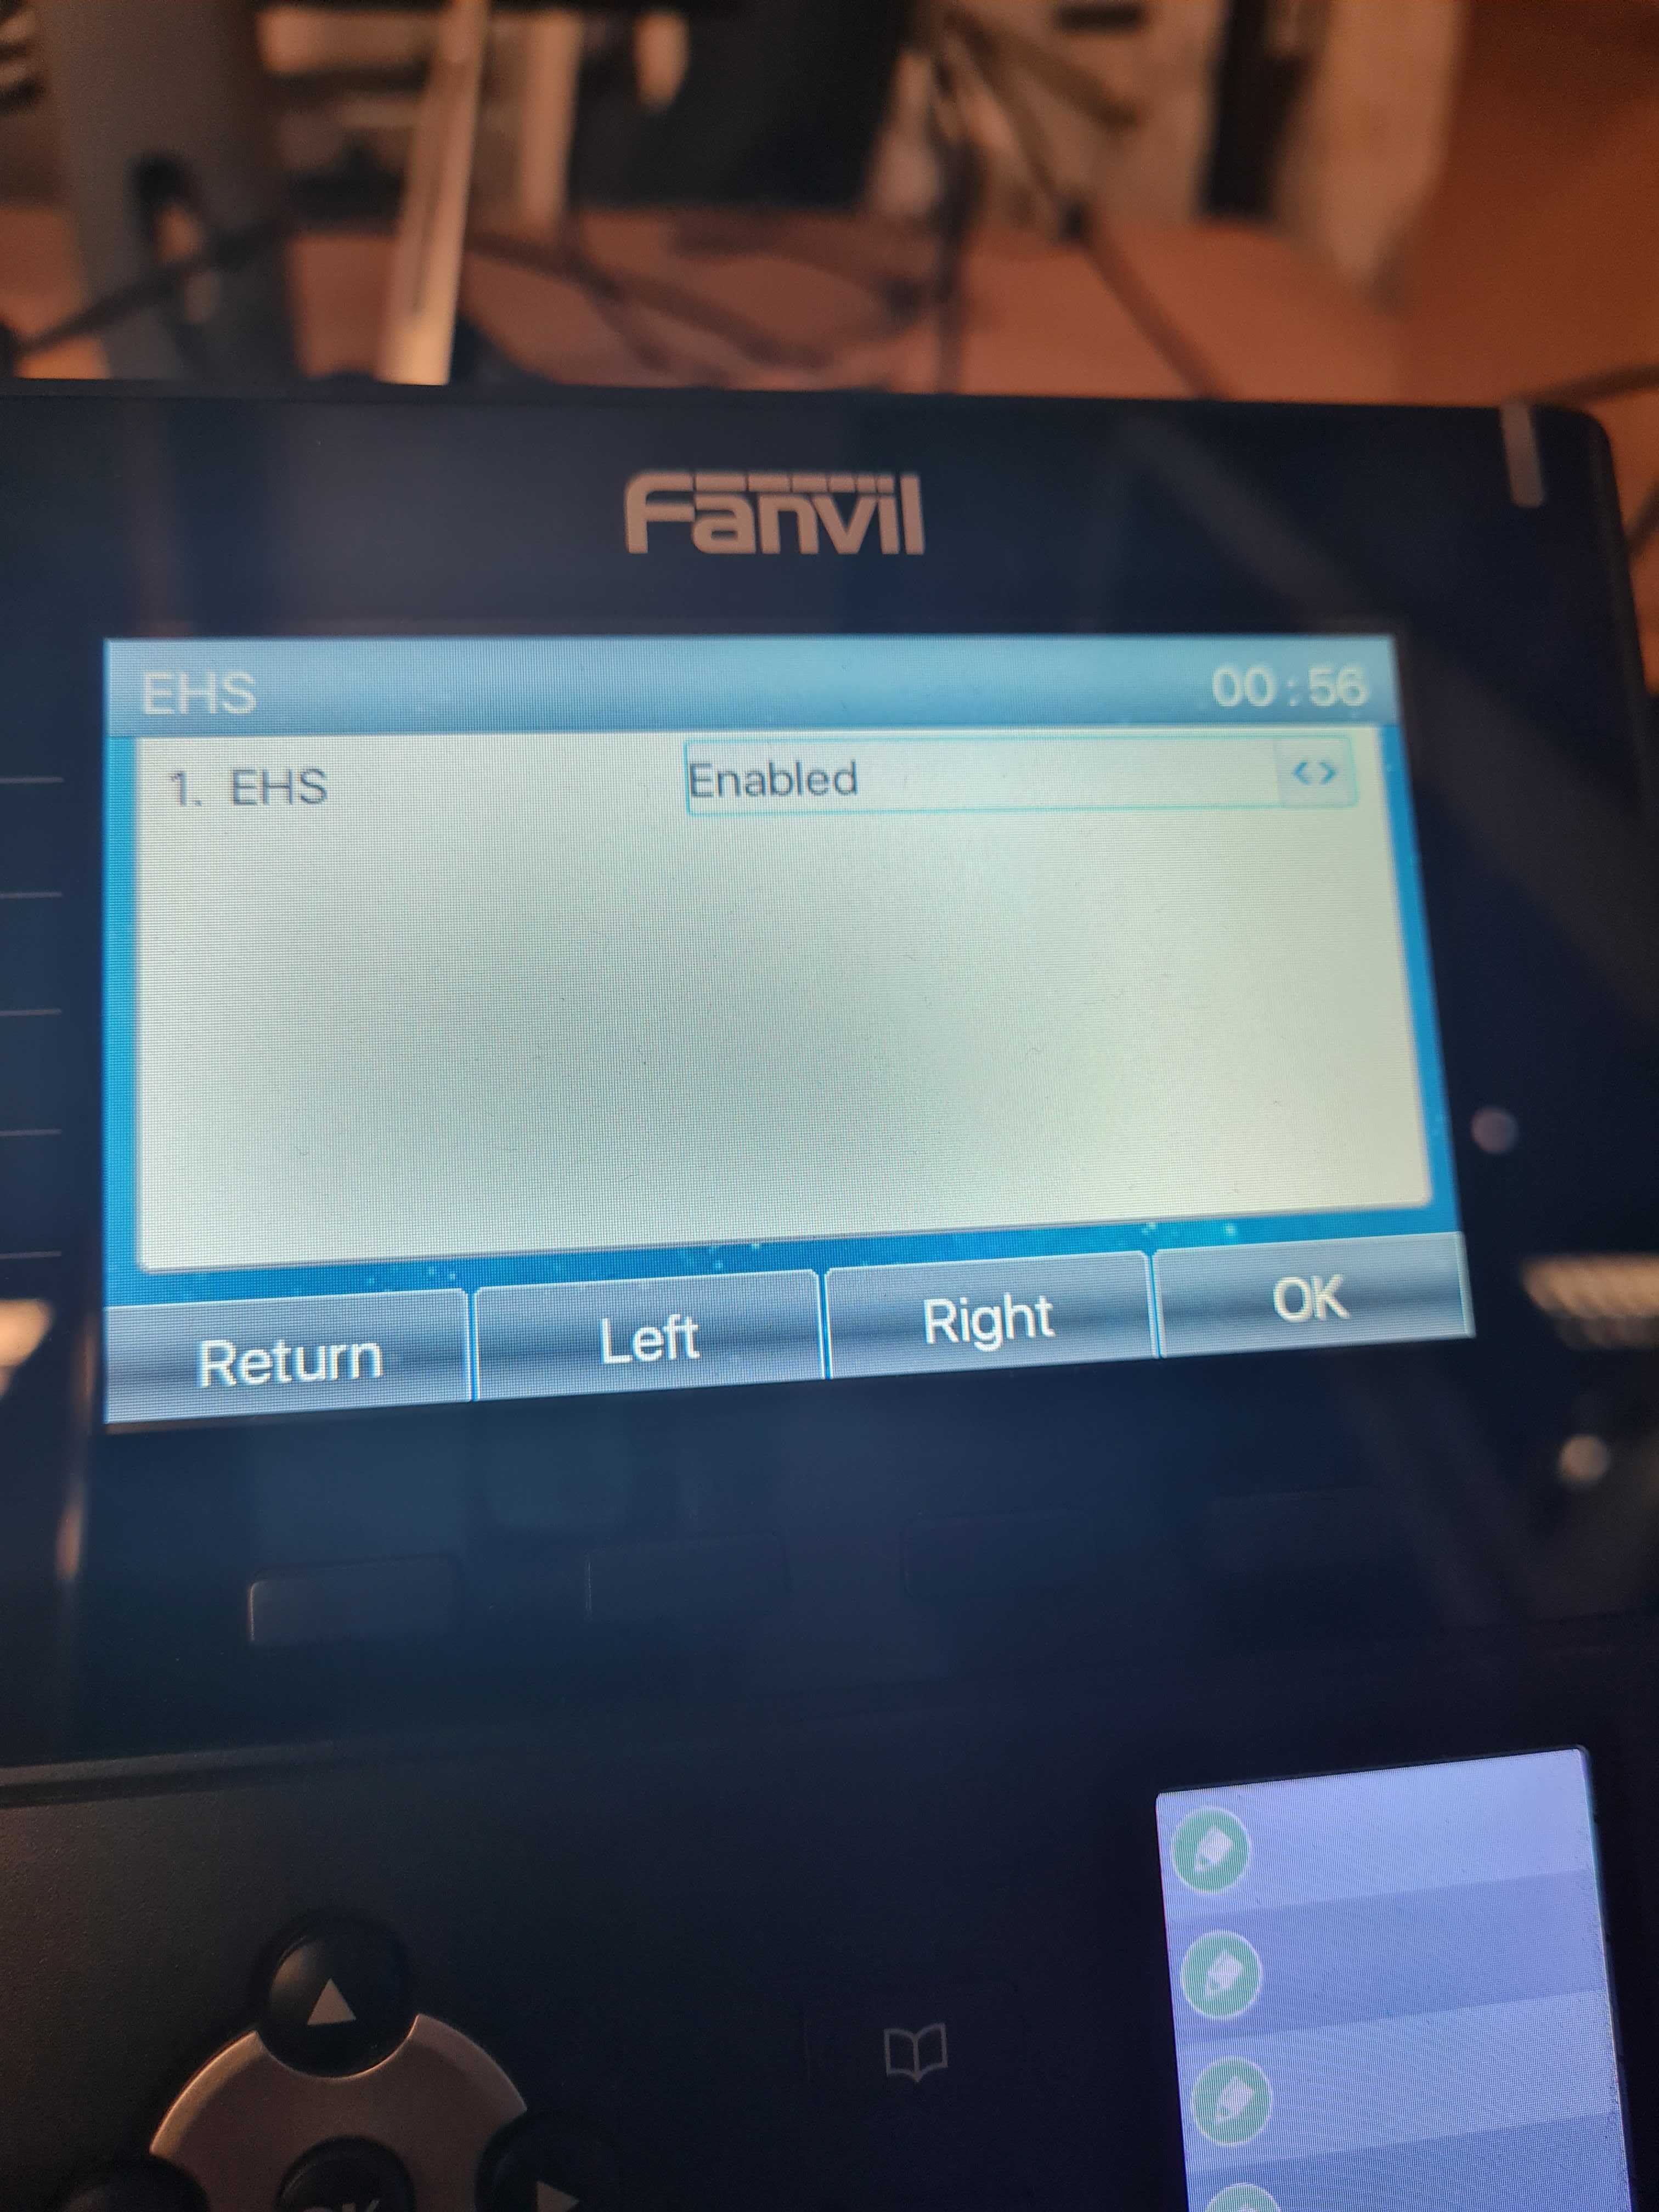
Go to Menu > Features > Advanced > EHS as shown below:
Step 2:
Using the right arrow key set the EHS option to ‘Enabled‘ and press ‘OK‘ to save changes:
Web Interface
Step 1:
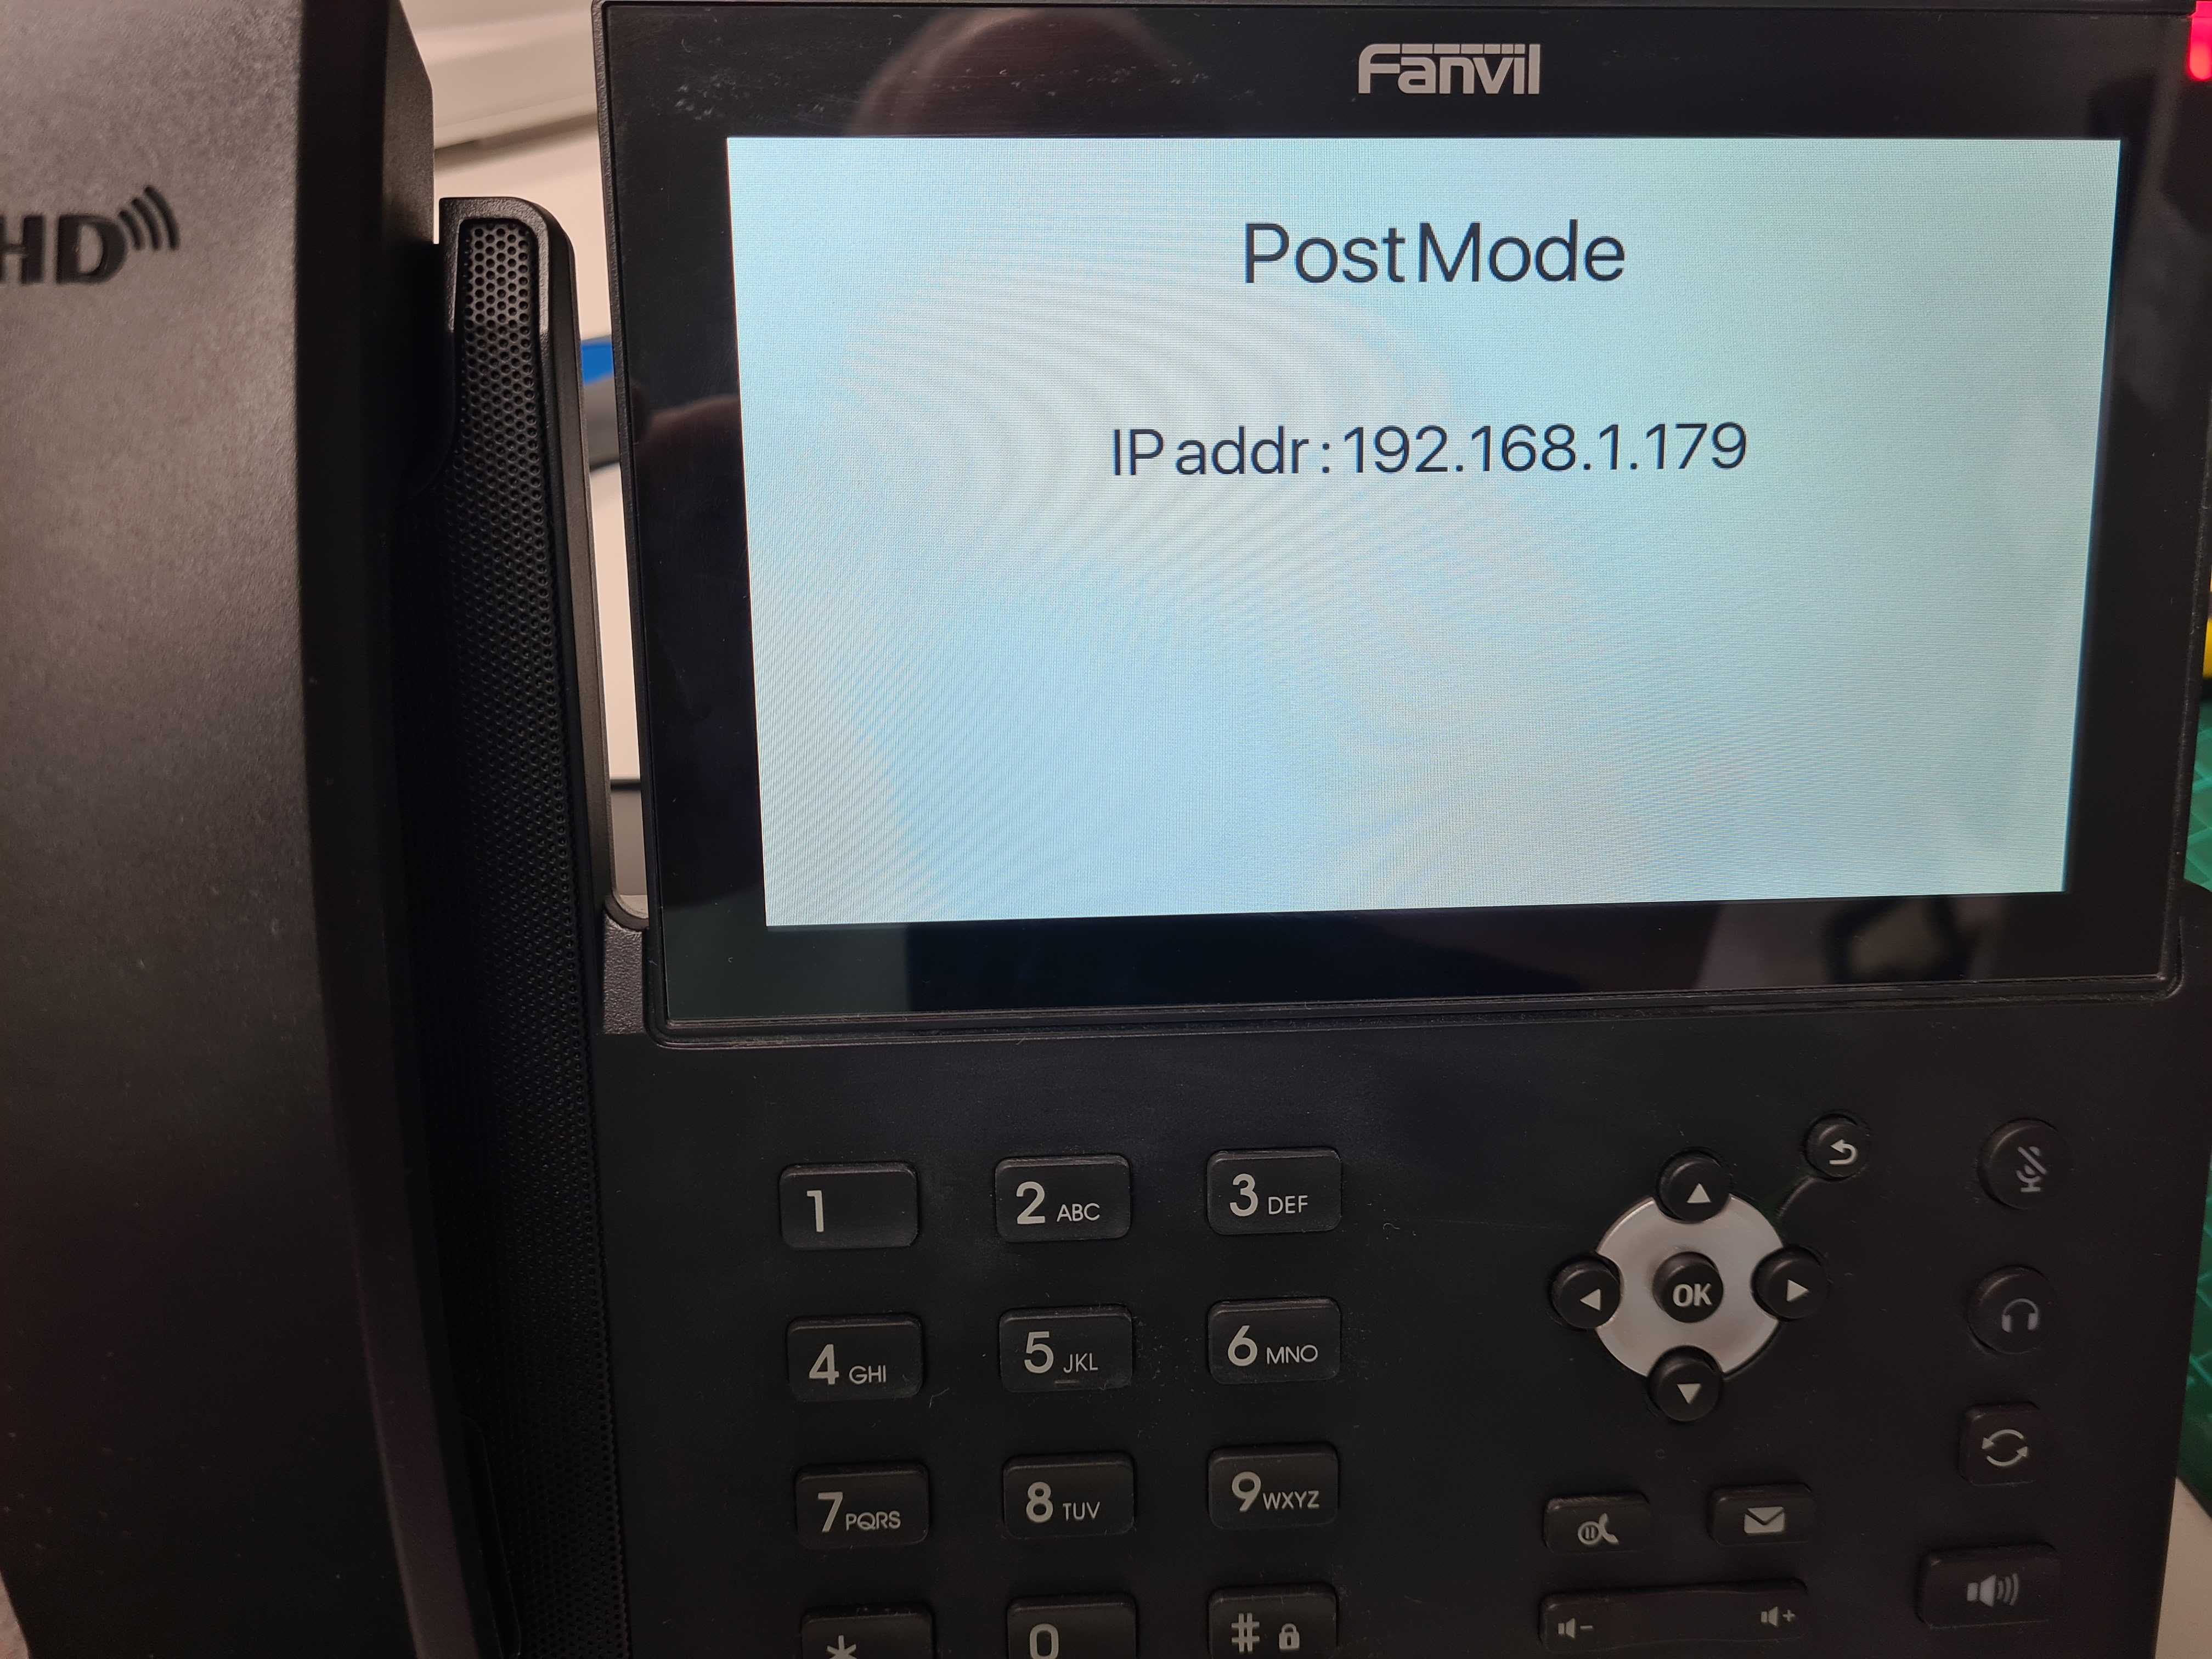
Find the IP address of your Fanvil phone by going to Menu Status or by pressing the ‘OK‘ button.
Step 2:
Once you have obtained the IP address enter this into your web browser you should be then prompted for login credentials, by default these are:
Username = admin
Password = admin
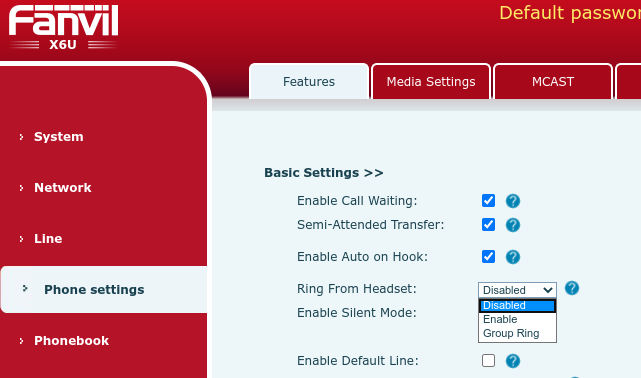
Step 3:
Once successfully logged into the web interface navigate to Phone SettingsFeatures > under Basic settingsEnable a setting called ‘Ring From Headset‘ as shown below:
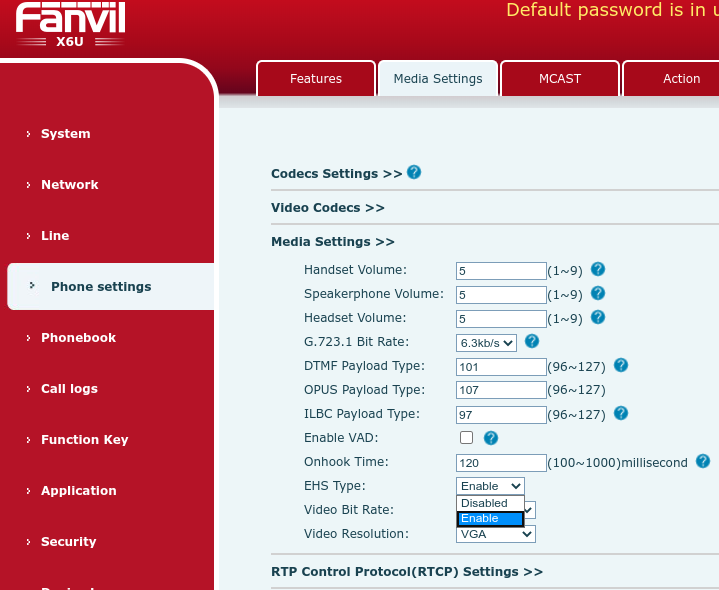
Step 4:
Now go to Media Settings > EHS Type > Enable > finally click Apply.
You should now be able to answer and end calls using your wireless headset.
If you have any problems/issues please contact support@provu.co.uk or call 01484 840048 option 2 for support.
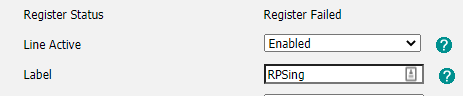
If you have recently factory reset a Yealink handset then you may see the following notifications on your devices screen. ‘input sn‘ on the first line (top left of the screen) or ‘RPSing’ on the account information on the web interface.
In this blog, we will take you through a few short steps you can take to solve this issue and have your phones back up and running as soon as possible.
Step 1:
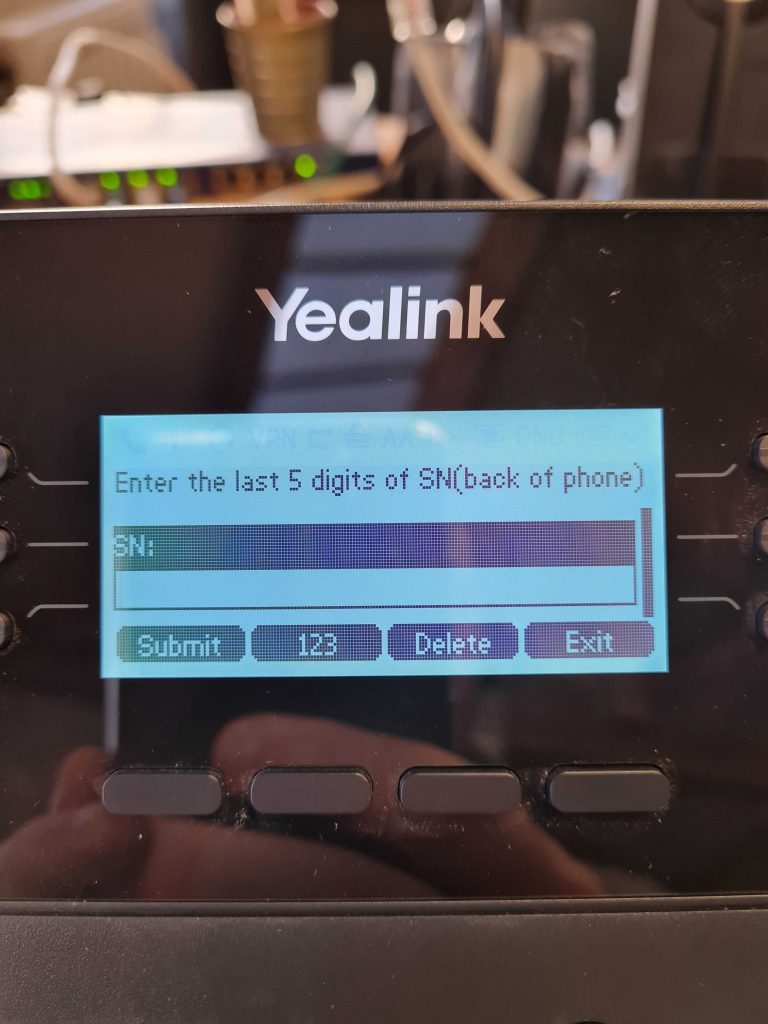
Click on the function key where ‘input sn‘ is located. You should then be presented with the following page:
Enter the last 5 digits of the serial number (Not the MAC address)
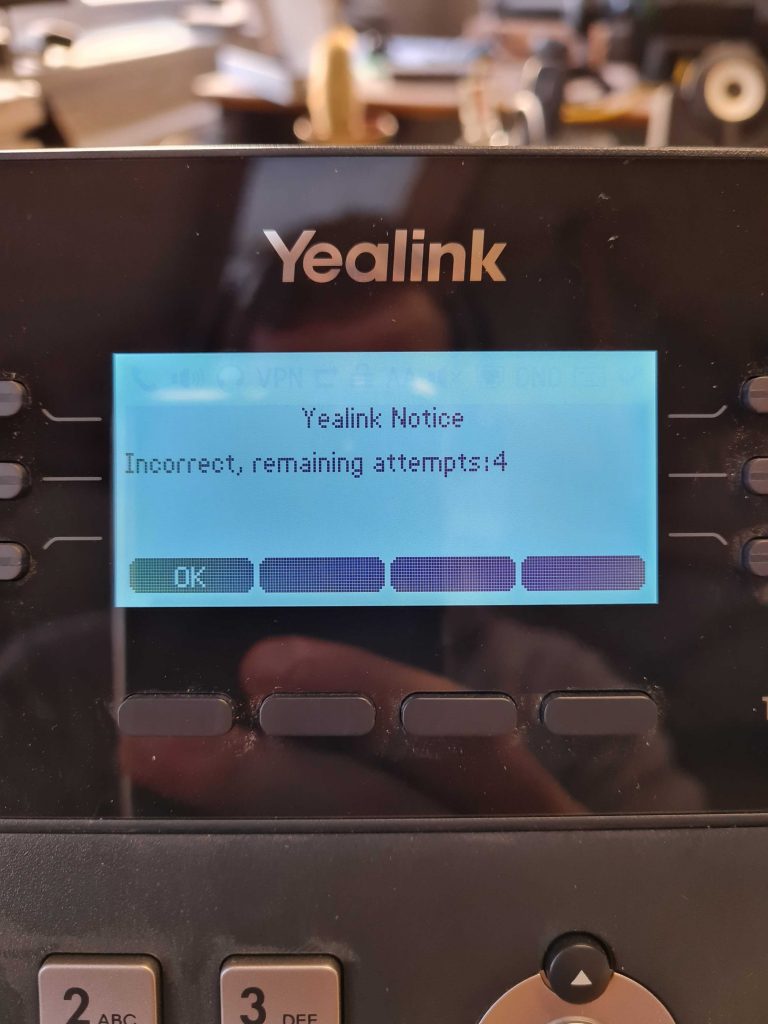
You get x5 attempts at entering the correct SN, if you enter the incorrect serial number you will get the following message:
Step 2:
Once you have entered the last 5 digits of the serial number the phone should then reset and boot up as normal.
Entering the serial number bounds the phone onto the Yealink RPS account.
If you run into any issues or would like more Yealink technical advice, please contact support@provu.co.uk or call 01484 840048 option 2.
If you have contacted Support regarding a technical issue that you are having with your 2N door intercom then we may have asked you to capture a trace replicating the fault.
This guide will show you how to capture a PCAP trace from a 2N Door Intercom.
Step 1:
Web browse to the IP address of the intercom. If you don’t have a DHCP table or network scanner to find the IP address reboot the intercom and wait for the second beep tone, after this press the main button 5 times. The intercom should then read the IP address out to you.
More information on this can be found on 2N’s Wiki.
Step 2:
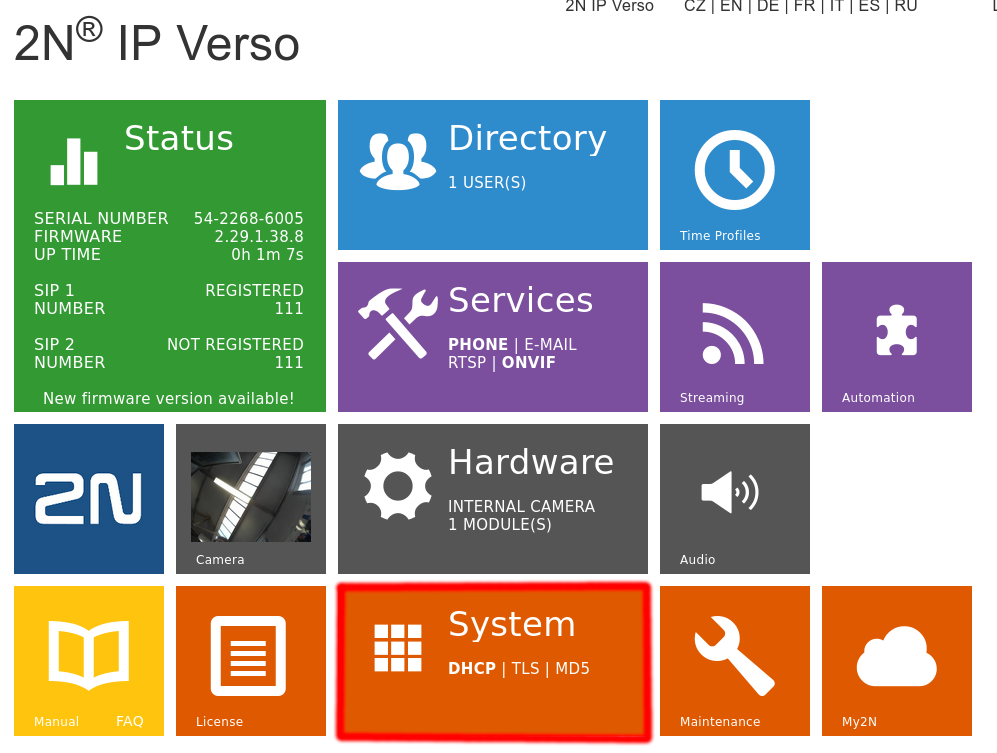
Once you have logged into the web interface go to System highlighted below:
Step 3:
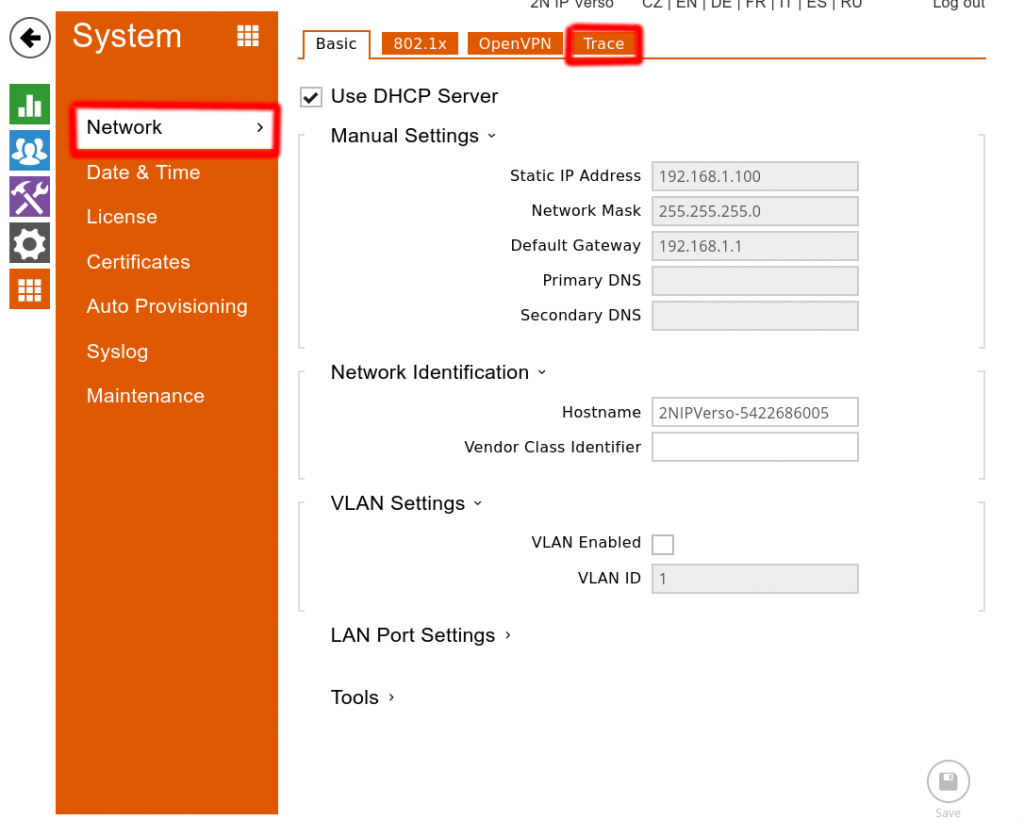
Go to Network > Trace as highlighted below:
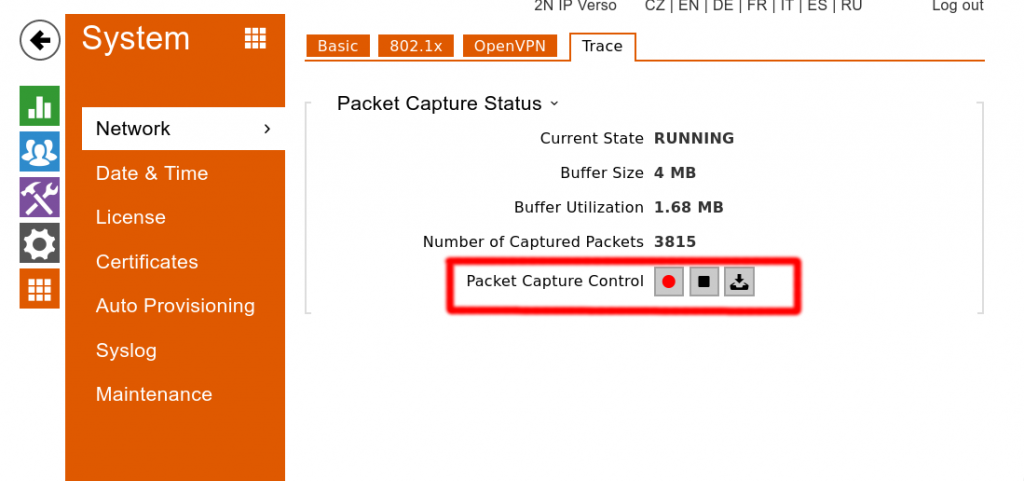
Step 4:
Once you are on the Trace page, press the red record button to start the trace > This is now the time to replicate the fault the customer is experiencing.
Step 5:
Once the fault has been replicated press the Stop button > then press Export > Finally send this to support@provu.co.uk
If you have any problems with this please contact support on 01484840048 option 2 or email support@provu.co.uk.
By now you may have heard of ProVu’s online portal, ProSys. Providing you with access to a range of tools designed to ease your hardware deployments, we’ve put together a short introduction video to give you a taste of what ProSys has to offer:
From ordering, remote device maintenance, system integration and device adoption, ProSys has you covered.
If you would like more information or would like to try ProSys Phone Management out for yourself please contact us on 01484 840048 or email contact@provu.co.uk
There are a couple of ways to capture logging information on 3CX, here is a guide on how to obtain both.
Capturing an Activity Log
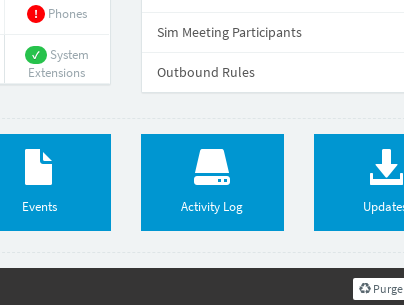
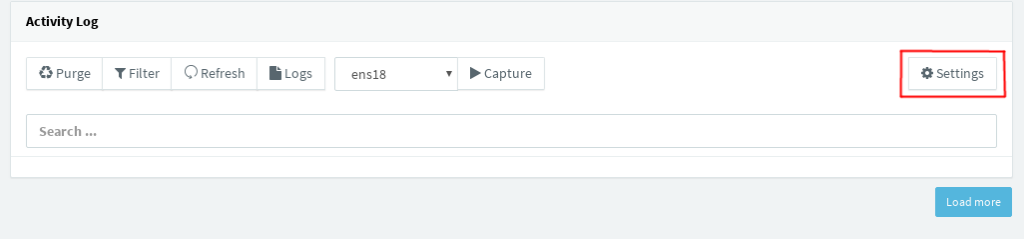
Step 1 – From the Dashboard of the Management Console click on ActivityLog (As shown below)
Step 2 – Click on Settings (Highlighted below)
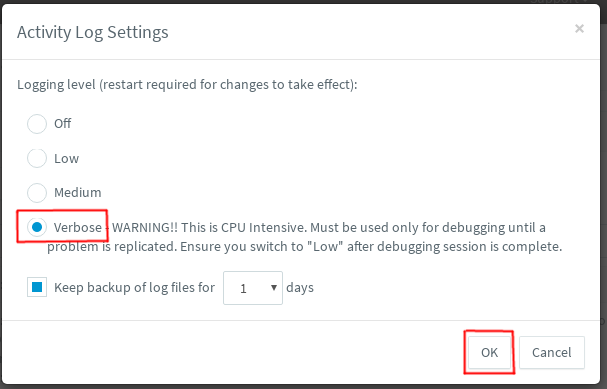
Step 3 – Change the LoggingLevel to Verbose and press OK (Highlighted below)
Step 4 – Once you have pressed OK click on Capture (Highlighted below)
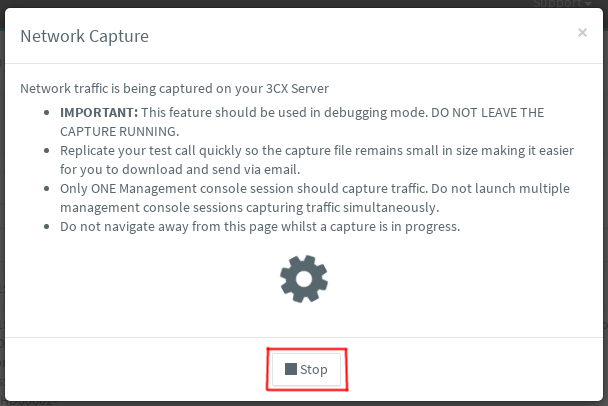
Step 5 – Once you have clicked on Capture the following window will pop up below.
At this stage you should replicate the fault you are experiencing and then press Stop. (Highlighted below)
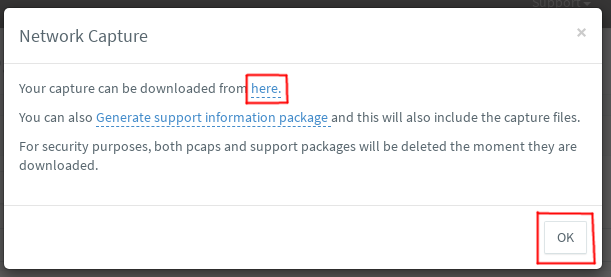
Step 6 – After you have clicked Stop the following window should pop up, click ‘here‘ to download the PCAP file then press ‘OK‘ (Both highlighted below)
Step 7 – Once the file has download please send this over to support@provu.co.uk with a description of the fault you are experiencing so we can look into this for you.
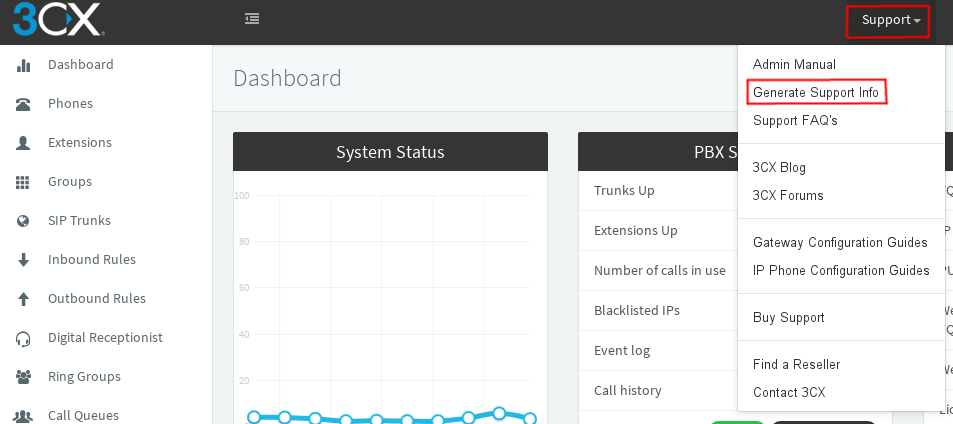
Generating Support Info
You can also Generate Support Information by doing the following:
Step 1 – From the Dashboard of the Management Console hover over Support at the top right and click on Generate Support Info(Highlighted below)
Step 2 – Once done the Administrator will get an email with the support information and the following window should appear:
Once the Admin received the support information please forward to to suport@provu.co.uk with a description of the fault you are experiencing so we can look into this for you.
If you have any issue obtaining a log please contact our support team at support@provu.co.uk or call 01484840048 option 2 for support.