
This blog post is going to outline the steps to take to source the required file. If you contact the ProVu support team experiencing Registration or Call issues with the Cisco CP series of phones, we will require a PCAP trace capturing the problem to help identify the cause of the issue.
Step 1 – Access the web user interface
In order to access the web user interface of your device you will need to find the IP address. There are a few ways this can be done such as logging in to your router and checking the DHCP table, but most likely the easiest method and the one this blog post is going to cover is to get it physically from the phone.
You’ll need to press the ‘Settings‘ button on the phone which has the symbol of a cog. Once you have pressed this button scroll through the options available and select ‘Status‘ > ‘Network Status‘ > ‘IPV4 Status‘ and make a note of the IP address.
Once you have the IP address, open a web browser and type the IP address in to the top search bar and press enter as displayed in the image below.
![]()
Once you have pressed enter it should take you to the ‘Info‘ page. On here you need to select the admin user and then advanced options by clicking the red outlined text in the image below.
(By default there is no admin password applied but if you have set one it will require this)

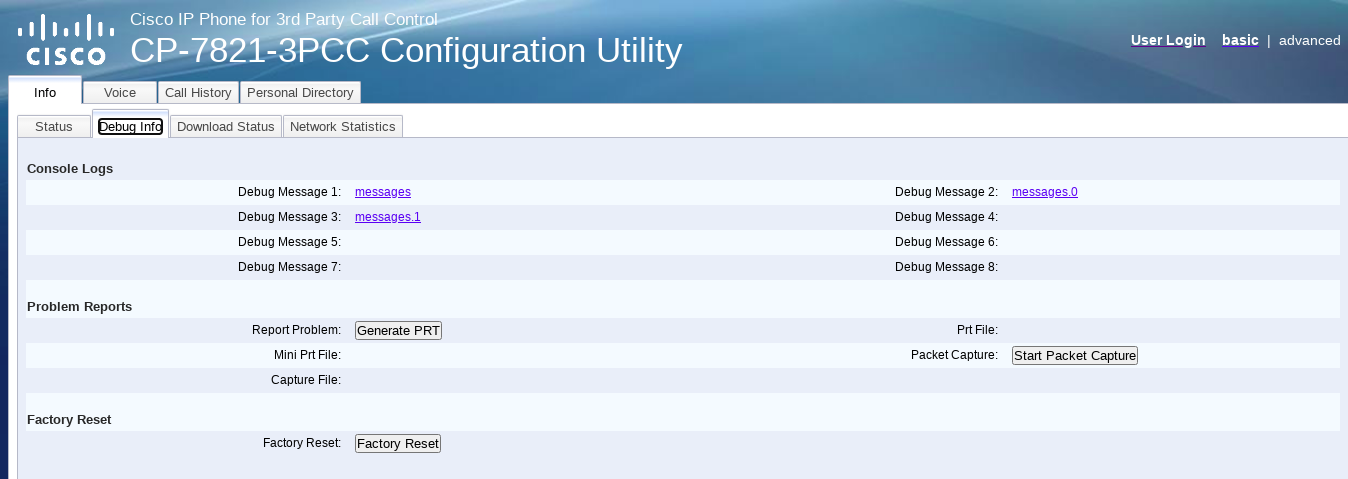
Once you have done that go to ‘Info‘ > ‘Debug Info‘ and you should be on the page below.
Step 2 – Capturing the ‘.pcap’ trace
On the ‘Info‘ > ‘Debug Info‘ page there is a section under ‘Problem Reports‘ that says “Packet Capture” with a button next to it. Follow the steps below to generate the file.
- Press ‘Start Packet Capture‘ and select the capture filter to ‘All‘.
- Replicate the issue – if your issue is related to outbound calls failing, attempt to place an outbound call. If your issue is related to Registration issues you can force a Registration by disabling and enabling the SIP Account:
- To do this you need to go to ‘Voice’ > ‘Ext 1‘ and change ‘Line Enabled‘ to ‘No‘. Then click ‘Submit all Changes‘ at the bottom of the page. Wait 30 seconds for the web user interface to reload and then go back to ‘Voice‘ > ‘Ext 1‘ tab and change ‘Line Enable‘ to ‘Yes‘ and click ‘Submit all changes‘.
- Press the button next to ‘Packet Capture‘ again (this time it should say “Stop Packet Capture“)
- Once the trace has been stopped and generated you can download it from “Capture File” link outlined in the image below.

Once you have download the file please send it to the engineer requesting it, or to support@provu.co.uk if this is the first time reporting the issue.