1. Set up a trunk on you PBX to use Register/account based authentication and set the main trunk number to the number of the sim you want the inbound calls to come from.
2. On the Voiceblue go to Gateway Configuration > VoIP Parameters > Sip Registration and enter the auth username and password from your PBX trunk. Set the Registration domain to the IP of the PBX
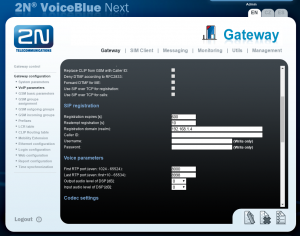
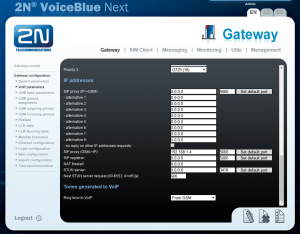
3. On the same page in the IP Addresses section enter the IP address of the PBX in the SIP Proxy (GSM→IP) field.
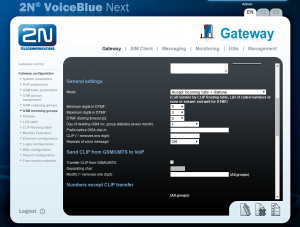
4. Go to the GSM incoming groups section. In General Settings change the Mode to ‘Accept incoming calls + dialtone’
5. Same section set the DTMF dialling timeout to 0 (zero).
6. Same section under List of called numbers add the number of your sim.
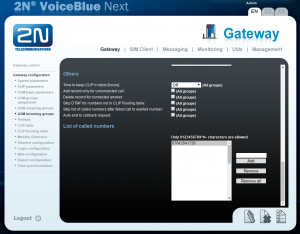
Calls should now pass through to your PBX and can be routed as required.
Thank you for reading.