This blog post is going to show you how to configure a Polycom VVX device to capture the SIP traffic flowing between the device and SIP Server.
This can be useful to try and diagnose SIP registration, or outbound calling issues.
Step 1 – Accessing the web user interface
First we need to find the IP address of the Polycom device. This can be done by pressing the ‘Home‘ button (symbol of a house) on the phone and scrolling through the menu and selecting ‘Settings’ > ‘Status’ > ‘Network’ > ‘TCP/IP Parameters’ and on this page make a note of the values in the “IPv4 Addr” field.
Now we have the IP address of the device, we need to access the web user interface. This can be done by launching a web browser and inputing the IP address in to the top search bar. You DO need to define ‘https://‘ and port ‘443‘ as the transport type and communication port as shown in the image below:

Once you have entered the IP address it may present a warning saying the connection is not private:
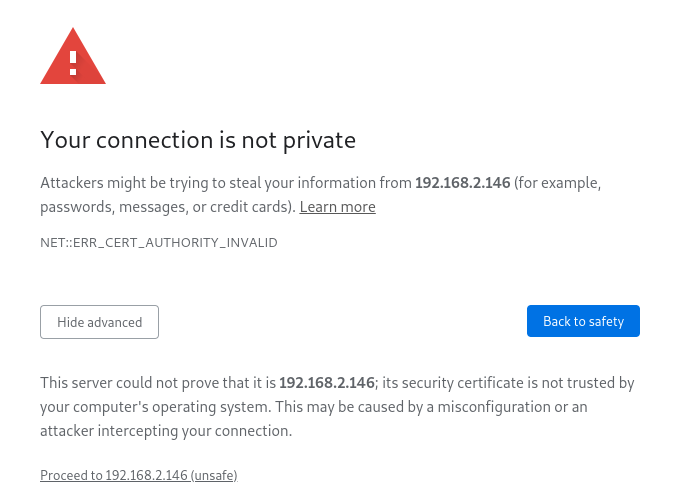
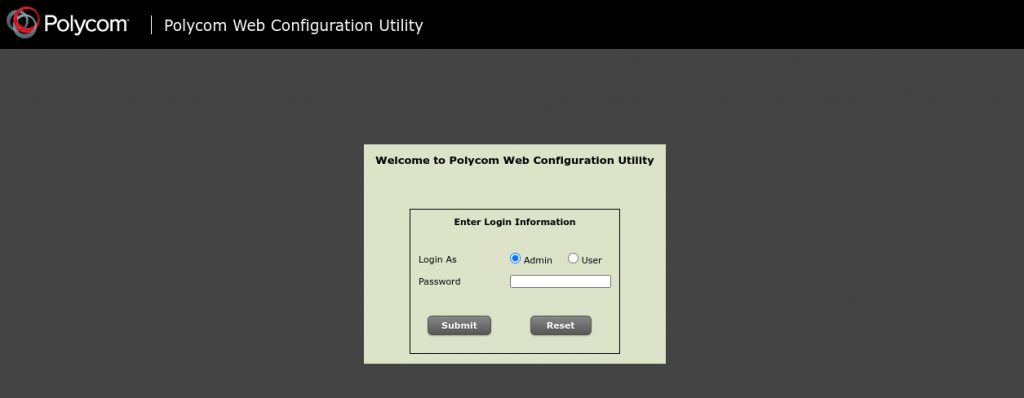
This is to be expected and you are seeing this because the TLS certificate on the device is not signed by a certificate authority recognised by the browser. Click the ‘Advanced’ button and then click “proceed to (‘IP Address’)”. Once you have done that you should be at the login page as shown in the image below.
To login, select the ‘Admin’ user and enter the password.
By default this is ‘456’.
Step 2 – Configuring the log level
Once logged in go to ‘Settings‘ > ‘Logging‘
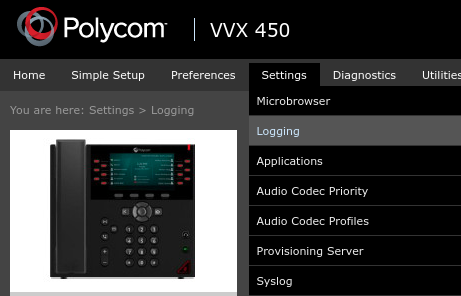
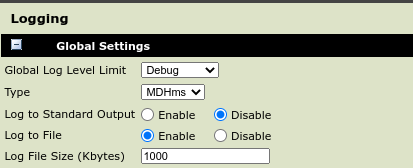
Once the ‘Logging’ page loads set the ‘Global Log Level Limit‘ to ‘Debug‘ and set the ‘Log File Size‘ to ‘1000‘ as shown in the image below.
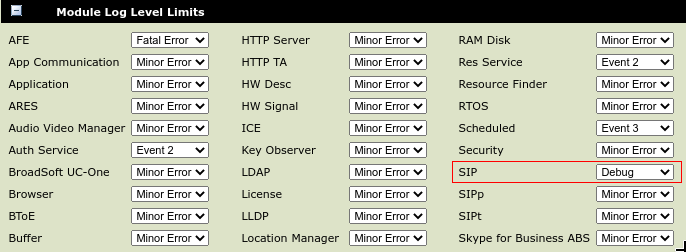
Next Expand the ‘Module Log Level Limits‘ section and change ‘SIP‘ to ‘Debug‘ as shown in the image below and click save at the bottom of the page.
Step 3 – Replicating the issue and downloading the log
Now the phone is configured to log the SIP packets flowing through the device it’s time to replicate the issue. If your issue is related to SIP Registrations a reboot of your device can be done to force a registration.
If your problem is with outbound calls not progressing you can go ahead and attempt to make a call.
Once the fault has been replicated, login to the web user interface and this time go to ‘Diagnostics‘ > ‘View & Download logs‘
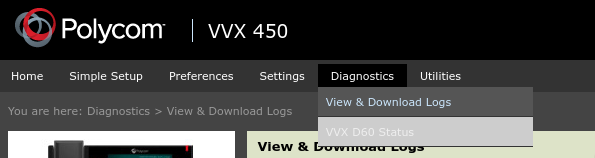
Once on this page you can view the logging information, but if a support engineer at ProVu has asked you to capture these files, please export all three file types by using the radial button below to change which file is downloaded and then click the ‘Export’ button.


Important – Once you’ve exported the logs, be sure to go back to ‘Settings’ > ‘Logging’ and click the ‘Reset to ‘Default’ button at the bottom of the page to revert the changes we’ve made.