Browse Author

Muhammad Bajwa

UPS Devices & How they can Help You Prepare for the PSTN Switch Off

The 2025 PSTN switch off poses a number of opportunities and challenges for the Channel. Read on to discover our Technical Solutions Director, Muhammad Bajwa’s thoughts on how our new range of UPS (Uninterruptible Power Supply) can help you prepare for the big switch off.

In my last blog post, I covered some benefits of introducing VoIP and Ofcom’s regulations around the PSTN switch off and their expectations from Service providers. Having just launched a new range of UPS devices, I will now cover how we can help you to fulfil the regulatory requirements and provide backup power to devices on site.

Requirements

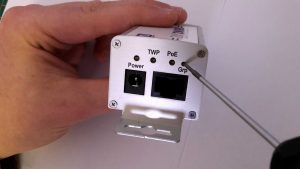
Having spoken to a number of partners about their requirements, some were quite basic, such as; the UPS needs to be reliable but economical, it should be maintenance free but must have a replaceable battery. The device should have 3 pin UK plugs to connect the power supply straight into it and ideally should allow some basic troubleshooting to check the battery status etc.

Our Solution

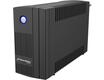
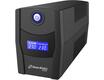
I have looked at a couple of brands but decided to go for Blue Walker Line Interactive UPS range as our go to product for the Channel. We have initially chosen three products from the range based on how much backup battery power it will provide to a router and a phone/ATA.

Testing

During my lab testing, the VI 650 SB lasted just over an hour, the VI 600 STL just over 2 hours and the VI 2200 STL lasted around 4 hours. The test devices in my lab were a DrayTek 2862Ln and a Yealink T57W with maximum load being around 25W on the UPS. Being Line interactive, the transfer rate was very quick (around 4ms) which means I did not notice any loss of power and my devices kept operating normally when the UPS was disconnected from the mains power.


Model:

Basic VI 650 SB UK

Basic VI 600 STL UK

Basic VI 2200 STL UK

Series:

VI SB

VI STL

VS STL

Type:

Line-Interactive (VI)

Line-Interactive (VI)

Line-Interactive (VI)

Phases (IN-OUT):

1-1

1-1

1-1

Form Factor:

Tower

Tower

Tower

Power Capacity:

650VA / 360W

600VA / 360W

2200VA / 1320W

Output Power:

0.55

0.60

0.60

Nominal Output Voltage:

230 VAC

230 VAC

230 VAC

Frequency (Battery Mode):

±0.05Hz

±0.05Hz

±0.05Hz

Type G (BS 1363):

2

3

4

LINE Mode Efficiency [%] (Full Load):

95.3

95.3

95.7

Batteries:

1x 12.0V/5.0Ah

1x 12.0V/7.0Ah

2×12.0V/9.0Ah

Recharge Time:

8h to 90%

8h to 90%

8h to 90%

Half Load Backup Time [min]:

4.5

5.0

3.9

Communication:

USB Type B – for Monitoring Software

USB Type B – for Monitoring Software

USB Type B – for Monitoring Software

Noise Level:

< 30dB

< 30dB

< 45dB

Fan Logic:

No fan

No fan

Always on (half speed) full speed if load > 25% in battery mode

IP Rating:

IP20

IP20

IP20

Humidity:

0% – 90% RH (non-condensing)

0% – 90% RH (non-condensing)

0% – 90% RH (non-condensing)

Product Weight [kg]

3.9

4.3

10.8

Data Line Protection:

N/A

N/A

RJ-11 Port, RJ-45 Port (100mbit)

Discover ProVu’s UPS Range

Battery Life

An important question I have already been asked a few times is how long the battery will last on these devices. To be honest, this really does depend on a few factors, namely:

  • The use case
  • Environmental factors
  • How well the device has been maintained

The typical life span of a UPS is around 3-5 years from the production date. PowerWalker offer a 2-year warranty on their products which covers both hardware and the battery. Ofcom expects the providers of the solution to have a maintenance plan in place to make sure the products can continue to work on an ongoing basis. That said, the end customer will have to take some responsibility for this. In this instance, it is recommended that the documentation provided clearly outlines what is required by the end user.

In my next blog post, I will be talking about PowerMaster’s software, its features and how it can help to remotely monitor and troubleshoot potential issues with deployed UPS devices.

What the PSTN switch off means to the Telco World 

As we edge closer to the 2025 PSTN switch off our Technical Solutions Director, Muhammad Bajwa has been sharing his thoughts about these changes and the affect it’s likely to have on Channel partners in the coming years. Find out more in this short blog.

BT announced the PSTN switch off back in 2015 and gave the channel 10 years to move everyone to a digital or Voice over IP network. There has been lots of conversation in the channel for the past 7+ years, but only now I can see things have started to take off.  Talking to businesses, some of the issues I tend to hear a lot about are along the lives of;

‘my customer does not have a stable internet connection’;

‘they are miles away from exchange so cannot get the right speed for VoIP’

‘they have been sold a traditional telephone system on 5–10-year lease so they cannot make any changes’

The list goes on….

Many of these conversations have not been easy, but with the expansion of Fibre and 4G/5G networks, the availability of Satellite Internet, and funding by the government it seems the Channel is now gearing up for the change.

A Shift in the Channel…

One major change I have seen in Telecoms is in the Internet Service Provider channel. Historically ISP’s or Broadband providers kept their distance from VoIP and/or UC services, but this year most of the conversations I have had have been with new ISP customers who have been trying to adopt/integrate VoIP services with their broadband offering. Consequently, we are seeing a huge surge in demand for VoIP enabled routers and/or Analogue adaptors. One of the biggest challenges facing the channel now is our reliance of the internet, without this, there is no voice or telephone service.

Before I discuss the challenges of offering VoIP, let’s have a look at some of the benefits of introducing VoIP to a business.

Benefits of VoIP

Lower costs: As VoIP relies on your internet service, businesses will be able to benefit from reduced/freeline rental. The reason I say “reduced line rent” is because VoIP Providers will still have to manage the servers which are providing the VoIP services.

Portability: VoIP numbers are portable unlike physical numbers so it can move between different networks just like mobile numbers. If a business moves from one location to another, there is no need to ring the provider, all you must do is take the VoIP device to your new location, connect it to the internet and your line is up a running in no time. Some VoIP providers even have their own mobile or PC softphone clients which means you can answer your calls anywhere in the world as long as you have an internet connection and the country you are in allows VoIP or SIP calls.

No PBX hardware on site: With traditional telephone systems, businesses would have some form of PBX (telephone system hardware) onsite which comes with its own maintenance and support services plus it’s one more thing that can break!  With VoIP it’s all hosted and depending on the type of service offering, you don’t have to worry about any of that. The majority of service providers will have clusters or high availability systems setup so disruption to VoIP services will be minimum.

Scalability: It’s very easy to scale with a VoIP telephone system, businesses can buy additional seats/VoIP channel from the provider which can be done on the fly which means as long as you have a compatible device, a new user can be setup in minutes.

Competition: The VoIP side of Telecom industry is already quite a competitive market which means businesses will have a broad range of providers to choose from. More competition means a more competitive offering.

Feature Rich: VoIP in general is far more feature rich as compared to the traditional telephony services. Things like call transfer, nuisance calls blocker, call forwarding, etc. are much easier to manage. There are of course other benefits like integration with CRMS systems, options to use UC features but it’s up to the business to buy the service best suited for their requirement.

VoIP Challenges

Now, as I mentioned, VoIP brings many benefits to a business, but it does rely on the internet which requires a power connection. Skimping on hardware such as routers can also cause some headaches, but I won’t go into that for now.

Since 2015, Ofcom has been actively involved in discussions with ISP’s, ITSP’s and other bodies in formulising a standard to regularise the side effects which the PSTN switch off will introduce. These have been developed to protect the consumer. Ofcom withdrew their previous 2011 guidance on FTTP as part of the strategic review of digital communications and published its reviewed guidance in Oct 2018 which included the PSTN switch off.

According to the final publication of Ofcom, service providers should enable or offer at least one backup solution to the customer in order to provide access to emergency services in case of power cut. During the discussion there were 2 main solutions discussed, one being a backup mobile phone and other one being a UPS (uninterruptible power supply). Ofcom’s regulation is not too prescriptive about which options service providers should offer, but the main highlight is that the offered solution should last for a minimum of one hour in the case of a power cut.

It is the Service Provider’s duty to make sure that the offered solution is suitable to meet the customers’ requirement. Ideally, the backup should be offered FOC especially to customers who are dependent on their landlines.

Ofcom’s publication also mentioned that some individual customers might require protection beyond one hour e.g., if the household they live in has a history of long duration power outages etc. so it is important to understand the customer’s requirements before offering a solution.

Read Ofcom’s Publication Here

In my next blog, I will be discussing options available from ProVu to tackle the power cut issues and how we can help fulfil the regulatory requirements of Ofcom.

ProVu main Number- Outage

27/08/12020 – 11:19

We have been informed by our provider that their SIP trunk services are fully operational and all outstanding issues have been fixed.

You can now start using our main office i.e. 01484840048 to get hold of us.

25/08/2020 – 12:48

Our provider has confirmed that they are starting to see a partial return to service. Please keep on using the alternative number for now.
We will confirm as soon as our main number is fully functional again.

25/08/2020 – 12:00 pm

We are aware that Our main office number is down at the moment. This is due to a major outage with our SIP trunk provider.

While our service provider is looking into it, please use the following numbers to reach out to us

01484500553

01484599554

01484500548

As of this time, we do not have an ETA on a fix but rest assured our Service Provider is working on it


Yealink T2x & T4x phones on 3CX – Firmware upgrade issues.

You may have recently noticed that some of your Yealink T2x & T4x series devices in use on your 3CX platform have been telling you that the FW version is no longer supported and you need to upgrade.

Yet when you try and upgrade using the 3CX fw upgrade feature it fails. The phone appears to start the upgrade but then reboots and does not upgrade.

The problem specifically is an earlier FW version that users were prompted to upgrade to.

The version in question is xx.83.0.55.

Something broke FW upgrading in this version and phones that found themselves on this version are no longer able to upgrade directly to the latest recommended 3CX FW version.

The fix for this is to manually upgrade the phones to an intermediary version xx.84.0.35 that fixes the FW upgrade issue.

Worth noting that it should also be possible to provision this upgrade to the phones.

After this upgrade the phones will be able to upgrade normally using the 3CX platform.

Helpfully, 3CX have published some guides on how to do this and where you can find the required FW files.

You can find these guides here…..

https://www.3cx.com/sip-phones/yealink-t20p-t22p-t26p-t28p/

https://www.3cx.com/sip-phones/yealink-t4-series/#h.7ls0w5vyhlnd

If for any reason you are unable to perform this upgrade manually, let us know, and we may be able to assist you in provisioning this upgrade to your devices.

Automate your web store with ProVu’s API

We have a number of APIs available for our resellers to utilise. These can help you to build your website and/or integrate with your CRM. Integrating your systems with ours can help to significantly simplify the process of getting important, up to date product information from us, as well as allowing your customers/staff to place their orders directly with us via your own online interface. Take a look at some of the benefits of using ProVu APIs.

Our APIs have been developed in-house and are constantly being updated and expanded to meet the requirements our resellers. The APIs are simple to use and can be integrated with almost all systems out there.

In this blog, we are going to look more closely at the following APIs: Product Information, Product Categories and Ordering as these tend to be the common starting points for integration.

Product Information API
There is a lot of information you can pull about the products we supply, this data can help in the building of your webstore.

Part code ProVu’s product name – this is a unique name given to each item, which is required to place orders. We can even store your own part code if you require or you can simply map these across.
Brand / Class For example Snom and Yealink.
Product Name A short concise product name.
Product Description This is a longer product description, which you can use to quickly build your product information web pages.
Product Range Some manufacturers have different ranges of products, where possible we store this information for you to use. For example, for Yealink we have T2, T4, T5 and CP. These can help to sub-categorise items within a brand/class on you website.
Retail Price Recommended retail price, this is guidance as to what you may want to charge your customers.
Your Price Your discounted trade price, this could be used with the retail price to calculate your sales out pricing to make sure you are making enough margin.
Available Stock Real-time quantity of stock available.
Item Weight Weight stored in kg can be used to help calculate shipping charges.
MPN Manufacturer’s part number/SKU.
EAN This field provides information about EAN/UPC/GTIN which is generally required for web stores using Google shops, shopify etc. You can differentiate between EAN and UPC number quite easily – if the number is 12 digits long it’s a UPC and if it’s 13 digits long it will be an EAN.

We also have a developers guide of how use our product images and datasheets to display on your own site.

Product Categories API
We provide a number product categories for example IP Desk Phone and IP Conference Phones with a list of applicable items, this can be used as a quick way to build your product menus and navigation within your web store if you wish.

Ordering API
An order can be placed by simply passing a unique order reference, list of ordered items and required quantities to us.

There is a number of other things you can tell us about your order using our ordering API:

  • Drop ship details including address and contact details
  • Drop ship branding (see more information on our Branded Shipping services)
  • Carrier service
  • Provisioning settings


It doesn’t stop here, we have more APIs available for our resellers including Order details, Invoices, Device status and Device management API – Take a look to find out more.

Adding IP Phone configuration details to orders

Our ProSys provisioning service enables resellers to add device-specific configuration settings while placing orders, offering a true plug-and-play service for their end-users.

As part of our continued drive to improve our online reseller portal, ProSys, we have recently made improvements to the user interface to enhance the user experience – now making it easier than ever to add device configuration details in ProSys.

How to add IP Phone configuration details in ProSys

1) The first step is to add the product to your basket. There are a couple of ways to add hardware to your basket:

You can go to the ‘Price List and stock information’ page, find the product you want to add and click on the button to add it to your basket. This will take you to the order page.

Or you can go straight to the ordering page using the button on the ProSys home page.

In the order form start typing the name of the product in the ‘Choose Product’ text box,  for example ‘Snom D715’. As soon as you start typing, the search results will start displaying a list of products with the nearest match. Simply click on the correct product you want to order to add it to the basket.

3) When you have your items in the basket, click on the button to take you to the configuration settings page.

4) On the configuration page, you will see fields like SIPUser, SIPPass and option to add up to 2 accounts to each phone. The majority of installations will only require Account A fields to be completed, but you can add a 2nd SIP account to the device if needed.

Before adding any details, please make sure you familiarise yourself with the terms on the configuration page. Find below a table which explains each setting and what should be added.

Label Setting meaning
SIPUser Extension number
SIPPass Extension password
SIPProxy Registration/Proxy server URL/IP
outboundProxy Outbound proxy (if any)
SIPPort Phone local SIP listening port
SIPDisplay Display name to appear on the phone screen
SIPIdle Idle screen name
setting_server URL/IP address to redirect the phone to another configuration server

For the majority of installations, you can safely ignore SIPPort and setting_server fields, if in doubt please get in touch.

We can also work with you to create custom configuration templates which can contain common settings such as country tones, dial plan, time server and language etc, these details can be applied to all your devices. Please speak to our sales team if you would like more information.

Tell us what you think
We’d love your feedback! Feedback helps us to make our systems even better for you and we would be very grateful for any comments, problems and suggestions you have on how we could improve ProSys in the future to best suit your needs. Login and send us your feedback or give us a call.

If you do not have a login or have forgotten your password you are able to request a new one here.

How to configure your 2N Voiceblue Next to pass incoming calls to your PBX

1. Set up a trunk on you PBX to use Register/account based authentication and set the main trunk number to the number of the sim you want the inbound calls to come from.

2. On the Voiceblue go to Gateway Configuration > VoIP Parameters > Sip Registration and enter the auth username and password from your PBX trunk. Set the Registration domain to the IP of the PBX

3. On the same page in the IP Addresses section enter the IP address of the PBX in the SIP Proxy (GSM→IP) field.


4. Go to the GSM incoming groups section. In General Settings change the Mode to ‘Accept incoming calls + dialtone

5. Same section set the DTMF dialling timeout to 0 (zero).

6. Same section under List of called numbers add the number of your sim.

Calls should now pass through to your PBX and can be routed as required.


Thank you for reading.

Installation guide for 2N® 2Wire Kit

The 2N 2Wire adapter kit is extremely useful. Giving you the capacity to use exisiting 2 wire cable runs to connect IP devices to a network and power the device via PoE.

But it’s worth doing your homework so you can get the most out of them.

To help with this we have created this guide to help you get to grips with using them.

Essentially they are plug and play straight out of the box but……. this depends on how you want to use them.

Each 2Wire kit comes with two adapters and one power supply.

The solution works fundamentaly using a Master and Slave approach.

Any adapter that you connect the power supply to will become a Master.

Any adapter that you then connect to the Master via the 2wire connection becomes a Slave.

The Master should be connected to the network and the Slave connected to the IP device.

Any Master adapter can have up to 4 slaves connected to it.


Here we will look at three use case scenarios.

  1. Where a single Master & Slave set up is required on a single network.
  2. Where a single Master & multiple Slave set up is required on a single network.
  3. Where multiple Master & Slave set ups are required on a single network.

For the first two scenarios, where only a single Master adapter is required, the 2Wire kit is simply plug and play.

PLEASE BE AWARE that in the case of scenario 3, where multiple Master adapters are required on a single network, a pairing procedure must be executed.

If you connect multiple Master adapters to a single network without performing the necessary unpairing/pairing procedures YOU MAY EXPERIENCE NETWORK CONFLICT ISSUES.

Good thing is….. the unpairing/pairing procedure is very simple. Here we will guide you through it.


First let’s take a look at how to connect a single Master and Slave set up.

This is the simplest configuration and works straight out of the box.

Just make sure you connect the 2 wire correctly to each adapter. Positive to positive & negative to negative.


Now let’s take a look at how to connect multiple Slaves to a single Master.

This is similar to a single Master / Slave configuration in that it works straight out of the box. Multiple Slaves can be wired into a single Master.

Again make sure to connect the 2 wire correctly to each adapter. Positive to Positive & negative to Negative.


Finally we have the multiple Masters & multiple Slaves on a single network configuration.

If this configuration is required and you are installing multiple Master adapters on to a single network, it is very important to perform an unpairing/pairing procedure. If you do not you may experience network conflict issues.


Unpairing and Pairing your adapters

Each adapter has a small hole labelled ‘Grp’. There is a button inside this hole that is used to initiate the unpairing/ pairing procedures.

To access the button you will need a small screwdriver or similar tool.

To perform unpairing/pairing procedures the adapters must be powered.

So you must connect the power supply to the Master and connect the Slave via the 2 wire connection.

But DO NOT connect them to the network or the IP device….. yet.

To unpair an adapter press and hold the ‘Grp’ button for 10 seconds, until you see all lights on the adapter go off.

After unpairing is complete you should see only the power light illuminated.

You should do this on all adapters before attempting a pairing procedure.

To perform a pairing procedure press and hold the ‘Grp button for 2 seconds. When you release the button the ‘TWP’ light will begin steadily blinking letting you know that the adapter is in ‘seek’ mode and is looking for another adapter to pair to.

Once an adapter has found another adapter to pair to the ‘TWP’ will become static, letting you know pairing is complete.

In a single Master & single Slave pairing it doesn not matter which adapter you put into pairing/seek mode first.

But if you wish to have multiple Slaves connected to a single Master, then you must connect all Slaves via the 2Wire connection to the Master first, then run individual pairing procedures for each connected Slave.

To do this you must initiate the pairing/seek mode on the Master first and then the first Slave.

Then repeat this for each Slave connected to the Master.

But remember, unpairing & pairing is only needed when installing more than one Master adapter on a single network. 


Thanks for reading.


Recommended Iphone/Ipad app for Protalk/Fermax Door entry system

Lots of people have been asking us to recommend an app that works with the Protalk/Fermax IP range of door entry systems. Though there are hundreds of them on the Apple store, not all work perfectly with Protalk’s IP door entry system.

Problem :

There are 2 main issues.

1. Multitasking

Multitasking means running an app in the background while the user can do other things. It is important to install/buy an app that supports multitasking if you wish to receive calls when the ipad/iphone is in sleep mode.

2. SIP over TCP support

Apple only ever allows a SIP application to work in the background (multitask) when it supports SIP over TCP. Its just the way they have built IOS(Apple’s operating system). When buying an app to work with a hosted solution or a PBX provider, make sure they support SIP over TCP.

Solution:

The solution is to use a PBX/Hosted provider which supports SIP over TCP or alternatively buy a SARK200 PBX which, along with offering other benefits, works for both video and audio over the TCP protocol. For for information about SARK 200 please click here.

Recommended Applications :

Audio /Video Application:

There are two applications that we have successfully tested with the Protalk video entry system.

Acrobits Softphone
UDVguard

Audio only applications :

For audio only door entry system you can use :

Linphone
Acrobits
Bria SIP phone

Please note that ProVu do not develop these applications. If the application crashes or stops working due to an update we cannot be held responsible. You will have to liaise with the company who develop these apps.

SNAP – Sangoma Vega Provisioning Tool for ITSP and Installers

Sangoma has launched a new web tool for ITSPs that allows for quick and easy provisioning of Vega gateways. The tool allows ITSPs to generate configuration files for any Vega gateway without having to manually configure each setting on the web GUI. SNAP walks through a series of screens and spits out a final configuration file which can be uploaded to the Vega.

To benefit from the tool, the ITSP will have to provide a test account and general install scenario such as whether the box will be on DHCP or static IP address, what codec types to use, etc. Sangoma will then test those scenarios with provided test account and make the final template available for users to download. There is no limit on the number of templates. Multiple templates can be created for the same product according to the scenario.

Have a look at the link below to get a general idea of how it works.

http://vegaconfig.com