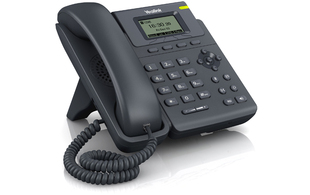
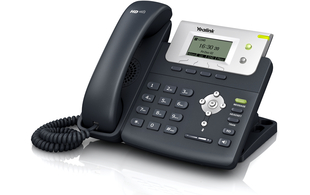
Yealink T26P, T28P and T38G now interoperable with Sennheiser Wireless Headsets


The Yealink EHS36 wireless (electronic hook switch) headset adaptor is now compatible with the high quality headsets in the Sennheiser DW Office DECT range. Meaning that there is now more choice of Wireless headsets to use with the T26P, T28P and the T38G.

Find out more about the Sennheiser products: www.provu.co.uk/sennheiser

The Sennheiser-Y-Cable is required for compatibility between the headset and the phone, this cable will be included in all our current and future stock of the EHS36.

Wiring Diagram:

EHS36 wiring

ProVu Launch Planet Technology range of PoE Injectors

Planet banner
Planet products

We are pleased to announce that we have reached agreement with Planet Technology Corporation of Taiwan to distribute their range of POE Injectors.

These are compact, affordable and reliable injectors and are ideal for powering IP phones plus other POE devices for example the Algo SIP alerter and fit easily into standard rackmount server cabinets.

With the ever increasing drive to greener technology solutions we are seeing many of the phone manufacturers moving towards supplying phones without a PSU. And with the Planet range POE injectors ProVu are now able to offer a very cost effective and greener POE solution.

We have available the 24 port, 12 port and 4 port injectors.

All pricing is available on ProSys, our Reseller portal. If your company has not been assigned an account or you have forgotten your login details give us a call on 01484 840048 to request a new one.

Vega 400/200/100 firmware recovery

If you have bricked your Vega box during the firmware upgrade process or something similar then it can be recovered.

You will need the following items for recovery.

  • Console cable (RJ45 to Serial converter). Vega 400/200/100 comes with a console cable.
  • Computer running Windows/Linux or Mac.
  • Terminal client such as Hyper Terminal, Minicom or Putty.
  • USB to Serial converter (optional: only required if computer does not have a serial port)

Recovery Procedure:

  • Turn off Vega
  • Connect RJ45 end of cable to console port and connect the serial connector to the serial port on computer.
  • Connect to Terminal client of your choice and set following configuration
  • Speed: 9600
    Data bits: 8
    Parity: None
    Stop bits: 1
    Flow control: None

  • Turn on Vega box and press Enter button a couple of times until the message “Press ‘Y’ to enter Boot Menu ” appears on terminal window.
  • Press ‘Y’

Note: Check the connections if nothing appear on terminal screen.

    Vega400 BootLoader: Version 3.00
    FPGA Test Pass (FPGA Version 3)
    RAMTest Pass – 64Mbytes verified
    Programmed MAC Address 00505816244A
    Press ‘Y’ to enter Boot Menu

    VegaStream Boot Menu Version 3.00
    ———- —- —- ————

    1) Download Boot Image (SRec)
    2) Download Firmware Image (SRec) (115K2 Baud recommended)
    3) Config Clear
    6) Switch Boot Partition
    D) Duplicate FLASH
    F) Set Flow Control (currently Hardware)
    Z) Set speed high (115200 Baud)
    E) Exit BOOT and Run Firmware

  • Finally press 6 to choose option 6 i.e. switch boot partition press 6 and wait couple of seconds. This setting will change the partition to older firmware version press E to exit and reboot to old firmware.

After the reboot the Vega should come back with older firmware and settings.

DE900 Rescue mode

If you get a gigaset DE900 stuck in rescue mode, this is what to do.

First change your computer to have an IP address of 192.168.15.2 with a 255.255.255.0 netmask. The phone will be on 192.168.15.1

Download the Firmware file
unzip

On Windows
Open a “DOS-box”
go to the DIR where the Firmware is located
TFTP -i 192.168.15.1 PUT filename.IMG

​On MAC/linux
Open a Terminal (Firmware file has to be in users home-DIR)
tftp
connect 192.168.15.1
binary
rexmt 1
timeout 60
put

Very secure Yealink provisioning coming soon

Just a quick note to say that I was supplied a specially modified version of a Yealink T28P a few weeks ago which has HTTPS certificates loaded into it.

There are two certificate chains, one is used by the provisioning server to verify the identity of the phone. The other is used by the phone to verify the identity of the server. There is a list of a few popular certificate signing authorities you can buy a certificate from for the server identity.

This two way identification is what is required for a truely secure provisioning system. It protects against attackers attempting to obtain SIP configuration from our servers and protects against DNS spoofing/poisoning attacks against your phones.

We sometimes get asked for HTTPS provisioning and of course it is pretty simple to implement. But without these certificates it is fairly useless. It does nothing to guarantee the identity of the server or the client.

At the moment this is a Beta test, we will be rolling out this provisioning option as soon as we can, in the next few weeks. It requires Yealink to start supplying phones with certificates pre-loaded at the factory and requires a certain (currently test-only) firmware version.

If any of this is of interest, please let us know.

Local area code on a snom desk phone

There are many ways you can build a dial plan on a snom phone.

The full range of features are documented on the snom wiki Dial Plan regex

As a quick example, here is how I can dial a local number in the area code 01484:


|^([2-9][0-9]{5})$|sip:014841@d

For many people, this may well be the only dial plan rule that they wish to use.

Get reading the documentation and see what you can do!

Raspberry Pi and Asterisk

Asterisk running on Raspberry Pi

I’ve been playing around with a Raspberry Pi for a few weeks now and thought I’d see how well Asterisk Open Source PBX works on it.

<%ThickBox(http://blog.provu.co.uk/media/4/20120618-raspi.jpg|Raspberry Pi)%>Raspberry Pi running on my desk

I’ve tried a couple of different versions of Debian on this device and have settled with Raspbian since this makes use of the floating point co-processor that is emulated in the normal Debian Armel packages. It’s early days for Raspbian yet and all the Debian packages have to be re-compiled but most stuff seems to be done and it works very well. Raspbian should perform better for tasks relying on the not-very-powerful ARM11 CPU on the Raspberry Pi.

As for Asterisk, proper Debian packages already exist for the Armel compiled operating system and it is simply a case of running “apt-get install asterisk” on the Raspberry Pi and it installs and works.

At the moment there is no package for Raspbian and also, I wanted to try out Asterisk 10. So I compiled from source.

The steps I took were:

  • Download the source from the Asterisk website, extract the tar archive
  • I started from the “hexxeh” Raspbian image which can be found on the Raspbian website. This already comes with most tools needed to build software, if you have installed from somewhere else just make sure you have got the build-essential Debian package
  • You will also need to install these packages: libncurses5-dev, libsqlite3-dev, libssl-dev (or chan_sip will be automatically unselected, this isn’t needed if you don’t want SIP)
  • Possibly more packages if using a different image of Raspbian or you’ve built your own.
  • Now back in the Asterisk 10 source folder you just extracted, issue the command “./configure –disable-xmldoc”. The option is to allow it to continue without installing the libxml2 development package
  • Now before running the build, it’s a good idea to check the modules you need will actually be built, the command: “make menuselect” will bring up a text menu that allows you to check the modules. In particular make sure chan_sip in the channels section is selected!
  • After that simply run: “make”. This will now compile Asterisk and all the modules you’ve selected. This will take around an hour on the Raspberry Pi native hardware! Note: you can use a cross compiler on more powerful hardware to build packages much quicker.
  • Now run: “make install” which will install the compiled software
    • <%ThickBox(http://blog.provu.co.uk/media/4/20120618-raspbian_asterisk.png|Asterisk 10 running)%>Asterisk 10 running

      Now you have installed Asterisk, you can run “make samples” to generate sample Asterisk config or write your own.

      So how well does it work?
      Surprisingly well I thought for a CPU that is generally thought to be approximately equivalent to a Pentium II 300 MHz. I have not done serious load testing but I set up a conference bridge (using the new confbridge feature in Asterisk 10) and it very easily handled 4 local SIP extensions in a conference at once. It’ll be interesting to see how much transcoding it can handle.

      This doesn’t mean that we’re going to start selling IP-PBX based on the Raspberry Pi. The hardware is still a bit too new and untested for the time being and the software is still very much in development. The main reason though is that for low-end hardware to run a PBX off, things like Sheevaplug make more sense. This has a more powerful CPU, more memory and by the time you factor in storage, power & casing for the Raspberry Pi, a Sheevaplug isn’t much more expensive.

      The Raspberry Pi’s CPU is a couple of generations out of date ARM11 core with ARMv6 instruction set. Where the devices shines is the GPU attached to it. This is a Broadcom VideoCore GPU and is pretty impressive indeed. It’s intense graphical processing that the Pi does best, that fact it can decode 1080p30 h264 “HD” video is very impressive (and I have tested this too).

      So while it runs Asterisk quite nicely for just a few phones not doing very much, it seems a bit of a waste to use the Pi for this since it’s not using it’s powerful graphics engine at all. I need to think of some graphical uses for it! Perhaps a fancy OpenGL-ES based call centre wall board system.

RTSP streaming from Protalk/Fermax door entry to VideoLan

You can now stream video directly from the Protalk door phone to your favourite rtsp streaming media server or VideoLan software.

If you are unsure what rtsp means then have a look at this wiki page.

This new feature will allow CCTV/Security installers to integrate video from the Protalk in existing video monitoring/recording software.

Protalk builtin rtsp server support H264 or H263 video format and listen on port 554.

VideoLan Configuration:

To see video stream on VideoLan software.

  • Open program then go to Open Media > Open Capture Device > Network and put “rtsp://ip.address.of.doorphone:554” finally press the Play button.

All being well you will see video from the door phone. If you want to force the rtsp server to use H263 or H264 then add the following in your url field.

‘rtsp://ip_address/video.263’ to force H263
‘rtsp://ip_address/video.264’ to force H264

If you face problem with any of above please get in touch.

This blog post applies to CityLine,SkyLine and SlimLine products.


Sangoma Vega 100 as an ISDN gateway to a SIP PBX

The aim is to use a Sangoma Vega 100 single port PRI gateway as an ISDN gateway for a SIP PBX.

All the Vega will do is forward anything it gets on the ISDN line to the SIP PBX and forward anything from the SIP PBX to the ISDN line.

Steps as follows:

  • Web browse to the Vega and login
  • Go to the Quick Config section
  • On the E1/T1 page, change the number for Interface 1 to just “.*” (dot-star without the quotes)
  • Ignore lines 2-4
  • Open up the Port Settings (ISDN line settings) section and check that the line is set to the correct mode, TE (not NT)
  • On the SIP tab, enter the IP or hostname of your SIP PBX into the domain and proxy settings. You do not need Outbound Proxy and it’s best to set this up without Registration
  • Apply the quick config

That should be it, the Vega will forward SIP to ISDN and ISDN to SIP regardless of numbers received on either side.

The main settings for this are in “Dial plan” in Expert Config. You can see what has been generated in the “To_SIP” and “To_E1T1” dial plans.

Note: this should also work on Vega 200 and Vega 400 if you add the other ISDN interfaces into the planner group that the dial plan “To_E1T1” uses.

Registering RTX4002 Repeater with N300/N510 IP Base

Updated 09/02/2018 – Luke Warby

*RTX4022P can not be set up in Daisy Chain with 3rd party devices such as Gigaset and Yealink*

Updated 10/01/2014 – Chris Wright

Below are some instructions that will help in registering a RTX repeater with Gigaset Base station.

DO NOT PLUG IN THE REPEATER UNTIL INSTRUCTED

1. Set the range extender up near the Gigaset Base Station, you can move it to its final
destination later.

2. Turn off Eco Mode through the Gigaset handset, go to Settings – Eco Mode. Untick the boxes if necessary

3. Turn on Repeater Mode through the Gigaset handset, go to Settings – System – Repeater Mode.
(If you are using firmware 42.194 or greater, you will need to disable the Encryption setting at this stage rather than enabling Repeater mode. More info here)

Updated 28/03/2018 – Jordan Carr

*RTX4022: press the button on the back of the repeater for 5 seconds instead of plugging the power in*

4. NOW PLUG THE POWER INTO THE RTX 4002 for 5 seconds and turn it off again; then turn it back on.

Note: The LED on the RTX 4002 slowly flashes showing that it is now in registration mode.
This should be a single flash, if it is a double flash please go back to Step 1 and retry.

5. Turn on Registration on the Gigaset Base Station, by either:
a. In the web GUI, go to Management > Miscellaneous > Start Registration’

b. On the Gigaset Base Station, press and hold the PAGE/FIND button for approximately 3-5 seconds

Note: The LED on the RTX 4002 flashes quickly to show that it is in ‘learn’ mode.

6. On the Handset – Key in X* – where ‘X’ is a number between 2 and 7. (This relates to the repeater number – the first repeater is number 2 as the N300 is the first link (1).)
Then press the green SEND button.

The LED will stop flashing for about 5 seconds; press * again to confirm the pairing. The LED should now show a steady light without flashing.

Note: If the LED goes back to flashing quickly then the new settings have not been saved or accepted by the RTX 4002. Repeat item 5. If the LED goes back to flashing quickly again then repeat item 5 with a different X.

7. Now position the RTX 4002 where required, ensuring that it is still within range of the Gigaset Base Station.

** If you hear a chirping/beeping noise when on call within range of the RTX, you may have enabled the verfication tone. For instructions on turning this off, please view our blog post**