You may be getting reports from your customers saying that when they are on a call, the opposite party is telling them that their audio is too quiet, or maybe even too loud when they talk. Usually this isn’t a problem because the opposite party can adjust the volume of the person calling with their own phone, but what if the opposite party has already done that and it’s still too quiet or too loud?
If that is the case then you may be able to adjust three settings on the Yealink device. These can found on the web user interface by going to the ‘Features’ > ‘Audio’ page and adjusting the settings in the image below outlined in green.
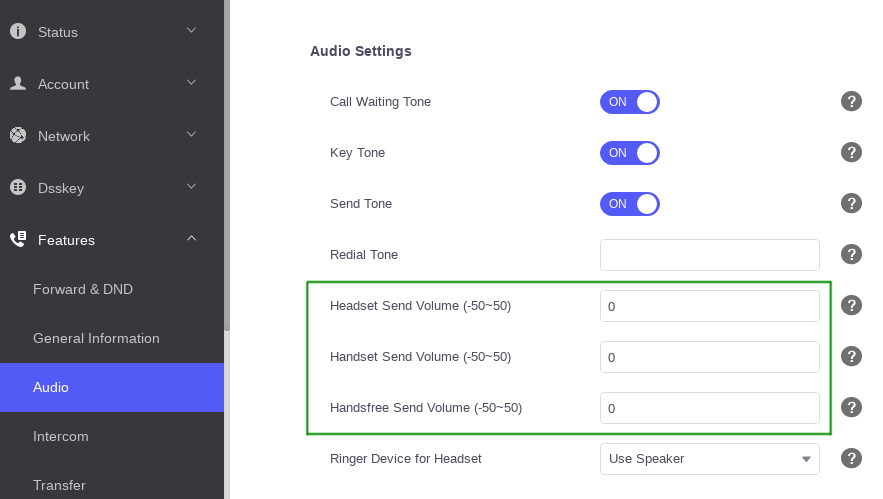
An alternative way to think what these settings do is adjusting how sensitive the microphone is on the device. You can adjust the handset, headset and handsfree sensitivity to be weaker or stronger. The valid values are between -50 and 50. The higher the value, the louder it should be. The lower the value, the quieter it should be.
When adjusting this setting it is important to be cautious. Incorrectly configuring the value can have adverse effects on the audio quality so it’s advisable to gradually increase or decrease the value until you find the right spot.
If you control your own provisioning server and would like to configure this remotely you can use the provisioning parameters below:
voice.headset_send
voice.handset_send
voice.handfree_send
Hopefully after adjusting these settings it resolves the issue and provides a better experience for the end-user and the opposite party on the calls.
For further technical assistance with your Yealink devices please contact our support team by emailing support@provu.co.uk.