Browse Tag

Vega

Expand your legacy with Sangoma Gateways

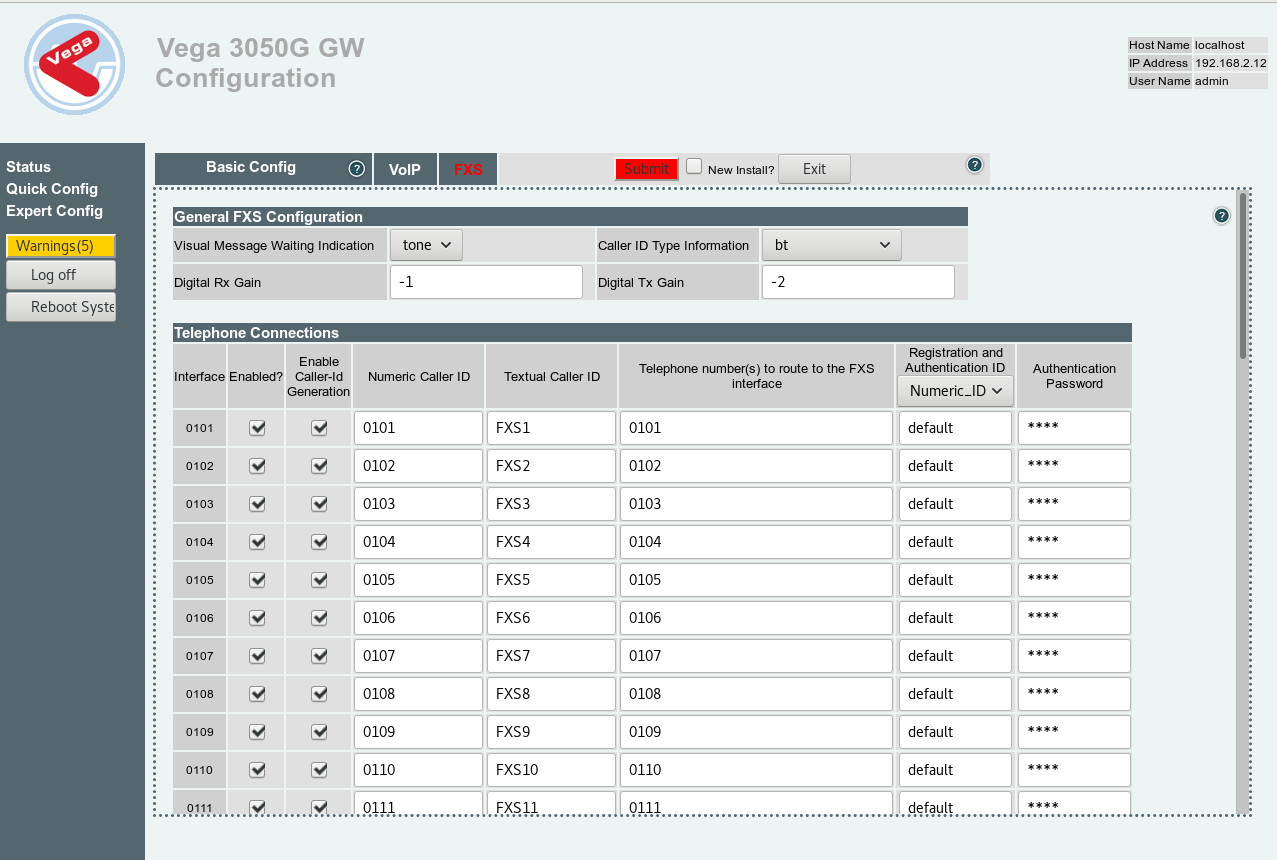
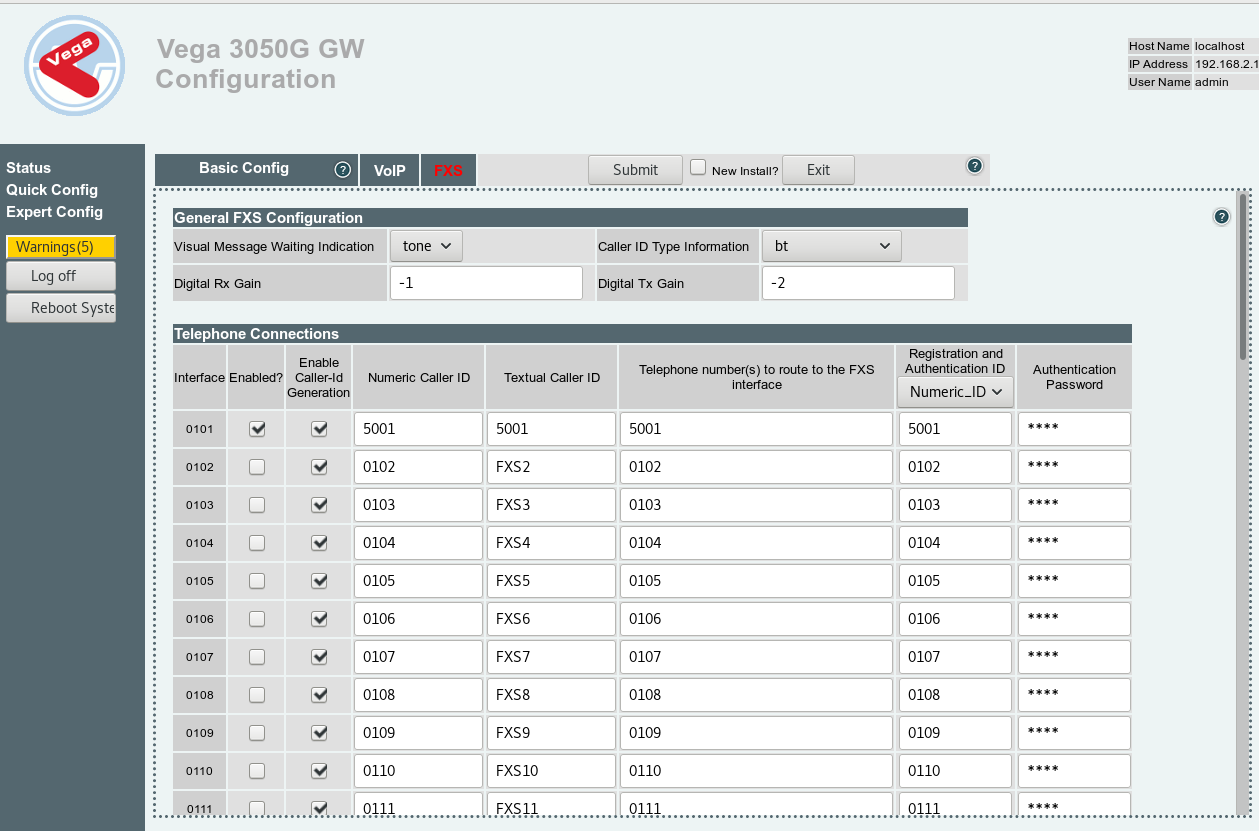
With the upcoming switch off of ISDN in 2025 and the introduction of SoGEA, a gateway seems to be more relevant than ever before. As a stand alone appliance that converts analogue to SIP, the ability to connect legacy infrastructure with modern VoIP networks saves businesses time and money which is often at the forefront of most savvy business minds.

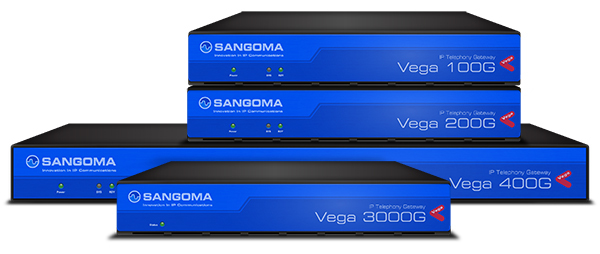
Sangoma’s Vega Gateways offers users a reliable and secure experience that can integrate into most legacy systems. With the availability of higher quality internet connectivity and the movement to more cloud based operating systems, it is more cost effective for businesses to adapt their legacy infrastructure with Gateways. Especially when those systems have been built up over years and have thousands of endpoints, it’s not practical, cost effective or ecological to throw it all away. With Sangoma Gateway you can join the analogue and digital worlds together.

Need an extra helping hand? Order through us to get additional benefits!

Unsure on how to install gateways into your existing set up? Make the most of ProVu’s pre-sales consultation or post-sales installation services. Alternatively learn how to install gateways and other useful Sangoma products, with Sangoma’s FOC training on the Sangoma university or keep a look out for upcoming training hosted by ProVu.

Annual support contracts

Extended hardware warranties

Remote installation services

Ideal businesses & Industries that will benefit most from Sangoma Gateways:

  • Hotels– Many hotels require telephones in guests rooms but do not wish to invest in the cabling required to bring IP connectivity to each room.
  • Healthcare – Many Hospitals or care homes still maintain analogue telephones for ease of use for patients or residents.
  • Poor IP Connectivity– In many rural areas it is not practical to acquire a broadband connection of sufficient bandwidth to carry SIP calls. Each SIP call typically requires about 100kpbs, so 10 calls takes 1 megabit of bandwidth.
  • Large sites – Such as factories or railways, where long line lengths make using IP impractical, expensive and possibly unreliable.

A Sangoma gateway could solve all these issues and more. Find out more about the Sangoma Gateways and how they can help to expand your legacy.

Explore Sangoma’s Gateways

Gateways to the rescue: Whitepaper

Want to know more about how you can benefit from Sangoma’s latest products? Speak to one of our sales team today on 01484 840048 or email contact@provu.co.uk.

Save with Sangoma’s Summer Gateway Bundle Offer

VoIP gateways can be a tricky business if not installed and configured properly and we know it can sometimes be a difficult and time-consuming task to learn about new, more technical products. Sangoma understands this and has developed a new offer for their Vega Gateway range. Available until the end of August 2018, the following bundles include everything you need to get up and running with your gateways, including one year’s technical support.

Small Business Bundle

SME Bundle

Enterprise Bundle

GATEWAY
Choose from one of the following options:

  • Vega 60G – 4 FXS
  • Vega 60G – 4 FXO
  • Vega 60G – 2 BRI

Gold Support

Implementation/
Consultation Time

60 Minutes

Enquire now

GATEWAY
Choose from one of the following options:

  • Vega 100G
  • Vega 3000G


Gold Support

Implementation/
Consultation Time

90 Minutes

Enquire now

GATEWAY
Choose from one of the following options:

  • Vega 600G – 60ch
  • Vega 3050G


Gold Support

Implementation/
Consultation Time

120 Minutes

Enquire now

Installation couldn’t be simpler with the implementation/consultation time and Gold Support included. Get in touch today to place your order and simplify the connection of VoIP services to existing legacy infrastructure.

Find out more about Sangoma Vega Gateways

ProVu & Sangoma Webinar Series – Registration Now Open!

Sangoma Vega gateways offer a powerful solution enabling you to seamlessly connect existing digital or analogue networks to VoIP without the need to change the present infrastructure – this can have great benefits for environments where there simply isn’t the time or budget to implement an entire new system.

Register now for our upcoming webinar series when we will be joined by Sangoma’s UK & IRE Sales Director, Richard Smith and see how Vega Gateways can help you convert your existing analogue telephone systems to IP in preparation for the BT switch off.

Webinar 1: Sangoma Vega 60G Gateways in Focus
Wednesday 6th June, 11 am

Discover Sangoma’s Vega 60G range, during this webinar we will look at how the 60G range can seamlessly connect analogue and BRI/ISDN2 to VoIP in small-medium sized businesses.

Register now

Webinar 2: Winning Business with Sangoma Vega Gateways
Wednesday 20th June, 11 am

As the second part of our webinar series, this webinar will cover the entire Vega Gateway range and the various usage scenarios – guiding you on the solutions available to grow your business.

Register now

Configuring a Sangoma Vega 3050G Gateway for use with 3CX

Firstly, log into your 3CX dashboard and navigate to the extensions tab on the left.

Create a new extension 

Replace the Authentication ID near the bottom with the extension number input at the top

Now, in a new tab navigate to your Vega’s web interface and log in. Once at the dashboard, click Quick Config on the left hand side. From here, click VOIP and change the Registration Mode to FXS Port. Next, replace the SIP Domain & SIP Server IP/Name fields with the IP address of your 3CX server.

Note: We also advise changing the first CODEC at the bottom to from g729 to none, as shown below.

After that, navigate to the FXS tab. You will notice that all of the Telephone Connections are enabled as shown below.

Disable all of the connections that you do not wish to use, and replace the Numeric Caller ID, Textual Caller ID, Telephone number and Registration and Authentication ID with the extension number, in this case 5001. Then type the authentication password in its respective field at the end of the row.

Return to your Extensions tab on 3CX. If you followed the guide correctly, there should be a green circle next to your new extension indicating that it has registered correctly and is ready to use.

If it is still red, go to your 3CX Dashboard > IP Blacklist and ensure that your PBX server has not been blacklisted automatically, as show below. If this has occurred, simply select the Denied IP, click edit and change Deny to Allow.


Vega 400/200/100 firmware recovery

If you have bricked your Vega box during the firmware upgrade process or something similar then it can be recovered.

You will need the following items for recovery.

  • Console cable (RJ45 to Serial converter). Vega 400/200/100 comes with a console cable.
  • Computer running Windows/Linux or Mac.
  • Terminal client such as Hyper Terminal, Minicom or Putty.
  • USB to Serial converter (optional: only required if computer does not have a serial port)

Recovery Procedure:

  • Turn off Vega
  • Connect RJ45 end of cable to console port and connect the serial connector to the serial port on computer.
  • Connect to Terminal client of your choice and set following configuration
  • Speed: 9600
    Data bits: 8
    Parity: None
    Stop bits: 1
    Flow control: None

  • Turn on Vega box and press Enter button a couple of times until the message “Press ‘Y’ to enter Boot Menu ” appears on terminal window.
  • Press ‘Y’

Note: Check the connections if nothing appear on terminal screen.

    Vega400 BootLoader: Version 3.00
    FPGA Test Pass (FPGA Version 3)
    RAMTest Pass – 64Mbytes verified
    Programmed MAC Address 00505816244A
    Press ‘Y’ to enter Boot Menu

    VegaStream Boot Menu Version 3.00
    ———- —- —- ————

    1) Download Boot Image (SRec)
    2) Download Firmware Image (SRec) (115K2 Baud recommended)
    3) Config Clear
    6) Switch Boot Partition
    D) Duplicate FLASH
    F) Set Flow Control (currently Hardware)
    Z) Set speed high (115200 Baud)
    E) Exit BOOT and Run Firmware

  • Finally press 6 to choose option 6 i.e. switch boot partition press 6 and wait couple of seconds. This setting will change the partition to older firmware version press E to exit and reboot to old firmware.

After the reboot the Vega should come back with older firmware and settings.

Sangoma Vega 100 as an ISDN gateway to a SIP PBX

The aim is to use a Sangoma Vega 100 single port PRI gateway as an ISDN gateway for a SIP PBX.

All the Vega will do is forward anything it gets on the ISDN line to the SIP PBX and forward anything from the SIP PBX to the ISDN line.

Steps as follows:

  • Web browse to the Vega and login
  • Go to the Quick Config section
  • On the E1/T1 page, change the number for Interface 1 to just “.*” (dot-star without the quotes)
  • Ignore lines 2-4
  • Open up the Port Settings (ISDN line settings) section and check that the line is set to the correct mode, TE (not NT)
  • On the SIP tab, enter the IP or hostname of your SIP PBX into the domain and proxy settings. You do not need Outbound Proxy and it’s best to set this up without Registration
  • Apply the quick config

That should be it, the Vega will forward SIP to ISDN and ISDN to SIP regardless of numbers received on either side.

The main settings for this are in “Dial plan” in Expert Config. You can see what has been generated in the “To_SIP” and “To_E1T1” dial plans.

Note: this should also work on Vega 200 and Vega 400 if you add the other ISDN interfaces into the planner group that the dial plan “To_E1T1” uses.