We have a new user friendly mobile site!

As a B2B distributor, the majority of users visiting our website are using desktop devices, but it’s no surprise that more and more users are finding us through their mobile devices – In fact 20% of our website views are now from mobile users.

So something needed to be done to make our site a little more user friendly for these users!

Our new mobile site is now up and running. We’ve adopted a simple method of creating a mobile style sheet – so that, the way our site is viewed, is different depending on the size of the screen / browser. This uses the same content as our main site so all the information you may need to access is still there – we don’t show you a cut down version of our site.

Webinar: Discover the uses & benefits of 2N GSM & UMTS Gateways

2N Gateways Webinar Banner

2N GSM and UMTS Gateways enable direct routing between IP, digital, analogue and GSM networks. With the potential to make significant savings on call costs to mobiles, they are a worthy item to consider adding to your portfolio. Join us on Thursday 20th April at 11:30 am to learn more about the range in our free webinar. Throughout the 30 minute webinar we will be discussing the following topics:

2N GSM Gateway Family

  • Introduction to the 2N Gateway range
  • Usage scenarios for 2N Gateways
  • Integrating GSM & UMTS Gateways with the 2N product range
  • Questions and answers

Register for your place now

How to configure Yealink T46G with Plantronics CS520 and EHS36

List of Components:

  1. 3.5mm DC Jack
  2. Plantronics phone cord
  3. Plantronics CS520 Headset
  4. Yealink EHS36 Adapter
  5. RJ12 Cord
  6. Plantronics Base
  7. Plantronics Base power supply

Configuration:

  1. Connect the RJ12 Cord (5) to the Yealink EHS36 Adapter(4).

2. Connect the 3.5mm DC Jack(1) to the Yealink EHS36 Adapter(4). Note that you only need the DC Jack in this end, you do not need to fill this socket.

3. Connect the Plantronics Base(6) to the power supply(7).

4. Connect the Plantronics phone cord(2) to the Plantronics Base(6).

5. Connect the 3.5mm DC Jack(1) to the Plantronics Base(6).

6. Connect the RJ12(5) to the EXT port on the back of the Yealink T46G. Then connect the Plantronics phone cord(2) to the headset port on the back of the phone; making sure you don’t put it in the handset port by mistake.

You shouldn’t need to change any of the settings in the phone as the Yealink EHS36 should work out of the box. However, you will want to check that on the bottom of the Plantronics base that the Dial’s are set correctly. This should be the correct setting for the dials :

Sangoma PBXact UC – User Control Panel (UCP)

Are you interested in finding out more about how the User Control Panel (UCP) works on a Sangoma PBXact UC system? Please see the following guide below on how to set this up and have this up and running in minutes:

This guide shows you how to create a user and set up UCP for an extension that already exists. If you would like to find out how to create an extension, please refer to the following link:

https://blog.provu.co.uk/sangoma-pbxact-uc-creating-an-extension/

Please note, if you have already created an extension on a PBXact UC system, you may already have a user created in the ‘User Manager’ section.

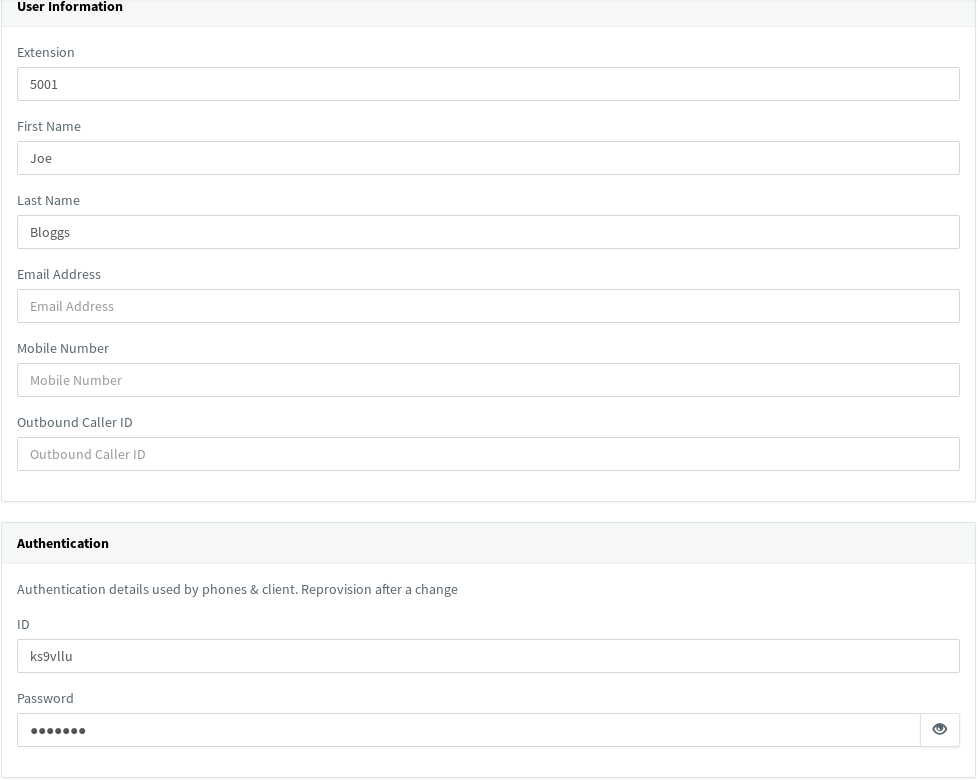
The screenshot to the right shows the ‘User Manager Settings’ section on the screen where you create an extension:

Step 1:

You will need to start by web browsing to the IP address of your PBXact system using a web browser of your choice. Once you have browsed to the PBXact UC system, you should see the homepage with the following options to choose from.

You will need to select ‘PBX Administration’ which is the first option on the left hand side of the interface.

Step 2:

You should now see a screen prompting you to enter a username and password. If you don’t know the username and password, you may need to consult an administrator.

Step 3:

Providing you have entered the correct username and password, you should see a system overview of the PBXact UC system.

Using the search bar at the top right hand side of the interface, you will need to search of ‘User Management’. Please see the screenshot below that shows this:

Step 4:

Once you have opened the ‘User Manager’, you will need to click on ‘Add’.

Step 5:

You should now see the options for creating a new user. You will then need to input a login name, description for the user, a secure password and also link the extension to an extension already created on the PBXact UC system.

Step 6:

For this step, you will need to scroll along the tabs using the arrow keys located near the top right hand side of the interface. You should then see some further options on the tabs including ‘UCP’.
Please click onto the ‘UCP’ tab which should display the following screen.

You will need to ensure that you change the ‘Allow Login’ to ‘Yes’ in order to log into the User Control Panel once the user has been created on the system.

Step 7:

Under the ‘UCP’ section, you should also see some additional options. Please see the screenshot below that show some of the other settings.

You may want to enable a user to be able to make calls via the User Control Panel. To do this, y
ou will need to navigate to ‘Miscellaneous’, then select ‘Yes’ under the option ‘Enable Originating Calls’.

Please note that there are other options that can be configured through these settings such as enabling conferences, voicemail settings and other options.

Step 8:

Once you have finished enabling the settings that you would like to be enabled for the user, you can go ahead and submit the changes by pressing the ‘Submit’ button located near the bottom right hand side of the screen.


You should now be taken back to the ‘User Manager’ home screen, which should display the option to ‘Apply Config’ at the top right hand side of the screen.

This is the end of the configuration process for enabling ‘UCP’ for a user. Please see the following steps below for logging into the ‘User Control Panel’:

Step 9 (Logging In):

If you are still logged into the PBXact UC system, you should see an option for ‘UCP’ using the tabs at the top of the screen.

Clicking onto the ‘UCP’ tab should open the ‘User Control Panel’ in a separate tab as shown in the screenshot below:

The login page for the ‘User Control Panel’ should now be displayed prompting you to enter a username and a password.

You will need to enter the user extension number and the password that was set on the fifth step of the configuration above and hit ‘Login’.

Providing you have entered the correct username and password, you should see the following screen or similar screen as shown below:

Please note that the options shown on the sidebar on the left hand side of the screen may vary depending on the settings that have been enabled/disabled.

You should be able to change settings such as presence for the extension you are logged in as by selecting the icon shown in the screenshot below:


How to configure Polycom VVX410 with Plantronics CS520 and EHS APP-51

List of Components: 

  1. Power connector for Plantronics Base
  2. Plantronics Headset
  3. APP-51 EHS Adapter
  4. Plantronics Base

Configuration:

  1. Connect the power connector (1) to the Plantronics Base (4) via the back of the base.


2. Connect the EHS Adapter (3) into the back of the Plantronics Base (4).

3. Connect the other ends of the EHS Adapter (3) into the back of the Polycom VVX410. Make sure that you connect the cable to the headset port and not the handset port by mistake.

4. In order to make sure that the headset works correctly with the phone you need to go to :

Settings > Basic Settings > Preferences > Headset Mode > Select Plantronics EHS Mode.

5. Make sure that the Dial settings on the bottom of the Plantronics base are set correctly. The correct Dial settings are below:

The headset should now work with the Polycom phone.

We have doubled our warehouse capacity!

We have recently completed building works on a new lift to help ease the process of bringing pallets into our warehouse. Our most recent development has opened up our cellar as usable warehouse space; more than doubling our capacity!

The new lift works on three levels – at loading level, up to our main warehouse level and down into the cellar. This work has allowed us to more than double the amount of usable warehouse space, giving us the ability to hold even more stock. Along with the new lift we’ve also built a new stairwell, the stairwell is now wider and less steep which will allow easier and safer access to the different floors.

The expansion into our cellar is a natural step for us as our sales are increasing year on year, the expansion will allow us to hold increased levels of stock and to meet the increasing demand from our resellers.

Cisco Multiplatform Phone Launch Round Up

We’ve been in Glasgow and Birmingham this week hosting our popular Cisco multiplatform SIP phone launches. Joined by guest speakers from the Cisco team, attendees learnt about Cisco’s latest SIP phone range – the 7800 and 8800 series.

Similar to the popular SPA range, Cisco’s new multiplatform series are designed to work with any 3rd-party hosted and on-site platform.

Why not try them out for yourself with our NFR offer? For more information and pricing, please contact the ProVu sales team.

How to Enable ZTP on Polycom Phones

Here is a step by step guide on how to enable ZTP on a range or polycom Phones:

  1. Plug the device in and wait for the screen to display “Loading Application” and then click cancel as soon as it appears.
  2. Wait for the screen to display “Welcome Auto Boot” and click on “Setup” and type in your password, by default this should be 456 unless it has been changed and then press “OK”
  3. Select “Provisioning Server” and then scroll down to the bottom to where it says “ZTP” to enable this setting by clicking select  and then use the down arrows to change the “ZTP” to “Enabled”
  4. Once this is done keep clicking “Exit” and then “Save & Reboot”, you have successfully enabled ZTP.

If you have any problems with this please contact our technical support team.

ProVu Sponsor Channel Leaders Conference

We’re proud to be sponsoring the Channel’s newest event! Join us in London on Tuesday 25th April for the first ever Channel Leaders Conference.

What is Channel Leaders?

Aimed at ICT Reseller Businesses, Channel Leaders is designed to combine practical knowledge with forward thinking strategic advice and discussion on how Channels can remain relevant to their customers both in the short term and in the future.

Throughout the day, you will have the opportunity to attend seminars and panel discussions from respected analysts and commentators – it’s a great opportunity to hear from Channel Leaders!

How can I attend?

Tickets are available through the Channel Leaders website. To save 50% simply get in touch and we will provide you with our exclusive discount code. But hurry, tickets are selling fast!

Jablocom Essence – Headset Compatibility

Did you know that you can use a headset with the Jablocom Essence phone? We have performed testing using an Eartec 308 monaural headset with a EAR-QD002P which is the compatible bottom cable for the headset with the Essence. Please see the following guide below to find out how to connect and use the headset:

Step 1:

You will need to disconnect the handset curly cable from the phone which is located at the back of the phone.

Step 2:

Connect the EAR-QD002P bottom cable into the RJ9 port where you originally disconnected the handset curly cable from.

Step 3:

You will need to ensure that the Essence is turned on and then navigate to the menu by pressing the key labelled ‘OPTIONS’ on the phone keypad.

Step 4:

Using the arrow keys, scroll down to ‘Settings’, then press the green button to proceed to the next menu.

Step 5:

You will then need to select ‘Phone’ which should be the first option in the menu, then scroll down to ‘Headset active’ option and press the green button.

When an incoming call is received on the phone, you can now press the green button to answer the call on the headset.