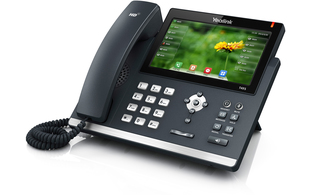
Distinctive ringing with Cisco phones

Both the older Cisco SPA range and the new CP range support distinctive ringing through the use of Alert-Info SIP headers.

The names to use can be found in the web interface for both phone types.  In the web interface, the settings are in the Voice section, phone tab, Ringtone heading.

On CP phones:

On SPA phones:

The important part for Alert-Info is the name part after “n=”.  The Alert-Info header must look like these examples:

Alert-Info:Mellow

Alert-Info:Simple-2

So simply put the name of the ringtone in the header and nothing else.  This is different to most phones (and actually not as specified in the SIP RFC) as they need to have a dummy URI inside them.

As an example, if you wanted to add this header in Asterisk, use the SIPAddHeader application:

SIPAddHeader(“Alert-Info:Mellow”)

Panasonic TGP600 now available to purchase as a standalone base

Following the launch of the TGP600 around 18 months ago, we have received requests from resellers wanting to order the base station as a stand alone item. After passing these requests on to Panasonic they have now launched the TGP600G as a standalone version of the TGP600 base station.

This new DECT base provides you with far greater flexibility by enabling you to build your own DECT solution with any mix (up to 8) of the following compatible handsets:

Handset Features
TPA65 DECT Desk Phone Wireless desk phone – no network cable, only power cable required.
1.8″ colour TFT display
Headset support
UDT121 Premium DECT Handset 1.8″ Colour LCD display
Built-in Bluetooth
Headset support
UDT131 Ruggedised DECT Handset IP65 Protection
Built-in Bluetooth
Headset support
TPA60 DECT Handset
(This handset comes bundled with the TGP600)
Low cost DECT handset
1.8″ Colour TFT display
Headset support

The KX-TGP600G is now available to order through our reseller portal, ProSys. If you do not have access to ProSys and would like to register for an account, please complete our ProSys Account Request Form.

Yealink RT10 ‘End of Life’ Notice

 Yealink RT10 End of Life

We have been informed by Yealink that the RT10 DECT Repeater is now End of Life and is no longer available to purchase. The RT10 will be replaced by the new Yealink RT20. Until the new RT20 is available you are able to use the RTX 4002 as a compatible repeater for use with both the W52P and W56P.

If you have any queries or would like to discuss how these changes may effect any projects you are working on, please call the sales team on: 01484 840048 or you can email: contact@provu.co.uk.

New Vega 50 FXS Analogue Gateway from Sangoma

Vega 3050G 50 FXS Analogue Gateway

We are pleased to announce the launch of the next generation Sangoma Vega 3050G high density 50 port analogue gateway. The Vega 3050G allows connection of a large quantity of analogue handsets and devices to an on-site or hosted VoIP PBX. The Vega 3050G is ideal for environments such as hotels or hospitals where a company wants to move to SIP, without having to replace existing phones, install new cabling around the building or effect day to day business.

Along with the Vega 3000G this new gateway replaces the old Vega 5000 series and features a new lower price!

Features

  • 50 Port FXS / 50 Simultaneous calls
  • Optional 2 ports FXO module available for emergency PSTN backup
  • Express setup (same familiar configuration and GUI as the Vega series)
  • Ideal for healthcare, hospitality and education industry sectors

How to make a 2N call a phone when the tamper switch is triggered

Did you know you can make your 2N tamper switch call a phone when it is triggered?

If you have a 2N tamper switch and want to know how to install it into your Verso, please click this link:

2N’s Helios IP Verso Tamper Switch

After the installation of the tamper switch you will need to configure it. Go on the 2N web-interface and go to Services (Purple tile) > Automation, from this page you will need to tick the box “Function Enabled” and fill in the “Object Type” and “Parameters” as seen below:

Please note: to change “Number=5070; Event=1″ to the extension you want the 2N to call when the tamper switch is triggered.After you have filled these automation in you can run a test by taking the metal plate of the 2N and seeing if your phone rings as seen in the video below:

In addition to this you could have a second Event that sends an email to you when motion is detected. This would be for extra security purposes and would capture a picture of who ever triggered the tamper switch. If you want to know how to do this click the link below:

How to set up Email notification from 2N movement detection

If you have any problems with this please contact our support team.

Cisco SPA 525G2 ‘End of Life’ Notice

Cisco SPA 525G2 ‘End of Life’ Notice

The EU have amended their regulations on the Wi-Fi spectrum and this impacts all the countries that follow the European compliance for all products incorporating Wi-Fi including the UK.

The SPA 525G2 IP phone which has Wi-Fi, is not compliant with the new regulation and therefore Cisco will be withdrawing this model from the market by the end of May in order to comply with the EU regulation. We currently have a limited number of SPA 525G2 units available, however when these have been sold, we do not intend to place any further stocking orders.

Alternative Models with Introductory Offer!
The SPA 525G2 is a popular phone and is usually purchased either because of its multi-line colour display, bluetooth or because Wi-Fi is needed. The new Multiplatform 8800 product family offers valid replacements for all cases beginning with the 8841.

To ease the transition from the SPA 525G2 to the new Multiplatform range we have made some generously discounted sample units available for our resellers, allowing you to test the 8841 and 8861 phones on your platform and giving you the opportunity to see for yourself the commercial offering this new series of phones can bring to your portfolio.

For more information on this NFR sample offer or if you would like to discuss how these changes may affect any projects you are working on, please call the Sales Team on: 01484 840048 or you can email: contact@provu.co.uk.

Experience Greater Flexibility with VTech’s latest SIP Products

We are pleased to announce the availability of two new products to the VTech ErisTerminal range. Expanding on the capabilities of VTech’s second generation range of SIP phones, these new additions are set to add even more features and flexibility to this excellent series.

VSP605A DECT Repeater

VTech VSP605A

Designed for use with the VSP600A and VSP610A DECT systems, the new VSP605A DECT Repeater extends coverage to approximately 135 metres, helping to maximise coverage in larger buildings. With the capability to connect up to 5 repeaters to a single DECT base, you can adapt your solution to suit individual building requirements.

VSP610A DECT Base Station & Handset

VTech VSP610A

For those who are familiar with the VSP600A, the new VSP610A incorporates all of the same great features of the VSP600A, including support for up to 6 SIP accounts and 4 concurrent calls. Now supplied with enhanced software, the VSP610A also enables access to new features such as remote XML phonebook, open VPN client and active URI/URL.

Find out more about the VTech Range

Algo 8301 Multicast Line IN Audio

This guide is designed to show how to make an Algo 8301 multicast the audio it receives on the Line IN or AUX IN ports.

In this guide we will use two Algo 8301 units, the first as the Multicast sender and the second as the multicast receiver.

Configuring the Multicast Sender

Log in to the Algo 8301 Web GUI and change the following settings:

  • Basic Settings > Multicast
    • Multicast Mode = Master/Sender
    • Multicast Type = Regular (RTP)
    • Master Single Zone = Music
  • Additional Features > Input/Output
    • Audio Always On = Enabled
    • Audio Input Port = Aux IN or Line IN (depending on what port you are wiring your audio source to)

Configuring the Multicast Receiver

Log in to the second Algo 8301 Web GUI and change the following settings:

  • Basic Settings > Multicast
    • Multicast Mode = Slave/Receiver
    • Multicast Type = Regular (RTP
    • Basic Slave Zones = Tick “Music” box.

Thats It! Couldn’t be simpler. In my test, I chose the Audio Input Port as the Aux IN port, then connected my mobile phone using a normal AUX cable. I then connected some PC speakers to the Aux OUT port on the second Algo 8301.


When I played the music on my phone, it was played out over the speakers plugged in to the second Algo, which was receiving the audio over multicast.

This would be a great way to take an audio input source in one location, and broadcast the message across a large site with multiple speaker groups.

Gigaset pro models now compatible with Broadsoft and Metaswitch

Gigaset have recently announced that the N510 IP and N720 IP PRO are now interoperable with the Broadsoft (BroadWorks software) and Metaswitch cloud-based unified communications platforms. The Gigaset N510 IP has passed the required test for both a Broadworks and a Metaswitch certificate and is suitable for auto provisioning deployment on the platforms. The N720 IP, which already had a Broadworks certificate has now received a certificate for auto provisioning deployment with Metaswitch.

Gigaset also plan to complete testing for the Maxwell device range, these are expected to be certified by the end of the first quarter of 2017.

Take a look at the Comms Business article here: http://commsbusiness.co.uk/news/gigaset-pro-models-compatible-with-broadsoft-and-metaswitch/

Provision Sangoma S700 IP Phone using Sangoma portal

You may or may not be aware that you can provision your Sangoma phones using the re-direction service which is available via the Sangoma portal. If you are interested in finding out how to provision your Sangoma phones, please follow the guide below:

Step 1:

You will need to start by navigating to the Sangoma portal which can be accessed by visiting the following link listed below:

https://portal.sangoma.com/

Please note, if you do not already have an account for the Sangoma portal, you will need to sign up for one. This can be done by accessing the following link listed below:

https://portal.sangoma.com/index.php/login/register

Please note that the registration link above will also list some important information regarding the Sangoma portal.

Step 2:

Once you have logged into the Sangoma portal, you should see the welcome page and also a navigation bar on the left hand side. Using the navigation bar, you will need to click onto ‘Products’ which should display a sub list with an option for ‘Sangoma Phones’. You will then need to click onto ‘Sangoma Phones’ which should display another sub list, where you can select ‘Register’.

Step 3:

You should now see a screen for registering a Sangoma phone. For this part you will need to find out the MAC address of the phone that you are wanting to register.

If you are able to web browse to the IP address of the Sangoma phone, this could be the easiest way as you can simply copy and paste the MAC address onto the Sangoma portal.

If you don’t know the IP address of the phone, you can obtain this by either web browsing to the IP address of the router and then looking for devices on the network, or, if you have the phone in front of you, you can obtain the IP address by pressing the tick button located at the centre of the arrow navigation keys, and then by pressing the tick button again on the ‘Information’ tab. You should then see the information page displaying the IP address under ‘IPV4’.

Step 4:

Once you have obtained the IP address, you will need to browse to that IP address using a web browser. By default, you will be prompted to enter a username and password before you can access the interface of the phone. The default username and password is ‘admin’. Please ensure that you change the default password for security reasons.

Once you have logged into the web interface, you should see the status page that displays a variety of information about the phone. You should see the MAC address under the ‘Network’ section. You will need to copy the MAC address, then navigate back to the Sangoma portal and paste it into the registration field.

Step 5:

Once you have pasted the MAC address into the registration field, you will need to press the submit button located next to the MAC address field. Providing the MAC address you have entered is valid and doesn’t already exist on the system already, you should see a message appear in green to show that your phone has been successfully registered.

Step 6:

You may see some phone details including the MAC address, manufacture date and more listed on the screen. You should see a ‘General Information’ section which will ask for the company name to assign the phone to. You will need to ensure that the correct company name is selected. You can then enter a description in the box below such as ‘Sangoma S700 IP Phone’ depending on the phone you are registering.

Step 7:

Below the description box, there should be a check box to ‘Enable Redirection’. You will need to check this box and some options should be displayed below. The ‘Redirection Type’ should be set to ‘IP/FQDN’. The ‘IP/FQDN protocol’ should be set to ‘http://’. The ‘IP/FQDN address should be blank by default. You will need to enter the IP address of the Sangoma PBXact UC system in this field followed by the provisioning port number e.g. ‘192.168.1.60:83’. Please ensure that you don’t include ‘http://’ at the beginning of the ‘IP/FQDN address’ field as the protocol option above should already be set.

Once the above options have been set correctly and the relevant information has been filled in, you can then go ahead and submit the changes using the ‘Submit’ button at the bottom of the page.

You page should then reload and display a green box stating that the changes have been updated. You will then need to reboot the phone in order for the provisioning process to start. You may want to factory reset your Sangoma phone if you want to overwrite the existing configuration.