Browse Tag

Snom

Using secure SIP and RTP with SARK PBX and Snom or Yealink phones

This involves two levels of encryption. The first is SIPS/TLS which is encryption of SIP signalling between the SARK PBX and your IP phone. It works in much the same way as HTTPS certificates do.

You can either purchase a certificate from a trusted source or generate your own self signed certificates. I’ll use self-signed certificates here because they are free and do the job for what I wanted.

The second part of encrypting your phone calls is the actual audio stream itself, the RTP. We can use SRTP, this is simply a case of turning it on but there’s no real point to doing this without firstly configuring SIPS/TLS because the keys used in SRTP encryption are passed in the SIP messages.

For me, there’s two reasons for doing all this.

The most obvious one is security, encrypting your phone calls means that anyone who is able to sniff your network traffic cannot extract your phone calls. For most people this is pretty unlikely but could happen all the same.

Perhaps of much more use is for remote or home workers and this is what made me get this working with SARK. One of the biggest problems in the world of VoIP is SIP-ALGs on routers making incorrect alterations to SIP packets. If your SIP packets are encrypted then any router they pass through cannot possibly make any alterations to them!

The steps to getting this working are (basically the same process on a SARK PBX as on any Asterisk PBX).

1) Generate self-signed certificates (commands issued at the Linux command prompt on SARK):

  • cd /etc/asterisk
  • mkdir ssl
  • cd ssl
  • echo 00 > file.srl
  • openssl req -out ca.pem -new -x509 -days 365
  • openssl genrsa -out server.key 2048
  • openssl req -key server.key -new -out server.req -days 365
  • openssl x509 -req -in server.req -CA ca.pem -CAkey privkey.pem -CAserial file.srl -out server.pem -days 365

2) Configure Asterisk:

Edit the file ‘sark_sip_header.conf’ either from the command line or in Asterisk File Edit in the SARK web interface. Add the following:

tlsenable=yes
tlsbindaddr=xx.xx.xx.xx
tlscafile=/etc/asterisk/ssl/ca.pem
tlsprivatekey=/etc/asterisk/ssl/server.key
tlscertfile=/etc/asterisk/ssl/server.pem
tlsclientmethod=tlsv1
tlscipher=ALL
tlsdontverifyserver=yes

Replacing xx.xx.xx.xx with your system’s own IP address. The last line isn’t essential for us but means if Asterisk is connecting as a client to a TLS server (so you’d need a SIP service provider who does TLS), whether to verify their certificate or not. If you do verify their certificate then they cannot be using self-signed certificates.

3) Configure extensions:

You can specify which extensions will use TLS & SRTP (and any you don’t, stay using unencrypted SIP & RTP).

In the SARK web interface, edit the extension and go to the “asterisk” tab. Add these lines:

transport=tls
port=5061
encryption=yes

This will turn on both TLS and SRTP for that single extension.

It’s important to note that once you’ve applied this, the phone MUST use it and trying to Register without encryption will now fail.

4) Configure the firewall:

By default SARK PBX only allow in SIP over UDP but TLS uses TCP. You need to add a rule in the ‘firewall’ section of the SARK web interface to allow TCP port 5061 (SIPS/TLS uses 5061 by default). Note, you don’t need to allow RTP over TCP, SRTP still uses UDP normally.

5) Configure the phones:

This assumes you already have a phone configured and working using normal SIP, this is how to convert them to use SIPS/TLS & SRTP.

Snom phones (note, you’ll probably need a fairly recent firmware version)

  • In identity #, add an outbound proxy such as “sip.mydomain.com:5061;transport=tls”. Where sip.mydomain.com is your SARK PBX’s hostname or IP address. You could also set up the correct DNS-SRV records for this (hint, _sips._tcp) but I’ll not go in to that here.
  • In the RTP tab, turn on RTP Encryption, set SRTP Auth-tag to AES-80 and RTP/SAVP to Mandatory

Then when making or receiving a call, look out for the little “lock” symbol on the phone screen to signify SIPS/TLS & SRTP are both in use in the call in progress.

Yealink phones (I used v72 firmware, older may work too)

  • In Account #, Register tab, set Transport to TLS, set Server Host Port to 5061.
  • In the Advanced tab, set RTP Encryption(SRTP) to ‘Compulsory’

Much like Snom, the phone will also display a “lock” symbol on the screen during a call with SIPS/TLS & SRTP in use.

One last thing to note, both Snom and Yealink phones do not verify server certificates by default. This means that there is no protection against a man-in-the-middle attack (someone else pretending to be your SIP server). You can turn on certificate verification on either phone but you MUST also do one of the following in order for SIPS/TLS to continue to work:

  • Purchase a certificate from a trusted source, much like you would if setting up a HTTPS website. Please speak to us first so we can advise you on the best place to buy as the phones have a limited number of CAs built into them in comparison to a web browser.
  • Continue with your self-signed certificate but load the CA it was signed against into the phone. This is the “ca.pem” file generated earlier on. It is safe to distribute this to your phones, it cannot be used to be generate more certificates without the key (which you need to keep safe).

Any questions to paul@provu.co.uk

Snom 7 Series End of Life Notice

We have received an end of life notice from Snom for their current 710, 720 and 760 models. We are currently holding significant stocks of each of these models and fully expect to be able to continue to supply these for the remainder of 2015 and most likely for some weeks in to the New Year.

The replacement models will be the D710, D715, D725 and D765. Although these new models look the same, they are black in colour and have completely new hardware and firmware. All of the D7 series models except the D710 are in stock and available to order now. We expect the D710 to arrive in the next few weeks.

If you have any queries or would like to discuss how these changes may effect any projects you are working on, please call the sales team on: 01484 840048 or you can email: contact@provu.co.uk.

The New Snom D765 has arrived!

The new Snom D765 is now available from ProVu. Joining the D7-series of IP phones, the D765 is the perfect companion for users requiring cutting-edge design and high-end functionality.

This new desk phone will replace the Snom 760 and is the first in the range to feature integrated Bluetooth connectivity and a large 3.5″ high resolution colour TFT display.

Key Features Include

  • Up to 12 SIP accounts
  • USB connectivity (allowing easy connection of the D7 expansion keypad, USB headset or WiFi dongle)
  • Two x gigabit ethernet switches
  • PoE support
  • RJ9, EHS, USB or Bluetooth headset support
  • 16 programmable function keys with built-in LEDs for visual call indication
  • For more information, please visit the D765 webpage.

Snom 300 still going strong

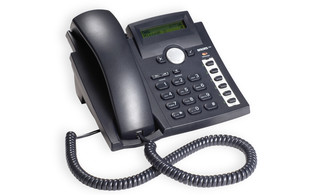
Launched in 2006 and having gone through several revisions the Snom 300 has stood the test of time and is still going strong. Over the years the Snom 300 has become one of the most popular SIP Phones ever. Proving to be the ideal choice for those volume applications where a relatively low cost but reliable and robust phone are essential requirements.

Although compact the Snom 300 has the same high quality handset and audio as the larger models and supports PoE as well as a 2 line backlit LCD display and headset port. It also has all the the most commonly used telephony features required for business use.

Key Features Include:

  • Call hold
  • Blind or attended call transfer
  • Speakerphone
  • DND mode (do not disturb)
  • 3 way conference call

With a retail price of just £55.00 the Snom 300 represents outstanding value and with its reputation for robustness and reliability it provides a great return on investment.

Convergence Summit South 2015

This year will mark our 3rd year of exhibiting at the Convergence Summit South, taking place at Sandown Park Racecourse on the 7th & 8th October. Joining us this year will be Sangoma, Snom, Gigaset and Yealink.

The exhibition is free to attend and is a great opportunity to meet new and existing clients.

Please register your attendance below and don’t forget to come and visit us at stand 73!

Pre Register now to attend the show

How to set-up JPEG stream on an IP bold door entry for a Snom 760

Here is a guide on how to set up a Snom 760 to be able to view the video stream from a Alphatech IP bold door entry unit.

1. Log in to the web user interface of the Snom 760

2. Go to Function keys

3. Select a key to active the video stream and set the fields to the following

Context —> Active
Type —–> Action URL
Number —-> http://IPADDRESSOFBOLD/snom01.xml ,
Short text —-> Description of button.

4. Once the following fields have been set click apply and then save.

5. To view the stream go to the Snom 760 and press the function key that has been assigned to active the stream of the video.

5b. To stop the stream press the X button on the Snom 760.

How to: 2N Video on Snom Screen

The 2N door intercoms have built in XML that allows you to stream the video feed from the camera directly onto the screen of a snom phone (760, 821, 870 models only).
This works by getting a static JPEG image and refreshing it frequently to make it appear as a video.

The URL you need to use is:

http://ip.addr.of.2n:80/enu/snom-video.xml

** Make sure to edit the URL so that it actually contains your 2N units IP address **

Now you need to browse to the web UI of your snom phone and add your 2N intercom to the directory. In the number field, enter the extension number of the 2N (the unit it presents as its Caller ID). Then in the Action URL field enter the URL shown above. Click the Add button to add the directory entry.

Now when you receive a call from your door intercom, the video stream will be shown on the display of your snom phone.

Please note, we recommend that you have the following firmware versions on each unit as a minimum:

Snom: 8.7.3.25
2N: 2.10

If you have any problems getting this to work, please email us at support@provu.co.uk.

New snom 2015 Spring Price list

We are pleased to confirm that snom have issued a new price list with some reductions in price to the 710, 720 and 760. In addition with the recent strengthening of the Pound against the Euro we are also applying some further adjustments that will reduce pricing on some of the other models as well.

These price reductions have been applied as of today Monday 2nd March 2015 and are available to view on ProSys our reseller portal. If you do not have a ProSys login or have forgotten your username and password please call the sales team on 01484 840048.

Visit ProVu at the Convergence Summit North 2015

Once again ProVu will be exhibiting at the Convergence Summit North and this time it is being held at the International Centre in Harrogate on 17th and 18th March.

This is a great opportunity to come and meet the ProVu team and view the latest products from snom, Konftel, Gigaset and Sangoma.

On display this year we will be featuring the exciting Gigaset Maxwell 10 tablet phone plus their latest cordless handsets. We will also have the very latest phone designs from snom with their D7 series. Sangoma will also be showcasing their new mini SBC which is designed for small companies and branch offices with call handling from 5 to 16 calls. And for the first time we will be joined by Konftel with their range of conference phones which support SIP.

We will be located on stand 47 and we would love to meet as many of you as possible. All you need to do is register to attend at the link below.

Pre Register Now to attend the show

We look forward to meeting you at the show and if you have any queries or would like to arrange a meeting please drop us a line at contact@provu.co.uk.

How to: Resolve Snom Meeting Point DTMF Issue

We have reports of issues with DTMF tones on a snom Meeting Point, particularly when (but not limited to) dialling in to hosted conference facilities.

The user types the access code or conference PIN in correctly, but they are advised that the code is incorrect.
This is because the microphone on the Snom Meeting Point is picking up the DTMF that is played back when the user types a digit. The phone then sends this code twice (once from the actual key press using RFC2833 and once from the microphone using inband DTMF).

There are a couple of settings you can change on the Meeting Point to stop this happening depending on your users preference:
Please Note: The Meeting Point must be on firmware 8.7.3.25 or newer or the settings will not be present in the device

1) DTMF Volume:

http://wiki.snom.com/Settings/dtmf_volume

Reducing this to a lower setting (1 or 2) may be enough, but setting it 0 will stop the playback of the DTMF tones. This may not be desirable if the customer wants to hear the DTMF being played back to them so they know the key press has definitely registered.

2) DTMF Microphone Delay:

http://wiki.snom.com/Settings/dtmf_micro_delay

This setting temporarily disables the microphone when a DTMF key is pressed, to stop it from picking up the tone being played back through the speaker. Set this to 1000 so that it delays for 1 second (it is off by default).

The settings do not appear in the web interface so you will need to use the dummy setting URL to save these changes. Simply type either of the following URLs into the web browser on your PC (that is connected to the same network as the Snom):

http://ip.addr.of.snom/dummy.htm?settings=save&dtmf_volume=0

http://ip.addr.of.snom/dummy.htm?settings=save&dtmf_micro_delay=1000

You need to change ‘ip.addr.of.snom’ to the actual local IP of the Snom Meeting point.

Thats it! Your Meeting Point should now connect to hosted conference rooms without issue.
If you have followed the steps above and are still having issues please email support@provu.co.uk.