If your Yealink device is in a boot loop or stuck on the Welcome initializing… Please Wait screen then you may need to preform a TFTP firmware recovery. This guide will show you how.
In the guide we will be using PumpKin TFTP Server but you can use any substitute you like.
Please note: ProVu are not liable for any issues caused by this download and please make sure that this is all setup on a LAN and not a WAN.
Step 1:
To acquire the firmware recovery files please contact support@provu.co.uk
Step 2:
Once you have the right firmware files you will need to setup your TFTP server.
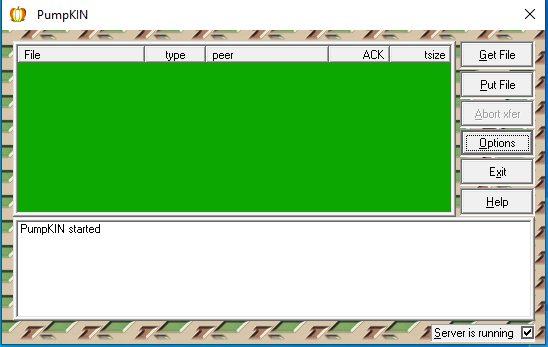
Once you have downloaded and installed PumpKin from the link above you will be presented with the below page:
From here you will need to click on options which should bring up the following window:
On the above window you will need to set the TFTP filesystem root to the folder that you stored the firmware files in. In the example above I kept this in the Downloads folder but these can be stored anywhere you like.
You will also want to change the Read Request Behaviour to Give all files and the Write Request Behaviour to Take all files as shown in the screenshot above. Setting these options will allow the phone to request all the firmware files that it is looking for in the selected file path.
Once these have been set you can now click ‘OK‘ to save changes.
Step 3:
Putting your device into TFTP recovery mode. This may differ depending on what Yealink device you have so I have tried to cover them all in this guide for you.
T19, T2x, T3x, T4x, T5x
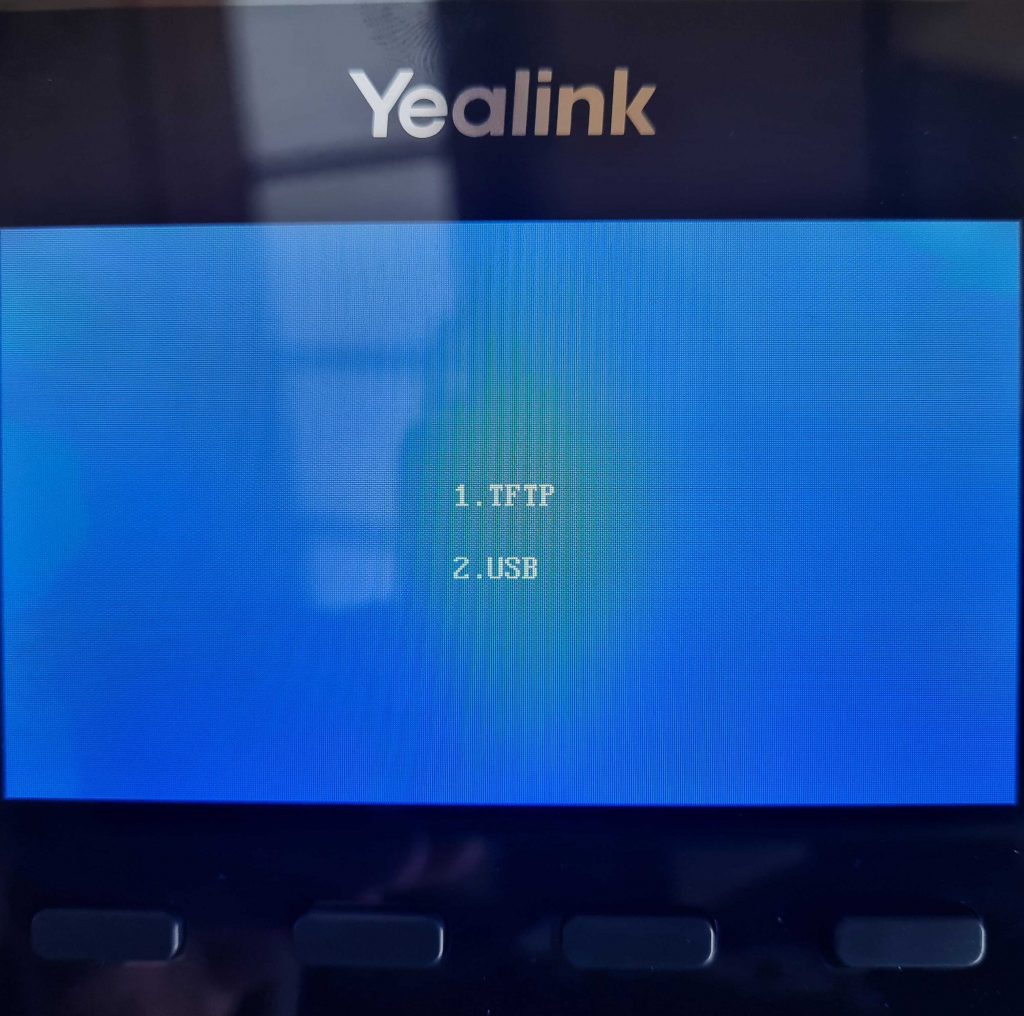
Step 1 – To recovery the above models you want to power off the device > press and hold the speakerphone button while powering on the device until you get to the following page:
Unless your phone has a USB port in which case you will see these 2 options before the above:
If you are presented with this page first then click on 1. TFTP option.
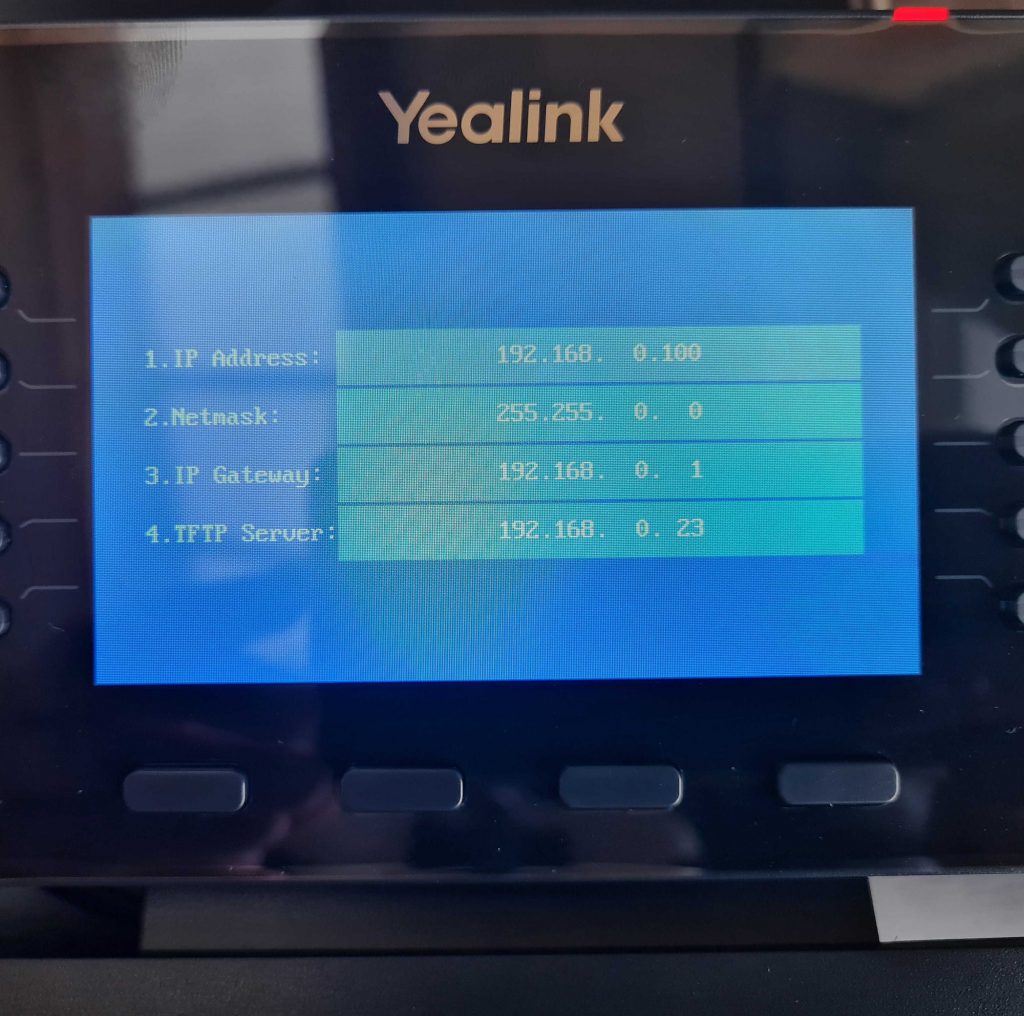
Step 2 – You should be on the page that has these four options:
IP address
Netmask
IP Gateway
TFTP Server
For these four options you will want to input the following:
IP address – Any unused IP address that is available on your network.
Netmask – For the netmask you will want to add the subnet mask of your network for example 255.255.255.0.
Gateway – This will be the IP address of your router.
TFTP Server– Finally this will be the IP address of the PC that is hosting PumpKin & Firmware files.
Once you have input these details press the ‘OK’ button on the handset, this will then start requesting the files that you downloaded and stored earlier.
Step 3 – Please note that this process can take a few minutes to complete. You should see Updating on the screen until eventually the phone reboots itself. If successful then once rebooted you should see the phones home screen as normal
If this was not successful then you should see a message such as Update failed, if that is the case then you will need to check your details and firmware file path and try again until successful.
W52P & W60B
Step 1 – To recover a DECT base station is a little different to a deskphone.
DECT equipment requests the files from a specific IP address so you will need to make sure that your PC that is hosting PumpKin is configured with the following information as per below:
Step 2 – During the recovery the base station should get an IP address of 192.168.0.100 and will request the firmware files from the IP address above (192.168.0.23)
To put the base station into recovery mode you will need to unplug the unit press and hold the paging button (only button on the base station) and power on the device while still holding the paging button until all the lights turn on one by one (Power, Network & Phone/Dect)
Step 3 – Just like the deskphone this will take a few minutes to complete. Once successfully complete the base should reboot and all lights on the base should be solid. The device should now get an IP address via DHCP and can now be accessible.
If you have any problems/issues with any of the above please contact support@provu.co.uk or call 01484 840048 option 2 for support.
The steps below will show you how to enable EHS both through the phones interface and the web interface on your Fanvil phone.
Phone Interface
Step 1:
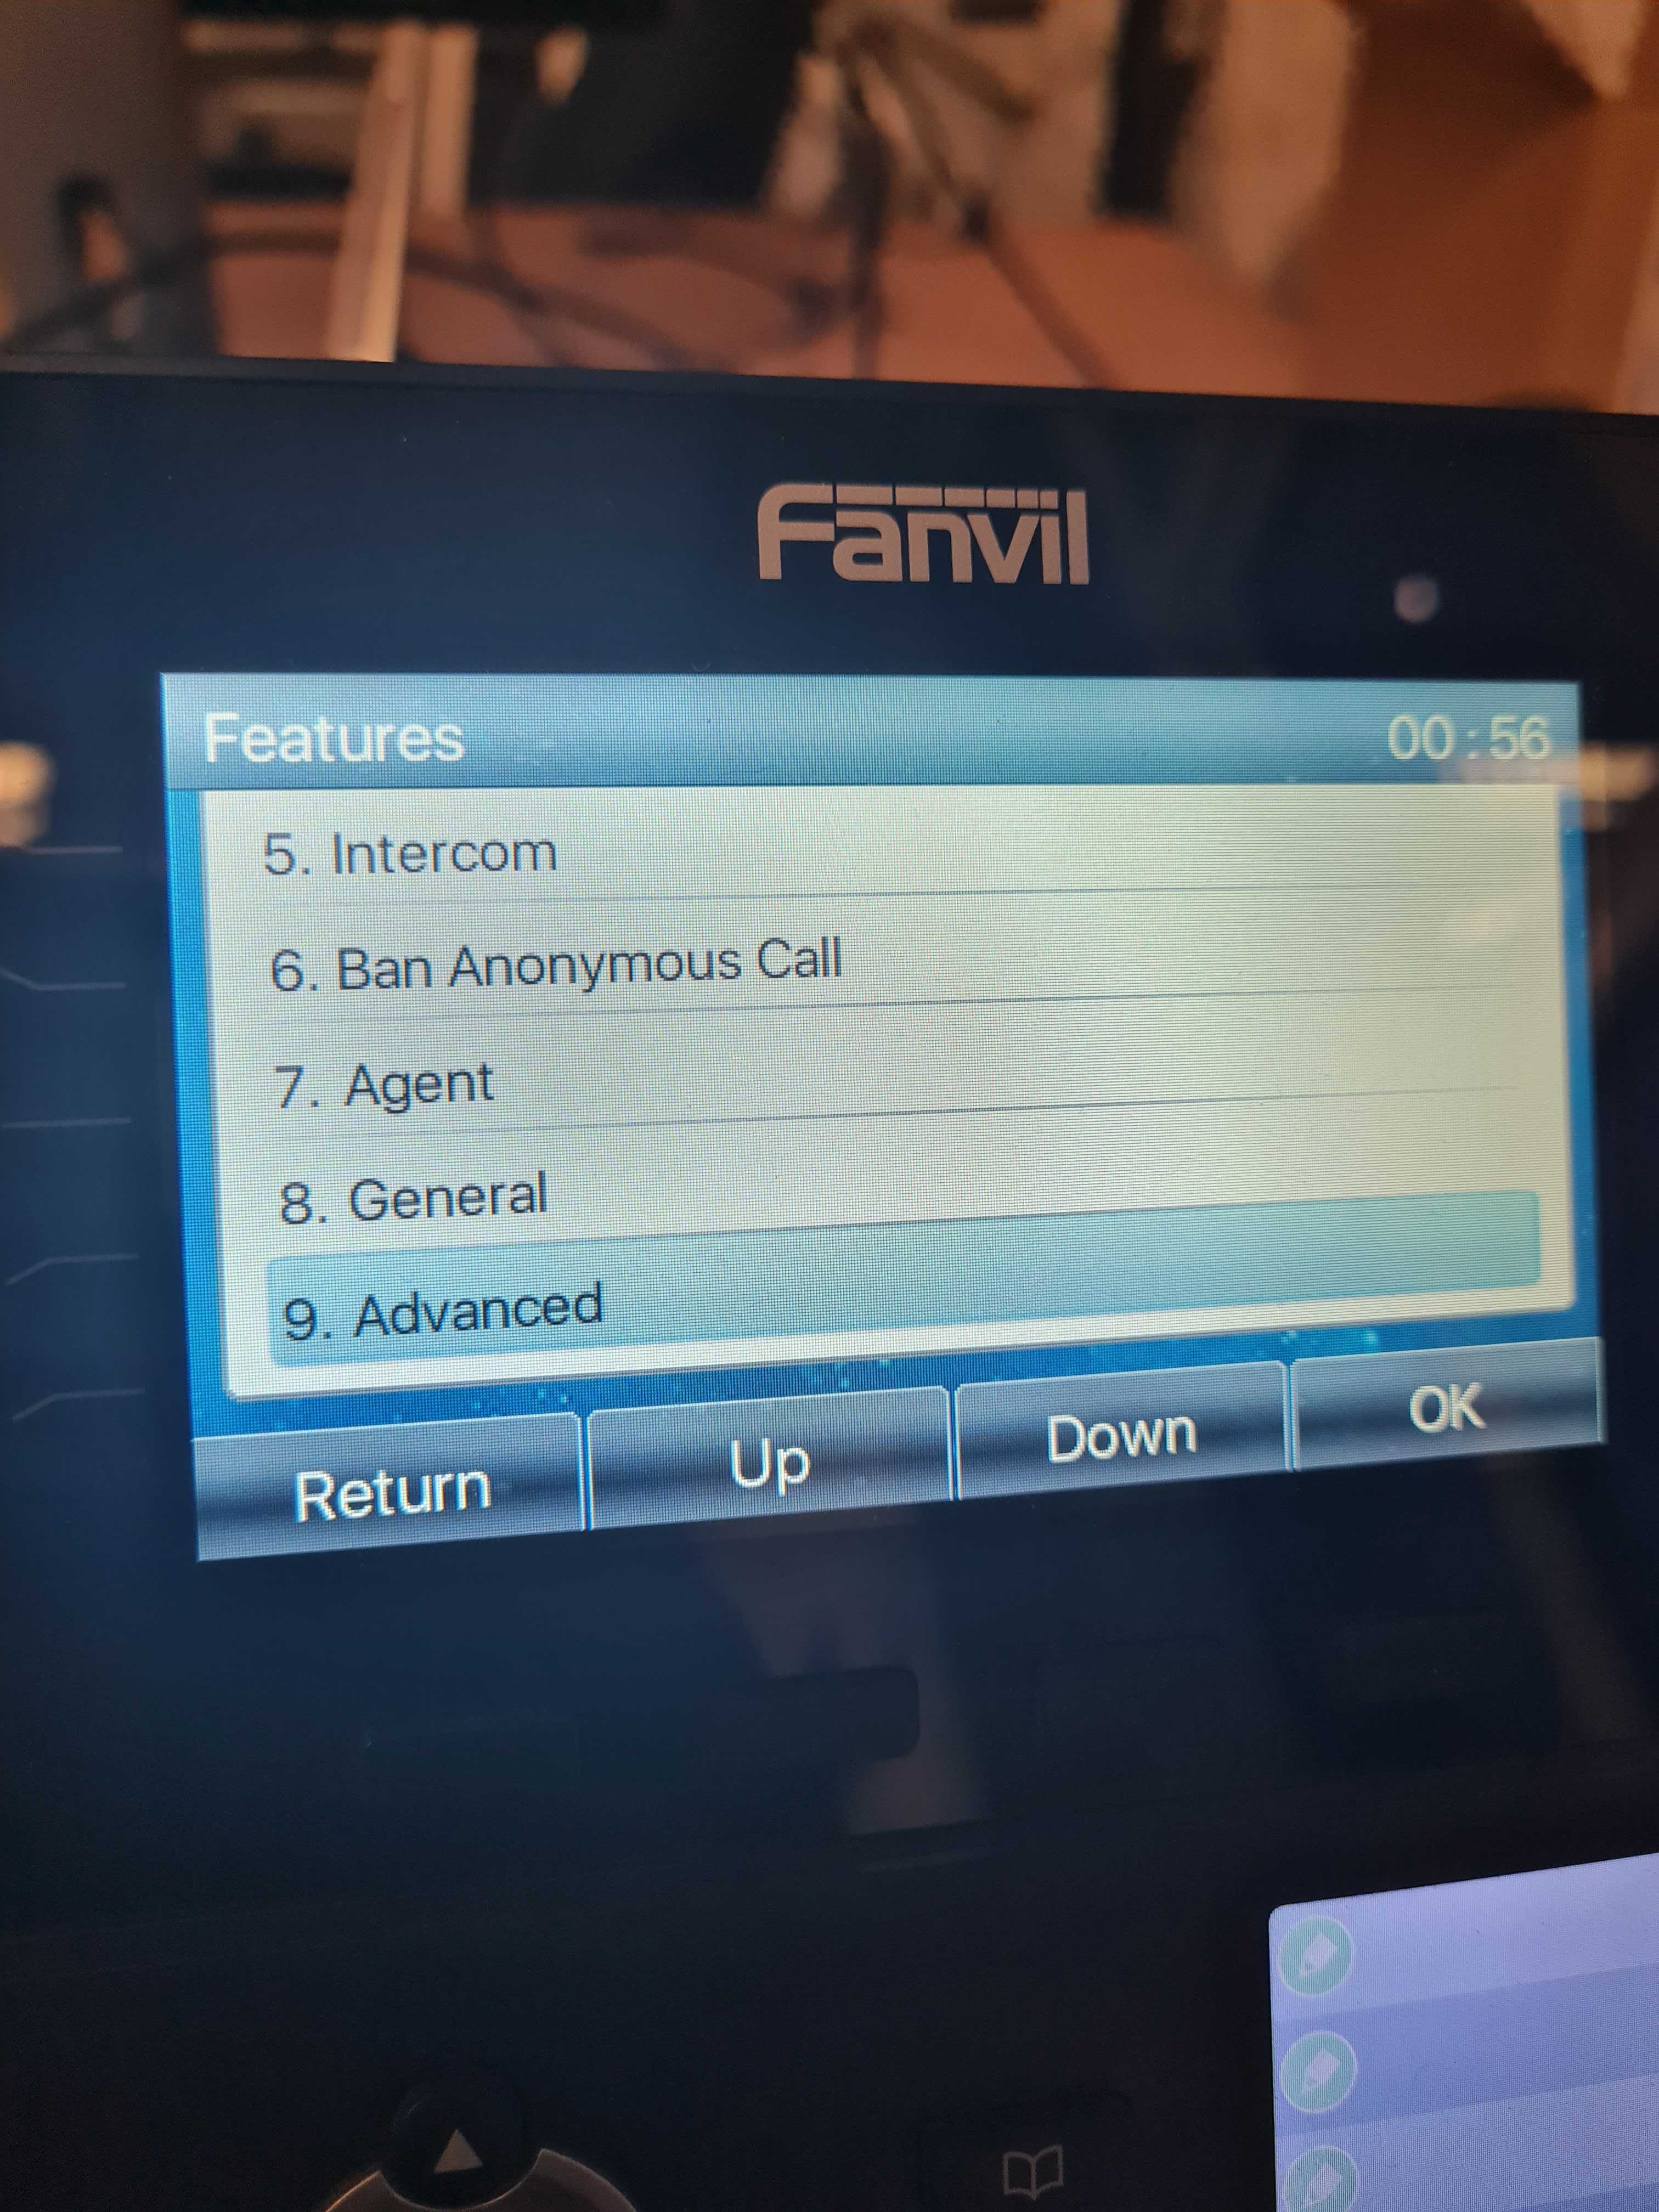
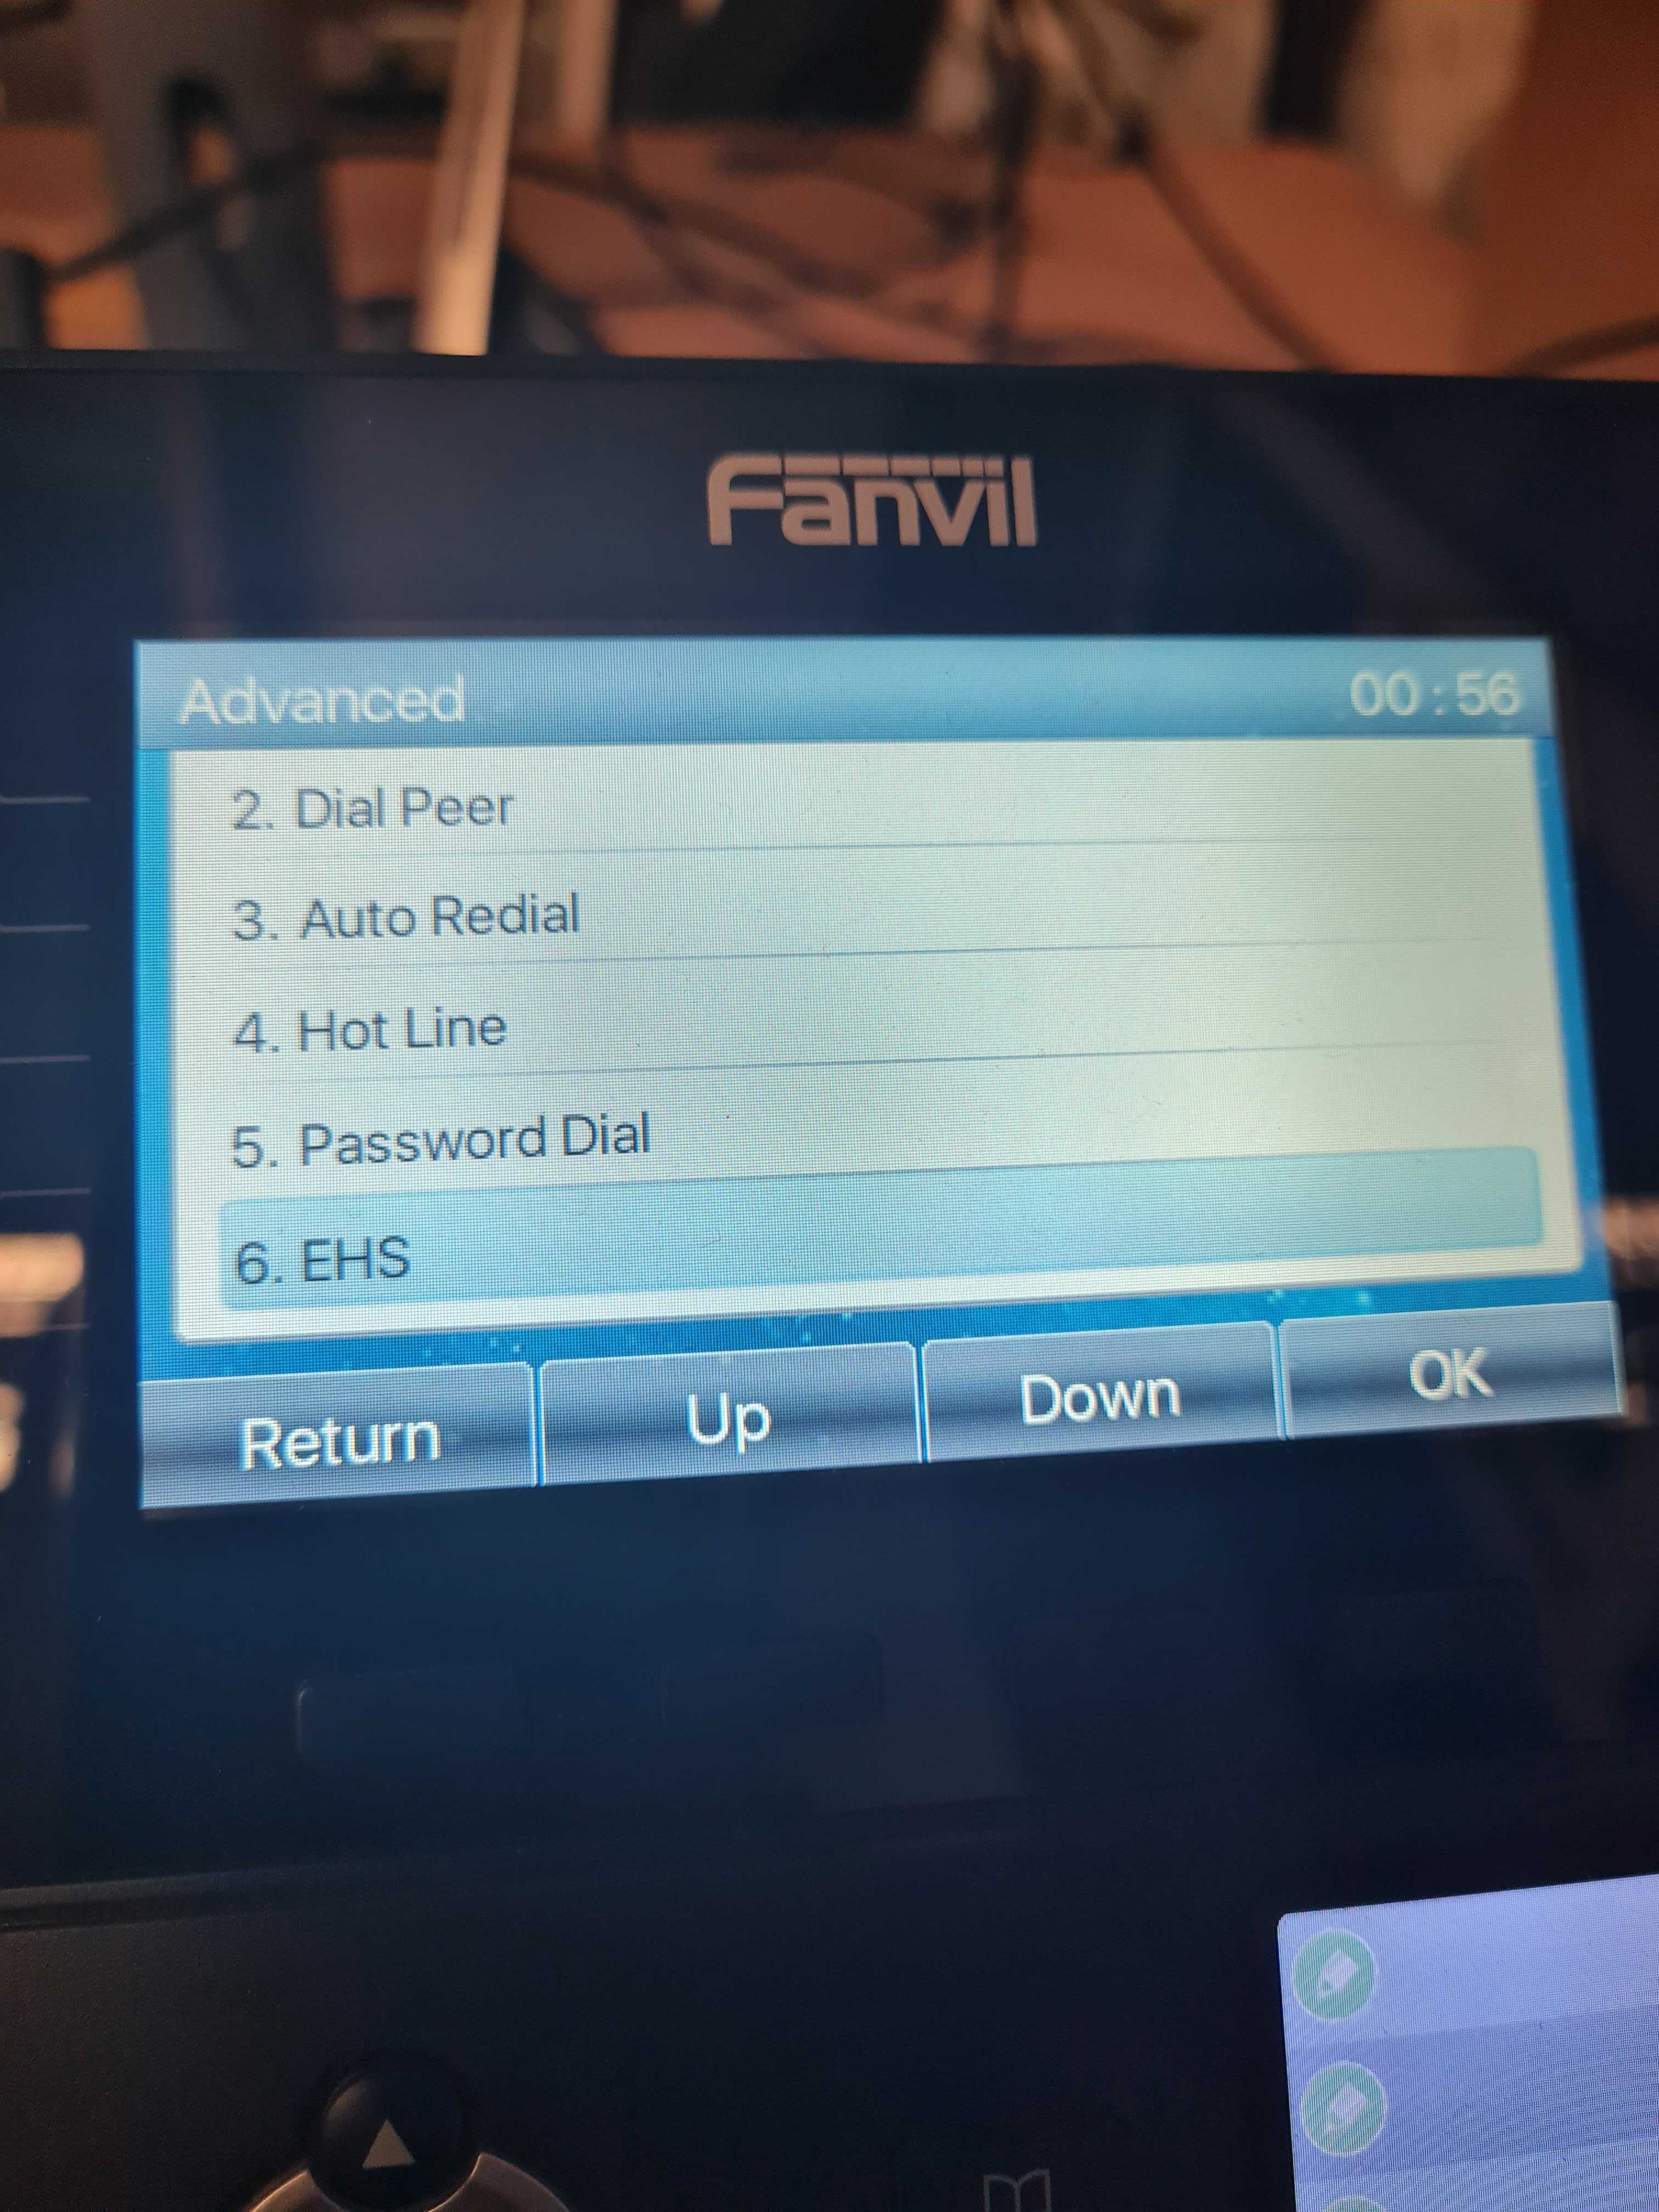
Go to Menu > Features > Advanced > EHS as shown below:
Step 2:
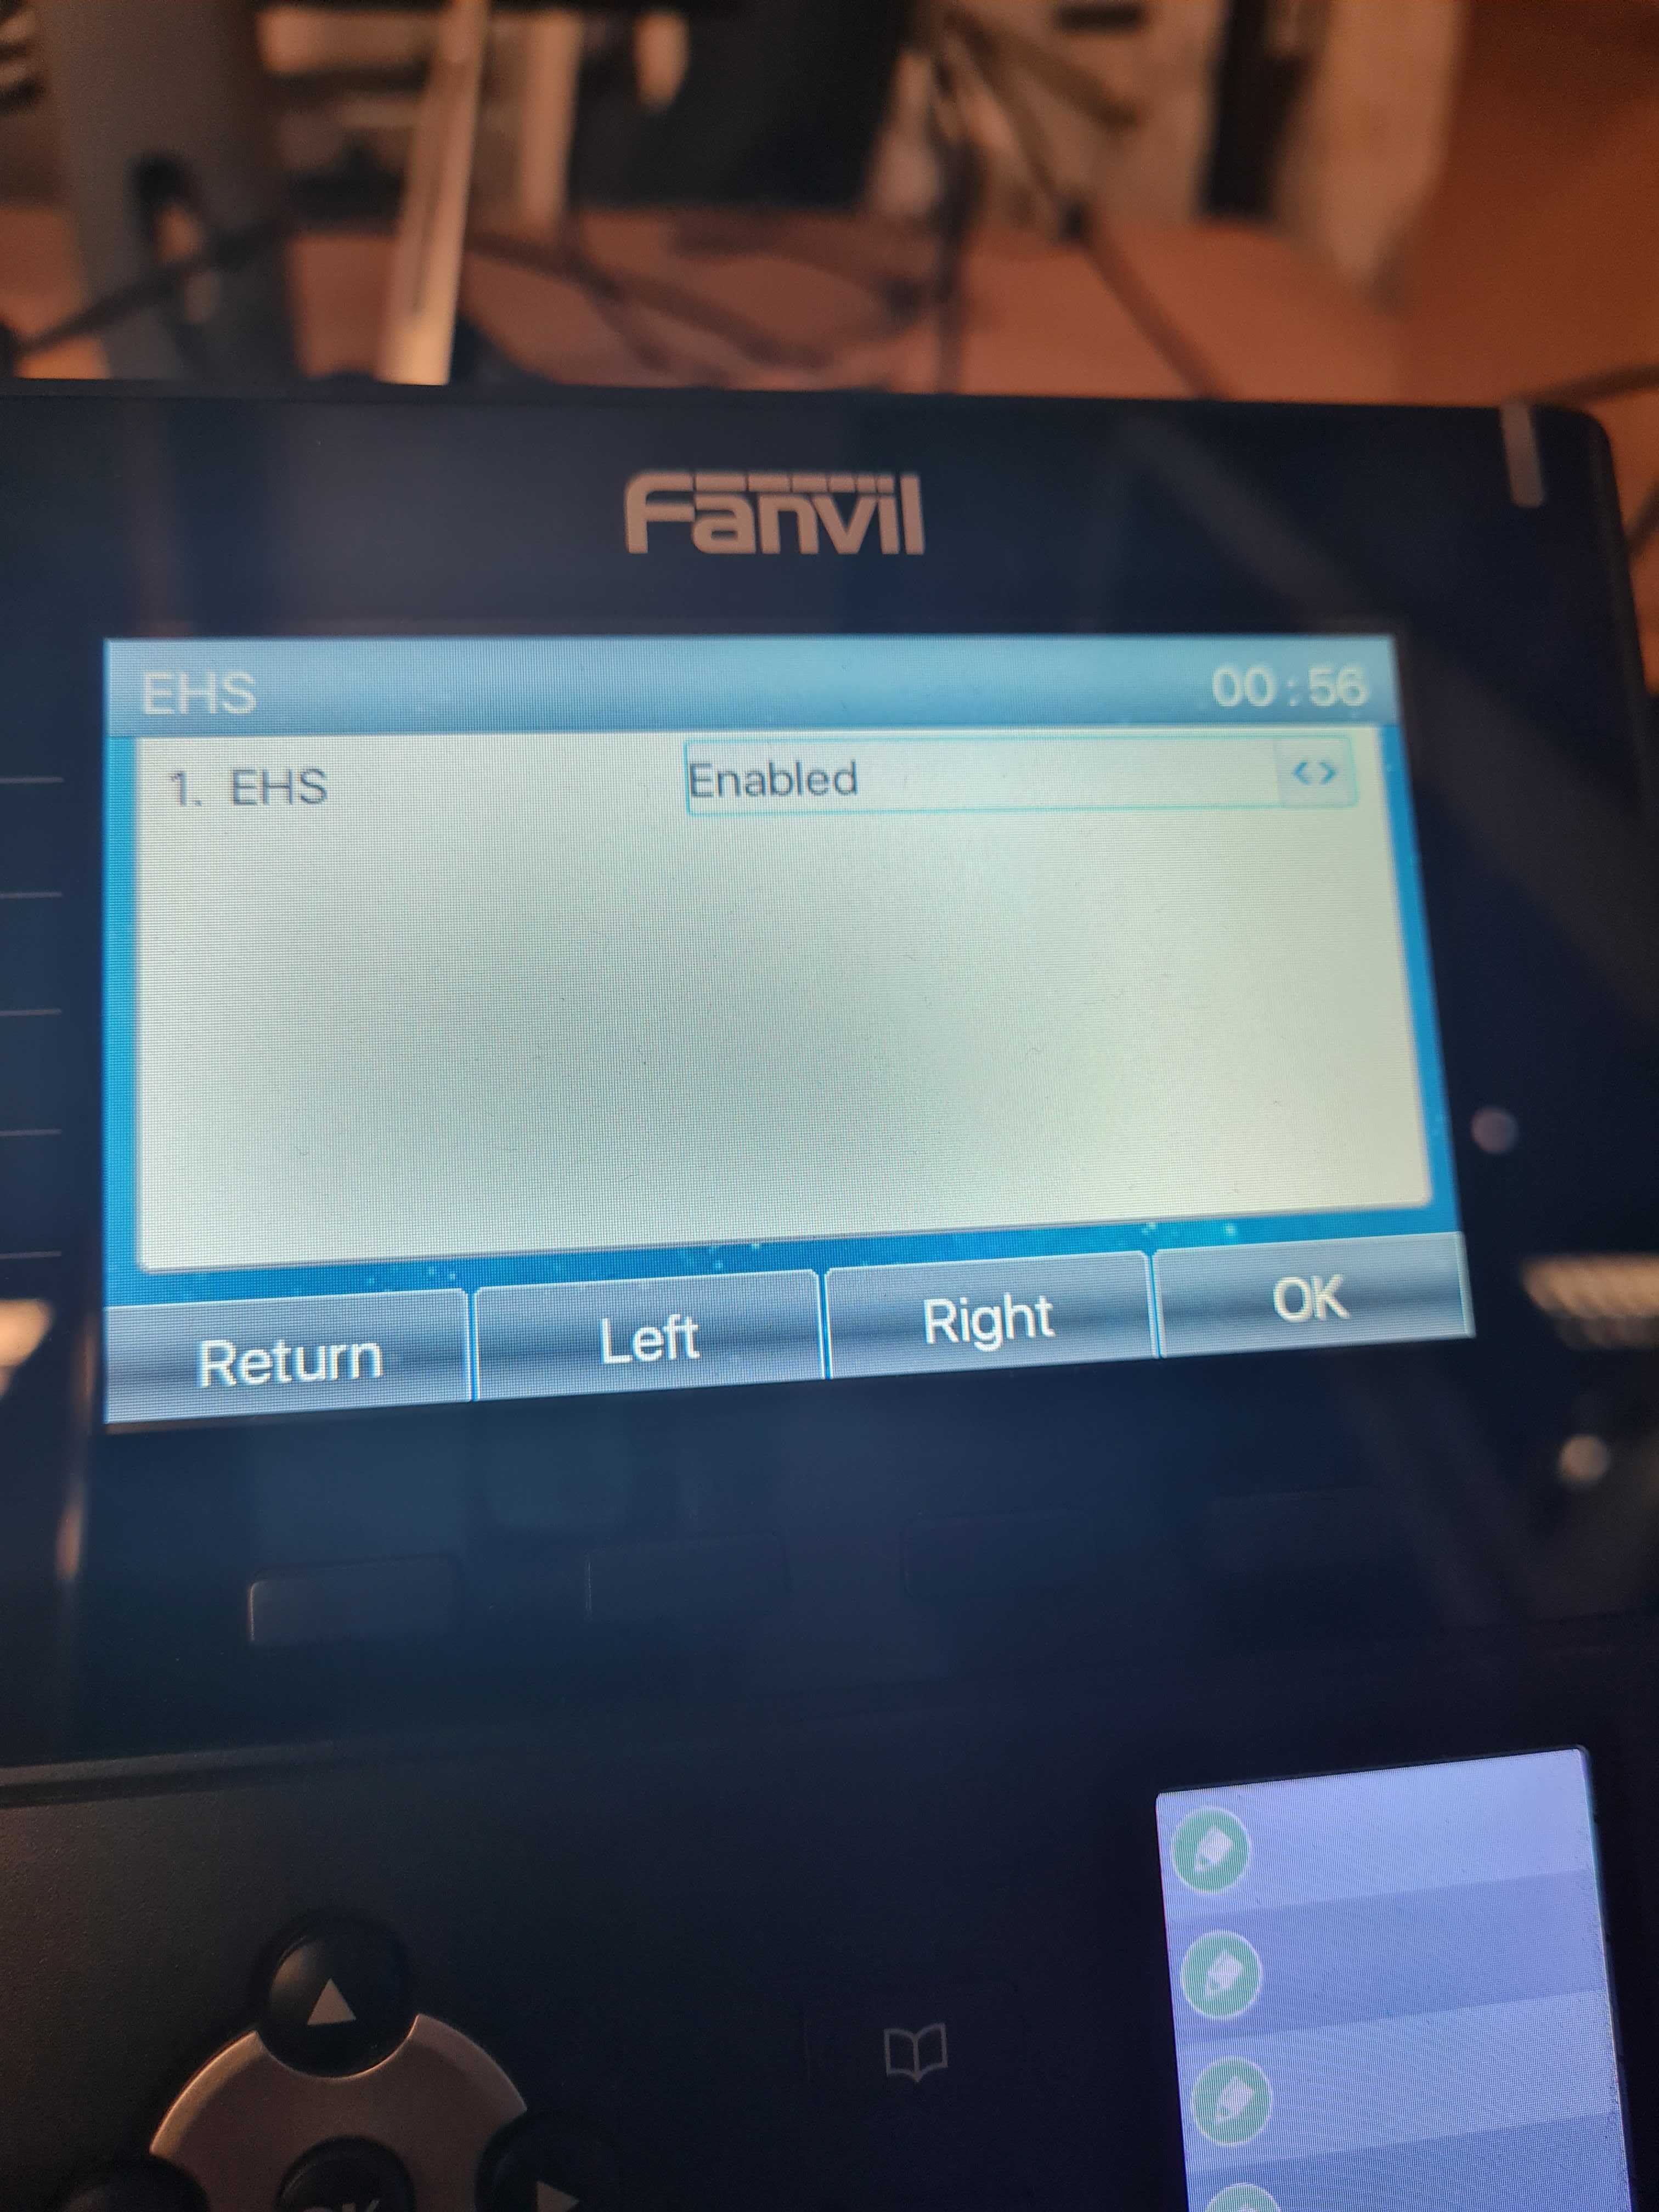
Using the right arrow key set the EHS option to ‘Enabled‘ and press ‘OK‘ to save changes:
Web Interface
Step 1:
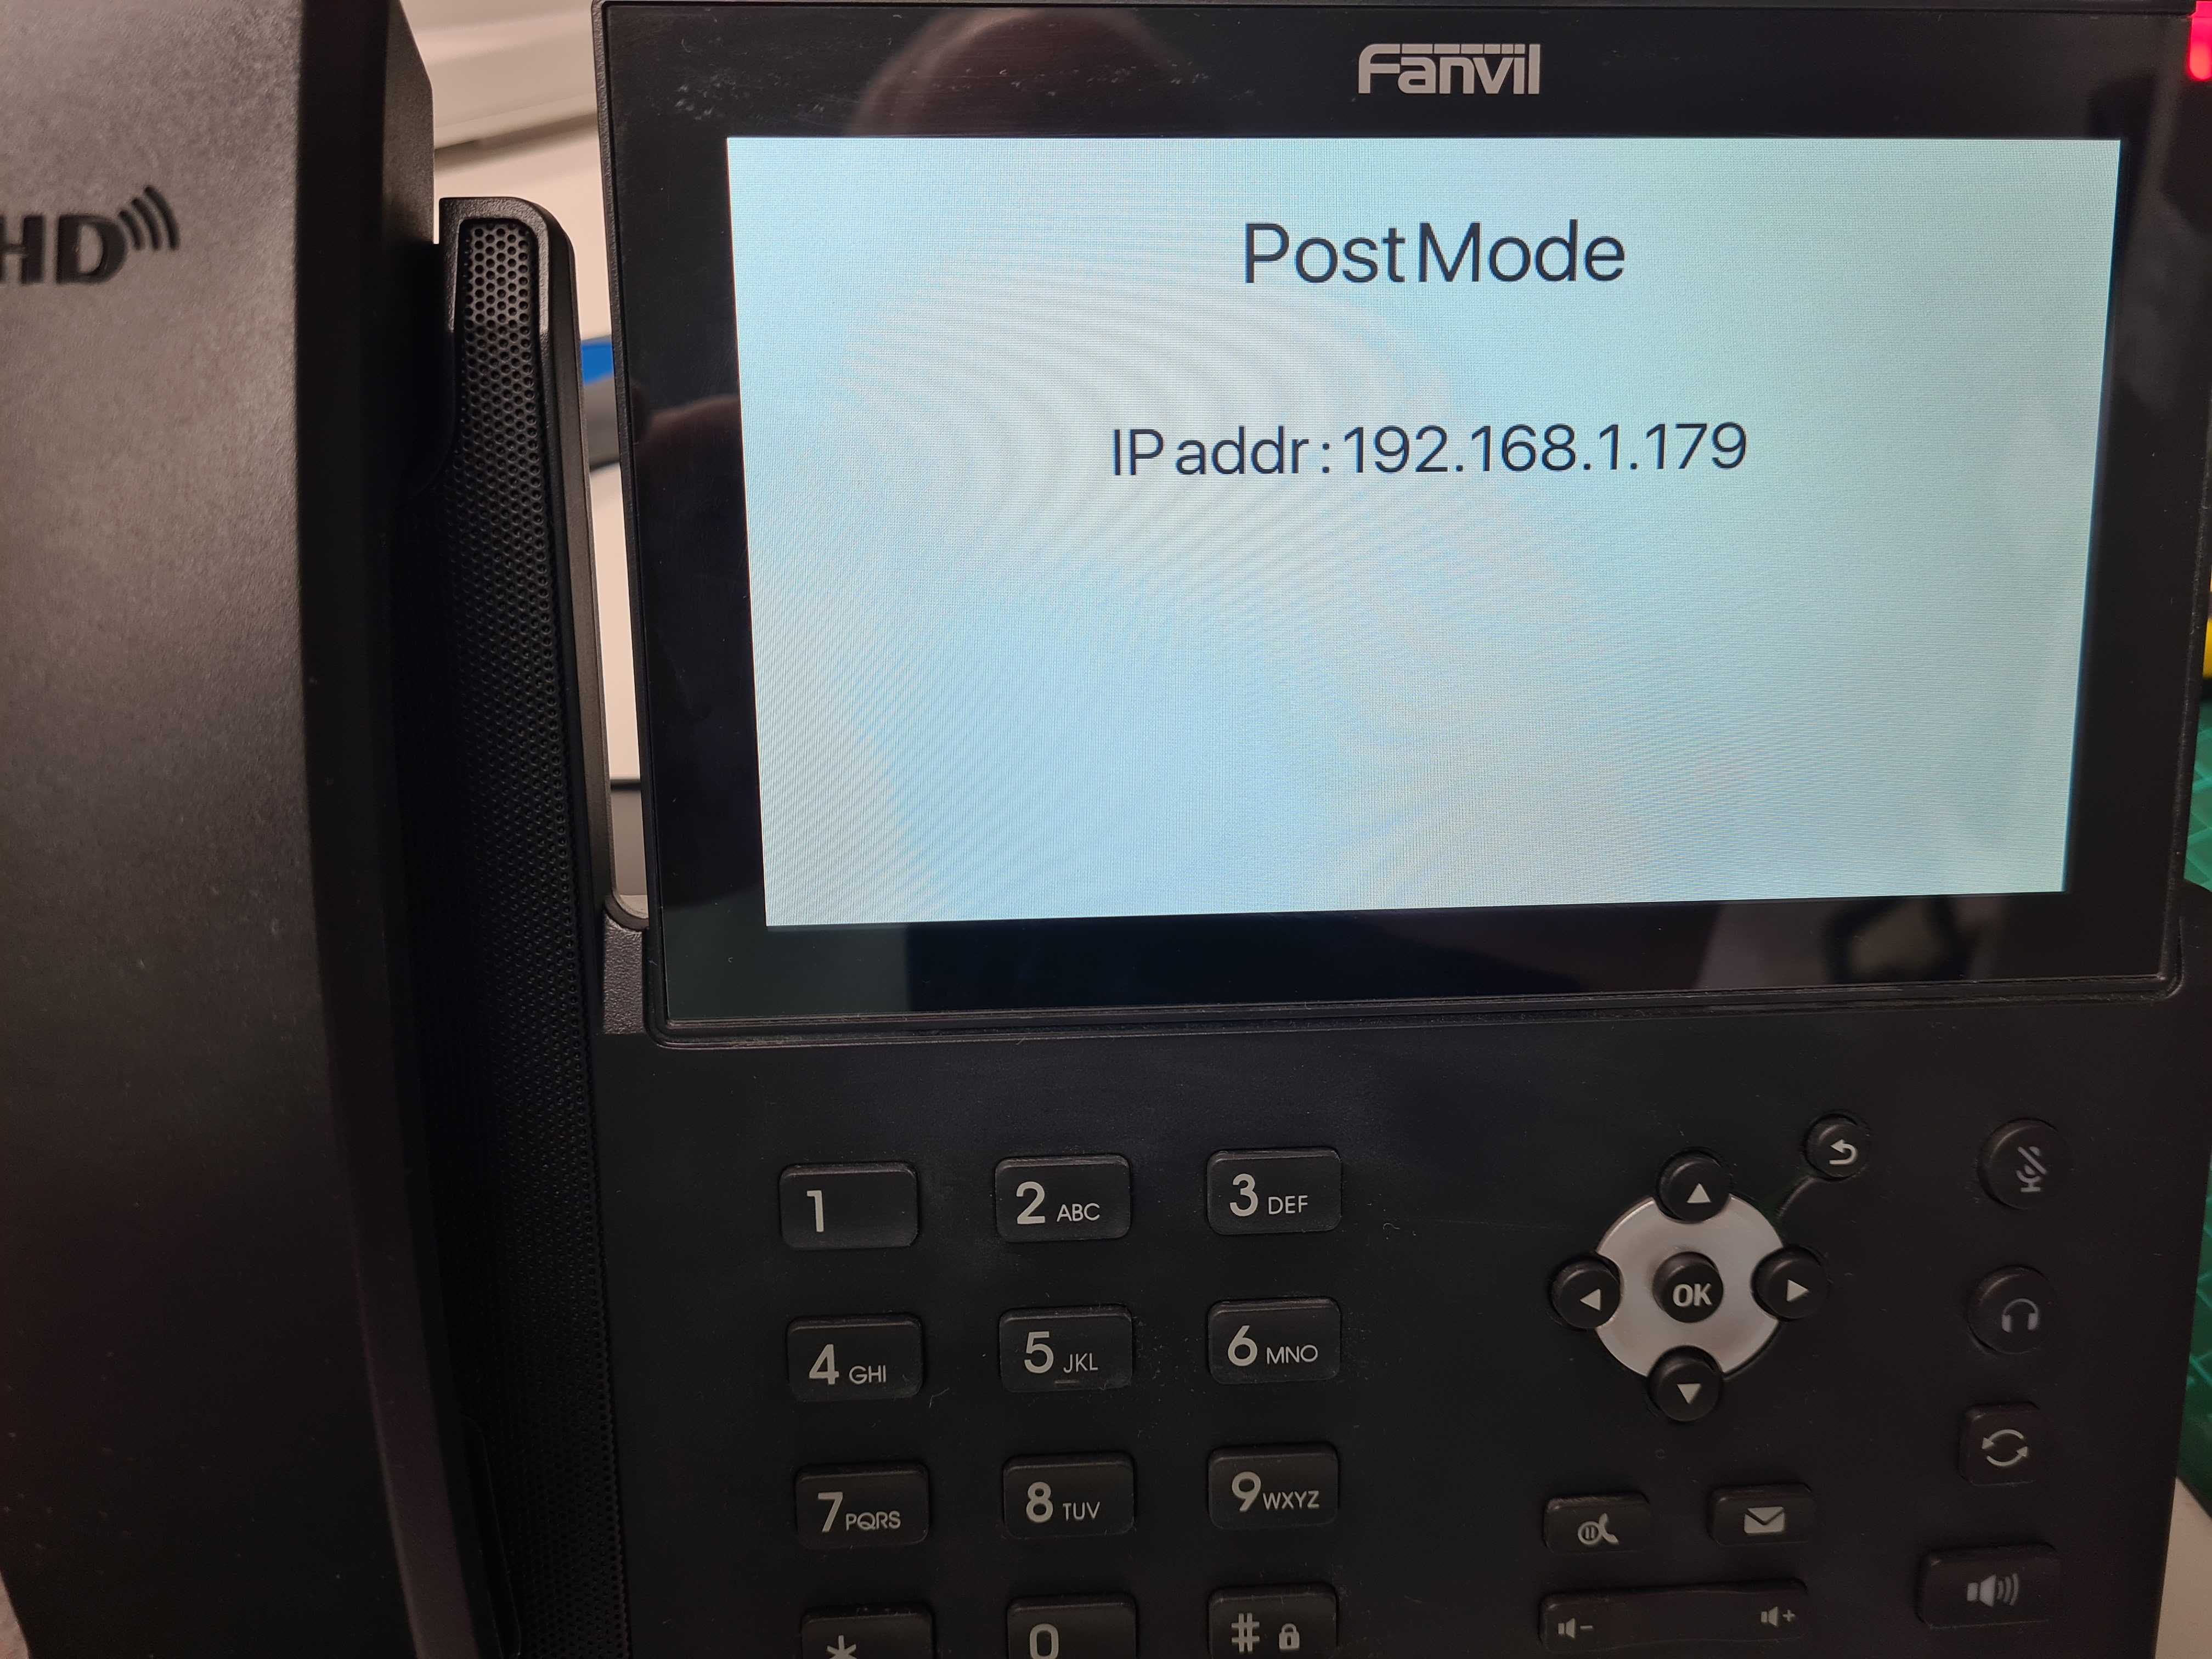
Find the IP address of your Fanvil phone by going to Menu Status or by pressing the ‘OK‘ button.
Step 2:
Once you have obtained the IP address enter this into your web browser you should be then prompted for login credentials, by default these are:
Username = admin
Password = admin
Step 3:
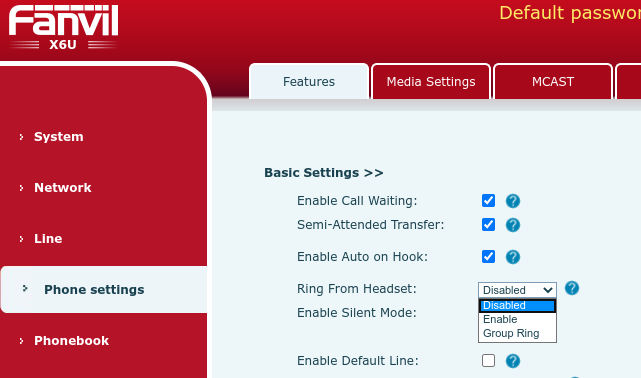
Once successfully logged into the web interface navigate to Phone SettingsFeatures > under Basic settingsEnable a setting called ‘Ring From Headset‘ as shown below:
Step 4:
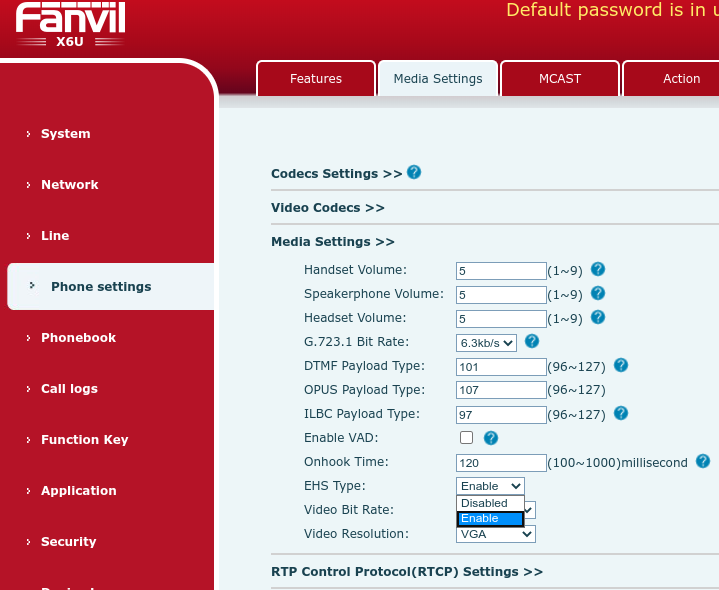
Now go to Media Settings > EHS Type > Enable > finally click Apply.
You should now be able to answer and end calls using your wireless headset.
If you have any problems/issues please contact support@provu.co.uk or call 01484 840048 option 2 for support.
Struggling to find USB headsets? Your search is over! We have an abundance of the latest and greatest USB headphones from the most advanced industry leaders. With more and more businesses looking to equip their staff with more resilient solutions there is no better time to expand your portfolio with plug & play USB headsets.
We’re here to support you; whatever your requirements, our team are on hand to help you every step of the way. With automatic device provisioning and branded or white labelled next day delivery available, your customers will be up and running in no time.
Call 01484 840048 or email contact@provu.co.uk. to discuss your requirements with a member of our team.
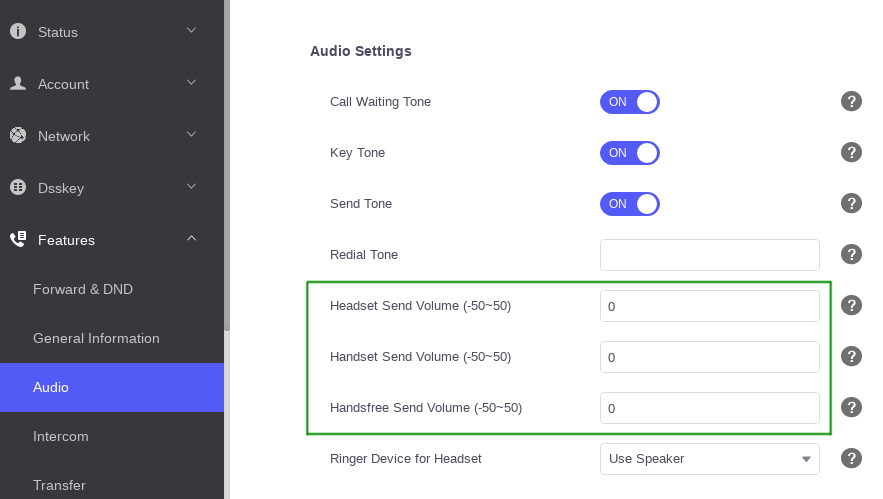
You may be getting reports from your customers saying that when they are on a call, the opposite party is telling them that their audio is too quiet, or maybe even too loud when they talk. Usually this isn’t a problem because the opposite party can adjust the volume of the person calling with their own phone, but what if the opposite party has already done that and it’s still too quiet or too loud?
If that is the case then you may be able to adjust three settings on the Yealink device. These can found on the web user interface by going to the ‘Features’ > ‘Audio’ page and adjusting the settings in the image below outlined in green.
An alternative way to think what these settings do is adjusting how sensitive the microphone is on the device. You can adjust the handset, headset and handsfree sensitivity to be weaker or stronger. The valid values are between -50 and 50. The higher the value, the louder it should be. The lower the value, the quieter it should be.
When adjusting this setting it is important to be cautious. Incorrectly configuring the value can have adverse effects on the audio quality so it’s advisable to gradually increase or decrease the value until you find the right spot.
If you control your own provisioning server and would like to configure this remotely you can use the provisioning parameters below:
Open the door to innovation in our upcoming 2N webinar. Whether you’re looking to explore new horizons or are already a reseller of 2N’s industry leading IP door entry and access control solutions we’ll guide you through how you can expand your solutions with 2N.
Register now to join our Technical Sales Executive and resident 2N expert, Gavin Sykes on Thursday 28th January at 11 am to discover more about:
2N’s leading IP door entry and access control range
How to remotely manage deployments via 2N’s Access Commander
ProVu’s 2N services including consultation, pre-commissioning, white-labelled installation and expert technical support
The aim of this blog post is to provide a guide on configuring the software side of the 2N IP intercom’s to be in a state where they can make and receive calls. It will also detail how to change the door release code and other switch related settings.
This blog post was created with a 2N IP intercom using firmware version ‘2.30.2.39.7’. Previous or future releases may vary slightly.
Prerequisite:
It is advisable to read and fully understand the installation manual for your intercom before proceeding with this guide. The installation manual can be found on the 2N wiki by selecting your model from the listed devices.
Step 1 – Obtaining the IP Address
By default 2N IP Intercom units obtain an IP address via DHCP. There are a few ways to obtain the IP address of 2N intercoms such as the DHCP table on the networks router, alternatively you can use the 2N network scanner, or by pressing certain calling buttons on the intercom just after bootup.
More information can be read about the network scanner, or button sequence on the following 2N FAQ page.
Step 2 – Accessing the web user interface
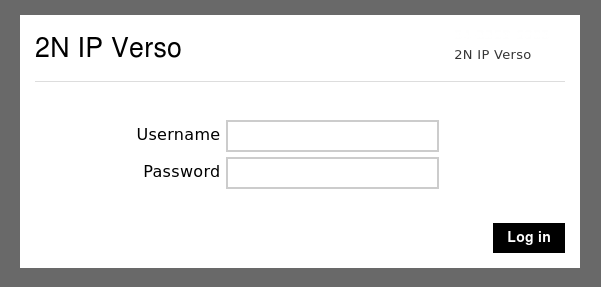
Once you have the IP address of the intercom open your web browser and type the IP address in to the top search bar. Once you press enter it should load the login page as shown in the image below.
The default username is ‘admin‘ and the password is ‘2n‘. If successful it will force you to change your password before proceeding.
Note: Some browsers work better than others, if you have issues with Chrome or Edge, try firefox. You may also see a certificate warning. This is expected behaviour and clicking advanced or proceed should take you to the login page above.
Step 3 – Checking & downloading the latest firmware version
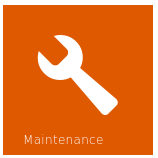
Once you have changed the admin password of the intercom it is advisable to make sure the unit is on the latest firmware version. You can do this easily by going to the ‘Maintenance’ section of the intercom.
To get to the maintenance section of the intercom you can use the ‘Maintenance’ button from the dashboard page
Dashboard Icon
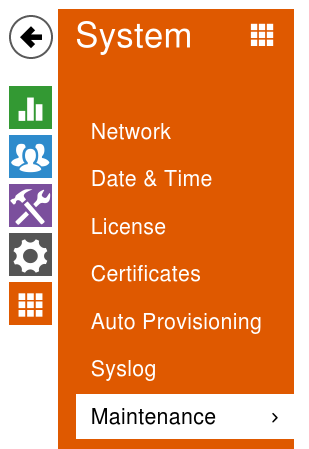
Alternatively click the ‘orange icon’ with 9 squares in it and choose ‘Maintenance’ from the list.
Sub-menu navigation
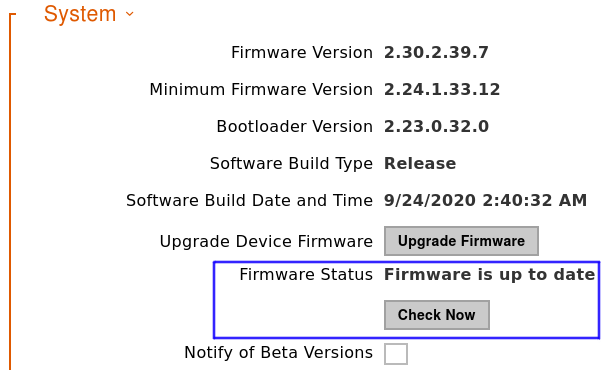
Once on the Maintenance page look for the ‘System‘ section shown in the image below. On this section it may already be reporting that there’s a new firmware version available next to ‘Firmware Status‘. If it doesn’t click the ‘Check Now‘ button.
If it reports a new firmware is available, read the ‘release notes’ carefully and if you are happy click proceed. The intercom will reboot during the upgrade. Once the upgrade is done this section should say the firmware is up to date.
Note: During the firmware upgrade do not remove the device from the network or interrupt the power to the intercom.
Step 4 – Configuring the SIP account & Call behaviour
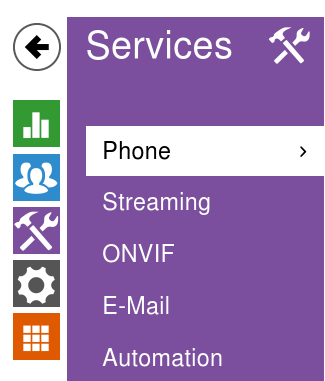
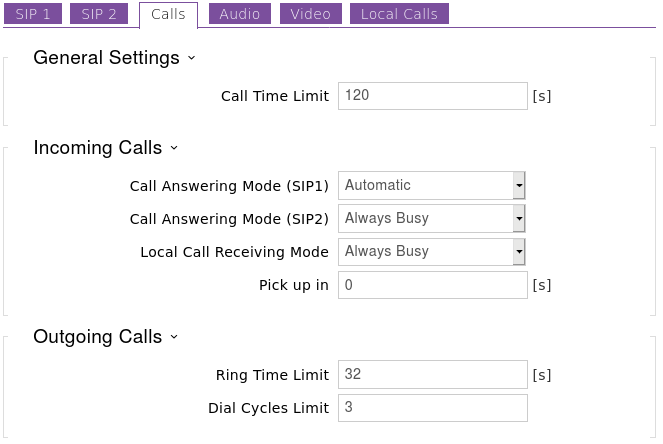
Now the intercom is on the latest firmware version we can proceed to configure the SIP account on to the device. This is done via the ‘Services‘ section and from within here the ‘phone‘ page as shown in the image below.
Sub-menu navigation
On the phone page it automatically takes you to the tab to configure ‘SIP Account 1‘ but the same applies if you are adding two SIP accounts.
Hopefully you are familiar with applying SIP accounts to VoIP devices and the fields on this page already make sense. If they do, feel free to populate this page and get the SIP account Registered.
If you don’t have much experience and you have taken a hosted seat with an ITSP, and they have provided you with some account settings similar to the ones in the table below, you may not know where they need to go. The right column in the table shows where they would likely go on the 2N intercom.
Details from ITSP
Suggested 2N IP Intercom Fields
SIP Number/Account: 203
Phone Number (ID) field
SIP Password: Password
Password field
SIP Server: 192.168.2.131
Domain, Proxy address and Registrar field.
SIP Port: 5060
Proxy port & Registrar port
SIP Auth: WCXfg453SA
Authentication ID
Note: The SIP Server can be an IP address, but most likely it’s the ITSP domain name.
The SIP Auth is not always provided. If you didn’t get one sent the SIP Auth is usually the same as the SIP Number/Account.
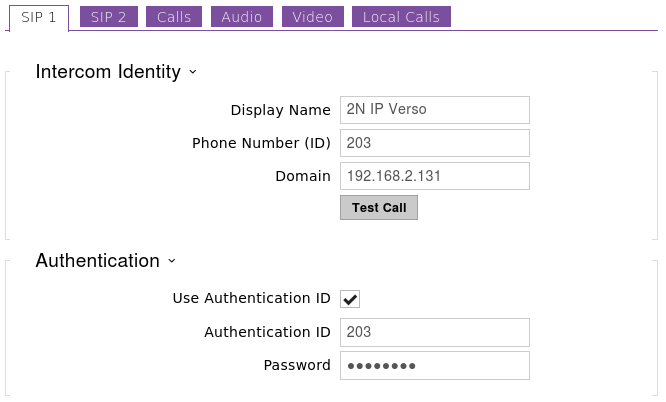
The images below show an example intercom being configured with a SIP account and the Registration status going to REGISTERED. If your Registration status goes to failed and you are sure the details are correct send an email to support@provu.co.uk and we’ll be able to help.
Now hopefully the SIP account is registered successfully with your ITSP or PBX. If it is we can continue with configuring the intercom’s call related settings.
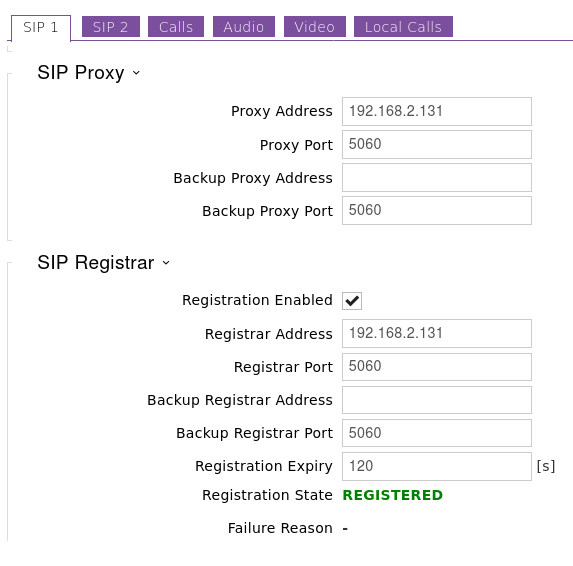
You may want to configure the intercom to automatically answer incoming calls. This is useful for situations where someone maybe stood at the intercom and you want to talk to them without them having to press the calling button. Or this maybe beneficial if you was on a call with someone at the intercom and the call time limit was reached so the intercom disconnected the call.
This behaviour is achieved by changing ‘Call Answering Mode (SIP1)‘ to ‘Automatic‘. When set to ‘always busy‘ the intercom will always decline incoming calls.
Step 5 – Creating users for the Directory, a.k.a – Phonebook
The Directory is where we add users to the intercom and also configure unique/personal details for them such as an RFID keyfob or a Name and number which is what we are going to look at.
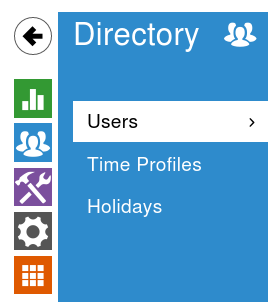
From the main dashboard click the icon below to get to the directory.
Dashboard Icon
Or alternatively from the sub-menu navigation go to the section shown in the image below.
Sub-menu Navigation
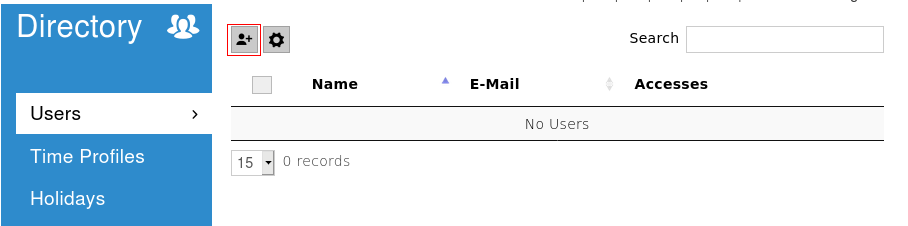
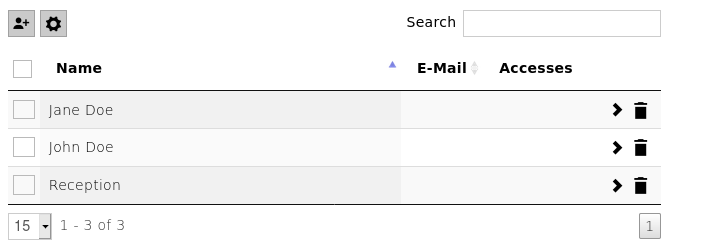
Once your on this page, to add a new user entry click the icon of a person as shown in the image below highlighted by the red box.
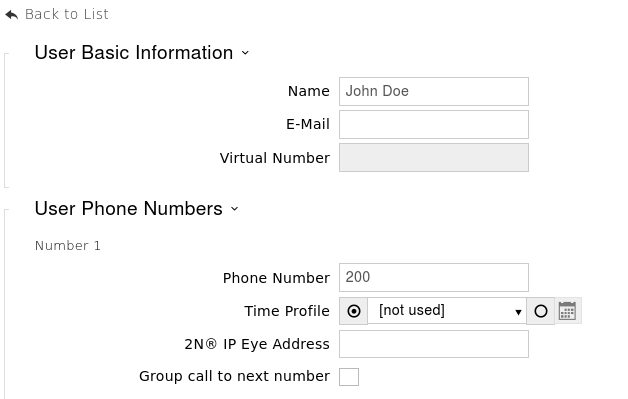
Once you click that button it will take you to a page asking for the Name, Email address, User phone numbers and user specific access settings. In this guide we’re just going to do the Name and Numbers. If this person has more than one number, add them in to the available number fields. If you want all three numbers to ring at the same time select the ‘group call to next number‘ and click ‘save‘ at the bottom of the page.
Example below:
Repeat the above step for the desired amount of users. Once you’ve added some more users you should end up with a list when you go to the directory page.
Step 6 – Configuring the dialling buttons
This is the step where we program the calling button with the users to call. The system doesn’t automatically add the users because it may not be desirable to call every user.
You can get to this section by pressing the Hardware icon on the dashboard.
Dashboard Icon
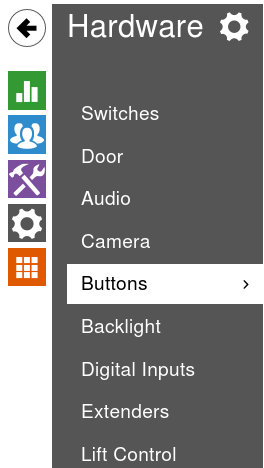
Or you can use the sub-menu navigation as shown in the image below:
Sub-menu Navigation
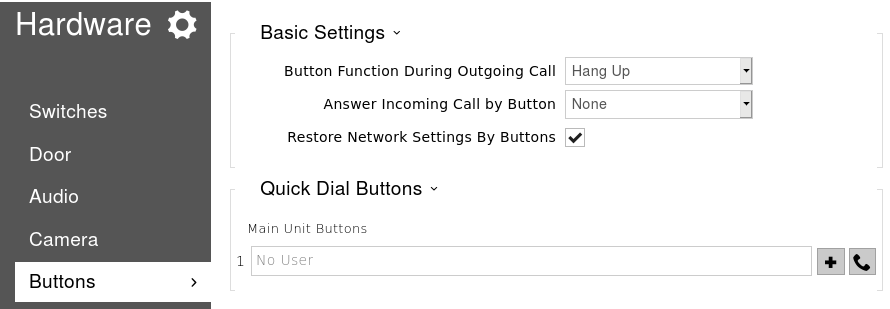
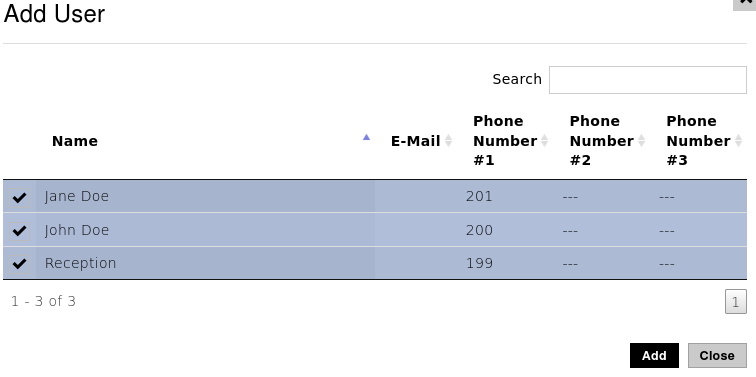
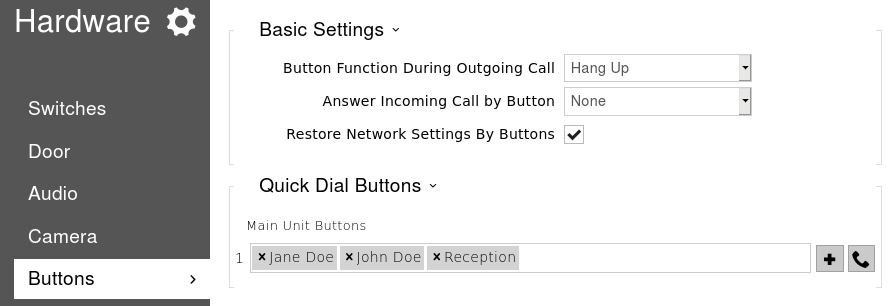
Once you are on the ‘Buttons’ page you will see that there are no users added to the main button. To add a user you need to click the ‘+‘ symbol next to the empty field.
Once you click the ‘+‘ symbol it should bring up a new page with a list of the users from the directory, find the users you want to call, select them and click the add button. Example Image Below:
Once you’ve clicked add you should see the users appear against the main unit button. If you are happy with this click the ‘Save‘ button at the bottom of the page.
Now when the button on the intercom is pressed it should dial the programmed numbers via the SIP account configured in step 4.
A Handy tip, if the intercom isn’t nearby, to save yourself a walk you can click the ‘handset’ icon next to the assign user button to simulate a button press. (hopefully your near the phones to answer or hear them ringing).
Step 7 – Configuring the switch & activation code
The final step in this configuration guide is to edit the switch activation code and change some other settings that maybe relevant to your deployment. The default activation code is ’00*’ but it’s highly recommended to change this to something else.
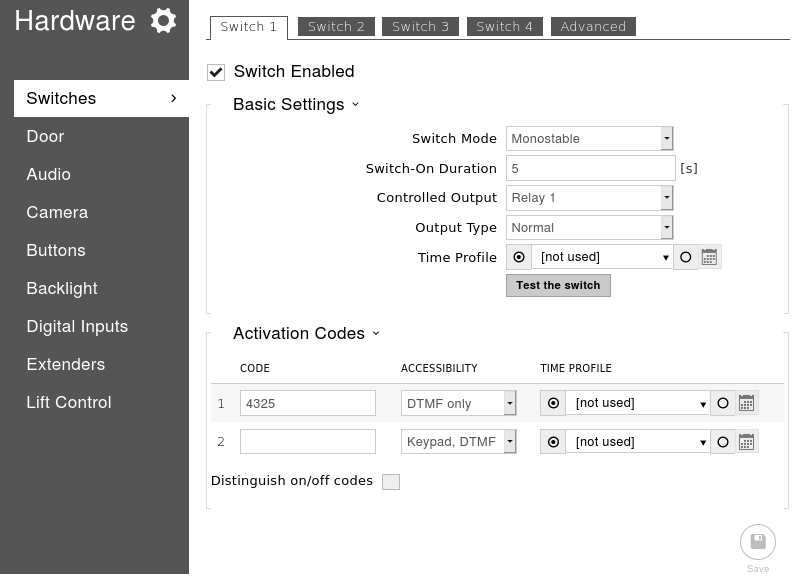
To do this we need to get to the ‘Switches‘ page and we can do this straight from the ‘Button’ page by clicking ‘Switches‘ at the top. Once on this page we can change the switch code under ‘Activation Codes‘.
As the image shows above you can apply two switch codes to each switch but usually one is enough. In the image above I have changed the switch code to 4325. Notice that I didn’t defined the ‘*’ which is be required when entering the code via DTMF (During a phone call).
If desired you can set it so the intercom doesn’t require the ‘*’ to be entered for confirmation by clicking the ‘Advanced’ tab at the top of the page and enabling legacy switch code.
Legacy switch code is only applicable for switch code 1.
Depending on your installation you may also need to change the settings in the table below:
Switch Setting
Description of Setting
Switch-on duration
Defines how long the switch will remain active in monostable mode. i.e – How long will the lock be released.
Controlled Output
Defines which output is used for this switch when activated.
If you’ve connected a lock to the ‘relay‘ on the PCB, select this.
If you’ve connected the lock to the ‘output‘ on the PCB use this.
Output Type
The type of lock being used will change which value needs to be applied.
‘Normal‘ is usually for a fail-secure lock, ‘Inverted‘ is usually for a fail-safe lock. ‘Security‘ is only applicable if the 2N security relay is being used.
To test your switch is working, you can click the ‘Test the switch‘ button on this page. If that works the setup is done. All you need to do now is make sure the intercom is working as expected.
Of course this is just a very basic guide covering the first steps on every intercom, if there are some additional requirements for the customer, or if your having issues with one of the stages above just send an email to: support@provu.co.uk
Also a very good place for 2N resources is the 2N Wiki and FAQ.
Save a staggering 60% on Snom A100M & A100D Bundles with ProVu. Until March 31st 2021 get up to 60% discount when you purchase A100M or A100D along with a ACUSB USB adaptor.
Snom A100M/D
Snom’s A100M/D offers you a lightweight, ergonomic design for maximum comfort for all day use. Using wideband technology you can benefit from high-definition and crystal-clear communication, plus flexible boom arm and passive noise cancelling microphone. With complete compatibility with Snom’s full range of desk phones you can enjoy the adaptability that the A100M/D offers with 3.5mm & USB quick disconnect adaptors like the ACUSB.
Not a Registered Partner?
There couldn’t be a better time to get on board with Snom! Register for free today to see if you qualify for rebates on your orders and receive a complimentary Snom phone of your choice.
Want to know more?
Contact the ProVu sales team on 01484 840048 or email contact@provu.co.uk to find out more or to be put in direct contact with the Snom UK team.
*Purchase an A100M or A100D along with a ACUSB Adaptor to receive 60% discount. Discount available to orders placed via email or over the phone. Offer available until 31st March 2021.
There is no doubt that last year was a tough one and while it doesn’t look like 2021 will let up yet, we are starting to see the wood for the trees and are beginning to get a handle on the interesting climate 2020 has left us in.
So why not move into 2021 by expanding your current portfolio with some new ranges to offer your customers. Create new streams of revenue with incredible brands such as 2N, Algo, 3CX, Counterpath, DrayTek, Dialogic and Sangoma.
Expand your portfolio
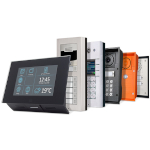
2N
Powerful compact IP intercoms with customisable units. 2N’s door entry intercoms and Access Control units offer the very best in building control. From external weatherproof & shock resistant IP Force intercoms to the adaptable and fully customisable Verso, 2N’s units offer you advanced functionality with intuitive design.
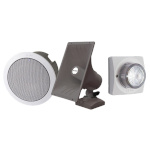
Advanced alerters and speakers designed to integrate into office, retail and warehouse spaces alike. With high quality audio Algo’s range opens up a new opportunity to add visual and audio alerting to your IP solutions.
Offering you a range of provisionable softphone licences combining video, presence and messaging Counterpath provides your customers a true unified communications experience across fixed & mobile networks. With extensive features and compatibility across many platforms such as Apple, Windows and Android there is no better way to bring your clients teams together. As a added bonus Counterpath offers full support for HD video, G729 audio codec and Microsoft Outlook integration as standard.
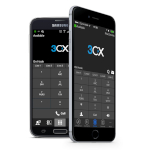
Providing a full PBX solution, 3CX creates a complete set of unified communications features with easy to use installation, management and maintenance of your customers’ companies phone systems. With support for 4 to 1024 simultaneous calls and a variation of editions to chose from, your customers are able to create a scalable and cost effective PBX solution that can grow with their business.
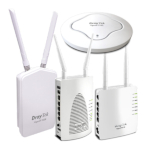
Whether your clients need to extend their range, require a clearer connection, or maybe just want to add security to a busy network. DrayTek offers your customers all of this and more. With a host of incredible products from routers, access points and switches, DrayTeks advanced products give your customers the very best in web managed networks.
New to our own portfolio, Dialogic offers customers a range of high end enterprise media gateways and voice cards which can upgrade existing PBX systems into VoIP allowing you and your customers to save the hassle of purchasing and installing a new system.
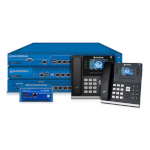
With the ISDN switch off now even closer, 2021 is the opportune time to ensure your customers are prepared. Sangoma’s gateway and SBC range provide an optimal solution for those who will need to upgrade their systems without the associated cost. Find out more today about how you can use these intelligent devices to upgrade existing analogue systems to VoIP.
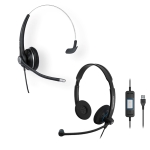
Take advantage of our extensive headset range from brands such as Yealink, Snom, Cisco, Sangoma, Senheiser/EPOS, Plantronics, Jabra, VTech, Eartec and Fanvil. With a variation of either monaural or binaural, headset or ear piece there is a style for everyone. Expand your headset collection for your clients.
With a refreshed outlook on this coming year, we can agree that everyone is looking for something new to grow their business, so why not offer a new range to your customers and expand your opportunities in 2021.
For assistance with putting together your solutions or to discuss any additional hardware you may require with a member of our team simply call 01484 840048 or email contact@provu.co.uk.
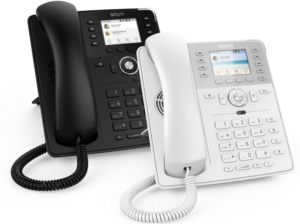
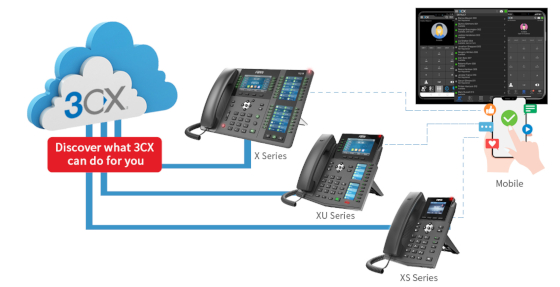
Efficient and reliable communication couldn’t be more important in today’s climate. Guaranteeing advanced integration and full interoperability between 3CX systems, Fanvil IP Phones also feature large colour screens, HD audio, PoE and rich extension functions, offering customers a high-quality communication solution for working remotely.
Benefits of 3CX & Fanvil
Get set up in minutes with hassle-free configuration
Secure calls with end-to-end encryption
Receive and make calls, see the status of your colleagues, chat, schedule conferences and access the company phonebook.
FREE for unlimited extensions and Low annual license prices allowing you to slash your phone bill for on the road/at home staff members.
Control your own phone numbers as well as your own SIP Trunk and cloud provider
Easy to add & manage extensions remotely as well as configuration & firmware
Adaptable and flexible with modern Android & iOS apps at no extra charge
All available for next day delivery direct to site from ProVu, your one-stop shop.