Browse Category

Technical Hints

Add Provisioning URL to Technicolor Router

If you have recently adopted a Technicolor router on to Prosys then you will need to follow the below steps to get your router up and running on our provisioning server.

If you are adopting a DGA0122 then you will need to download this specific firmware version here.

Step 1:

Login to the web interface of your Technicolor router using the Engineer details below:

Username = engineer

Password = (Access key found on the back of the router)

If router model isn’t a DGA0122 then skip the next 2 steps and go to Step 4.

Step 2:

Once logged in go to System Info > Configuration tab > Local Upgrade > Choose File > Upgrade as shown below:

Step 3:

Once the upgrade has been completed you will need to factory reset the router by logging back in as engineer and going to > System Info > Configuration tab > and click Reset.

Step 4:

Time to put our provisioning URL into the router.

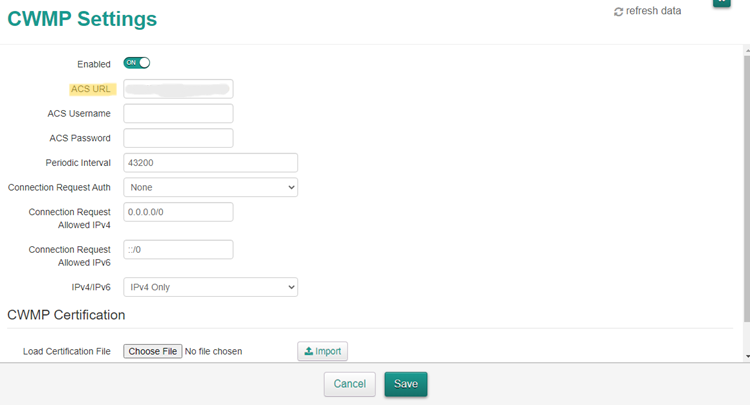
Once logged in as engineer go to CWMP, this will take you to the TR069 page.

In the ACS URL field enter your provisioning server URL and then click save and your done.

If you have any issues please either email support@provu.co.uk or call 01484840048 option 2 for support.

NEW BLF Configuration Now Available!

Have you ever wanted to remotely programme your phone’s function keys prior to them arriving on site?

We’re thrilled to share our latest system development with you! Introducing our new BLF configuration service, available exclusively on ProSys.

What does this mean for me?

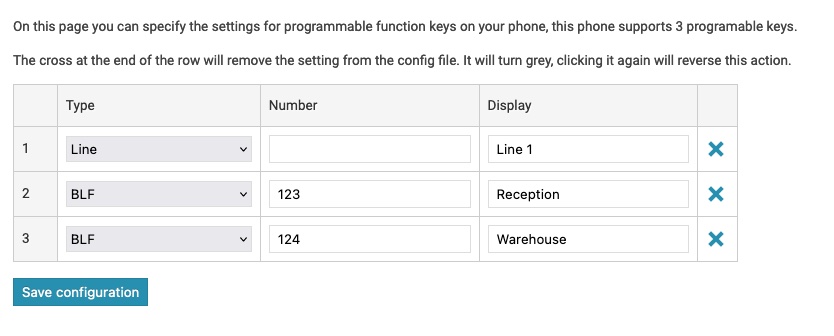
In ProSys Management, you can now edit the function settings on any Snom or Yealink* phone. This new feature can be used to update busy lamp field settings with information such as extension numbers, contact names and/or areas within a business such as ‘reception’.

It’s as easy as 1, 2, 3

Getting started couldn’t be simpler! On the ProSys Management page, you can specify the settings for your device’s programmable function keys by simply filling in the relevant fields.

Once complete, click ‘Save configuration’ to apply your settings to the associated devices.

Whether you’re about to deploy a large number of phones or would like to remotely update the BLF keys of devices out in the field. Our new service could save you hours of manual work and the costs associated with carrying out site visits.

Try it out for yourself!

In order to access this new service, you will need to become a ProSys Management user. Along with BLF configuration, ProSys Management offers a range of additional features including:

  • The ability to view and monitor all deployed phones
  • Search for phones by MAC address or phone number
  • Edit settings eg. Change SIP username and passwords
  • Manage phone firmware upgrades in a controlled manner
  • Keep logs of phone status and errors
  • Maintain log of firmware updates

Get in touch today to set up a free trial of ProSys Management and discover the future of simplified hardware deployments.

Find out more

Already a ProSys Management user? BLF configuration should automatically show up on your account – What are you waiting for get started today!

Tell us what you’d like to see!

We’re always looking to develop our systems to best suit your needs. If you have any suggestions of how we can add further functionality to our BLF configuration or to any other element of our systems we welcome you to share your thoughts! Simply complete our online feedback form or email support@provu.co.uk.


*Additional brands will be added in due course.

Snom D862 & D865 – Information you need to know!

This information may change in the future and has been provided from reviewing firmware version 10.1.141.11 on the D862 & D865

Quick fire points

  • Provisioning uses XML formatting for the D862 & D865, they no longer support the ‘cfg’ provisioning format
  • Make sure you secure the old and new web user interfaces with a username and password
  • Set an admin password to restrict the phone access to user settings (setup via old WUI)
  • Familiarise yourself on how to access the old web user interface
  • Familiarise yourself with provisioning parameters to secure your devices

XML Based provisioning

The D862 & D865 no longer support cfg/flat file provisioning parameters, they will only provision via XML based formatting – https://service.snom.com/display/wiki/Desk+Phone+Configuration+Files

Prefer to use the old-style web user interface?

It is still possible to access the old-style web user interface of the D862 and D865 by navigating to the IP address of your phone with “http” and port “3112”:

Example: http://192.168.1.15:3112

Securing the old-style interface

Once you have accessed the old-style web user interface, it will display security advice where you can setup a HTTP user, HTTP Password and an administrator password to secure your device. If you accidentally navigate away from this page, you can go to ‘Advanced > QoS/Security’ and configure these settings from there:

How to login to the new web user interface and secure it.

You’ve received your new Snom phone, you’ve plugged it into the network, it has obtained its IP address. You enter this into your web browser and you are presented with this login page. There’s no default username or passwords here so go ahead and click the ‘Authenticate’ button to login.

Once logged in, you will see some warnings saying a password has not been set for the ‘admin’ and ‘user’ account. To configure these, go to ‘Security > Advanced’ and populate the fields below and click ‘Apply’.

New provisioning parameters for a new interface

Due to the Snom D862 and D865 having a new web user interface to manage the devices, there are also new provisioning parameters to secure them.

Settings for new WUI:

Admin Account uses:
webserver_admin_name
webserver_admin_password

User Account uses:
webserver_user_name
webserver_user_password 

If you provision your own Snom devices, do not forget to still apply these parameters below for the old web user interface and admin (phone) password:

http_user
http_pass
admin_mode
admin_mode_password
admin_mode_password_confirm

How to restrict admin access from users

Turning off admin mode will restrict unauthorised access to admin settings such as performing a factory reset, changing SIP credentials etc.

Web user interface method

To turn admin mode ‘off’ via the web user interface go to ‘Advanced > QoS/Security’ and set “Administrator mode” to ‘off’ and click ‘save’. – Default pin is ‘0000’ but ensure this is changed to secure your phone even further.

Phone user interface method

You can turn ‘admin’ mode off on the phone user interface by accessing the following:

‘Menu > System > Administrator Access = Off > Save’

I hope this blog helps you to get started with your new devices. If you need any further support with the new Snom D8xx series, please contact us on: 01484 840048, our support team will be happy to help you with any queries you may have.

What the PSTN switch off means to the Telco World 

As we edge closer to the 2025 PSTN switch off our Technical Solutions Director, Muhammad Bajwa has been sharing his thoughts about these changes and the affect it’s likely to have on Channel partners in the coming years. Find out more in this short blog.

BT announced the PSTN switch off back in 2015 and gave the channel 10 years to move everyone to a digital or Voice over IP network. There has been lots of conversation in the channel for the past 7+ years, but only now I can see things have started to take off.  Talking to businesses, some of the issues I tend to hear a lot about are along the lives of;

‘my customer does not have a stable internet connection’;

‘they are miles away from exchange so cannot get the right speed for VoIP’

‘they have been sold a traditional telephone system on 5–10-year lease so they cannot make any changes’

The list goes on….

Many of these conversations have not been easy, but with the expansion of Fibre and 4G/5G networks, the availability of Satellite Internet, and funding by the government it seems the Channel is now gearing up for the change.

A Shift in the Channel…

One major change I have seen in Telecoms is in the Internet Service Provider channel. Historically ISP’s or Broadband providers kept their distance from VoIP and/or UC services, but this year most of the conversations I have had have been with new ISP customers who have been trying to adopt/integrate VoIP services with their broadband offering. Consequently, we are seeing a huge surge in demand for VoIP enabled routers and/or Analogue adaptors. One of the biggest challenges facing the channel now is our reliance of the internet, without this, there is no voice or telephone service.

Before I discuss the challenges of offering VoIP, let’s have a look at some of the benefits of introducing VoIP to a business.

Benefits of VoIP

Lower costs: As VoIP relies on your internet service, businesses will be able to benefit from reduced/freeline rental. The reason I say “reduced line rent” is because VoIP Providers will still have to manage the servers which are providing the VoIP services.

Portability: VoIP numbers are portable unlike physical numbers so it can move between different networks just like mobile numbers. If a business moves from one location to another, there is no need to ring the provider, all you must do is take the VoIP device to your new location, connect it to the internet and your line is up a running in no time. Some VoIP providers even have their own mobile or PC softphone clients which means you can answer your calls anywhere in the world as long as you have an internet connection and the country you are in allows VoIP or SIP calls.

No PBX hardware on site: With traditional telephone systems, businesses would have some form of PBX (telephone system hardware) onsite which comes with its own maintenance and support services plus it’s one more thing that can break!  With VoIP it’s all hosted and depending on the type of service offering, you don’t have to worry about any of that. The majority of service providers will have clusters or high availability systems setup so disruption to VoIP services will be minimum.

Scalability: It’s very easy to scale with a VoIP telephone system, businesses can buy additional seats/VoIP channel from the provider which can be done on the fly which means as long as you have a compatible device, a new user can be setup in minutes.

Competition: The VoIP side of Telecom industry is already quite a competitive market which means businesses will have a broad range of providers to choose from. More competition means a more competitive offering.

Feature Rich: VoIP in general is far more feature rich as compared to the traditional telephony services. Things like call transfer, nuisance calls blocker, call forwarding, etc. are much easier to manage. There are of course other benefits like integration with CRMS systems, options to use UC features but it’s up to the business to buy the service best suited for their requirement.

VoIP Challenges

Now, as I mentioned, VoIP brings many benefits to a business, but it does rely on the internet which requires a power connection. Skimping on hardware such as routers can also cause some headaches, but I won’t go into that for now.

Since 2015, Ofcom has been actively involved in discussions with ISP’s, ITSP’s and other bodies in formulising a standard to regularise the side effects which the PSTN switch off will introduce. These have been developed to protect the consumer. Ofcom withdrew their previous 2011 guidance on FTTP as part of the strategic review of digital communications and published its reviewed guidance in Oct 2018 which included the PSTN switch off.

According to the final publication of Ofcom, service providers should enable or offer at least one backup solution to the customer in order to provide access to emergency services in case of power cut. During the discussion there were 2 main solutions discussed, one being a backup mobile phone and other one being a UPS (uninterruptible power supply). Ofcom’s regulation is not too prescriptive about which options service providers should offer, but the main highlight is that the offered solution should last for a minimum of one hour in the case of a power cut.

It is the Service Provider’s duty to make sure that the offered solution is suitable to meet the customers’ requirement. Ideally, the backup should be offered FOC especially to customers who are dependent on their landlines.

Ofcom’s publication also mentioned that some individual customers might require protection beyond one hour e.g., if the household they live in has a history of long duration power outages etc. so it is important to understand the customer’s requirements before offering a solution.

Read Ofcom’s Publication Here

In my next blog, I will be discussing options available from ProVu to tackle the power cut issues and how we can help fulfil the regulatory requirements of Ofcom.

Yealink Teams – How to setup a screen lock

If desired on your Yealink Teams phone you can set a screen lock to prevent unauthorized people from making changes to your device, scheduled meetings or prevent them from making outbound calls. When the screen is locked you can still answer incoming calls.

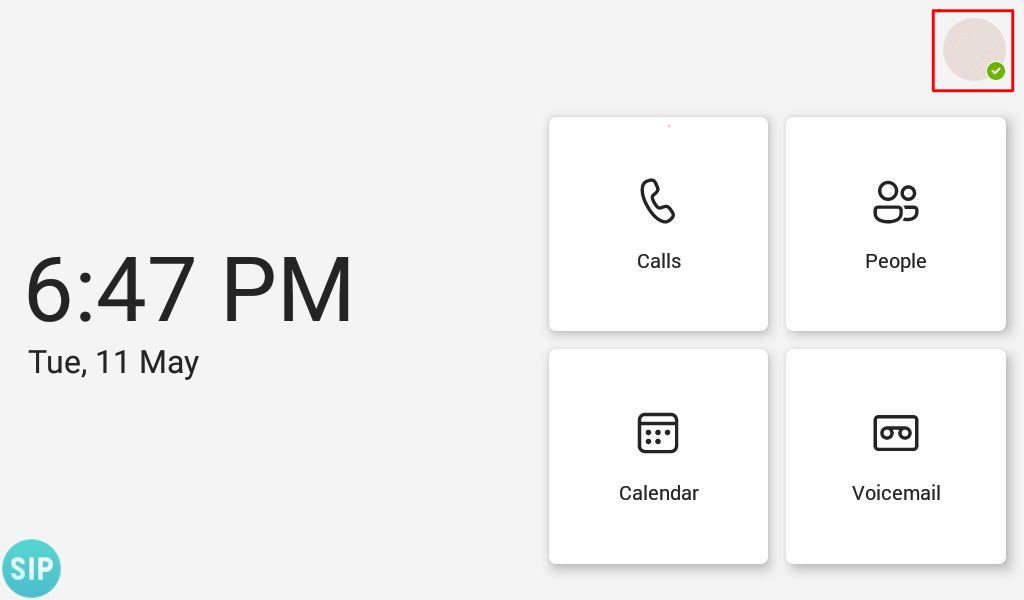
Step 1 – Press your account icon in the top right hand corner where it shows your account’s presence status

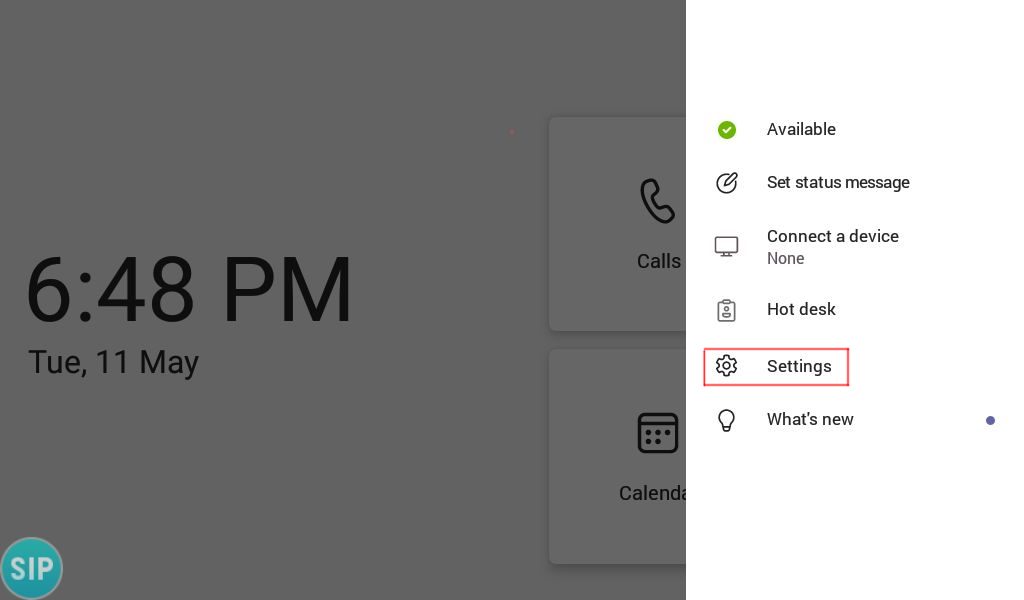
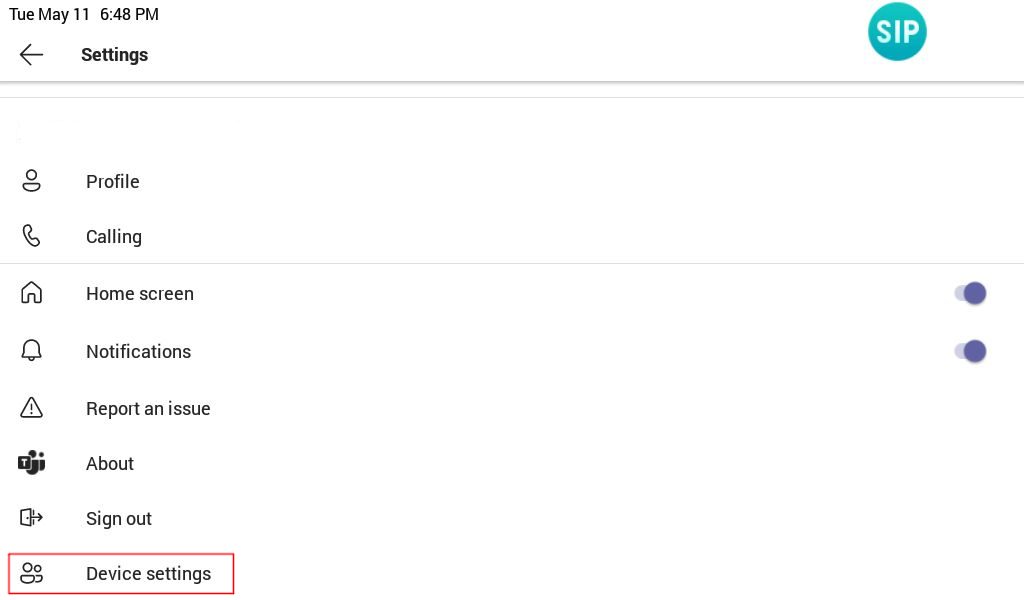
Step 2 – Select ‘Settings’

Step 3 – On the settings page scroll down and select ‘Device Settings’

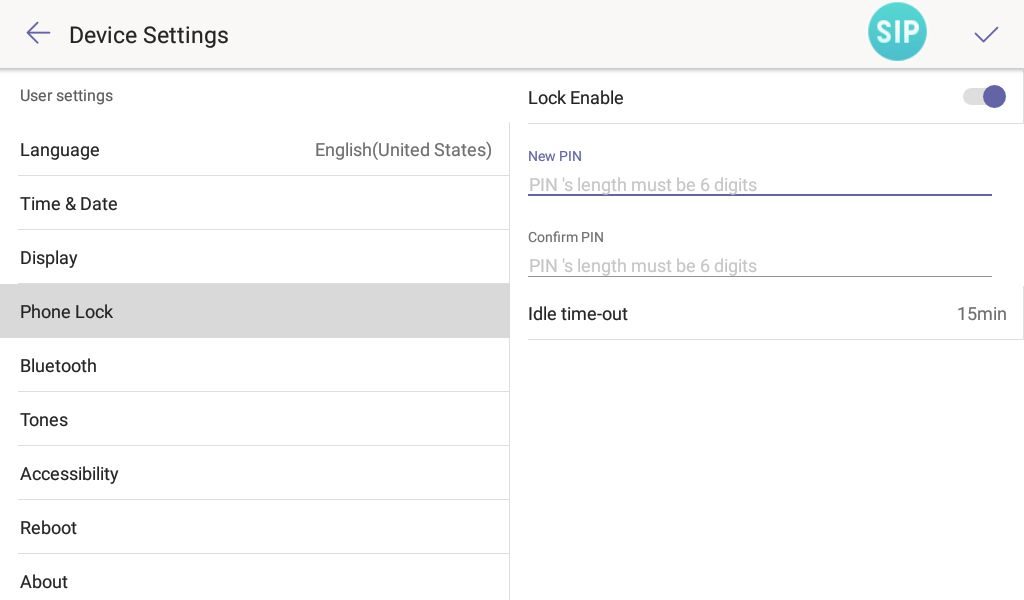
Step 4 – On the ‘device settings’ page find ‘Phone Lock’ and move ‘Lock Enable’ to the ‘ON’ position. Once you have done that enter a PIN with the minimum length of 6 digits, and then enter the digits again to confirm them. You may also wish to decrease the idle time-out to something less that 15 minutes as there’s no way to manually lock the device.
Step 5 – When your phone screen locks it should change to the one shown in the image below, press the padlock icon and enter your pin to unlock to the device.

If you would like to disable screen lock, go to ‘Settings’ > ‘Device Settings’ and change ‘Phone Lock’ to disabled. If your device is forcibly being set with a screen lock you must speak to your system administrator about getting it disabled.

If you have purchased your Yealink Team’s devices from ProVu and you are having difficulty with this blog post, or anything else related to your device please send an email to support@provu.co.uk explaining your issue.

How to enable Hybrid Mode on Yealink Teams Devices

The following blog post was done with a T56A running firmware version 58.15.0.124. The same steps should apply to the following models on the latest firmware version: T55A, T56A, T58A, CP960, MP54, MP56, MP58

You can enable hybrid mode directly through the web user interface of the Teams device. This allows you to use a SIP account to make and receive calls, as well as using your Teams account.

Part 1 – Enable Hybrid mode

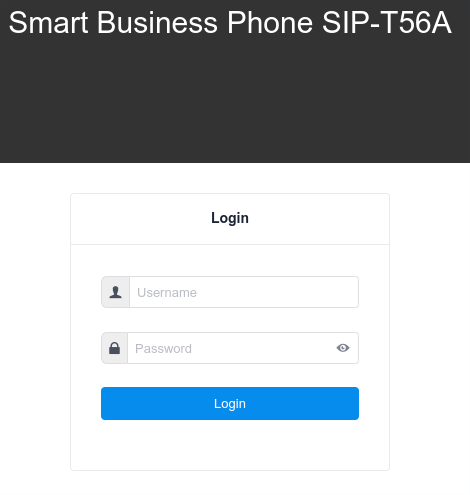
Step 1 – Access the web user interface of the phone by entering the IP address of the device in to a web browser. You need to specify ‘https’ and port ‘443’, (Example: https://192.168.1.15:443) in order for the login page to load otherwise you will see an error saying this site cannot be reached.

Step 2 – Once you are presented with the login page for the web user interface, login to the device. By default the credentials are ‘admin’ for the username and password.

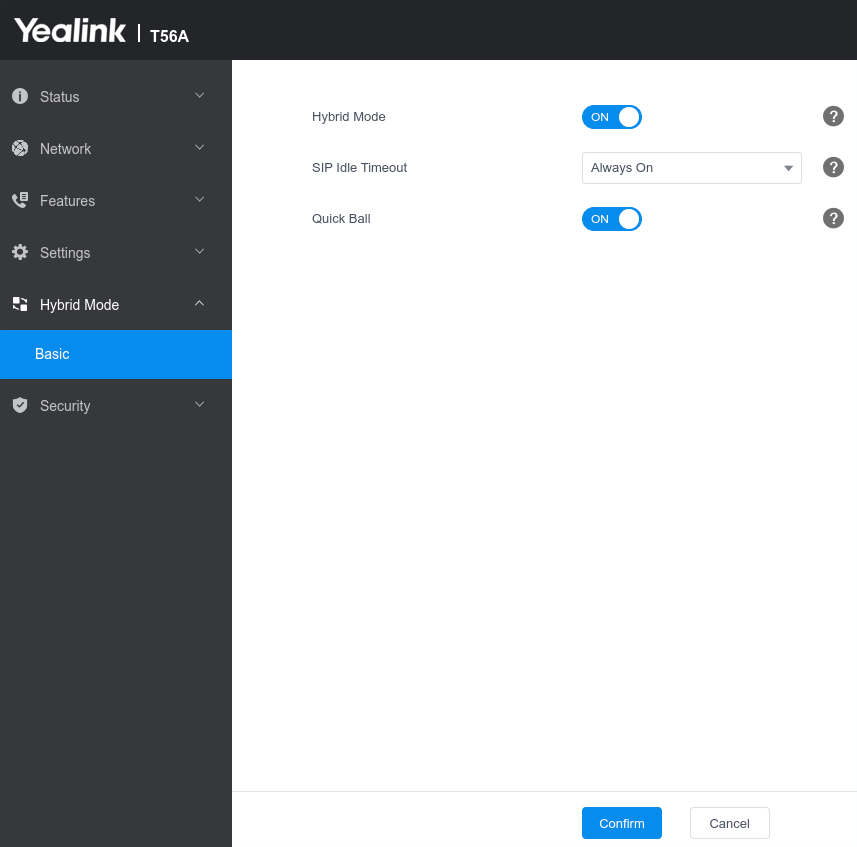
Step 3 – Select Hybrid mode down the column to the left and choose basic. When the page loads move the ‘Hybrid Mode’ slider to ‘ON’.

You will then be presented with two settings, SIP Idle timeout and Quick Ball. The SIP Idle timeout configures if the device should revert back to teams mode after a period of inactivity. The Quick Ball mode is a handy setting that when enabled presents a little button on the screen to flick between teams mode and Hybrid (SIP) mode.

Step 4 – Once you are happy with the settings picked click confirm and the phone will restart.

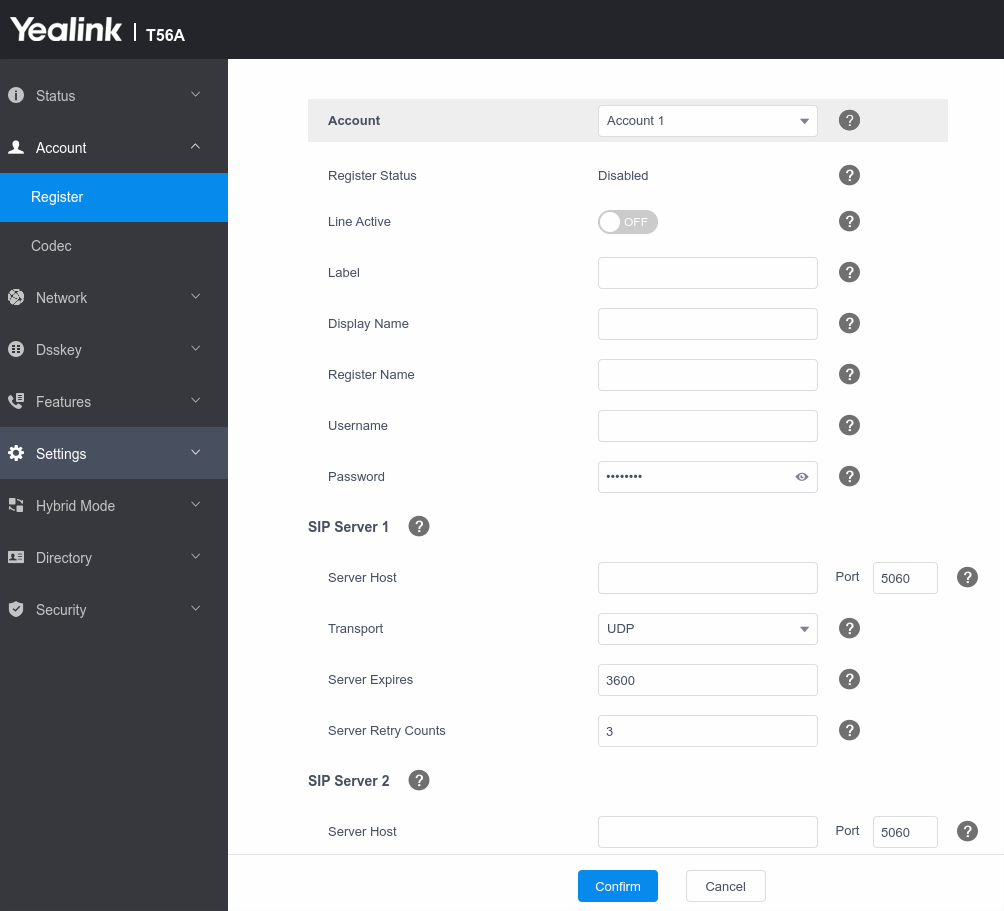
Step – 5 Once the phone has restarted login to the web user interface and click ‘Account’ to setup your SIP account on this device.

Note: If you have Quick Ball turned off, you will need to follow the steps below to access Hybrid mode from the phone user interface otherwise you can easily flick between the two modes via the Quick Ball.

Part 2 – Access SIP (Hybrid mode) from the Phone User Interface

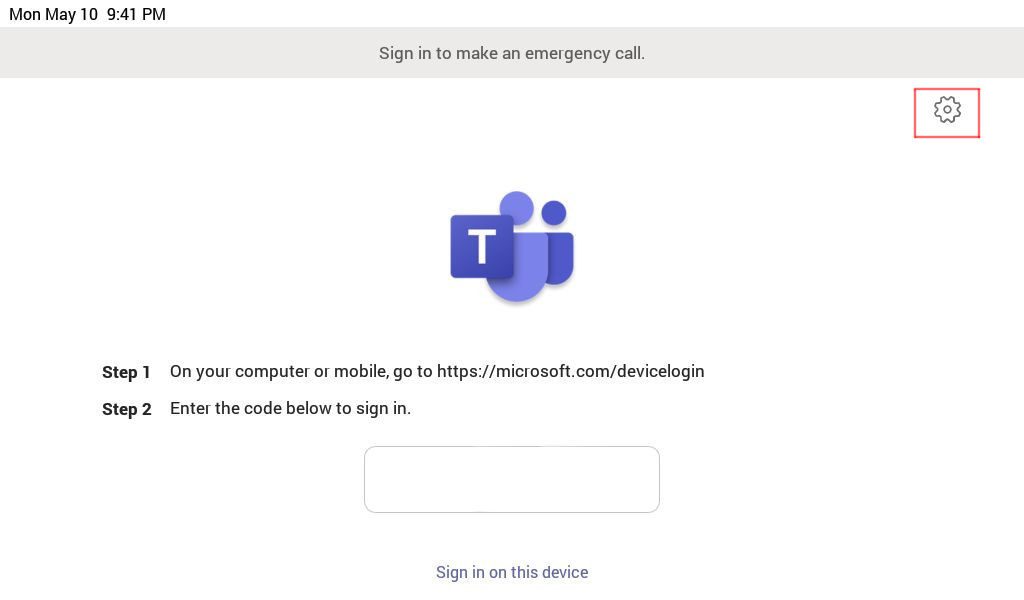
Step 1 – From the settings menu go to ‘device settings’, or when on the sign in screen click the cog symbol highlighted in the image below.

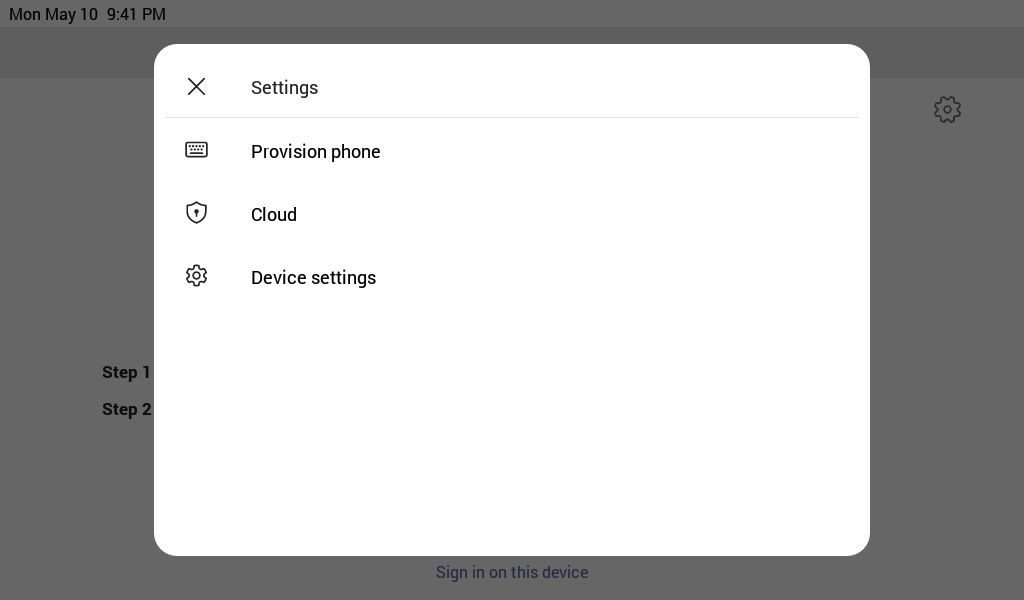
Step 2 – When the new page opens click ‘Device settings’

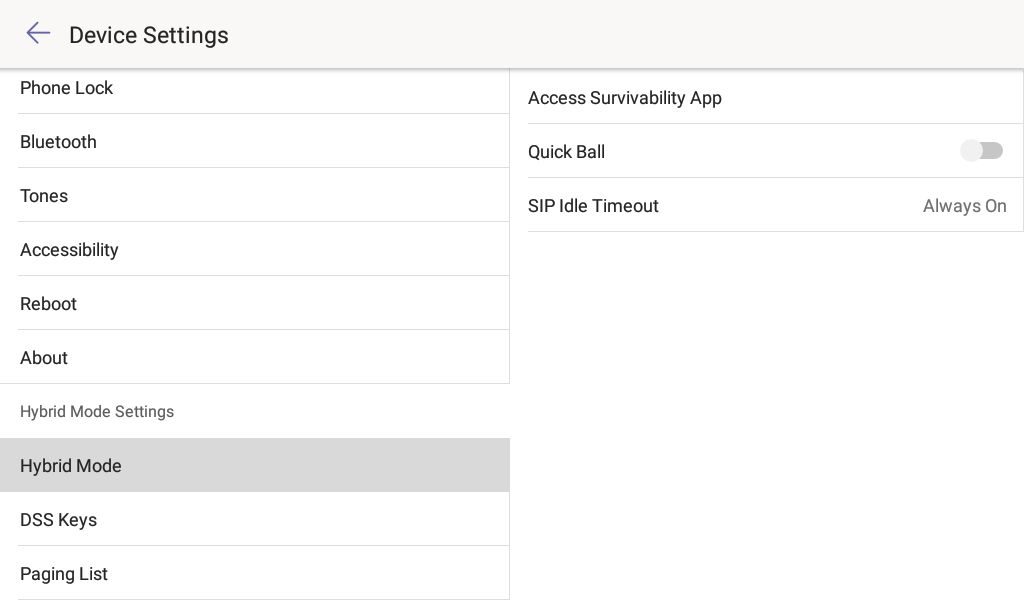
Step 3 – Once on the ‘device settings’ page scroll down to ‘Hybrid Mode’ and you should see the page as shown in the image below. To proceed to access ‘Hybrid mode’ click ‘Access Survivability App’

If you would like to quickly switch between your teams and SIP account I would recommend turning on the Quick Ball feature. This will allow you to change between Teams mode and Hybrid mode at the click of a button. The ‘SIP Idle timeout’ configures if the device should revert back to teams mode after a period of inactivity.

Step 4 – Once you have clicked Survivability you will see a similar screen to the one below and if you have an account registered you can start placing and receiving calls.

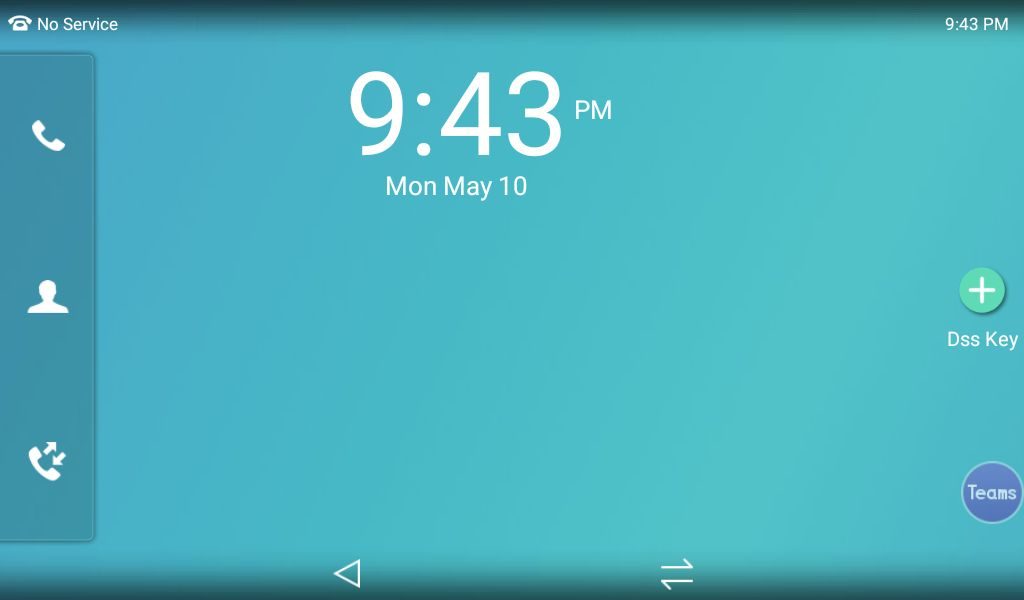
In the image below you can see a little circle in the bottom right corner saying teams. This is the Quick Ball to easily change modes, otherwise press the two lines at the bottom of the screen to go back to teams mode and follow the steps above to get back in to hybrid mode.

If you have purchased your Yealink Team’s devices from ProVu and you are having difficulty with this blog post, or anything else related to your device please send an email to support@provu.co.uk explaining your issue.

Yealink Teams – How to login to your Teams account on a Yealink Teams Device

This blog post was created with a T56A on firmware version 58.15.0.124 but the process should be the same across all Teams desk phones.
 In order to login to a Yealink Teams device, you need a certain subscription as outlined in this blog post.

Method 1 – Using an internet capable device with a login code

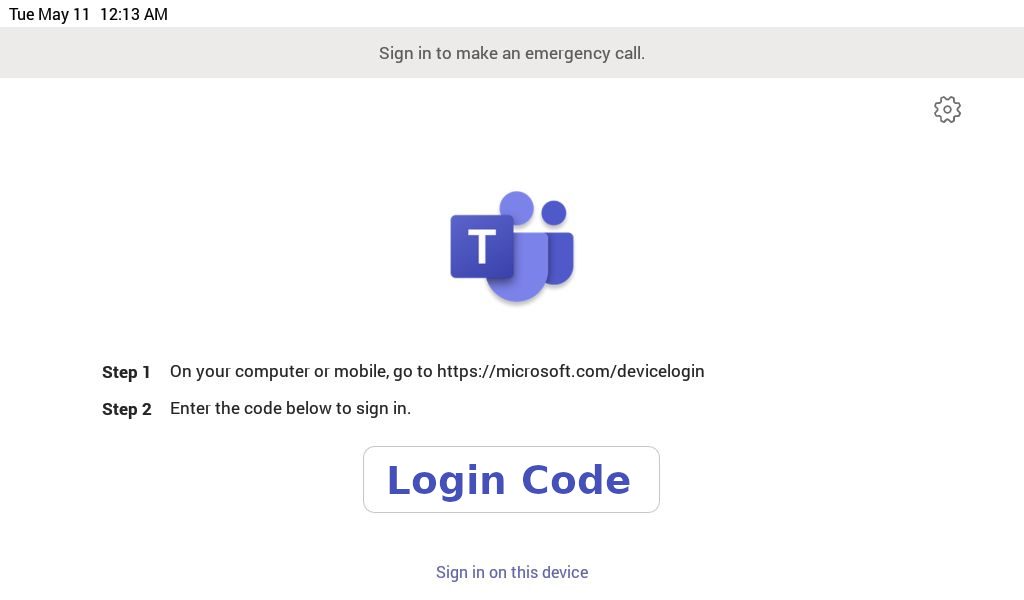
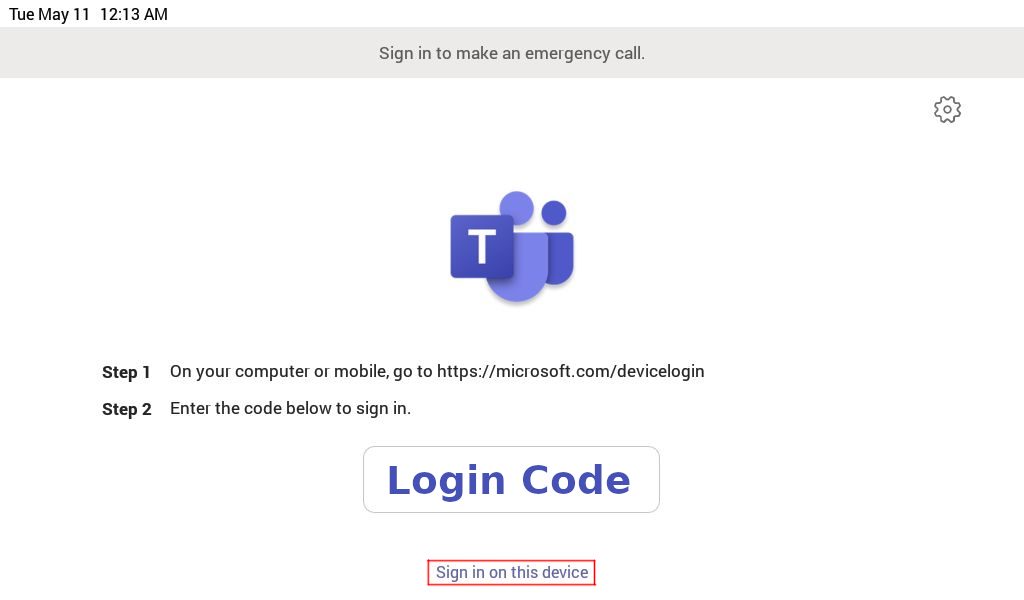
Step 1 – Follow the instructions on the login page of your Yealink Teams device, example shown in the image below, it tells you to web browse to the following URL on an internet capable device: https://microsoft.com/devicelogin

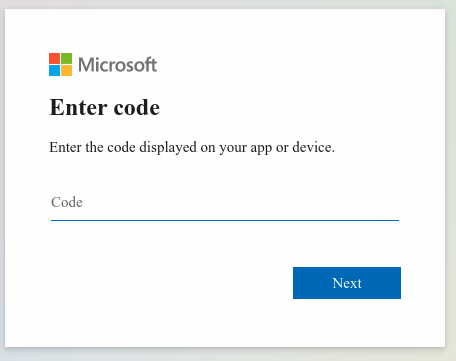
Step 2 – Once you’ve browsed to that URL enter your login code from your devices login screen.

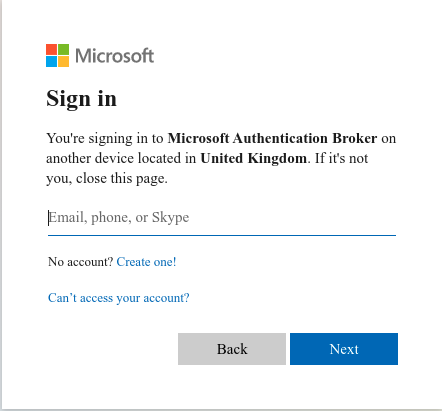
Step 3 – Once you’ve entered the code, you will be presented with a page to enter your email address.

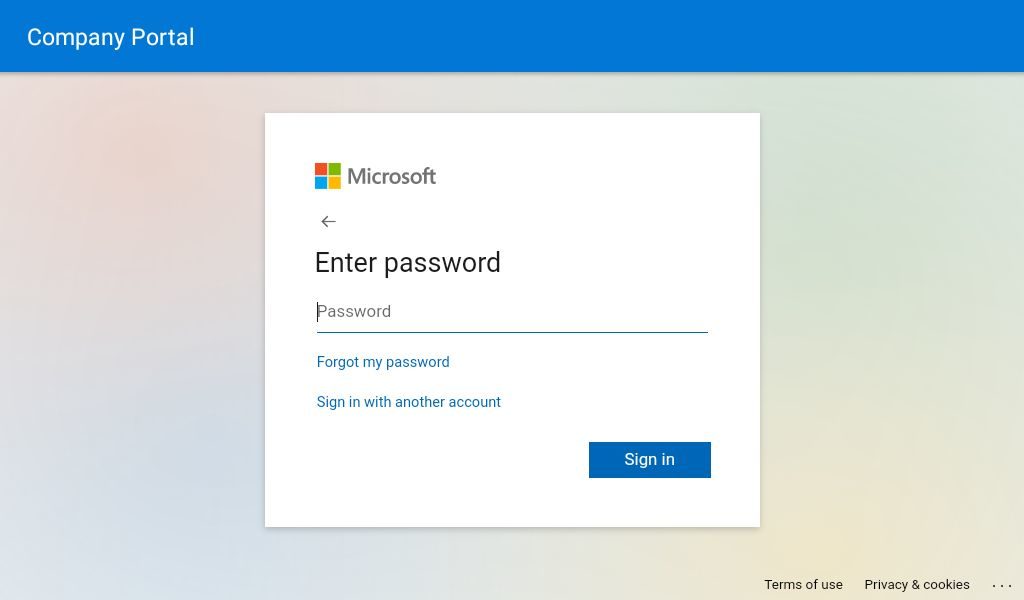
Step 4 – Once you’ve entered your email address, you will then be asked to enter your password for this account.

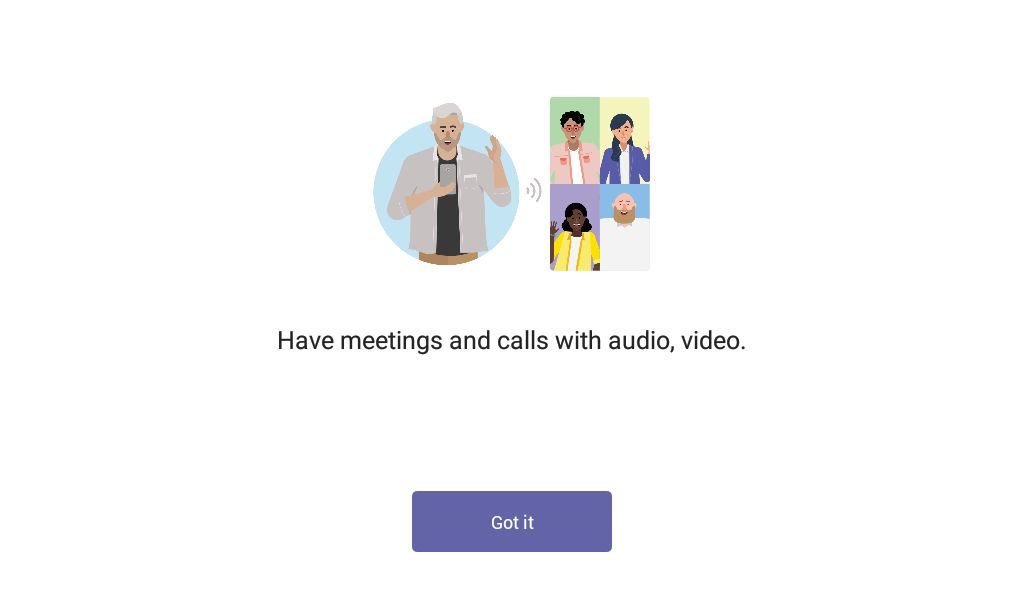
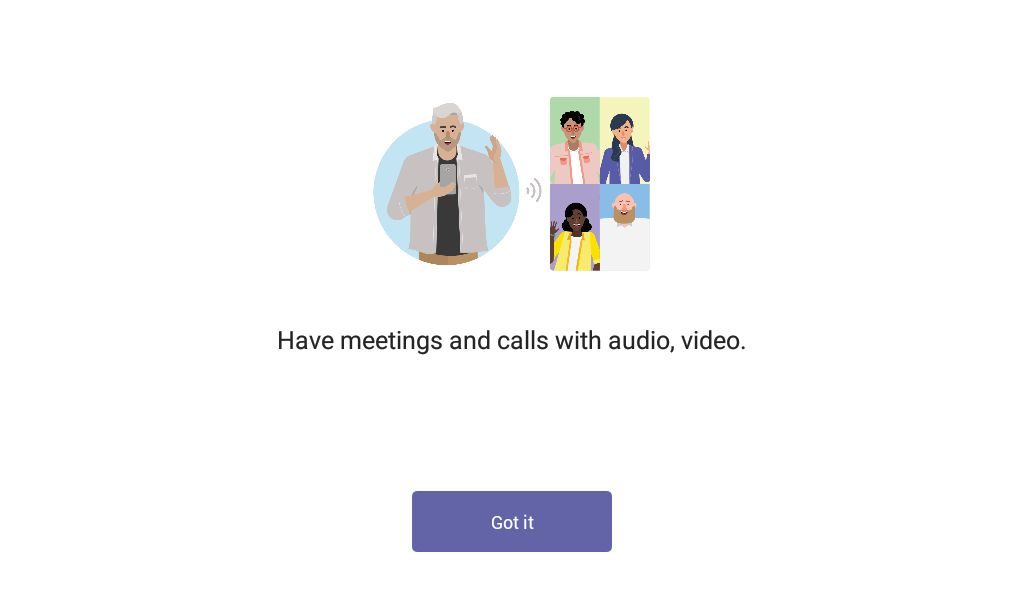
Step 5 – Once you have done that, your phone will automatically sign-in to your teams account and the web page will tell you to close the page. If your phone is nearby you may see it automatically start to log you in and then your phone will display this page. Click ‘Got it’ to start making or receiving calls.

Method 2 – Using the phones user interface

Step 1 – On the device’s login page, press “Sign in on this device”

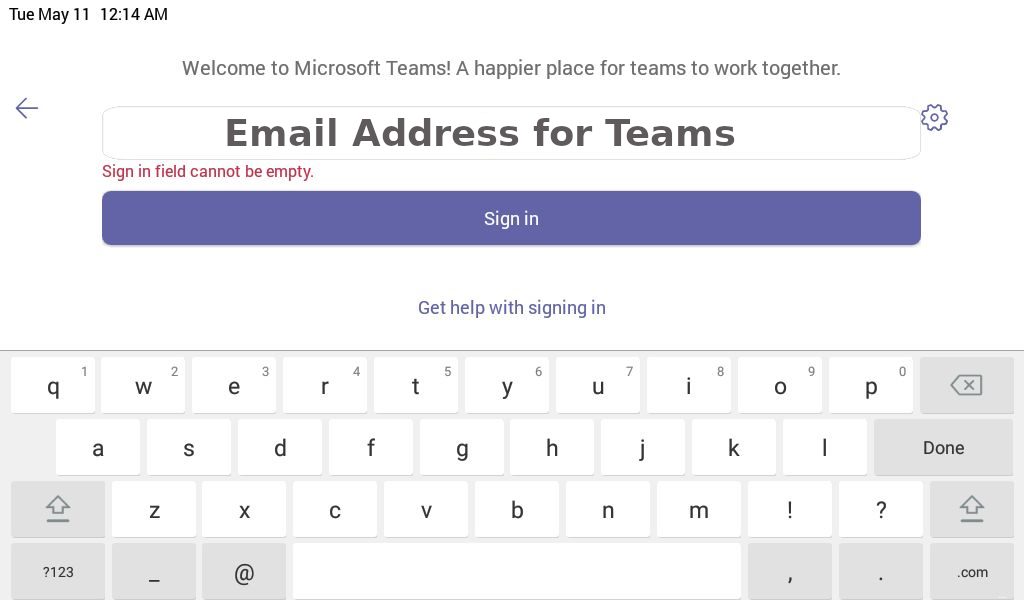
Step 2 – Once you have done that a new screen will load asking for your to enter your Microsoft Teams email address, Once you have done that click the sign in button.

Step 3 – Another screen will then load asking you to enter the password for the Microsoft Teams account you are trying to sign in with.

Step 4 – Once you have done that, it will cycle through some more screens and eventually, it will have signed in to your Teams account on this device. Click ‘Got it’ and you can start to make and receive calls.

If you have purchased your Yealink Team’s devices from ProVu and you are having difficulty with this blog post, or anything else related to your device please send an email to support@provu.co.uk explaining your issue.

Supported Microsoft Teams Subscriptions on Yealink Teams Devices

At the time of writing, and to the best of our knowledge these are the requirements to be able to log in to a Yealink Teams device with a Microsoft Teams account.

You will need one of the following Microsoft subscriptions, but these do not allow PSTN calling. It’s only possible to communicate with other Teams users on your system. Please also note you can not login with a free to use Microsoft Teams account.

Supported Microsoft Teams Subscriptions:

  • Microsoft 365 Business Basic
  • Microsoft 365 Business Standard
  • Microsoft 365 Business Premium
  • Microsoft 365 E3 or A3
  • Office 365 E3 or A3

If you want to place PSTN calls you will also need an additional subscription to the Microsoft 365 Business Voice service (available for qualifying plans only) or have a Microsoft 365 E5 service.

Please be aware that Microsoft 365 and Office 365 are not the same.

Below are some links so you can compare the available services, but make sure to read the small print to fully understand which services are offered and which are excluded with the plan. If you are still unsure I’d recommend reaching out to Microsoft and explaining your interest and requirements.

Compare Microsoft 365 Business Plans

Compare Microsoft 365 Enterprise Plans

Compare Office 365 Plans

Compare Microsoft 365 Business Voice & Microsoft 365 E5

Discover more about Yealink Teams Devices

Important: Additional Microsoft plans are required for the Yealink Microsoft Teams Rooms Systems. This page can be used to identify which plan you will need.

Yealink TFTP Recovery

If your Yealink device is in a boot loop or stuck on the Welcome initializing… Please Wait screen then you may need to preform a TFTP firmware recovery. This guide will show you how.

In the guide we will be using PumpKin TFTP Server but you can use any substitute you like.

Please note: ProVu are not liable for any issues caused by this download and please make sure that this is all setup on a LAN and not a WAN.

Step 1:

To acquire the firmware recovery files please contact support@provu.co.uk

Step 2:

Once you have the right firmware files you will need to setup your TFTP server.

Once you have downloaded and installed PumpKin from the link above you will be presented with the below page:

From here you will need to click on options which should bring up the following window:

On the above window you will need to set the TFTP filesystem root to the folder that you stored the firmware files in. In the example above I kept this in the Downloads folder but these can be stored anywhere you like.

You will also want to change the Read Request Behaviour to Give all files and the Write Request Behaviour to Take all files as shown in the screenshot above. Setting these options will allow the phone to request all the firmware files that it is looking for in the selected file path.

Once these have been set you can now click ‘OK‘ to save changes.

Step 3:

Putting your device into TFTP recovery mode. This may differ depending on what Yealink device you have so I have tried to cover them all in this guide for you.

T19, T2x, T3x, T4x, T5x

Step 1 – To recovery the above models you want to power off the device > press and hold the speakerphone button while powering on the device until you get to the following page:

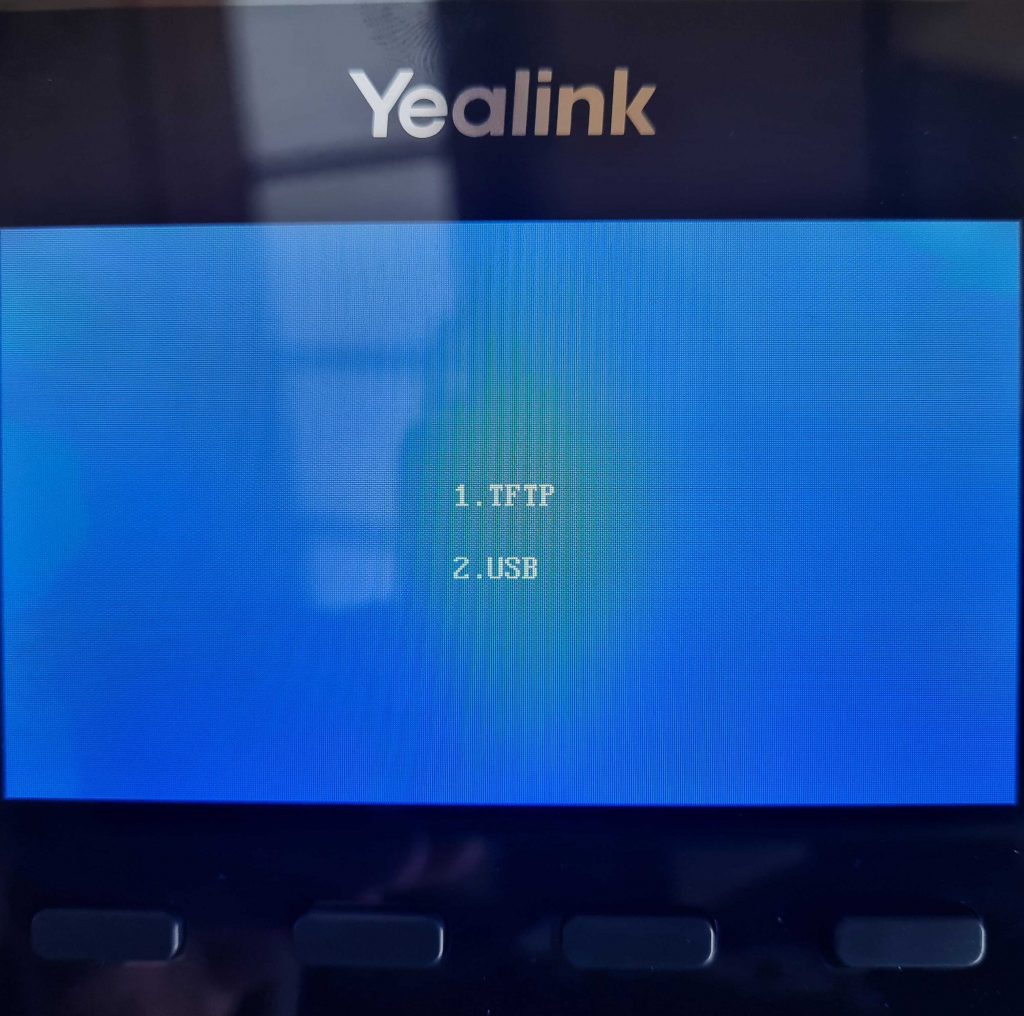
Unless your phone has a USB port in which case you will see these 2 options before the above:

If you are presented with this page first then click on 1. TFTP option.

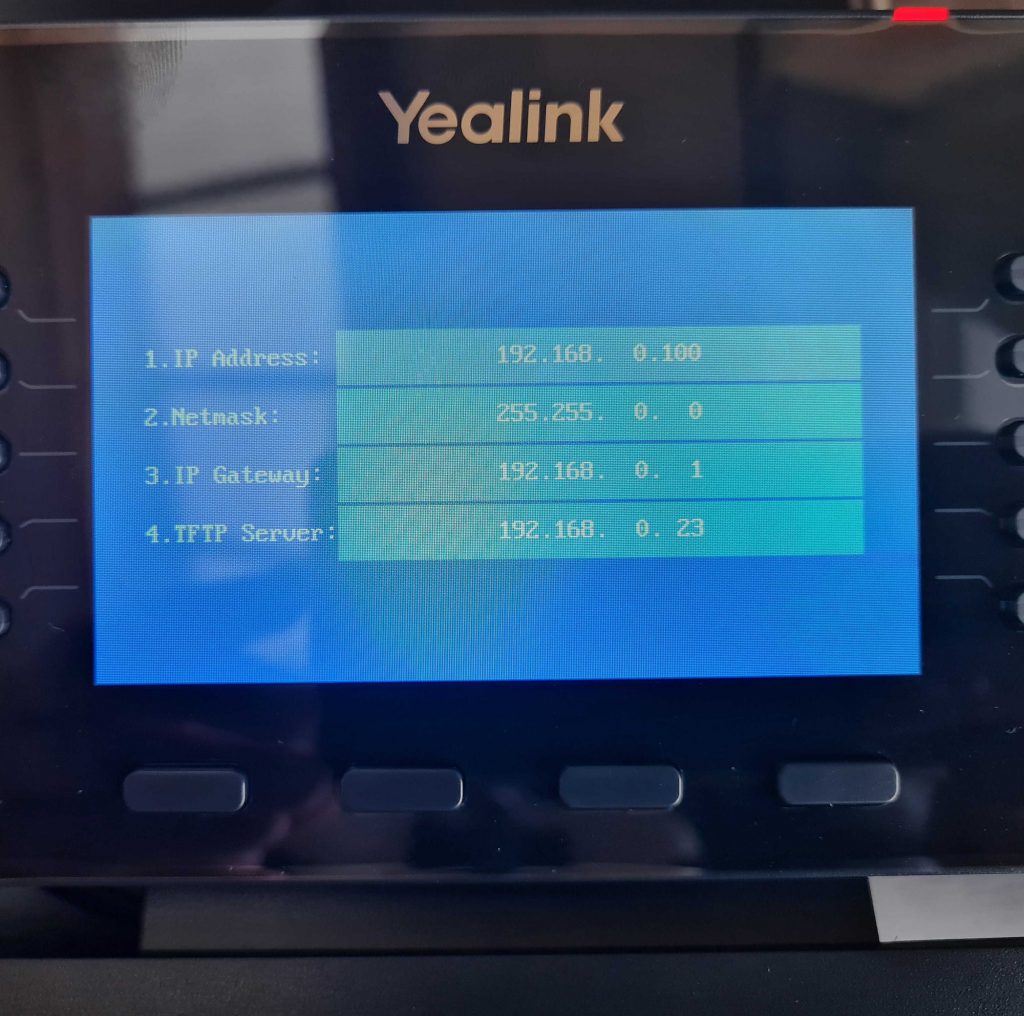
Step 2 – You should be on the page that has these four options:

  1. IP address
  2. Netmask
  3. IP Gateway
  4. TFTP Server

For these four options you will want to input the following:

  1. IP address – Any unused IP address that is available on your network.
  2. Netmask – For the netmask you will want to add the subnet mask of your network for example 255.255.255.0.
  3. Gateway – This will be the IP address of your router.
  4. TFTP Server Finally this will be the IP address of the PC that is hosting PumpKin & Firmware files.

Once you have input these details press the ‘OK’ button on the handset, this will then start requesting the files that you downloaded and stored earlier.

Step 3 – Please note that this process can take a few minutes to complete. You should see Updating on the screen until eventually the phone reboots itself. If successful then once rebooted you should see the phones home screen as normal

If this was not successful then you should see a message such as Update failed, if that is the case then you will need to check your details and firmware file path and try again until successful.

W52P & W60B

Step 1 – To recover a DECT base station is a little different to a deskphone.

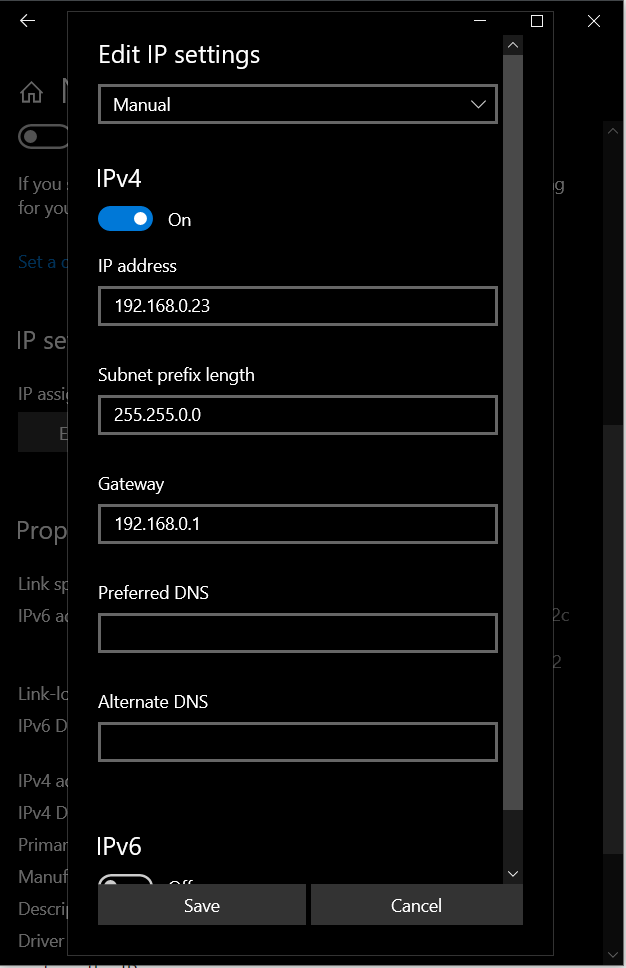
DECT equipment requests the files from a specific IP address so you will need to make sure that your PC that is hosting PumpKin is configured with the following information as per below:

Step 2 – During the recovery the base station should get an IP address of 192.168.0.100 and will request the firmware files from the IP address above (192.168.0.23)

To put the base station into recovery mode you will need to unplug the unit press and hold the paging button (only button on the base station) and power on the device while still holding the paging button until all the lights turn on one by one (Power, Network & Phone/Dect)

Step 3 – Just like the deskphone this will take a few minutes to complete. Once successfully complete the base should reboot and all lights on the base should be solid. The device should now get an IP address via DHCP and can now be accessible.

If you have any problems/issues with any of the above please contact support@provu.co.uk or call 01484 840048 option 2 for support.

Fanvil Stuck on Splash Screen

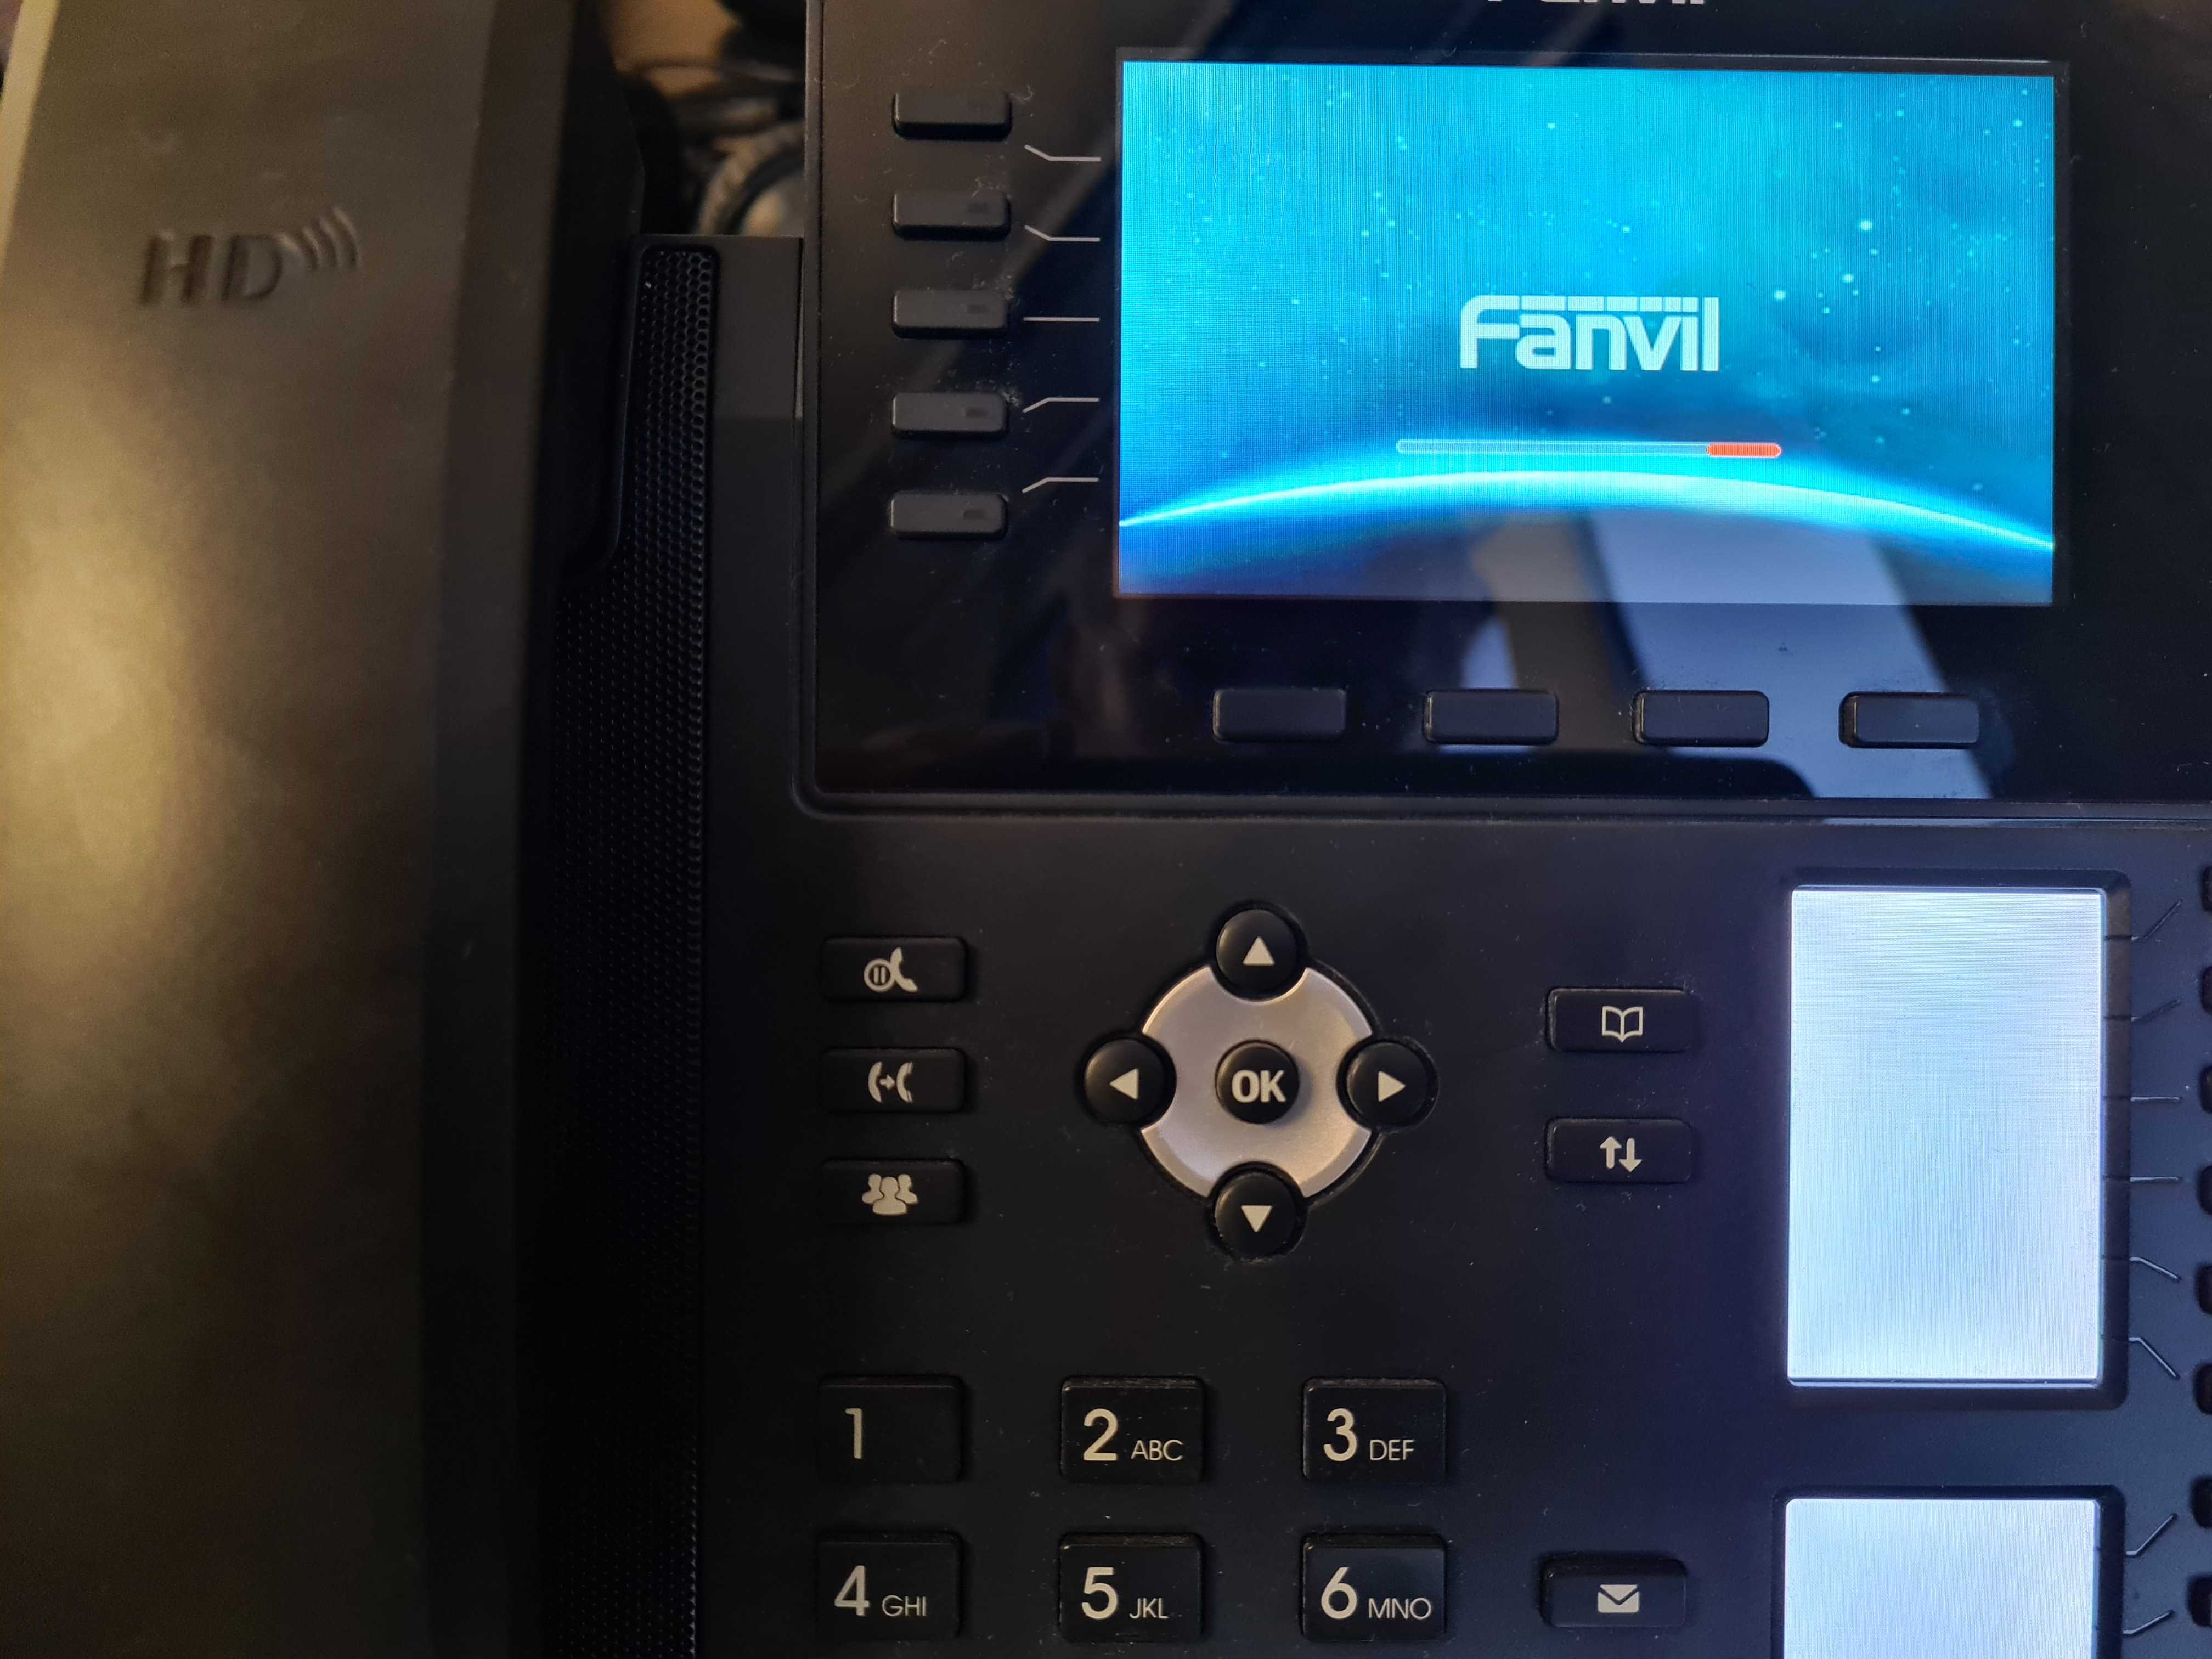
If your Fanvil phone is stuck on its splash screen:

Then you may be able to resolve this by hard resetting the phone via POST MODE. Follow the steps below to find out how:

Step 1:

Make sure your IP phone is completely turned off.

Step 2:

Hold the pound key (#) 

  • If you are using an X6: press # after the 2nd Red Light blinks on Power Indicator LED.
  • If you are using an X7: press # after the power light has flashed 4 times.

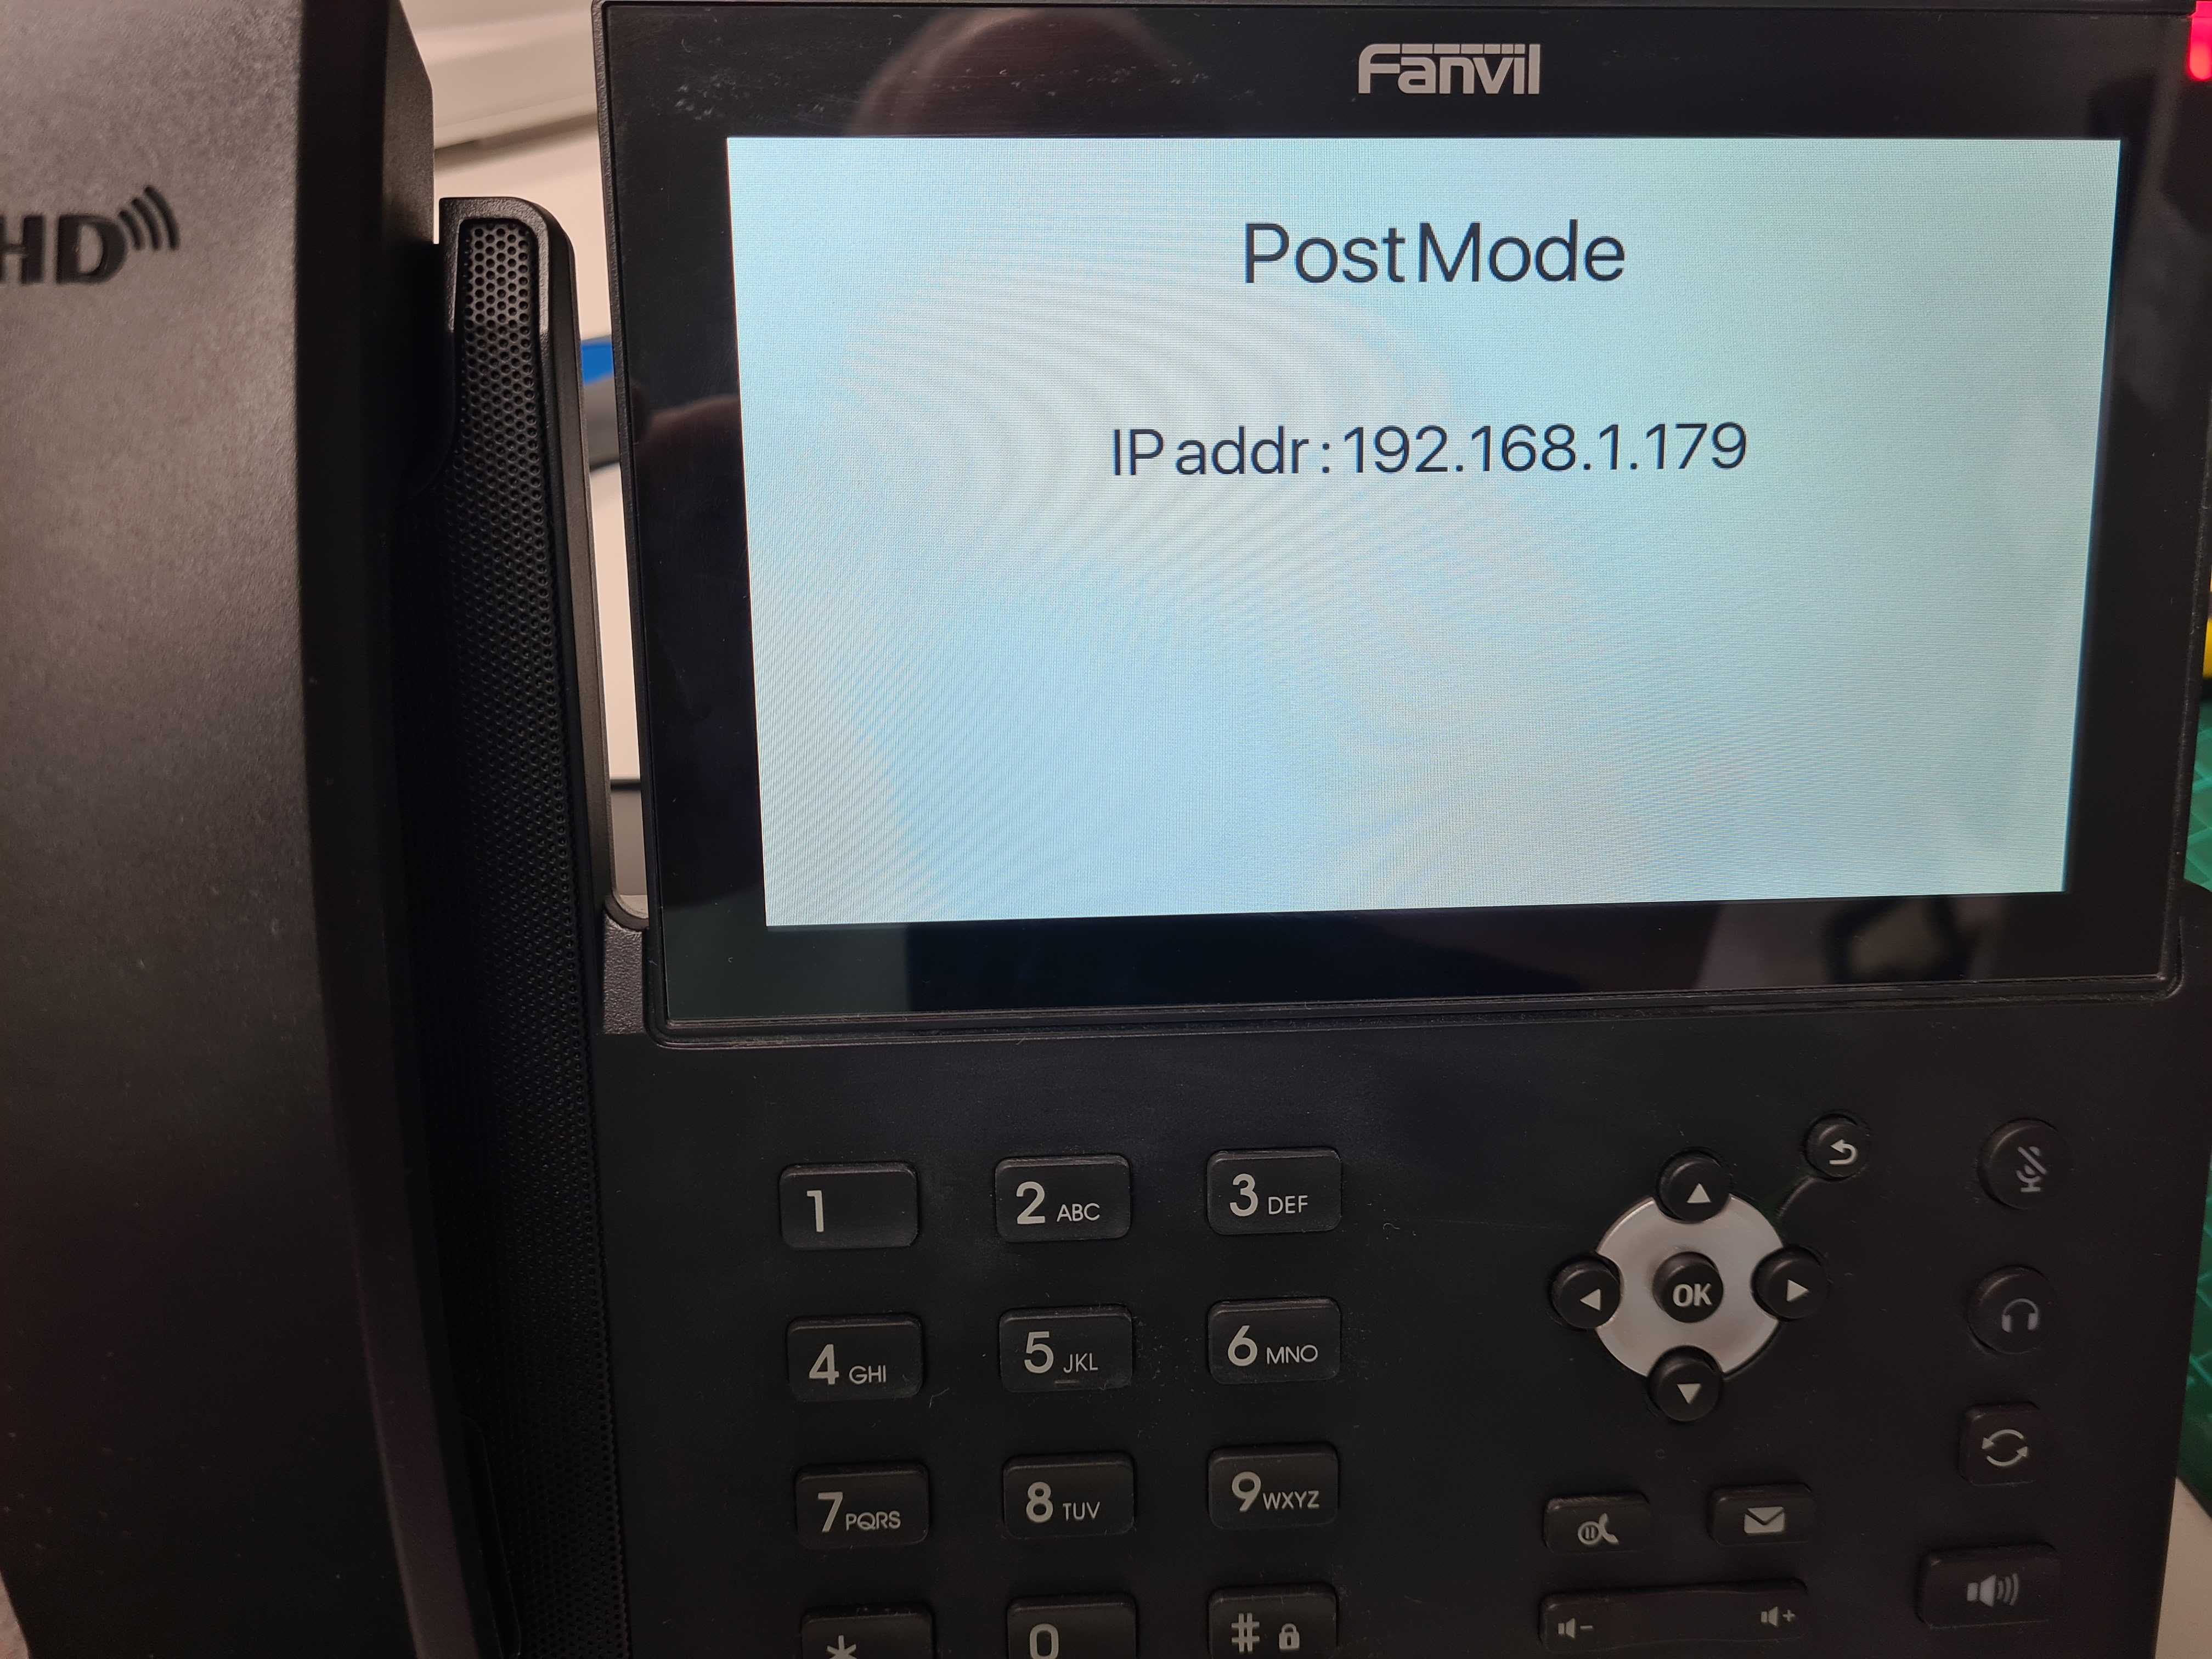
You will then see the message “Post Mode” appears on your screen as per image below:

Step 3:

Dial *#168

After 5 seconds, you should see “Conf Reset” on your screen.

Restart your IP phone and your phone will be reset to the factory settings.

If this did not resolve your issue they you may need to try a TFTP firmware recovery found here.

If you have any issues please contact support@provu.co.uk or call 01484 840048 option 2.