Browse Category

Technical Hints

870 with no rainbow Swirl

Snom870s come with default screen background with has a swirly rainbow.

We’ve had a few customers recently complain their phone is faulty because of a mark on the screen.

The good new is that the 870 is a completely customisable phone. So using prosys we can now provision a plain background. If you want this on your 870, please ask your account manager.

How to: Panasonic Repeater Pairing

This is a short guide on how to pair up a Panasonic repeater (KX-A405) to a Panasonic DECT base. This guide assumes that you have plugged in your DECT base and registered the handset to it – if you have not yet done this please do so now, consult the user manual for the base if you require help.

The base must be on firmware 22.58 or greater. Older firmwares do NOT include repeater functionality

Step 1: DO NOT PLUG IN THE REPEATER YET.

In the handset menu select IP service (toolbox icon). Select Call Features then Repeater Mode. Set this setting to ON.

Step 2:
Press and hold the ALL button on the base for 4 seconds (or until the status light blinks red). On the TGP500 this button is on the side, on the TGP550 it is on the front.

Step 3:
Once the status light is blinking red, you can now plug in the repeater. Make sure that the repeater is within range of the base (around 1 metre away is best) – you can reposition the repeater to its final location once it is paired.

The repeater should now automatically pair with the base. Once both of the LEDs are lit green the process is complete. Please note this may take a few seconds.

** If the LEDs do not light green – consult Page 10 of this manual to diagnose the problem.**

That’s it! The repeater is now paired to the base. You can now press the ALL button once to take the base out of registration mode.

If you are one of our customer’s and are having trouble with this please send an email to support@provu.co.uk or call us on 01484840048 and a member of the technical team will be able to help.

SNAP – Sangoma Vega Provisioning Tool for ITSP and Installers

Sangoma has launched a new web tool for ITSPs that allows for quick and easy provisioning of Vega gateways. The tool allows ITSPs to generate configuration files for any Vega gateway without having to manually configure each setting on the web GUI. SNAP walks through a series of screens and spits out a final configuration file which can be uploaded to the Vega.

To benefit from the tool, the ITSP will have to provide a test account and general install scenario such as whether the box will be on DHCP or static IP address, what codec types to use, etc. Sangoma will then test those scenarios with provided test account and make the final template available for users to download. There is no limit on the number of templates. Multiple templates can be created for the same product according to the scenario.

Have a look at the link below to get a general idea of how it works.

http://vegaconfig.com

SARK SIP-to-SIP peering

You can use the built-in SailToSail or IAX2 trunks, but both of these will use the IAX protocol. If you are wanting to achieve this sibling trunking via SIP, you will need to use the “GeneralSIP” template when creating a trunk.

The steps below are the same for both systems, so follow them through once and then repeat the same process on the other system.

– Login to the SARK web interface
– End points > Trunks > Create new ([*] button on right) > GeneralSIP
– give the trunk a dummy number (I just used 0000 in my test)

– Configure the trunk to point to the URI/IP of the target system (sibling)
– Make up a username and password
– Press “Save”

– Go back to the trunks screen and now “edit” the new trunk
– Click on the “User” tab that appears on the next page
– Set the “Asterisk User” box to be the same as your chosen username above
– the asterisk config for this trunk can then be populated into the textbox below:
“””
secret=password123
context=extensions
“””
Where the secret is the same as the chosen password before.
Now commit your changes and do the same on the other system. With any luck, these should now be peering correctly. You may wish to check on the asterisk console `asterisk -rvvvv` and then `sip show peers`

Best of luck!

Siemens Gigaset – IP DECT Transfer ‘How To’

There are two types of transfer on a Gigaset IP DECT phone. The first way is called a DECT transfer and can only be used to transfer a call to another handset registered to the same base station.

The second type is a SIP transfer and can be used to transfer a call to any other number using your VoIP service provider or PBX. Chances are this is the type of transfer you want to do so you can skip right to the SIP transfer section if you want to.

Please note that you cannot transfer analogue/PSTN call to an external pstn number.

DECT/Internal Transfer How-To

  • During a call, press the “int” key on the handset. This is usually the left hand button on the four way navigation key in the middle but it depends on the handset model.
  • The person you were talking to now hears some awful music on hold generated by the Gigaset phone itself! which can be turned off from the web interface.
  • You will see a list of the other DECT devices registered to the base station, select one of the the dect handset and press the green dial button and it will start ring.
  • Announce the call and press the Red hangup key when ready to transfer.
SIP/External Transfer How-To

An external transfer is made a lot easier if you change a setting in the web interface of the phone before hand. You only need to do this once by the way!

There are two settings to look at. First setting is called "Transfer Call by On-Hook" and is found by clicking "settings" then "telephony" and "advanced" in the web interface. Change it to "yes". Other settings is " Use the R key to initiate call transfer" and found on the same page, change it t "yes"

After this the actual transfer process is fairly straight forward:

  • During a call, press the R keys on the handset which can be found on the lower left or right side of the keypad
  • Dial a number and press the green button to make a call.
  • When you are ready to transfer, simply press the hang up key on the Gigaset handset and the other two callers are connected.

Vega 400/200/100 firmware recovery

If you have bricked your Vega box during the firmware upgrade process or something similar then it can be recovered.

You will need the following items for recovery.

  • Console cable (RJ45 to Serial converter). Vega 400/200/100 comes with a console cable.
  • Computer running Windows/Linux or Mac.
  • Terminal client such as Hyper Terminal, Minicom or Putty.
  • USB to Serial converter (optional: only required if computer does not have a serial port)

Recovery Procedure:

  • Turn off Vega
  • Connect RJ45 end of cable to console port and connect the serial connector to the serial port on computer.
  • Connect to Terminal client of your choice and set following configuration
  • Speed: 9600
    Data bits: 8
    Parity: None
    Stop bits: 1
    Flow control: None

  • Turn on Vega box and press Enter button a couple of times until the message “Press ‘Y’ to enter Boot Menu ” appears on terminal window.
  • Press ‘Y’

Note: Check the connections if nothing appear on terminal screen.

    Vega400 BootLoader: Version 3.00
    FPGA Test Pass (FPGA Version 3)
    RAMTest Pass – 64Mbytes verified
    Programmed MAC Address 00505816244A
    Press ‘Y’ to enter Boot Menu

    VegaStream Boot Menu Version 3.00
    ———- —- —- ————

    1) Download Boot Image (SRec)
    2) Download Firmware Image (SRec) (115K2 Baud recommended)
    3) Config Clear
    6) Switch Boot Partition
    D) Duplicate FLASH
    F) Set Flow Control (currently Hardware)
    Z) Set speed high (115200 Baud)
    E) Exit BOOT and Run Firmware

  • Finally press 6 to choose option 6 i.e. switch boot partition press 6 and wait couple of seconds. This setting will change the partition to older firmware version press E to exit and reboot to old firmware.

After the reboot the Vega should come back with older firmware and settings.

DE900 Rescue mode

If you get a gigaset DE900 stuck in rescue mode, this is what to do.

First change your computer to have an IP address of 192.168.15.2 with a 255.255.255.0 netmask. The phone will be on 192.168.15.1

Download the Firmware file
unzip

On Windows
Open a “DOS-box”
go to the DIR where the Firmware is located
TFTP -i 192.168.15.1 PUT filename.IMG

​On MAC/linux
Open a Terminal (Firmware file has to be in users home-DIR)
tftp
connect 192.168.15.1
binary
rexmt 1
timeout 60
put

Local area code on a snom desk phone

There are many ways you can build a dial plan on a snom phone.

The full range of features are documented on the snom wiki Dial Plan regex

As a quick example, here is how I can dial a local number in the area code 01484:


|^([2-9][0-9]{5})$|sip:014841@d

For many people, this may well be the only dial plan rule that they wish to use.

Get reading the documentation and see what you can do!

RTSP streaming from Protalk/Fermax door entry to VideoLan

You can now stream video directly from the Protalk door phone to your favourite rtsp streaming media server or VideoLan software.

If you are unsure what rtsp means then have a look at this wiki page.

This new feature will allow CCTV/Security installers to integrate video from the Protalk in existing video monitoring/recording software.

Protalk builtin rtsp server support H264 or H263 video format and listen on port 554.

VideoLan Configuration:

To see video stream on VideoLan software.

  • Open program then go to Open Media > Open Capture Device > Network and put “rtsp://ip.address.of.doorphone:554
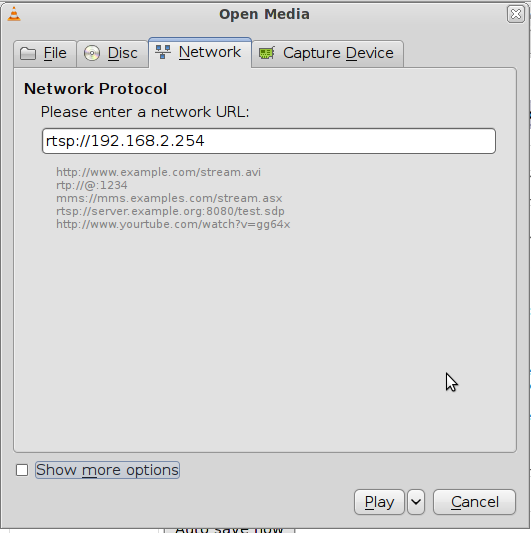
” finally press the Play button.

All being well you will see video from the door phone. If you want to force the rtsp server to use H263 or H264 then add the following in your url field.

‘rtsp://ip_address/video.263’ to force H263
‘rtsp://ip_address/video.264’ to force H264

If you face problem with any of above please get in touch.

This blog post applies to CityLine,SkyLine and SlimLine products.


Sangoma Vega 100 as an ISDN gateway to a SIP PBX

The aim is to use a Sangoma Vega 100 single port PRI gateway as an ISDN gateway for a SIP PBX.

All the Vega will do is forward anything it gets on the ISDN line to the SIP PBX and forward anything from the SIP PBX to the ISDN line.

Steps as follows:

  • Web browse to the Vega and login
  • Go to the Quick Config section
  • On the E1/T1 page, change the number for Interface 1 to just “.*” (dot-star without the quotes)
  • Ignore lines 2-4
  • Open up the Port Settings (ISDN line settings) section and check that the line is set to the correct mode, TE (not NT)
  • On the SIP tab, enter the IP or hostname of your SIP PBX into the domain and proxy settings. You do not need Outbound Proxy and it’s best to set this up without Registration
  • Apply the quick config

That should be it, the Vega will forward SIP to ISDN and ISDN to SIP regardless of numbers received on either side.

The main settings for this are in “Dial plan” in Expert Config. You can see what has been generated in the “To_SIP” and “To_E1T1” dial plans.

Note: this should also work on Vega 200 and Vega 400 if you add the other ISDN interfaces into the planner group that the dial plan “To_E1T1” uses.