Fanvil Desk Phones to Meet Every Budget

Let us introduce you…

As the newest brand to become part of the ProVu portfolio, Fanvil offer a wide range of devices designed to suit every budget. With devices spanning entry-level to high-end enterprise requirements, Fanvil’s XU series offer:

  • Additional on-screen DSS
  • BLF support across all phones
  • OPUS codec support

X7 & X7C Executive-Level Phones

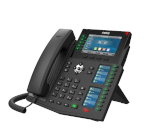
For additional functionality and features, the X7 and X7C offer high-end enterprise devices with large high resolution colour screens, support for up to 20 SIP accounts and up to 127 programmable memory keys (60 on the X7C).

Calling Dr M90

Dr M90 to Reception, to reception, Dr M90.

As part of Snom’s latest DECT revolution, the new Snom M90 DECT handset offers something a little different to others on the market, with a number of unique features which give it some compelling points to push to customers in the clinical/medical sector.

Is there a doctor in the house?

Snom’s M90 is perfect for a range of environments, including:

  • Hospitals
  • GP/Doctors Practice
  • Dental Surgery
  • Laboratories
  • Nurseries
  • Care Homes

Control your environments…

Featuring a special antibacterial housing, the M90 handset is JIS-Z801 certified meaning it is not only easy to clean, but also doesn’t allow bacteria and viruses to breed. All while maintaining an elegant and modern design which would become a defining feature on any desk.

In addition, the M90 is also IP65 rated, protecting the device from dirt and water splashes as well as drops of up to 2 metres.

That’s not all, the M90 is fully compatible with the M900 multicell DECT base station, with huge potential for future scalability with support of up to 4,000 base stations and up to 16,000 handsets.

Put your DECT woes into remission…

Compatible with the revolutionary M900 Multicell DECT base station, this solutions offers huge potential for future scalability with support for up to 4,000 base stations and up to 16,000 handsets.

What’s more, the Snom M90 also includes an integrated Bluetooth tag which can be used in tandem with Snom’s low energy beacons for additional functionalities such as device tracking.

Diagnose your solution

Call a member of our team or email contact@provu.co.uk to discuss the best way to implement the M90 solutions to your customers systems.

Discover the Snom M90

A Sennheiser Offer too good to resist…

Time to upgrade your hardware? Let 2020 be your year to renew your team’s headsets and save over 50% off the RRP with Sennheiser’s NFR offer. Available across the entire headset range, you too can enjoy the renowned superior audio quality and user experience that comes with Sennheiser devices.

Select your headset

Join the headset revolution today and become a Sennheiser Reseller. Sign up couldn’t be easier, simply complete our short online form and join the Sennheiser reseller community where you can benefit from:

 Industry leading 2-3 years no quibble warranty
 Global advanced replacement
 Access special price agreements & deal registration, save an additional 2 – 6% on large projects*
 Reduced competition – you won’t find Sennheiser products on third party websites

Become a Sennheiser reseller

*T&C’s apply, speak to a member of the ProVu Team to find out more

How to capture a trace in 3CX

There are a couple of ways to capture logging information on 3CX, here is a guide on how to obtain both.

Capturing an Activity Log

Step 1 – From the Dashboard of the Management Console click on Activity Log (As shown below)

Step 2 – Click on Settings (Highlighted below)

Step 3 – Change the Logging Level to Verbose and press OK (Highlighted below)

Step 4 – Once you have pressed OK click on Capture (Highlighted below)

Step 5 – Once you have clicked on Capture the following window will pop up below.

At this stage you should replicate the fault you are experiencing and then press Stop. (Highlighted below)

Step 6 – After you have clicked Stop the following window should pop up, click ‘here‘ to download the PCAP file then press ‘OK‘ (Both highlighted below)

Step 7 – Once the file has download please send this over to support@provu.co.uk with a description of the fault you are experiencing so we can look into this for you.

Generating Support Info

You can also Generate Support Information by doing the following:

Step 1 – From the Dashboard of the Management Console hover over Support at the top right and click on Generate Support Info(Highlighted below)

Step 2 – Once done the Administrator will get an email with the support information and the following window should appear:

Once the Admin received the support information please forward to to suport@provu.co.uk with a description of the fault you are experiencing so we can look into this for you.

If you have any issue obtaining a log please contact our support team at support@provu.co.uk or call 01484840048 option 2 for support.

Welcome Fanvil!

We are proud to introduce our new partnership with Fanvil. Now in stock and available for next day delivery, the popular Fanvil H series of hotel phones and X series of IP desk phones can now be purchased from ProVu.

Fanvil H Series

Specially designed for the hospitality sector, Fanvil’s H series comprises of the H2, H3 and H5 phones. Offering three simple to use devices, these phones are ideal for use in hotel guest rooms where user requirements are often minimal. With solutions being deployed to hotels all over the world, from Ireland and Russia, to China and Cyprus, the H series can be easily deployed with full compatibility with 3CX.

Fanvil H Series

X210 & X210i Reception Phones

Ideal for busy receptionists and concierge, the X210 and X210i IP phones offer access to a wide range of features and functions. Perfect for tying a hotel or business network together, the X210 and X210i provide 106 programmable keys for BLF and speed dial, for additional functionality the X210i also features a flexible goose neck microphone for broadcast announcements.

Fanvil X210 & X210i Series

The X Series

As Fanvil’s flagship range, the X series covers all requirements from simple entry-level devices, to high end, enterprise-level phones with a 7″ touch screen, WiFi and Bluetooth connectivity. Featuring a sleek modern design, all devices in the X series have a high resolution colour display and HD audio quality.

Fanvil X210 & X210i

Check out the Fanvil range

How to capture a SIP trace on a Snom phone

If you have contacted our support team with a technical issue we may require to see a trace from the phone.

Please note: This guide is for TLS, if you are using UDP or TCP please refer to the following guide below:

Here is how to obtain the logs from the phone.

Step 1 – Web browse to the phones web interface.

Step 2 – Once logged in navigate to SIP Trace down the left hand side (As shown below)

Step 3 – Click on Clear then replicate the fault you are having.

Step 4 – Once you have replicated the fault go back to this page (above) and click Reload.

Step 5 – Please save this trace into a plain text editor and send it over to support@provu.co.uk for us to investigate your issue further.

If you have any problems obtaining a trace please contact support@provu.co.uk or call 01484840048 option 2 for support.

How to capture a PCAP trace on a Snom phone

If you have contacted our support team with a technical issue we may require to see a trace from the phone.

Please note: This guide is for UDP/TCP, if you are using TLS please refer to the following guide below:

Here is how to obtain the logs from the phone.

Step 1 – Web browse to the phones web interface.

Step 2 – Once logged in navigate to PCAP Trace down the left hand side (As shown below)

Step 3 – Click on Start then replicate the fault you are having.

Step 4 – Once you have replicated the fault go back to this page (above) and click Stop.

Step 5 – Click ‘here‘ highlighted in blue (As shown below)

Step 6 – The trace will start to download, once downloaded please send this over to support@provu.co.uk for us to investigate your issue further.

If you have any problems obtaining a trace please contact support@provu.co.uk or call 01484840048 option 2 for support.

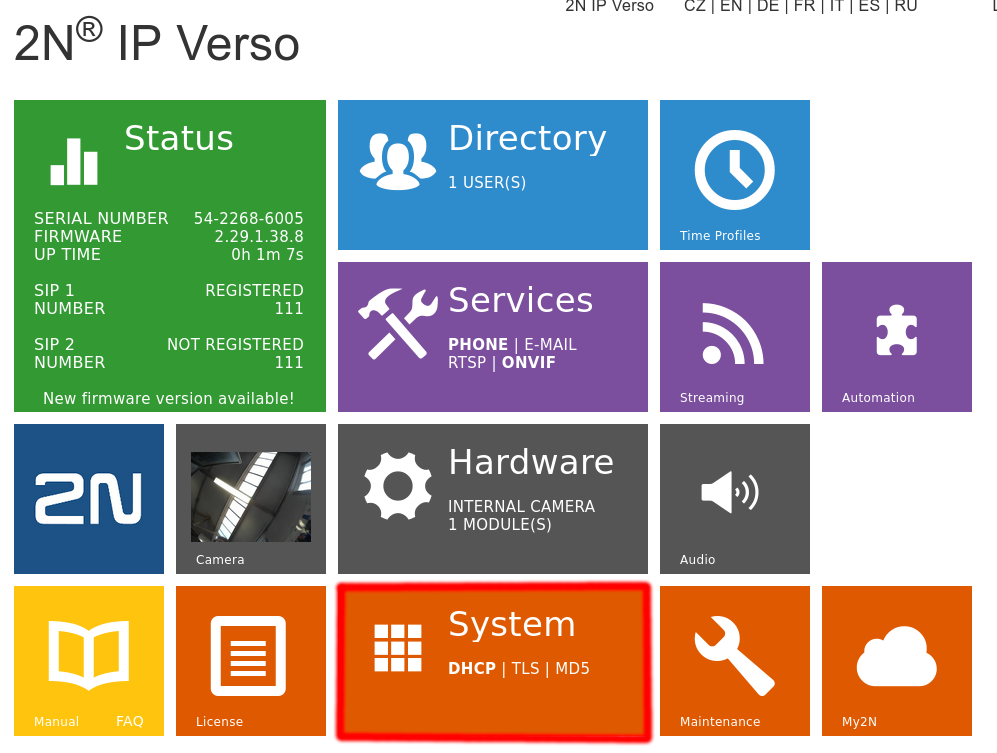
2N Function Licensing

Some 2N IP intercom functions are unavailable until a valid license key is entered. The following types of licenses are available:

Enhanced Audio (9137905)
Enhanced Video (9137906)
Enhanced Integration (9137907)
Enhanced Security (9137908)
Gold (9137909)
InformaCast (9137910)
NFC (9137915)
IP intercoms Lift module license (9137916)

https://wiki.2n.cz/hip/conf/latest/en/3-rozdily-mezi-modely-a-licencovani-funkci/3-2-licencovani-funkci

For more information on any of the licenses please see 2N’s wiki page above or contact: contact@provu.co.uk or support@provu.co.uk

Bria Enterprise – Generating Support Logs for Windows

If you have contacted our support team regarding an issue with CounterPath’s Bria Enterprise application we may require some logs from your application that you will need to generate.

Step 1 – Open the Bria Stretto application and click on > Help > Troubleshooting (As shown below)

Step 2 – The following window should open, from here click on the Support tab > Change the Log Level to Verbose then close the window.

Once you have closed the above window you can now replicate your fault.

Step 3 – Once you have replicate the fault go back to help > Troubleshooting > Support then press Send Log Report.

Once you have clicked on Send Log Report the following window should pop up:

Step 4 – Click Send Log, this will generate a log reference (As shown below)

Please send this log reference over to us with the user account that this log belongs to so we can find it on the CounterPath Portal.

Please note: You need to contact us once the log has been generated as they don’t stay on the portal for long.

CP960 Star Connection

Yealink Star Connection is where you can connect multiple devices together.

The CP960 supports this feature so you can have larger conferences.

You can connect up to four CP960’s together, one will be the master phone and the rest will act as slave phones.

The Master phone will keep all of its features but the slave phones only sync some of the features of the master phone such as call mute and DND. The slave phones are only used for speakers and microphones.

Here is how to set up Star Connection:

Please note: before you start you must make sure that all the Yealink CP960’s are on the same subnet.

From the CP960 that you want to be the Master unit go to > Settings > Advanced Settings (default password: admin) > CP Star Connection > Create Group (this will generate a random four digit pin)

Now from the slave units go to > Settings > Advanced Settings > CP Star Connection > Search Group (this will automatically find the Master unit if they are on the same subnet) > once it finds the Master unit click > Join > enter the four digit pin displayed on the Master unit > OK.

The Slave units will then reboot into slave mode as shown below:

Once the slave units have rebooted you will be presented with a message on both units as per below:

Once all the Slave units have rebooted and you have confirmed by pressing ‘OK‘ you can then ‘Stop Broadcast‘ on the Master unit.

You have now successfully setup Yealink CP Star Connection.

If you have any issues with any of the above please contact support@provu.co.uk or call 01484840048 option 2 for support.