Didn’t manage to catch our 2N webinar or want to go over anything you may have missed? We have you covered.
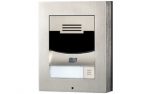
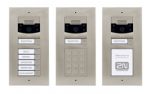
The Webinar hosted by our very own 2N specialist Gavin Sykes along side 2N’s Matt Raban covers the many features and units available to consumers. Such as the Solo, Verso and Force.
Also discussed is what ProVu can do to help you add 2N products to your portfolio. With many features like Consultation, Remote Support and white labelled installations, there are many reasons how ProVu can make 2N a valuable addition to your portfolio.
Our Trained experts are on hand to help you quote the correct equipment you need for your clients. Giving you a hassle free and time saving option to cut to exactly what you need for the project.
Pre-commissioning
Once devices have been chosen for the project, our team of 2N experts can configure the equipment to your chosen platform as well as conduct test calls to make sure that all products function as expected.
White-labelled installations
Carried out by a trusted and accredited 2N installers direct to site, saves you time as well as being a useful addition if you lack access to your own installation engineers. Giving you peace of mind that the equipment will be installed quickly and efficiently.
Remote Support & Troubleshooting
With multiple years of experience, our 2N experts can remotely access devices to get to the root of any issues you may face directly.
Get in touch with our expert sales teams on 01484 840048 or email contact@provu.co.uk to find out how build your 2N Portfolio today!
Open the door to innovation in our upcoming 2N webinar. Whether you’re looking to explore new horizons or are already a reseller of 2N’s industry leading IP door entry and access control solutions we’ll guide you through how you can expand your solutions with 2N.
Register now to join our Technical Sales Executive and resident 2N expert, Gavin Sykes on Thursday 28th January at 11 am to discover more about:
2N’s leading IP door entry and access control range
How to remotely manage deployments via 2N’s Access Commander
ProVu’s 2N services including consultation, pre-commissioning, white-labelled installation and expert technical support
The aim of this blog post is to provide a guide on configuring the software side of the 2N IP intercom’s to be in a state where they can make and receive calls. It will also detail how to change the door release code and other switch related settings.
This blog post was created with a 2N IP intercom using firmware version ‘2.30.2.39.7’. Previous or future releases may vary slightly.
Prerequisite:
It is advisable to read and fully understand the installation manual for your intercom before proceeding with this guide. The installation manual can be found on the 2N wiki by selecting your model from the listed devices.
Step 1 – Obtaining the IP Address
By default 2N IP Intercom units obtain an IP address via DHCP. There are a few ways to obtain the IP address of 2N intercoms such as the DHCP table on the networks router, alternatively you can use the 2N network scanner, or by pressing certain calling buttons on the intercom just after bootup.
More information can be read about the network scanner, or button sequence on the following 2N FAQ page.
Step 2 – Accessing the web user interface
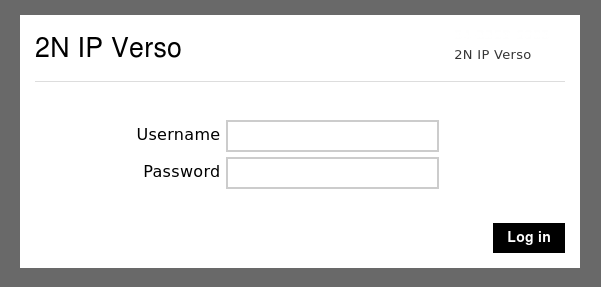
Once you have the IP address of the intercom open your web browser and type the IP address in to the top search bar. Once you press enter it should load the login page as shown in the image below.
The default username is ‘admin‘ and the password is ‘2n‘. If successful it will force you to change your password before proceeding.
Note: Some browsers work better than others, if you have issues with Chrome or Edge, try firefox. You may also see a certificate warning. This is expected behaviour and clicking advanced or proceed should take you to the login page above.
Step 3 – Checking & downloading the latest firmware version
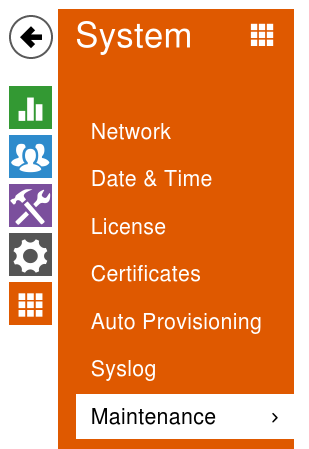
Once you have changed the admin password of the intercom it is advisable to make sure the unit is on the latest firmware version. You can do this easily by going to the ‘Maintenance’ section of the intercom.
To get to the maintenance section of the intercom you can use the ‘Maintenance’ button from the dashboard page
Dashboard Icon
Alternatively click the ‘orange icon’ with 9 squares in it and choose ‘Maintenance’ from the list.
Sub-menu navigation
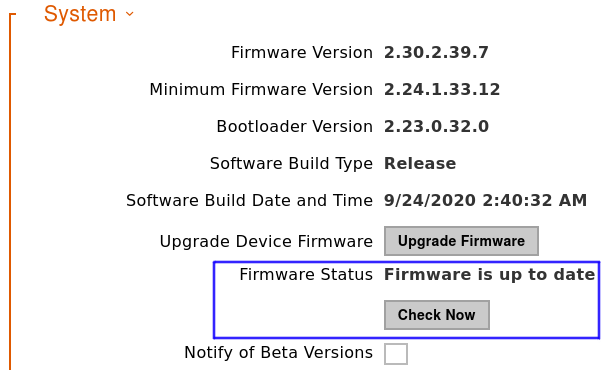
Once on the Maintenance page look for the ‘System‘ section shown in the image below. On this section it may already be reporting that there’s a new firmware version available next to ‘Firmware Status‘. If it doesn’t click the ‘Check Now‘ button.
If it reports a new firmware is available, read the ‘release notes’ carefully and if you are happy click proceed. The intercom will reboot during the upgrade. Once the upgrade is done this section should say the firmware is up to date.
Note: During the firmware upgrade do not remove the device from the network or interrupt the power to the intercom.
Step 4 – Configuring the SIP account & Call behaviour
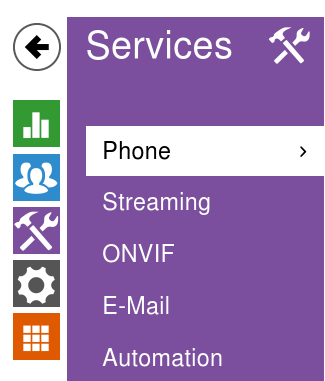
Now the intercom is on the latest firmware version we can proceed to configure the SIP account on to the device. This is done via the ‘Services‘ section and from within here the ‘phone‘ page as shown in the image below.
Sub-menu navigation
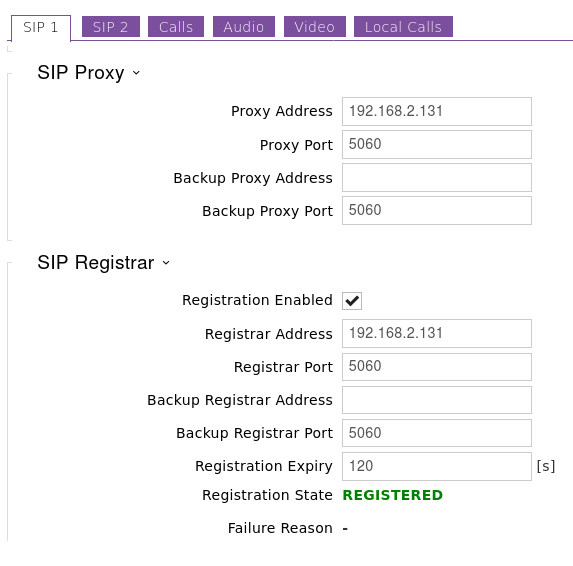
On the phone page it automatically takes you to the tab to configure ‘SIP Account 1‘ but the same applies if you are adding two SIP accounts.
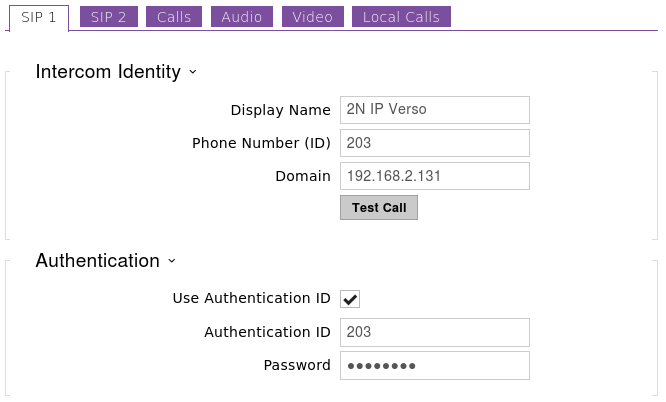
Hopefully you are familiar with applying SIP accounts to VoIP devices and the fields on this page already make sense. If they do, feel free to populate this page and get the SIP account Registered.
If you don’t have much experience and you have taken a hosted seat with an ITSP, and they have provided you with some account settings similar to the ones in the table below, you may not know where they need to go. The right column in the table shows where they would likely go on the 2N intercom.
Details from ITSP
Suggested 2N IP Intercom Fields
SIP Number/Account: 203
Phone Number (ID) field
SIP Password: Password
Password field
SIP Server: 192.168.2.131
Domain, Proxy address and Registrar field.
SIP Port: 5060
Proxy port & Registrar port
SIP Auth: WCXfg453SA
Authentication ID
Note: The SIP Server can be an IP address, but most likely it’s the ITSP domain name.
The SIP Auth is not always provided. If you didn’t get one sent the SIP Auth is usually the same as the SIP Number/Account.
The images below show an example intercom being configured with a SIP account and the Registration status going to REGISTERED. If your Registration status goes to failed and you are sure the details are correct send an email to support@provu.co.uk and we’ll be able to help.
Now hopefully the SIP account is registered successfully with your ITSP or PBX. If it is we can continue with configuring the intercom’s call related settings.
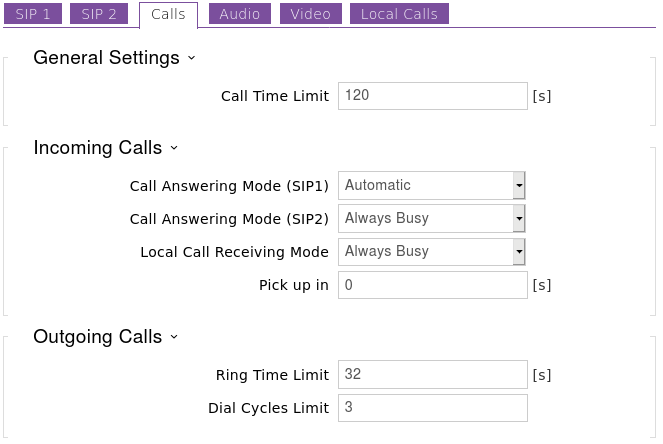
You may want to configure the intercom to automatically answer incoming calls. This is useful for situations where someone maybe stood at the intercom and you want to talk to them without them having to press the calling button. Or this maybe beneficial if you was on a call with someone at the intercom and the call time limit was reached so the intercom disconnected the call.
This behaviour is achieved by changing ‘Call Answering Mode (SIP1)‘ to ‘Automatic‘. When set to ‘always busy‘ the intercom will always decline incoming calls.
Step 5 – Creating users for the Directory, a.k.a – Phonebook
The Directory is where we add users to the intercom and also configure unique/personal details for them such as an RFID keyfob or a Name and number which is what we are going to look at.
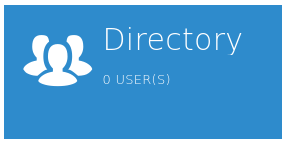
From the main dashboard click the icon below to get to the directory.
Dashboard Icon
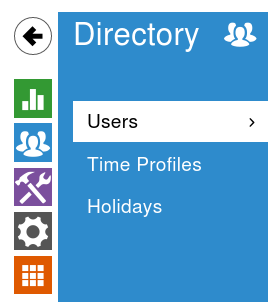
Or alternatively from the sub-menu navigation go to the section shown in the image below.
Sub-menu Navigation
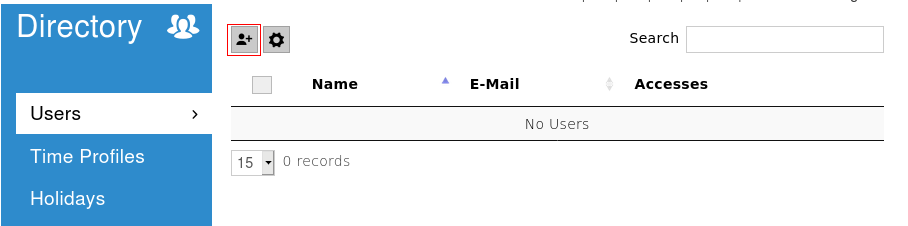
Once your on this page, to add a new user entry click the icon of a person as shown in the image below highlighted by the red box.
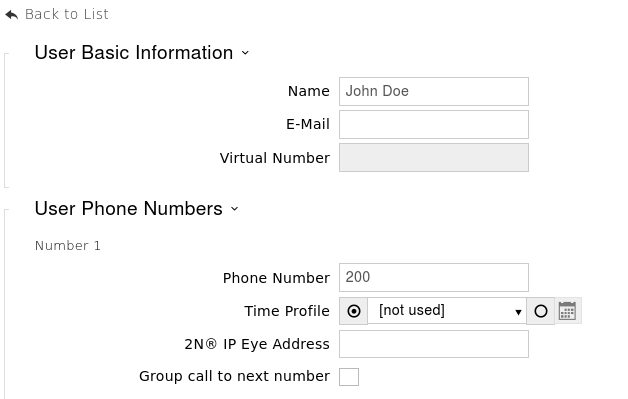
Once you click that button it will take you to a page asking for the Name, Email address, User phone numbers and user specific access settings. In this guide we’re just going to do the Name and Numbers. If this person has more than one number, add them in to the available number fields. If you want all three numbers to ring at the same time select the ‘group call to next number‘ and click ‘save‘ at the bottom of the page.
Example below:
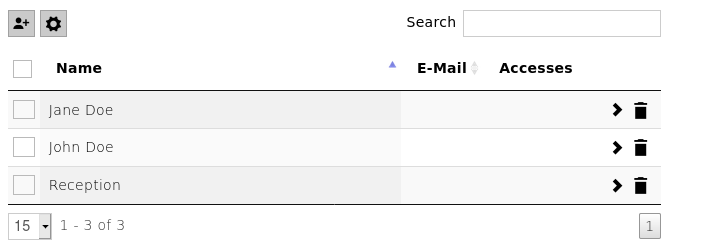
Repeat the above step for the desired amount of users. Once you’ve added some more users you should end up with a list when you go to the directory page.
Step 6 – Configuring the dialling buttons
This is the step where we program the calling button with the users to call. The system doesn’t automatically add the users because it may not be desirable to call every user.
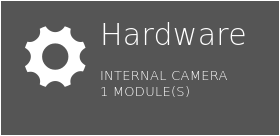
You can get to this section by pressing the Hardware icon on the dashboard.
Dashboard Icon
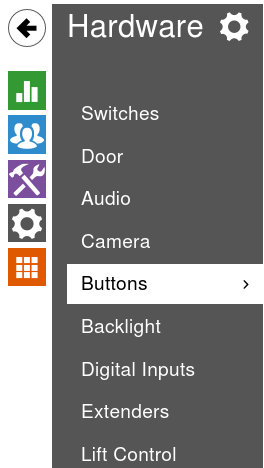
Or you can use the sub-menu navigation as shown in the image below:
Sub-menu Navigation
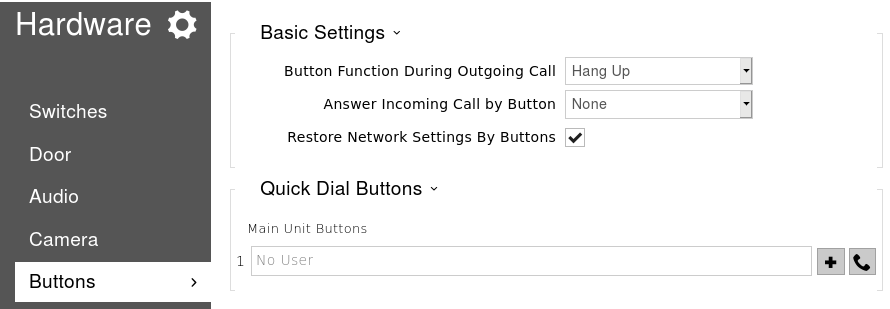
Once you are on the ‘Buttons’ page you will see that there are no users added to the main button. To add a user you need to click the ‘+‘ symbol next to the empty field.
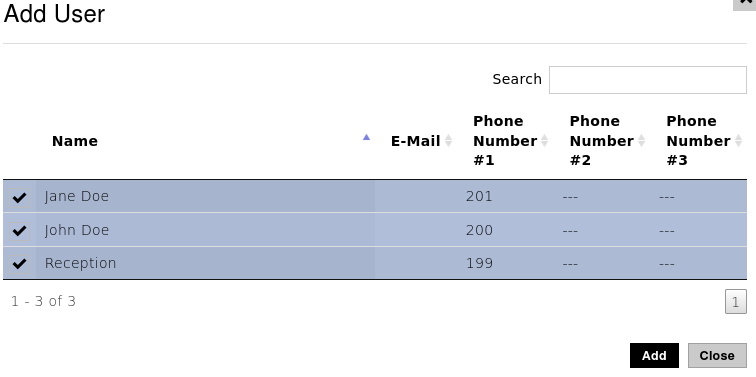
Once you click the ‘+‘ symbol it should bring up a new page with a list of the users from the directory, find the users you want to call, select them and click the add button. Example Image Below:
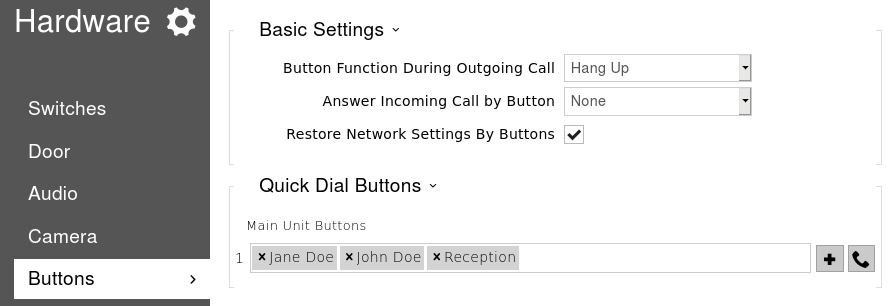
Once you’ve clicked add you should see the users appear against the main unit button. If you are happy with this click the ‘Save‘ button at the bottom of the page.
Now when the button on the intercom is pressed it should dial the programmed numbers via the SIP account configured in step 4.
A Handy tip, if the intercom isn’t nearby, to save yourself a walk you can click the ‘handset’ icon next to the assign user button to simulate a button press. (hopefully your near the phones to answer or hear them ringing).
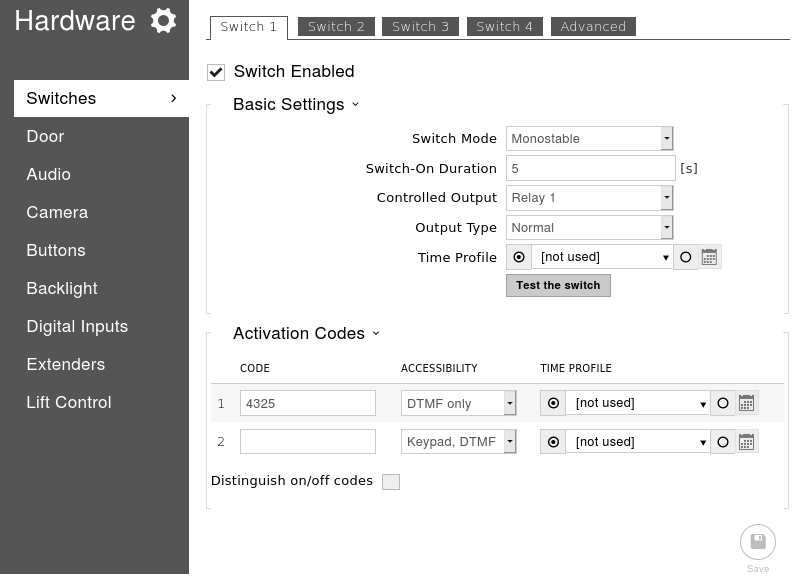
Step 7 – Configuring the switch & activation code
The final step in this configuration guide is to edit the switch activation code and change some other settings that maybe relevant to your deployment. The default activation code is ’00*’ but it’s highly recommended to change this to something else.
To do this we need to get to the ‘Switches‘ page and we can do this straight from the ‘Button’ page by clicking ‘Switches‘ at the top. Once on this page we can change the switch code under ‘Activation Codes‘.
As the image shows above you can apply two switch codes to each switch but usually one is enough. In the image above I have changed the switch code to 4325. Notice that I didn’t defined the ‘*’ which is be required when entering the code via DTMF (During a phone call).
If desired you can set it so the intercom doesn’t require the ‘*’ to be entered for confirmation by clicking the ‘Advanced’ tab at the top of the page and enabling legacy switch code.
Legacy switch code is only applicable for switch code 1.
Depending on your installation you may also need to change the settings in the table below:
Switch Setting
Description of Setting
Switch-on duration
Defines how long the switch will remain active in monostable mode. i.e – How long will the lock be released.
Controlled Output
Defines which output is used for this switch when activated.
If you’ve connected a lock to the ‘relay‘ on the PCB, select this.
If you’ve connected the lock to the ‘output‘ on the PCB use this.
Output Type
The type of lock being used will change which value needs to be applied.
‘Normal‘ is usually for a fail-secure lock, ‘Inverted‘ is usually for a fail-safe lock. ‘Security‘ is only applicable if the 2N security relay is being used.
To test your switch is working, you can click the ‘Test the switch‘ button on this page. If that works the setup is done. All you need to do now is make sure the intercom is working as expected.
Of course this is just a very basic guide covering the first steps on every intercom, if there are some additional requirements for the customer, or if your having issues with one of the stages above just send an email to: support@provu.co.uk
Also a very good place for 2N resources is the 2N Wiki and FAQ.
There is no doubt that last year was a tough one and while it doesn’t look like 2021 will let up yet, we are starting to see the wood for the trees and are beginning to get a handle on the interesting climate 2020 has left us in.
So why not move into 2021 by expanding your current portfolio with some new ranges to offer your customers. Create new streams of revenue with incredible brands such as 2N, Algo, 3CX, Counterpath, DrayTek, Dialogic and Sangoma.
Expand your portfolio
2N
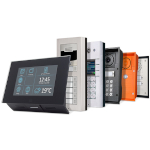
Powerful compact IP intercoms with customisable units. 2N’s door entry intercoms and Access Control units offer the very best in building control. From external weatherproof & shock resistant IP Force intercoms to the adaptable and fully customisable Verso, 2N’s units offer you advanced functionality with intuitive design.
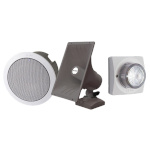
Advanced alerters and speakers designed to integrate into office, retail and warehouse spaces alike. With high quality audio Algo’s range opens up a new opportunity to add visual and audio alerting to your IP solutions.
Offering you a range of provisionable softphone licences combining video, presence and messaging Counterpath provides your customers a true unified communications experience across fixed & mobile networks. With extensive features and compatibility across many platforms such as Apple, Windows and Android there is no better way to bring your clients teams together. As a added bonus Counterpath offers full support for HD video, G729 audio codec and Microsoft Outlook integration as standard.
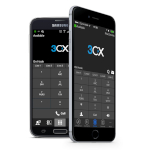
Providing a full PBX solution, 3CX creates a complete set of unified communications features with easy to use installation, management and maintenance of your customers’ companies phone systems. With support for 4 to 1024 simultaneous calls and a variation of editions to chose from, your customers are able to create a scalable and cost effective PBX solution that can grow with their business.
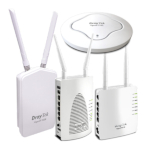
Whether your clients need to extend their range, require a clearer connection, or maybe just want to add security to a busy network. DrayTek offers your customers all of this and more. With a host of incredible products from routers, access points and switches, DrayTeks advanced products give your customers the very best in web managed networks.
New to our own portfolio, Dialogic offers customers a range of high end enterprise media gateways and voice cards which can upgrade existing PBX systems into VoIP allowing you and your customers to save the hassle of purchasing and installing a new system.
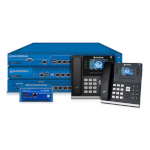
With the ISDN switch off now even closer, 2021 is the opportune time to ensure your customers are prepared. Sangoma’s gateway and SBC range provide an optimal solution for those who will need to upgrade their systems without the associated cost. Find out more today about how you can use these intelligent devices to upgrade existing analogue systems to VoIP.
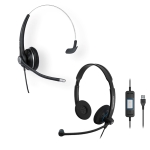
Take advantage of our extensive headset range from brands such as Yealink, Snom, Cisco, Sangoma, Senheiser/EPOS, Plantronics, Jabra, VTech, Eartec and Fanvil. With a variation of either monaural or binaural, headset or ear piece there is a style for everyone. Expand your headset collection for your clients.
With a refreshed outlook on this coming year, we can agree that everyone is looking for something new to grow their business, so why not offer a new range to your customers and expand your opportunities in 2021.
For assistance with putting together your solutions or to discuss any additional hardware you may require with a member of our team simply call 01484 840048 or email contact@provu.co.uk.
If you have contacted Support regarding a technical issue that you are having with your 2N door intercom then we may have asked you to capture a trace replicating the fault.
This guide will show you how to capture a PCAP trace from a 2N Door Intercom.
Step 1:
Web browse to the IP address of the intercom. If you don’t have a DHCP table or network scanner to find the IP address reboot the intercom and wait for the second beep tone, after this press the main button 5 times. The intercom should then read the IP address out to you.
More information on this can be found on 2N’s Wiki.
Step 2:
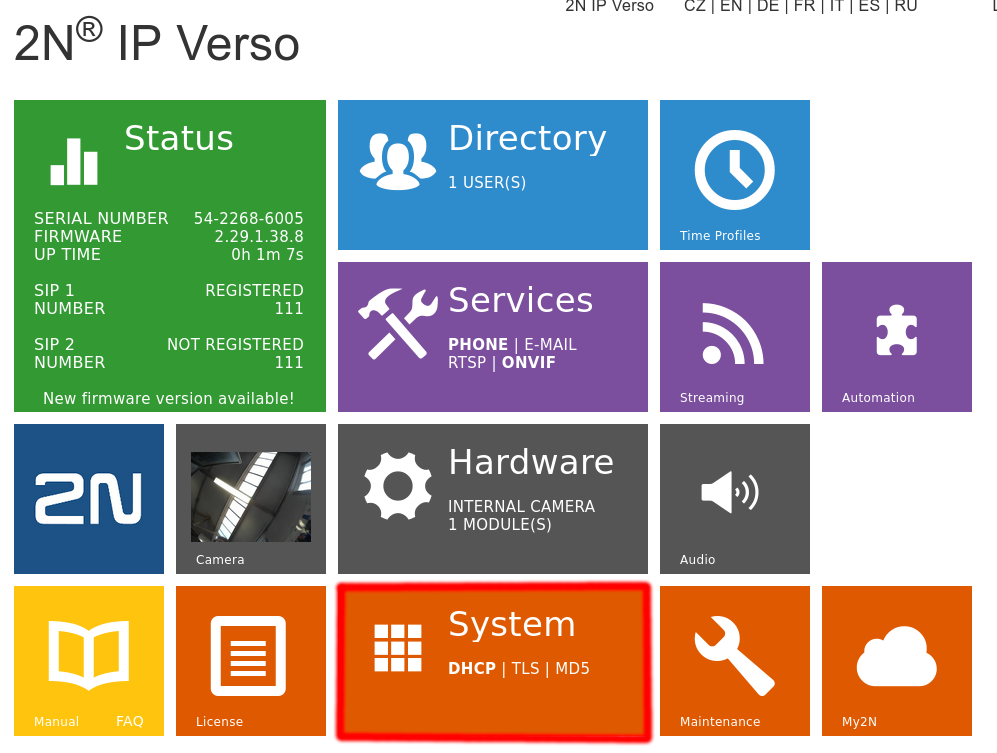
Once you have logged into the web interface go to System highlighted below:
Step 3:
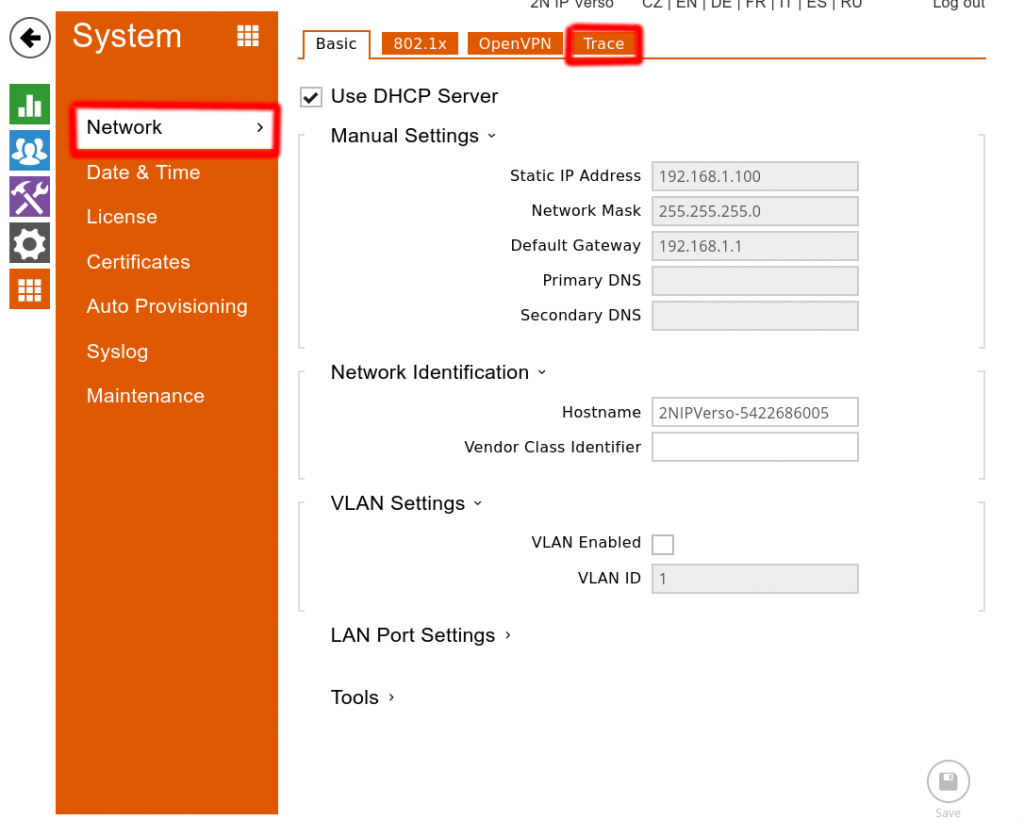
Go to Network > Trace as highlighted below:
Step 4:
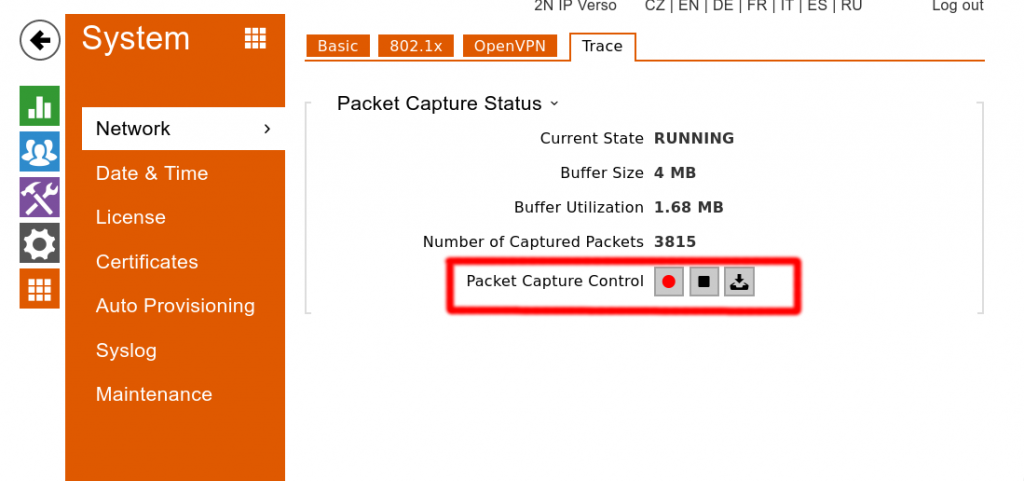
Once you are on the Trace page, press the red record button to start the trace > This is now the time to replicate the fault the customer is experiencing.
Step 5:
Once the fault has been replicated press the Stop button > then press Export > Finally send this to support@provu.co.uk
If you have any problems with this please contact support on 01484840048 option 2 or email support@provu.co.uk.
Explore how 2N’s Contactless solutions can help to keep your business and customers safe as the world begins to return to normality.
As the world begins to return to some form of normality, we are beginning to see people become a little more careful when it comes to interacting with businesses and products. To combat this social wariness, 2N offers the perfect products to take additional steps to keep not only your customers safe but also your staff. From the New 2N Indoor View touchscreen answering unit, to the zero-touch Bluetooth Verso Module, 2N has plenty of extraordinary devices to make your workspace safe and secure.
Video Screening
A compact and sleek design for any modern space, the Indoor View is perfect for screening visitors before entering a building. With its impressive 7” colour touchscreen allowing for wide angle video. As an added bonus, the Indoor touch is usable with PPE gloves giving users an added layer of protection.
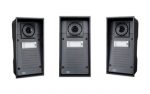
Never worry about your intercom again with the IP Force. With a protection rating of IP69K 2N’s IP Force intercom can be exposed to even the harshest environments and cleaning products. With a choice of visual signalling models as well as a HD camera the IP Force can cater to needs of people with hearing difficulties or impaired orientation abilities.
Minimise contact in high traffic areas by turning the IP Verso and Access units into a contactless access control solution. Simply add a Bluetooth module to enable staff to enter a building through their smart phones or tablets with the 2N® Mobile Key application. With the ability to monitor people who enter and exit buildings users may even set up a Track & Trace system for their workspace.
Explore how 2N can improve your workspace with the new 2N Virtual Experience
If you are interested in more of 2N’s products as well as seeing them in situ. Check out 2N’s Virtual Experience and explore 2N products in a 3D space.
With lock down easing in most of the country, companies are looking to adapt to this new normal with innovative ways to display and present their products. One such company has turned to the digital space and created something truly amazing, the 2N virtual experience.
What is it…
The 2N virtual experience is exactly what it says on the tin, a virtual experience that showcases 2N products in situ for customers to explore. With 3 unique experiences to choose from; apartment building, single house and commercial building, viewers are able to explore a 3D environment allowing viewers to see a plethora of 2N products doing what they do best.
Explore the 3D environment based on your preferred experience and select a start point from the blue bar at the bottom of the screen. Or, if you prefer, select your start point and use the arrows to move around the virtual space to discover 2N products.
2N products
With many 2N products featured, it is easy to get lost. That’s why selecting your preferred start location from the bottom blue bar, allows you to easily find the area you wish to explore. To help you better visualise how to deploy 2N solutions.
With the ability to assemble and dissemble products in the virtual environment. You are able to see how to install the solutions as well as how to assemble the housing units. As it is a 3D space, you are able to rotate the camera 360° for a better angle of all of the 2N products on display, helping you to choose the best solution for your needs.
What’s more, when you come across a 2N product you wish to see more of, orange points of interest are displayed to tell you what each part of the solution is as well as being a link to the webpage of the product. And if are wanting the technical documents for a 2N product, there is a handy documents button in the lower right which takes you to the technical specifications as well as other useful information.
Experience for yourself
The 2N Virtual Experience is really something special. It innovates and adapts to current situations and offers a unique user experience that while it is a business tool to demonstrate 2N solutions, it is also fun to explore and experience a new way to view products. Try the 2N virtual experience for yourself.
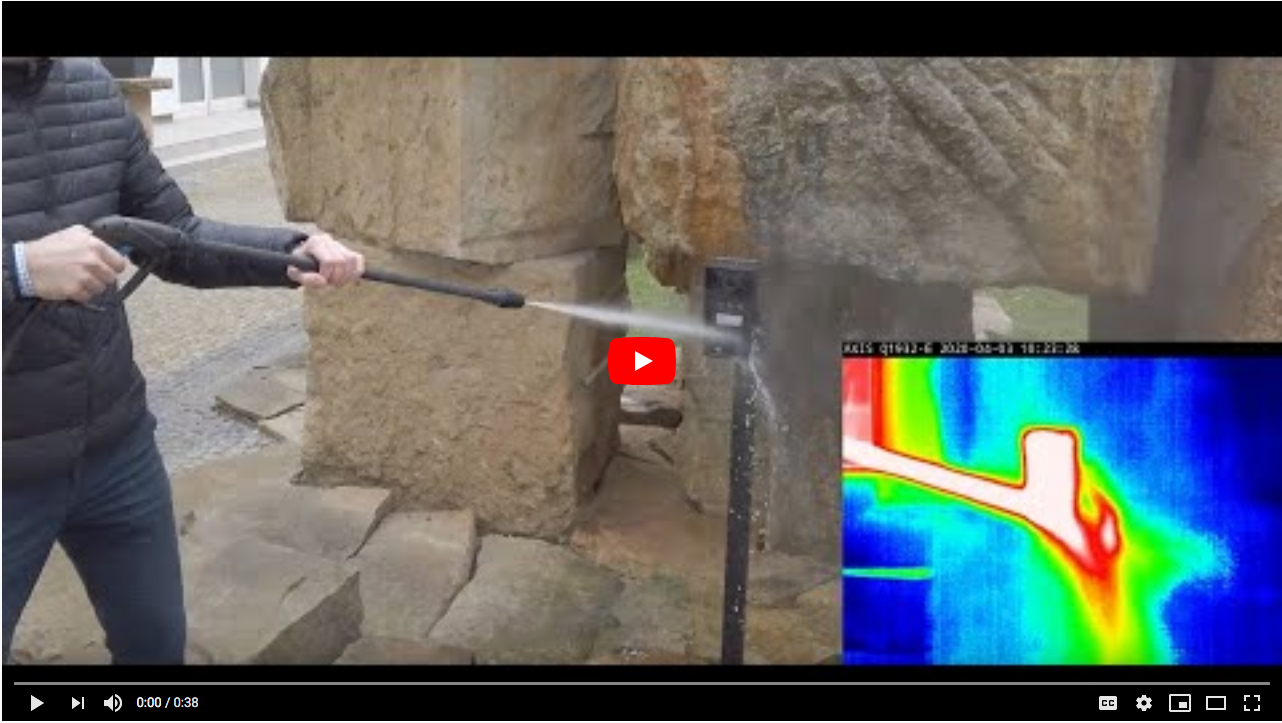
As we all look for new ways to adapt to the ‘new normal’, cleanliness is going to remain at the forefront of our minds for some time to come. 2N have put together some new videos to illustrate how users can continue to benefit from their products while maintaining optimal safety.
With a protection rating of IP69K 2N’s IP Force intercom can be exposed to even the harshest environments and cleaning products. See their latest video to see how this robust intercom can be thoroughly cleansed.
A pain point for many touchscreens is the difficulty using them when wearing gloves. 2N’s IP Verso and Indoor Touch can be easily used when wearing gloves. See the incredible responsiveness in 2N’s short video clip.
2N also offer a contactless solution with their Bluetooth module. Both the IP Verso and the Access units can be adapted to create a contactless solution. Simply add in the Bluetooth module to enable staff to access your buildings through their smart phones or tables with the 2N® Mobile Key application.
Thermal cameras have become a hot topic over the past few months, but the reliability of these have been deemed unreliable by the MHRA. Our sister company, Alliot Technologies is the UK’s exclusive distributor of the Kentix SmartXcan body temperature sensor. Unlike other devices on the market, this smart device uses sensors to provide a core temperature reading via the eyes as well as the forehead. Compliant with the IEC80601-2-59 regulation for medical use, this sensor can be simply integrated with 2N systems to enable/restrict access based on the temperature reading.
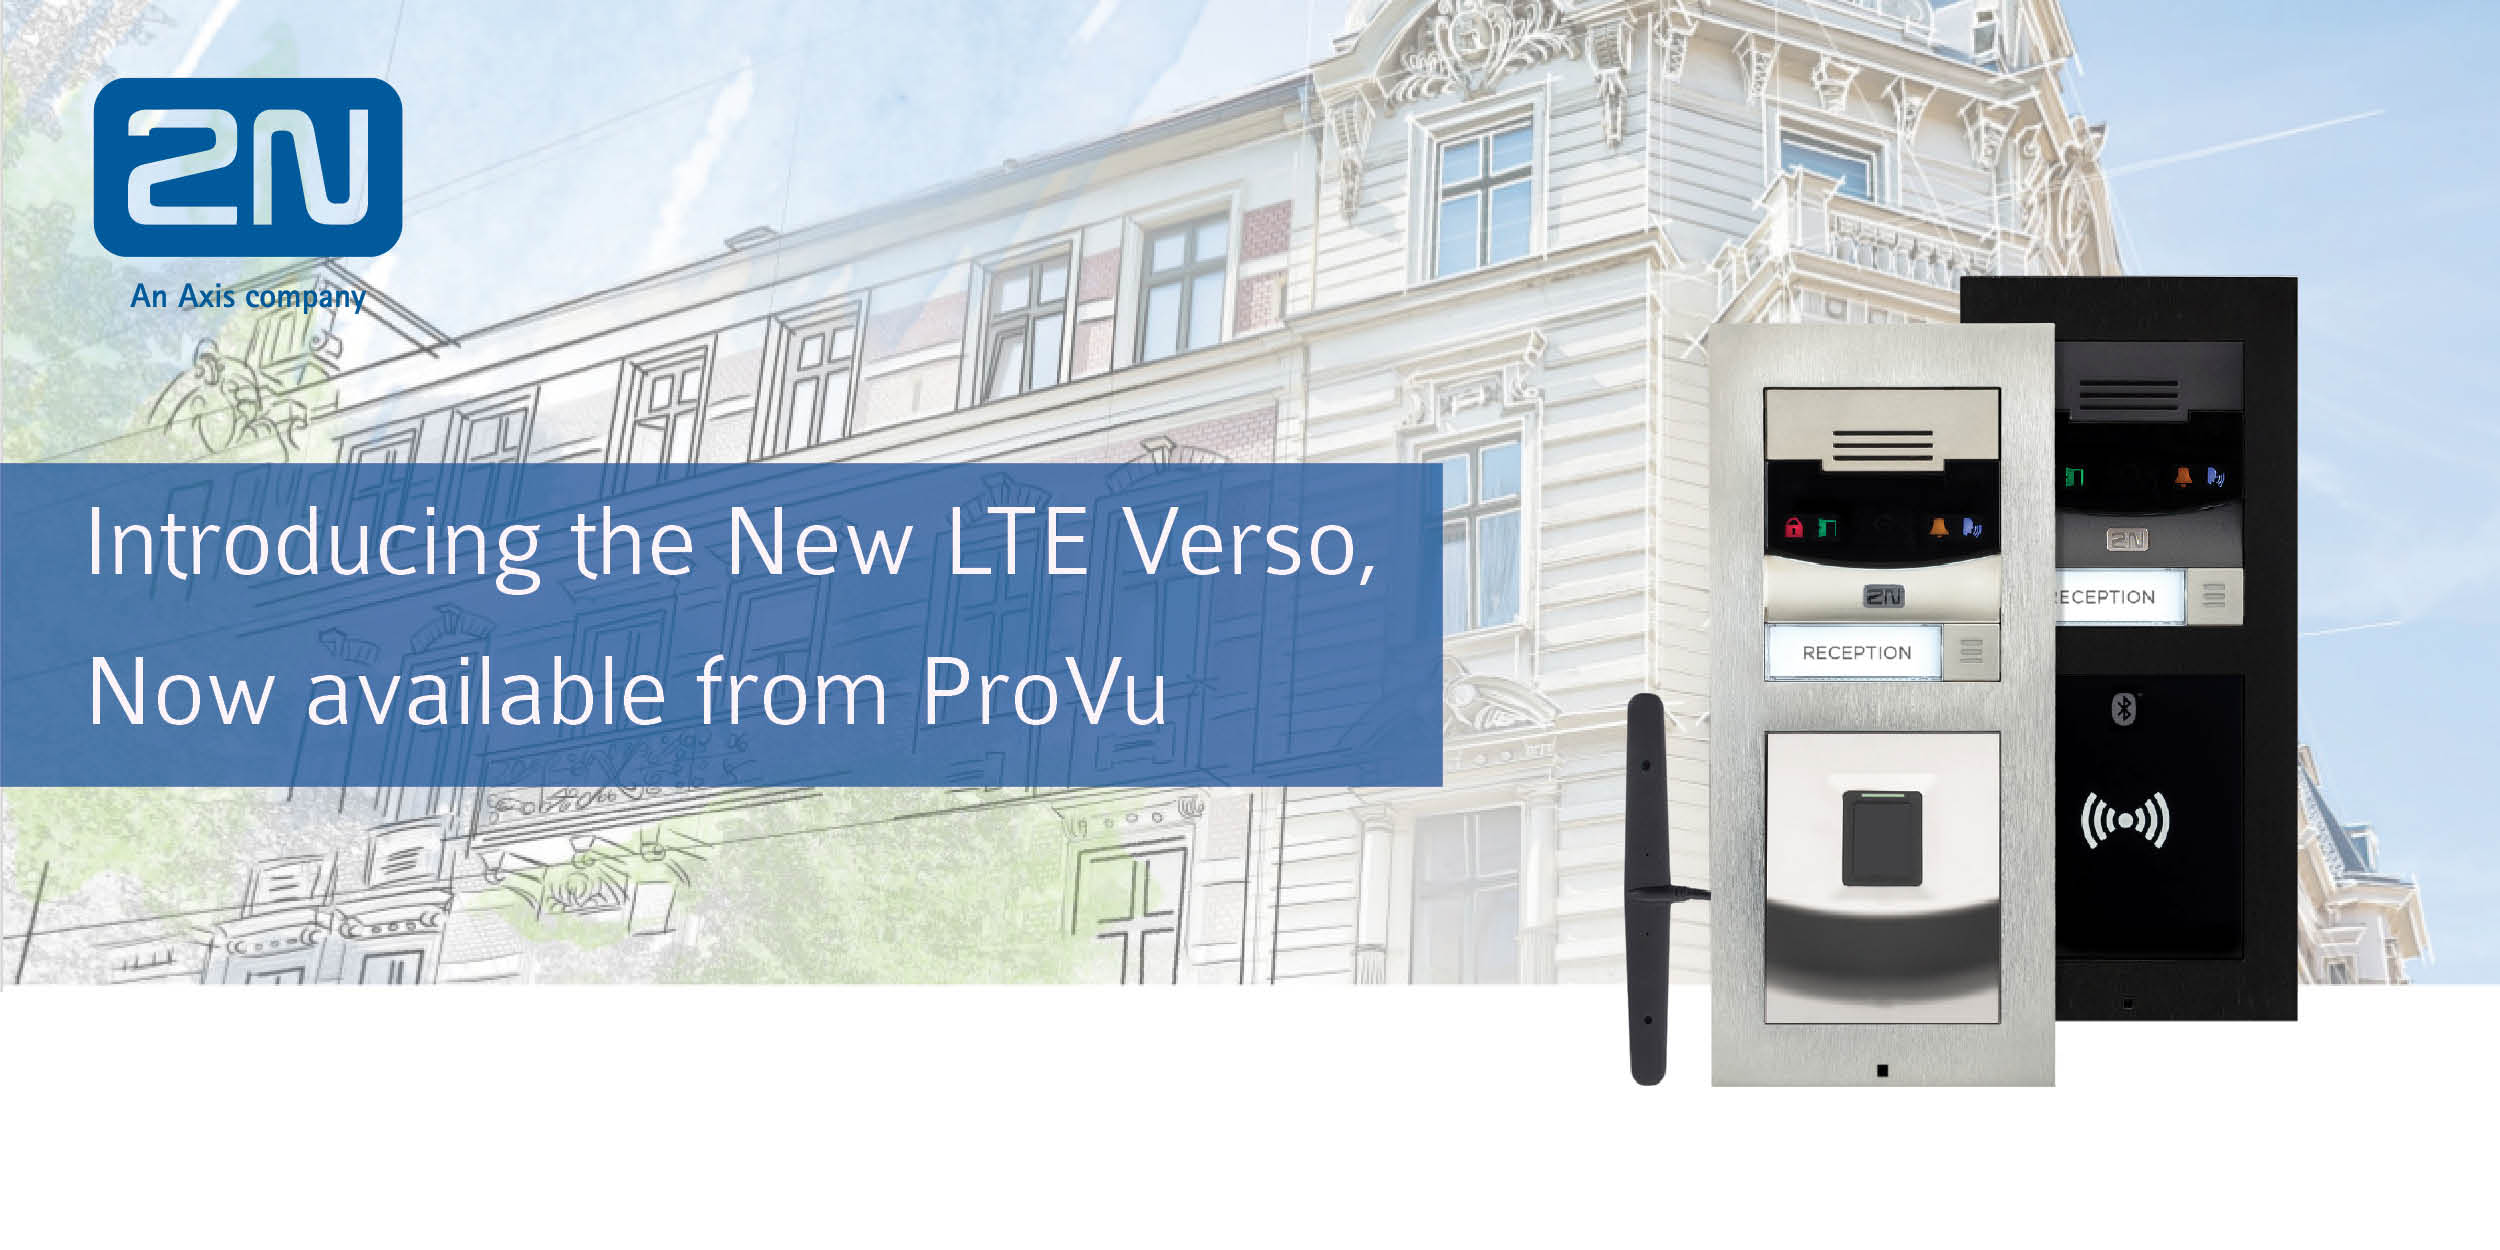
The new 2N LTE Verso is now available to order from ProVu. Featuring the same elegant design and compatible modules as the popular IP Verso, this new model offers a HD camera to provide a unique LTE door entry solution with video.
Compatible with SIM cards across a variety of networks, the LTE Verso utilises a 4G mobile communications standard for delivering high-speed wireless communication to either your PBX or the My2N hosted system. Without the need for any expensive cabling this solution can be easily installed – simply connect to power and it’s ready to go!
Key Advantages include:
Ideal solution for older buildings or remote locations where cabling may not be feasible.
Features a HD camera to offer an LTE video intercom
Can be remotely and securely configured via 2N’s cloud portal.
Pricing and stock information can be seen on our reseller portal, ProSys.
*Please note: The LTE Verso base unit requires the use of 2N’s external antenna when used with additional modules and is compatible with a variety of mobile networks in the UK. Video Preview is available on smart phones and the Indoor Touch via the My2N app, but is not compatible with third party PBX’s or third party VoIP phones.
At the start of 2018, 2N updated their standard warranty terms from 2 years to an industry-leading 3 years. What you may not know, however, is that you can extend the warranty on your 2N purchases even further, up to a total of 5 years.
Why should you consider buying an extended warranty for your 2N products? Besides protecting your investment for a longer period of time, you get the added benefit of a simple pricing structure, and there is no need to buy it immediately – you can keep CAPEX down by buying the extended warranty up to a year after you buy the items.
Warranty length
Price
Up to 3 years
FREE
1 additional year (total of 4 years)
7% of the items’ price
2 additional years (total of 5 years)
14% of the items’ price
The extended warranty can be purchased on all 2N products, covering all their intercoms, access units and gateways that we supply.


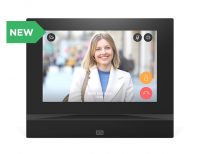 the Indoor View is perfect for screening visitors before entering a building. With its impressive 7” colour touchscreen allowing for wide angle video. As an added bonus, the Indoor touch is usable with PPE gloves giving users an added layer of protection.
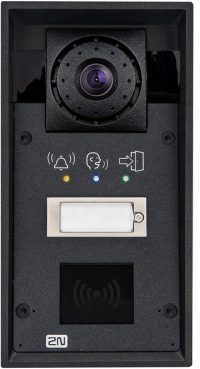 protection rating of IP69K 2N’s IP Force intercom can be exposed to even the harshest environments and cleaning products. With a choice of visual signalling models as well as a HD camera the IP Force can cater to needs of people with hearing difficulties or impaired orientation abilities.
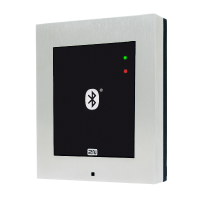 Access units into a contactless access control solution. Simply add a Bluetooth module to enable staff to enter a building through their smart phones or tablets with the 2N® Mobile Key application. With the ability to monitor people who enter and exit buildings users may even set up a Track & Trace system for their workspace.